You are currently viewing documentation for CompuTec ProcessForce 3.0, which is a plugin installed and managed through CompuTec AppEngine 3.0, built on .NET 8. If you are working with older environments, you may need the documentation for CompuTec ProcessForce 2.0: https://learn.computec.one/docs/processforce/2.0/.
Please note that CompuTec ProcessForce 2.0 will be supported only until December 31, 2026. After this date, the product will no longer receive regular support or maintenance updates. Read more
CompuTec AppEngine 3.0 introduces a new architecture, and all CompuTec components, including the CompuTec ProcessForce 3.0 plugin, must be updated together to ensure full compatibility.
Before starting your installation or upgrade process, we strongly recommend reviewing the CompuTec AppEngine 3.0 and CompuTec ProcessForce 3.0 documentation.
Import and Assign Computec ProcessForce License
After installing CompuTec ProcessForce, you must import and assign a valid license before users can use CompuTec ProcessForce plugin in SAP Business One.
This guide explains how to import the license file, assign the license to your company database, and assign licenses to users.
If you are upgrading an existing CompuTec ProcessForce installation, you may not need to repeat this procedure.
The license assignment process is similar to assigning new SAP Business One license.
Follow the steps below to import and assign the license:
Step 1: Obtain the license file
- Before you can continue, obtain a valid license file from your CompuTec ProcessForce provider.
If you do not already have a license file, follow our Request CompuTec ProcessForce License guide.
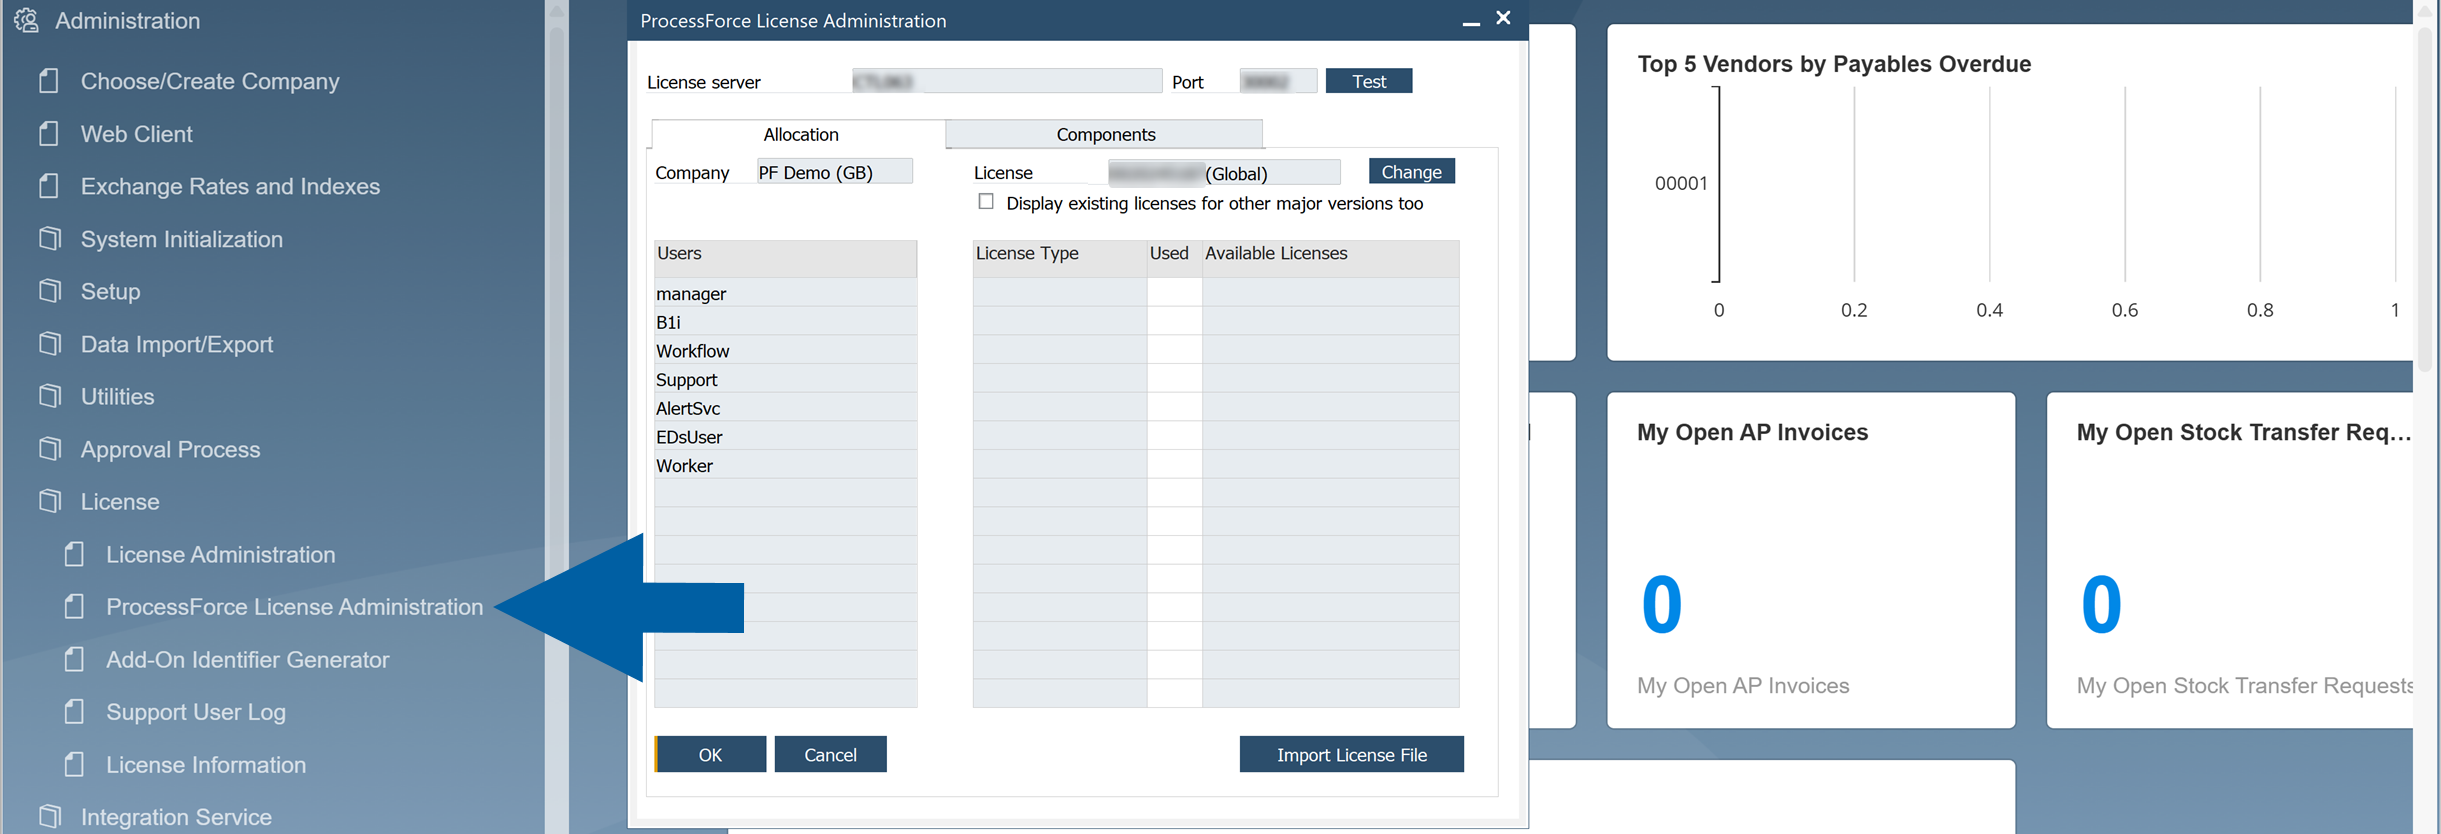
Step 2: Open License Administration
-
In SAP Business One, go to Administration > License > ProcessForce License Administration.
-
Click Test to verify that the CompuTec License Service is running and available.

-
If the connection is successful, you will see a green success banner at the bottom of the screen.

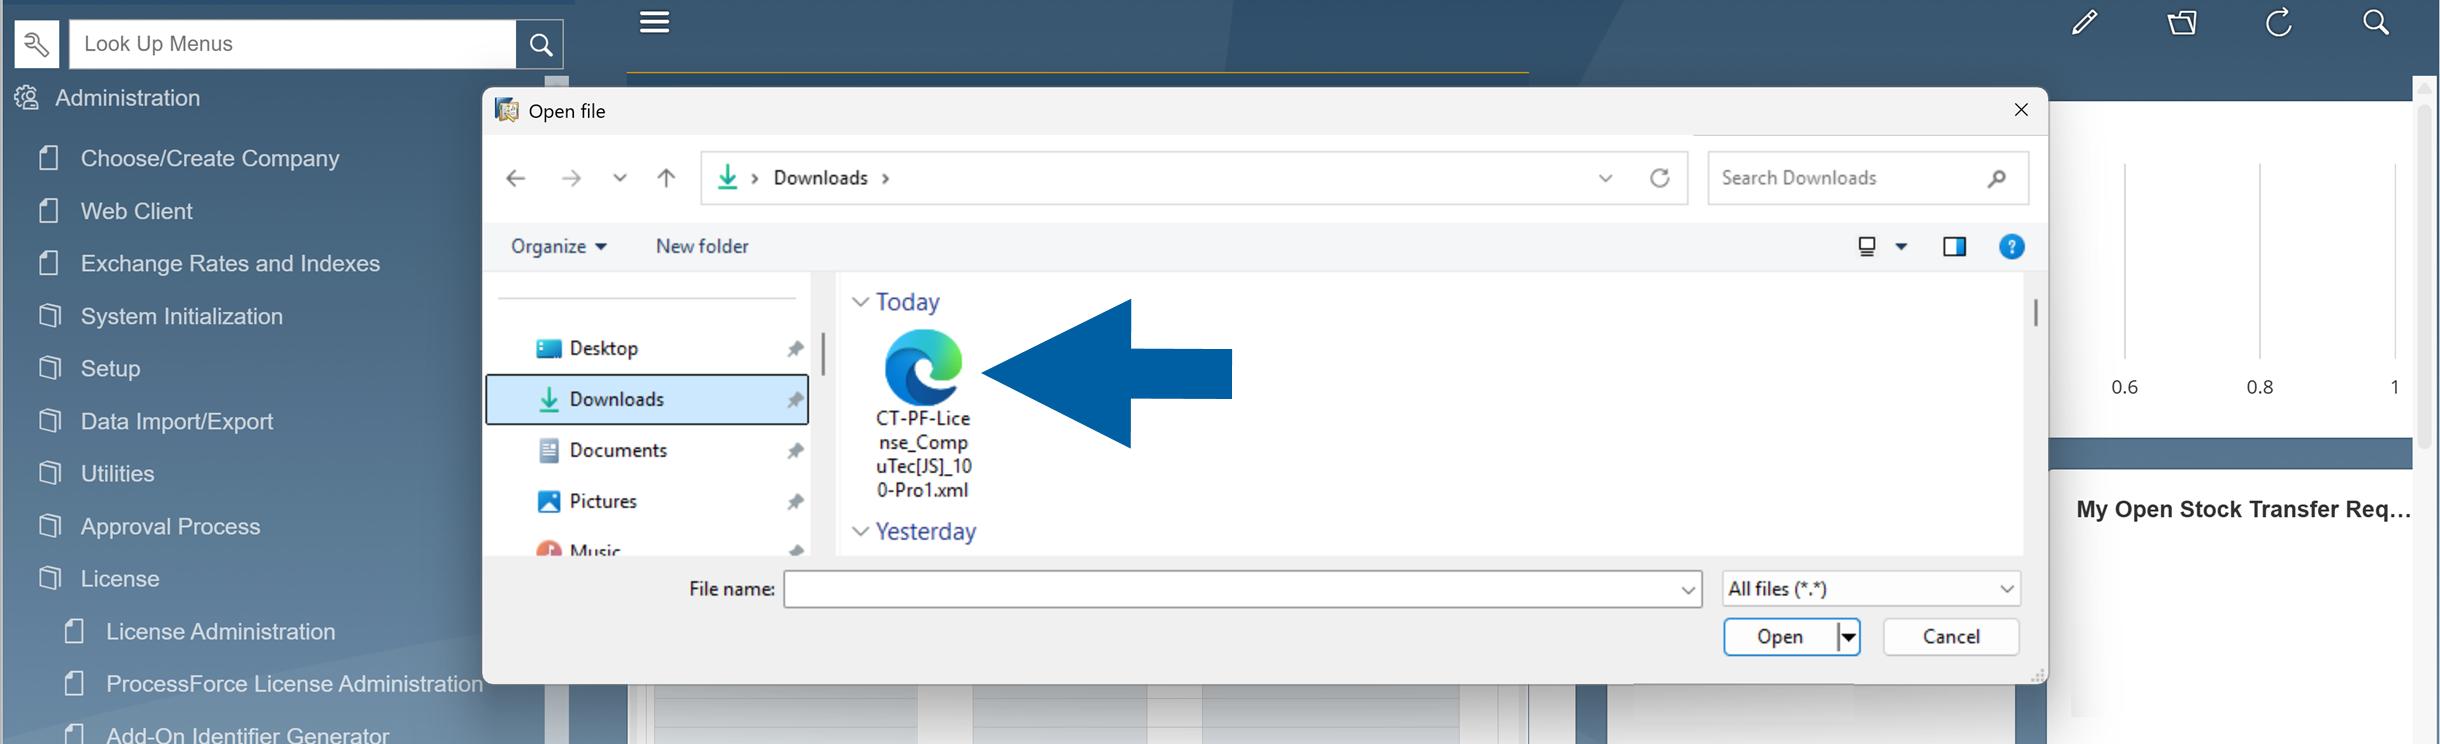
Step 3: Import the license file
-
Click Import License File.

-
Browse to the license file location.
-
Select the license file and confirm the import.
 important
The license file must have a
.xmlextension.
Some web browsers, such as Safari, may change the file type during download. If this happens, the import may fail. -
After the import is completed successfully, a confirmation System Message appears.

-
Click Change to assign/change the license for the company.

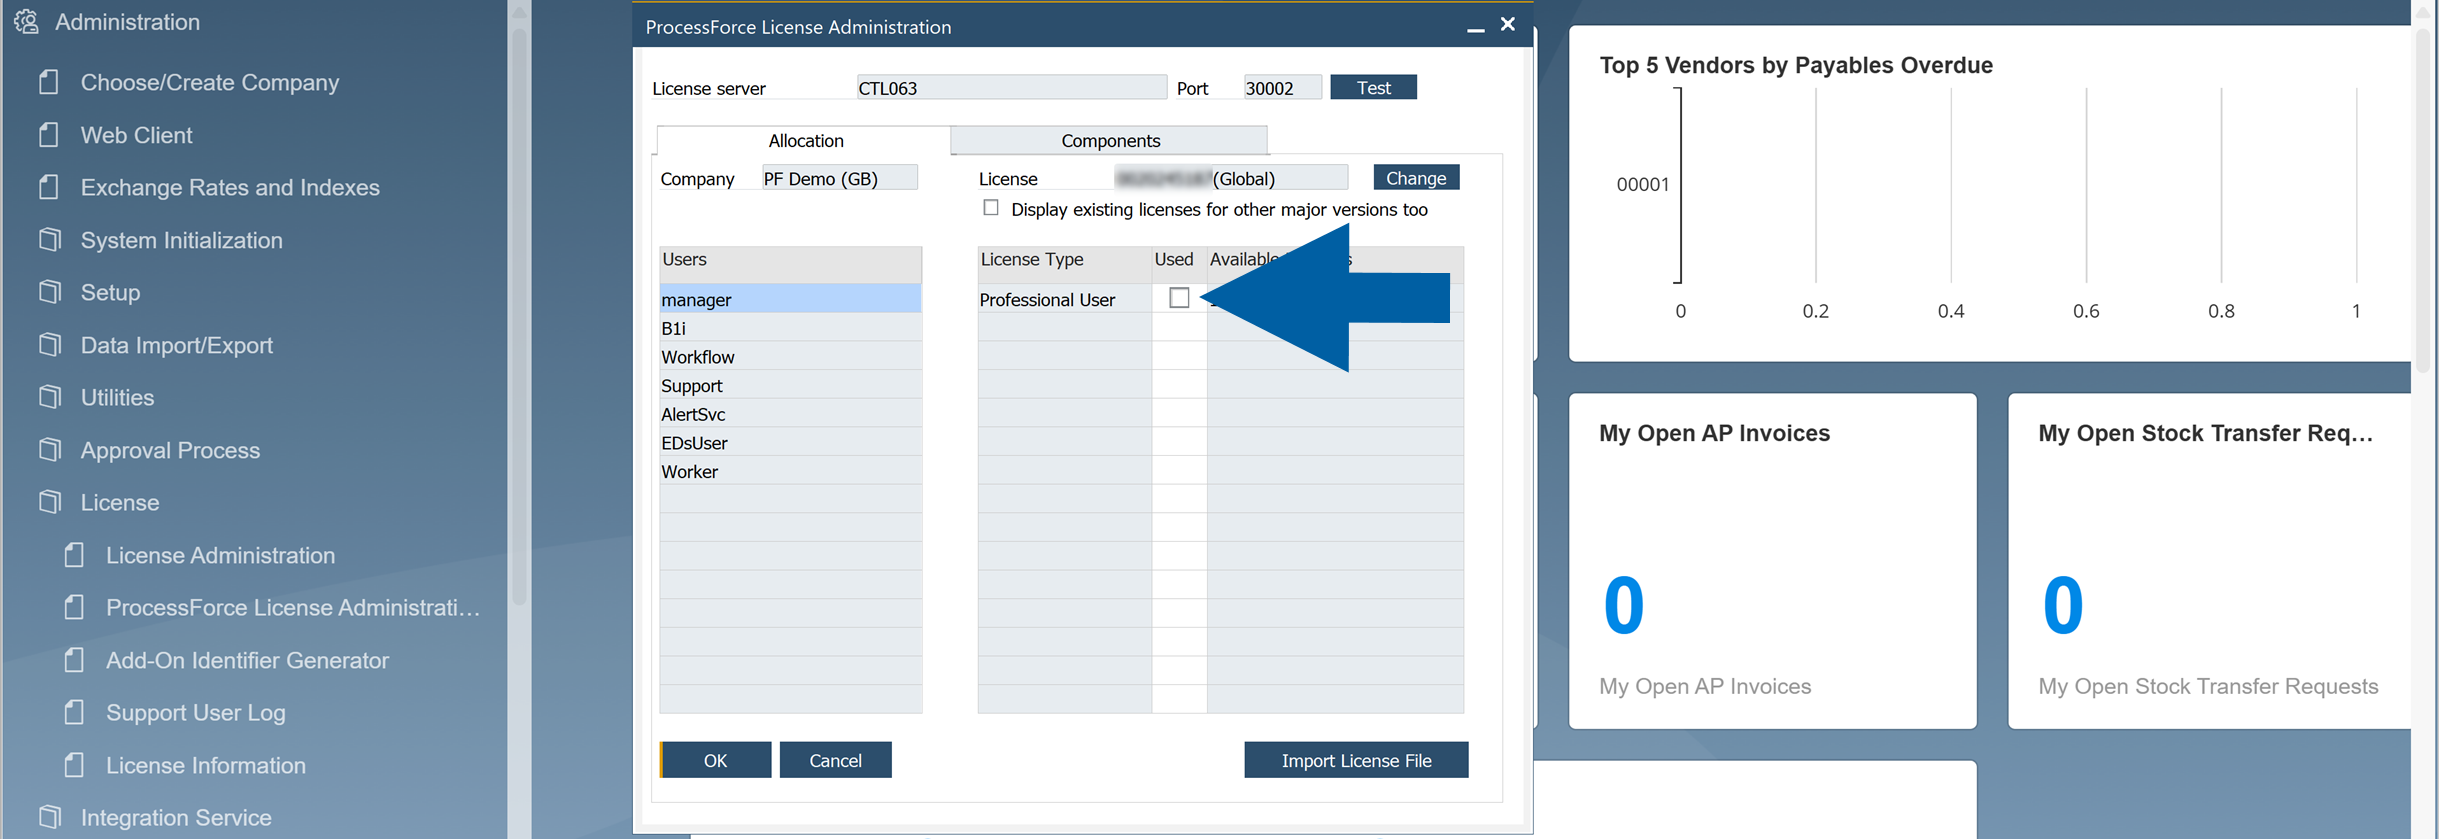
Step 4: Assign the licenses to users
-
Choose the users form the list and assign them to the chosen license type.
-
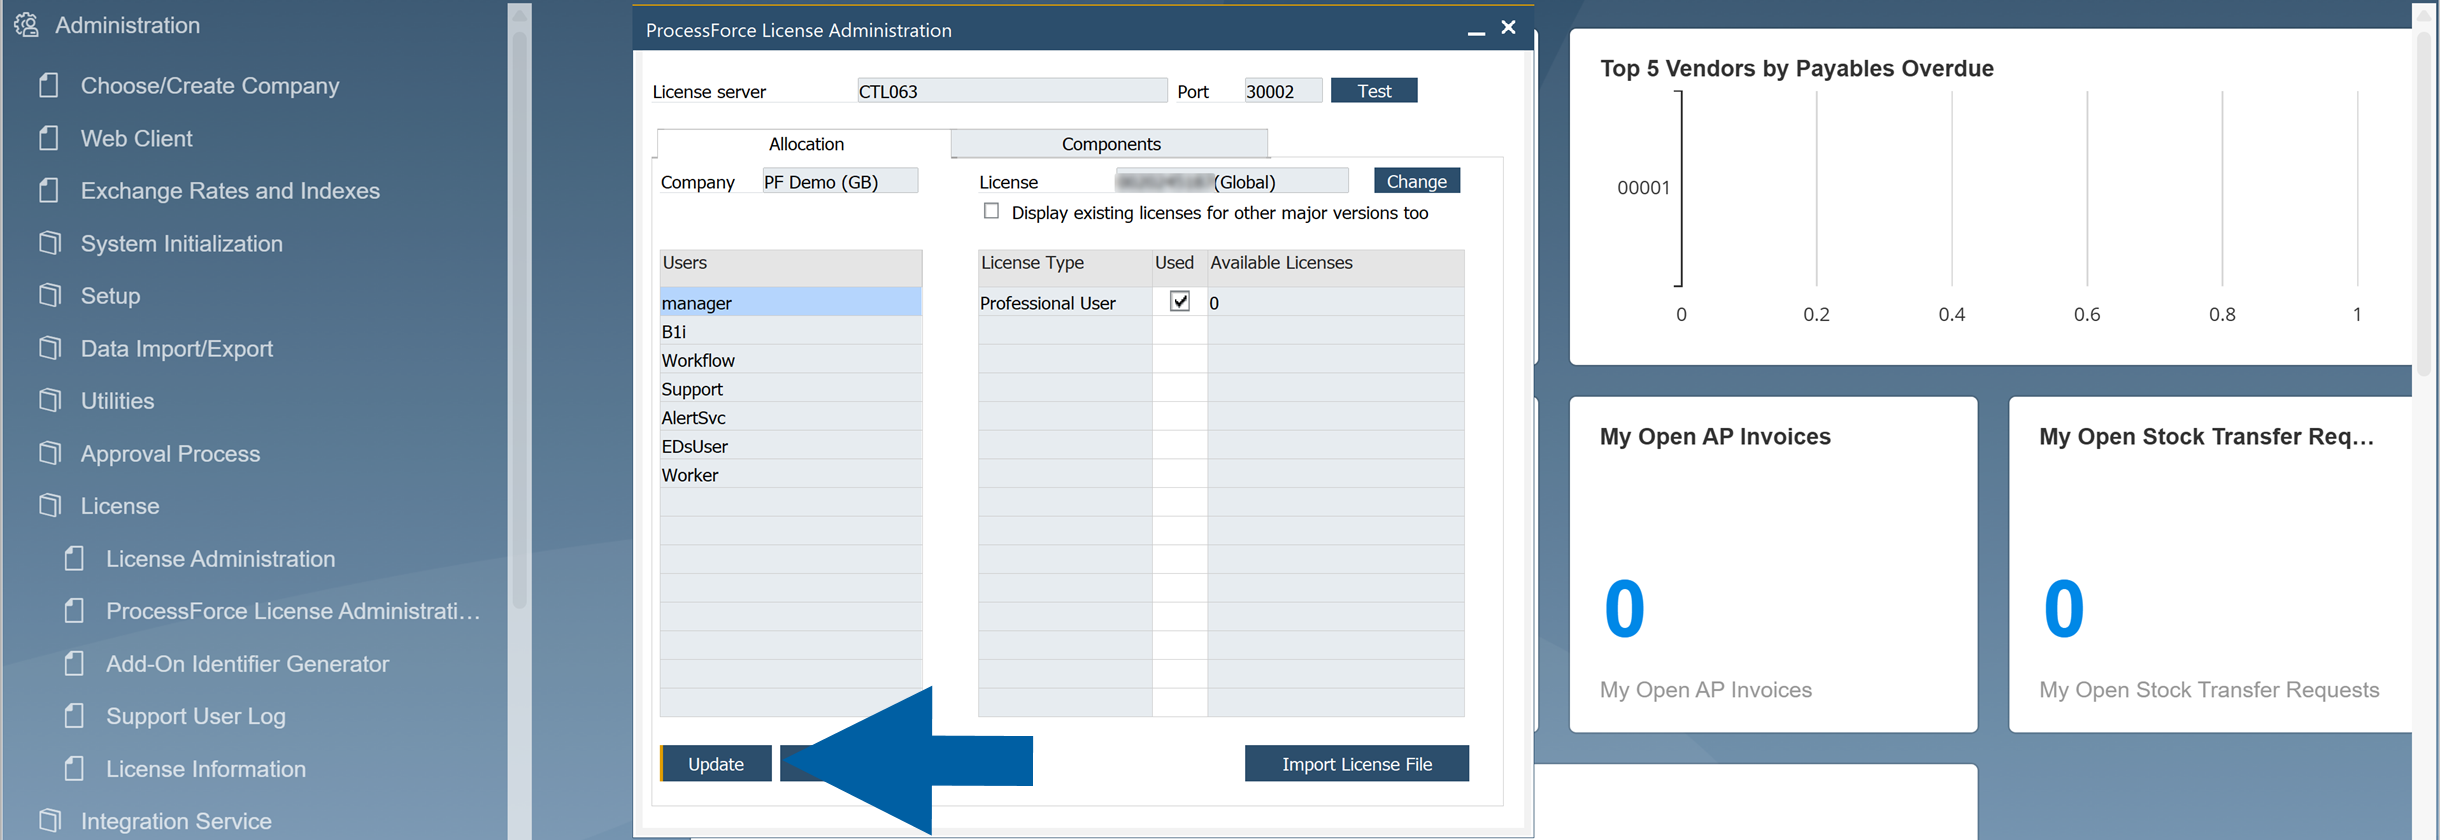
Click Update to save the changes.
-
Click OK.
-
The license assignment is now complete, and users can access CompuTec ProcessForce according to their assigned license type.