Smart Actions
Smart Actions feature in CompuTec WebUp extends the concept of View Actions by making your logic reusable, flexible, and applicable across multiple areas of the SAP Business One Web Client.
While View Actions are tied to document-level triggers (such as On Add or On Update), Smart Actions solve a key limitation of traditional View Action allowing you to attach logic directly to UI elements like buttons, fields, or controls.
Here are main differences between Smart and View Actions:
-
View Actions:
- Run only on document events (such as
On AddorOn Update). - Best for document validation and background automation.
- Run only on document events (such as
-
Smart Actions:
- Work on user interactions inside the UI.
- Best for interactive user experience and dynamic logic.
Key functions of Smart Actions
With Smart Actions in Computec WebUp, you define an action once and reuse it in multiple places.
Smart Actions can be used in many scenarios. For example, they allow you to:
- Trigger logic when a user edits a field
- Run actions when a button is pressed
- Display confirmations or validations at the exact moment of interaction
- Improve user experience without modifying SAP core functionality
This results in faster processes, fewer user errors, and better control over how users interact with business data.
Example
You can create a Smart Action that shows a confirmation message: Do you want to save changes for document number 234?
Instead of hardcoding 234, you define a Parameter (e.g., DocNum). This parameter can dynamically pull the current document number from SAP Business One.
Add and activate Smart Action
To add and activate a new Smart Action, follow these steps:
Step 1: Create a new Smart Action
To create a Smart Action, follow these steps:
-
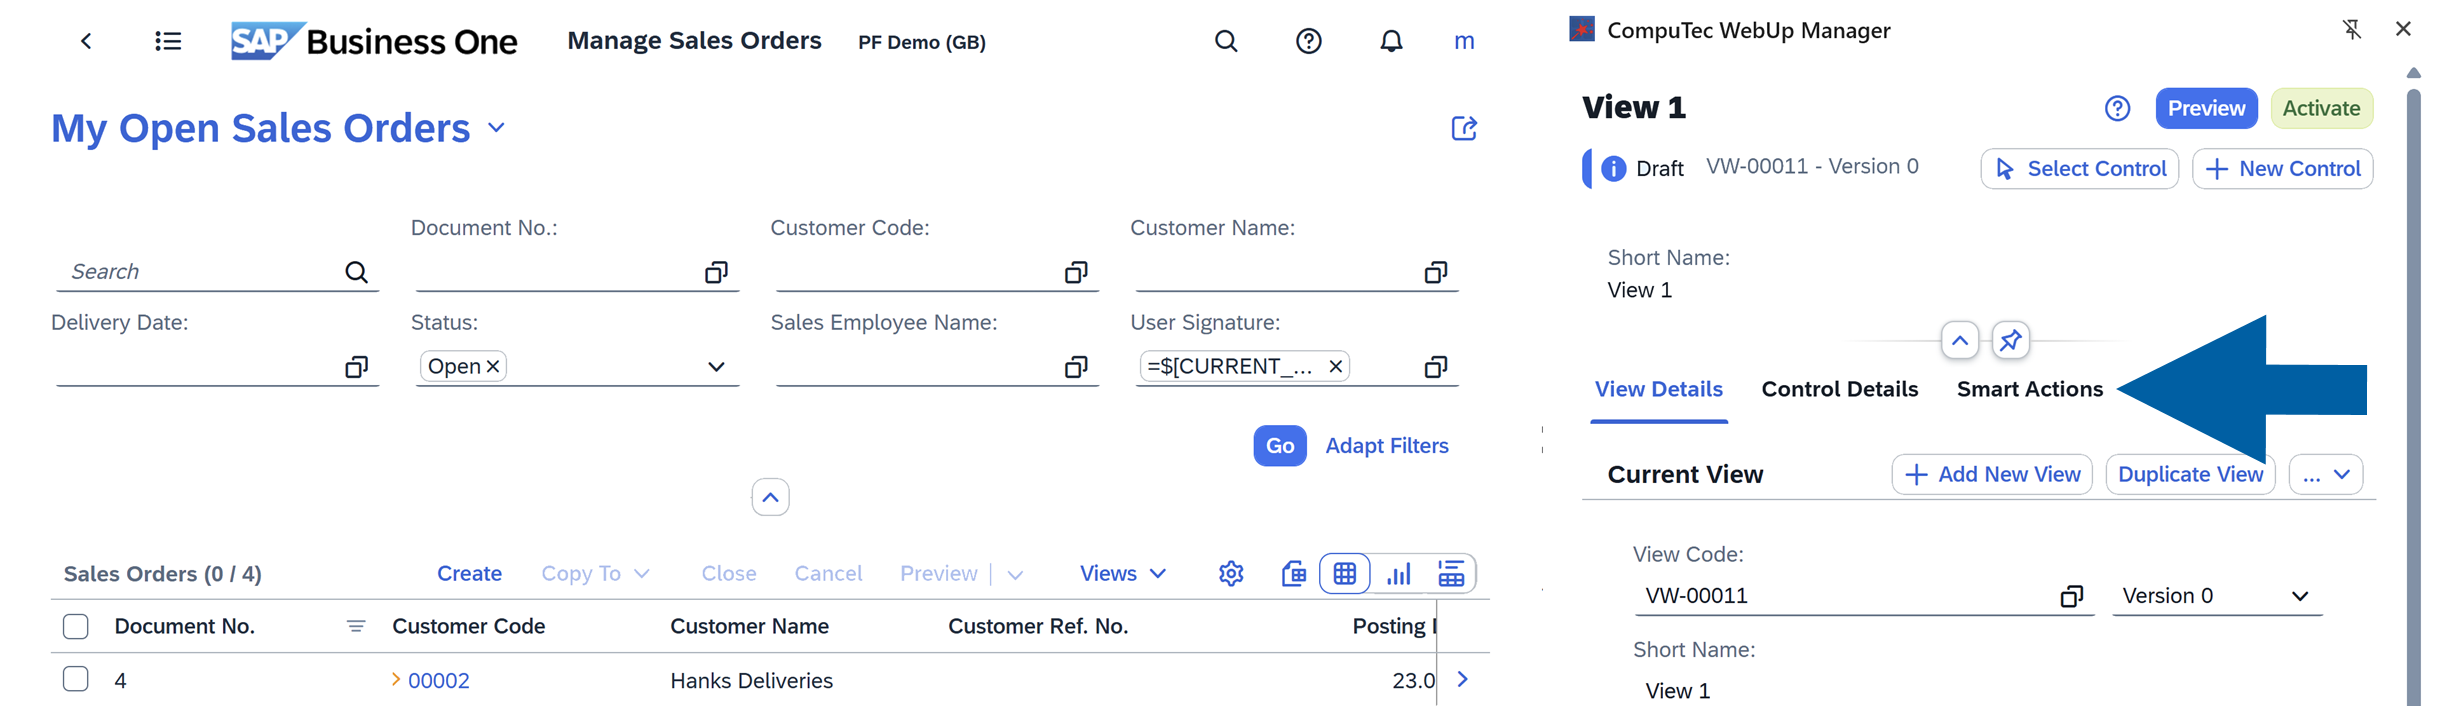
Open Computec WebUp Manager.
-
Navigate to Smart Actions tab.
-
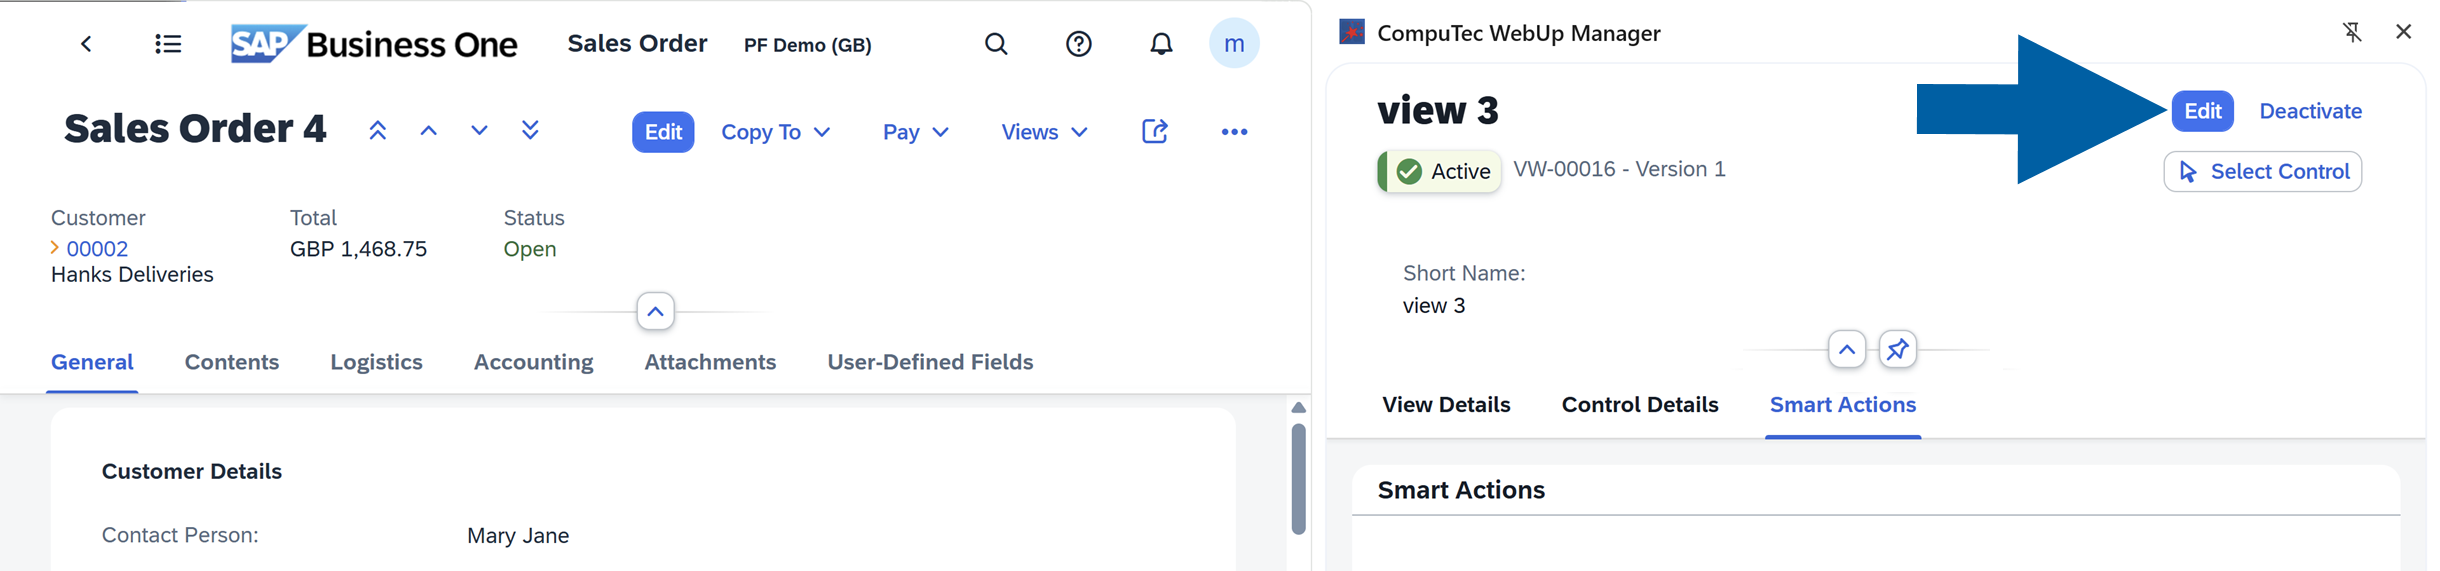
Click Edit to enable the edit mode.
-
Click Add Smart Action.

-
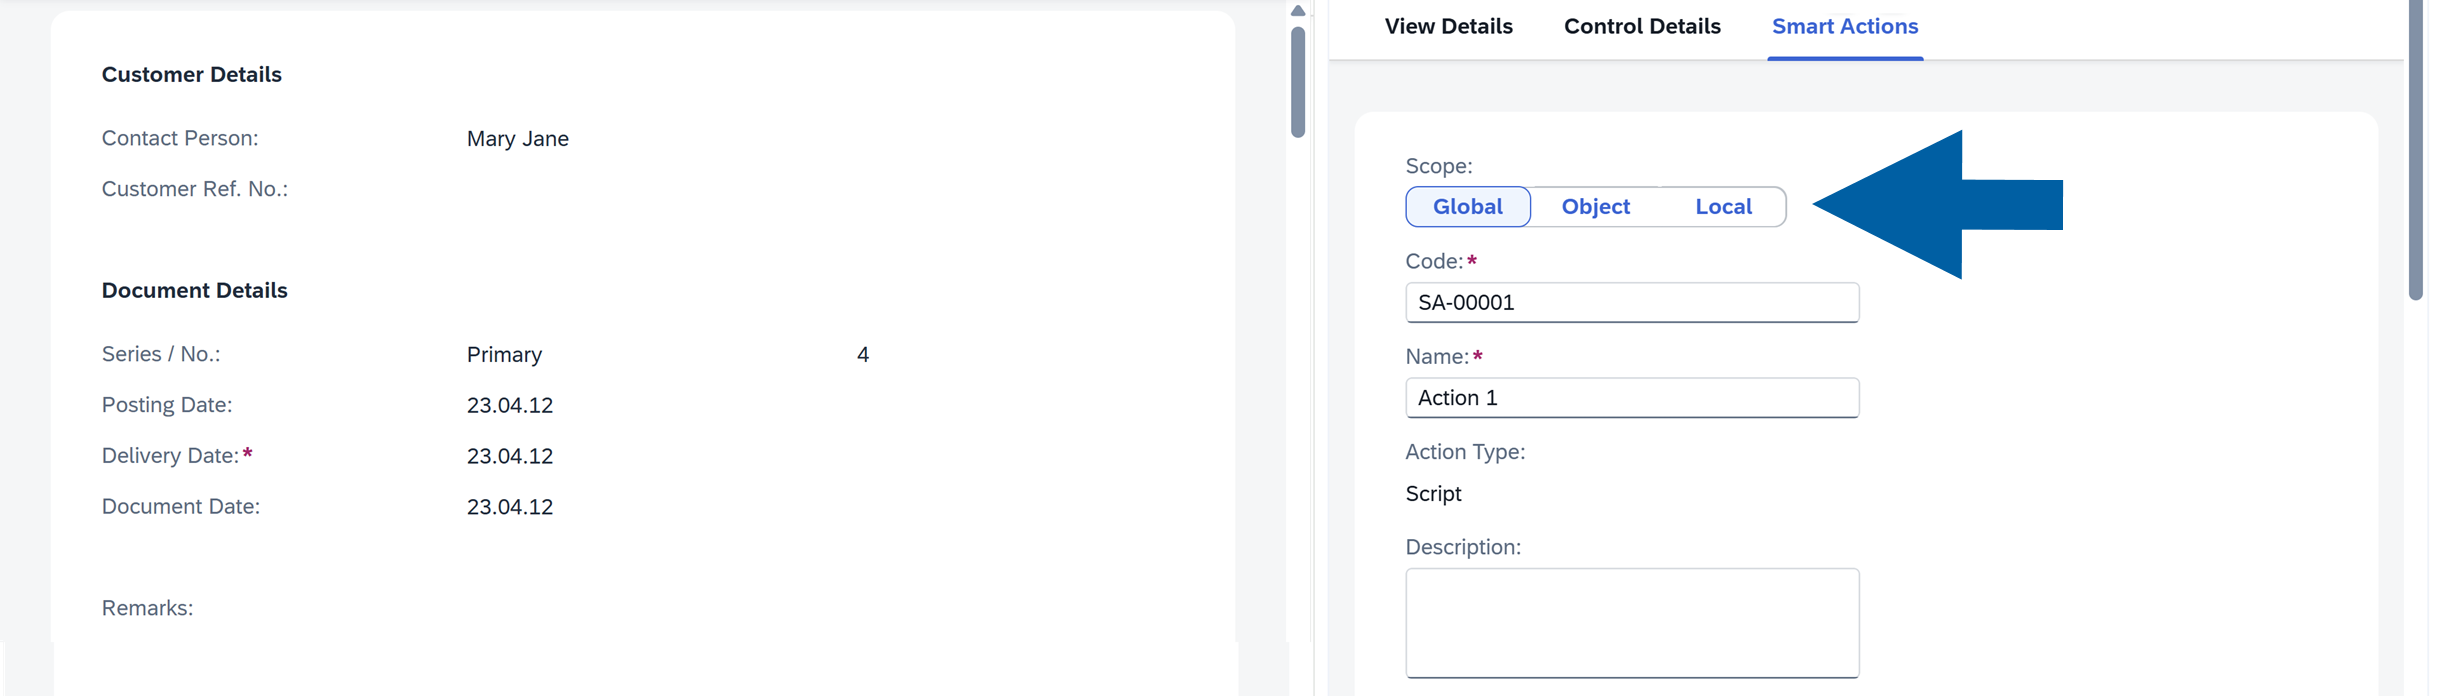
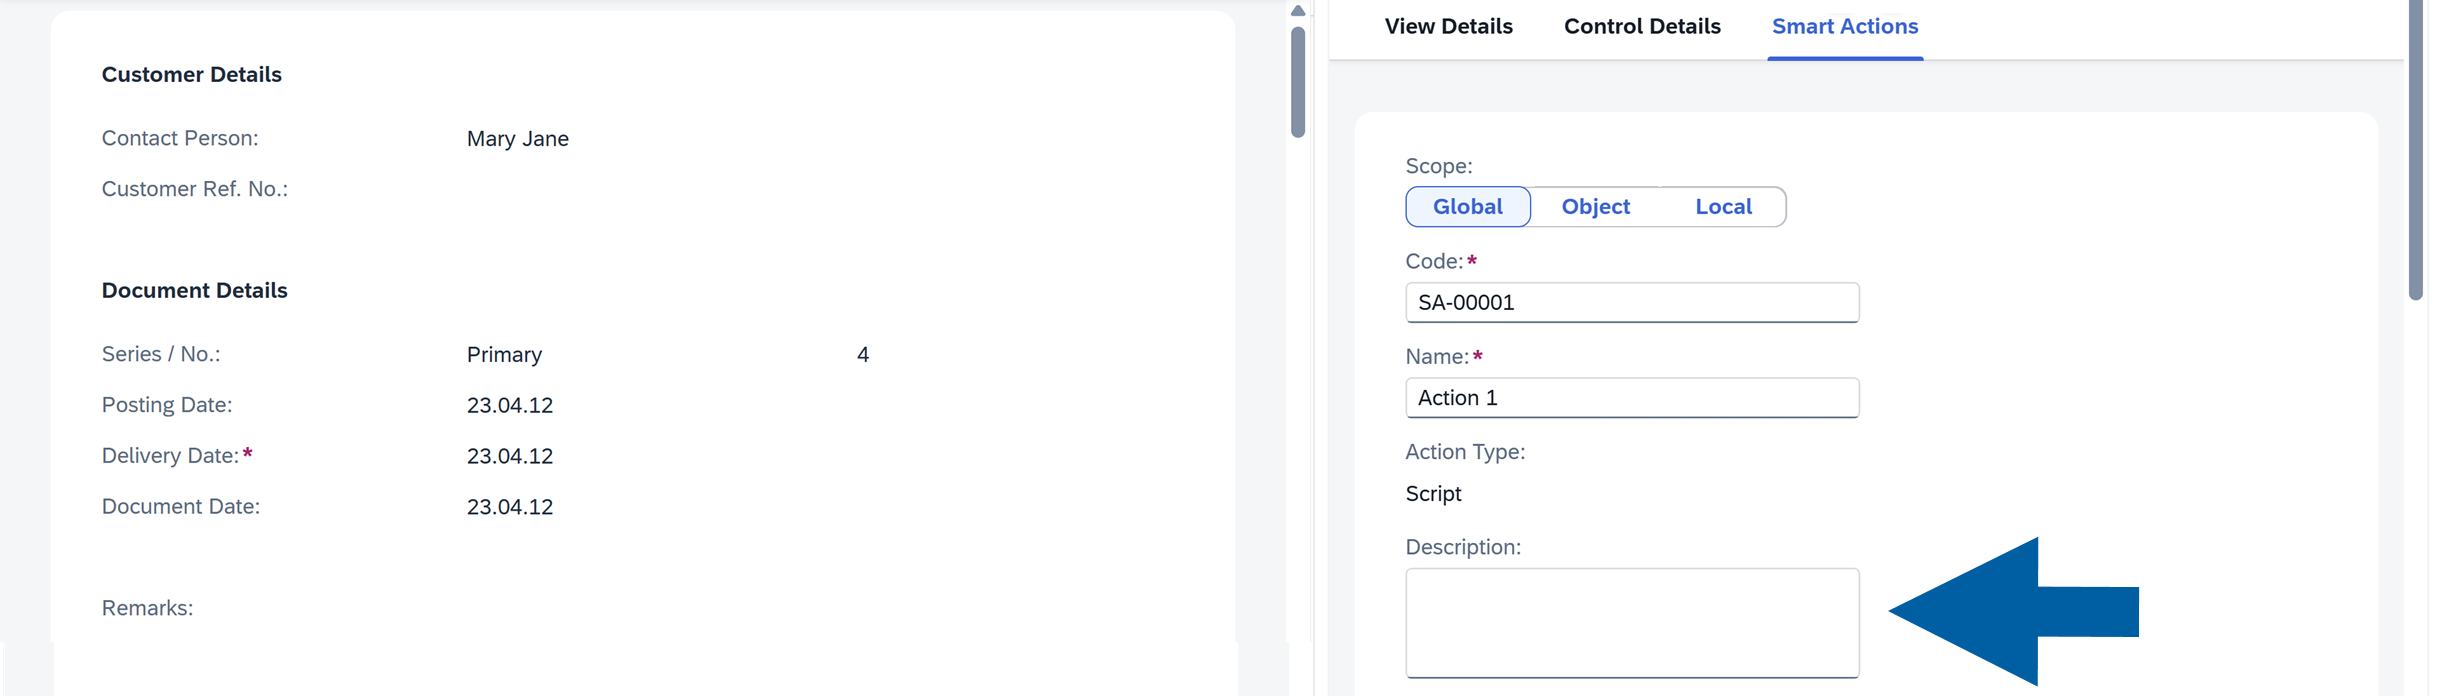
Define the Action scope. You can choose from:
- Global : Available across all views and all document types, for example, a reusable validation used in Sales Orders, Purchase Orders, and Business Partners.
- Object: Available for all CompuTec WebUp views (e.g., Sales Order), across all its view versions.
- Local: Available only in the current view version. Use Local for temporary or highly customized behavior.
-
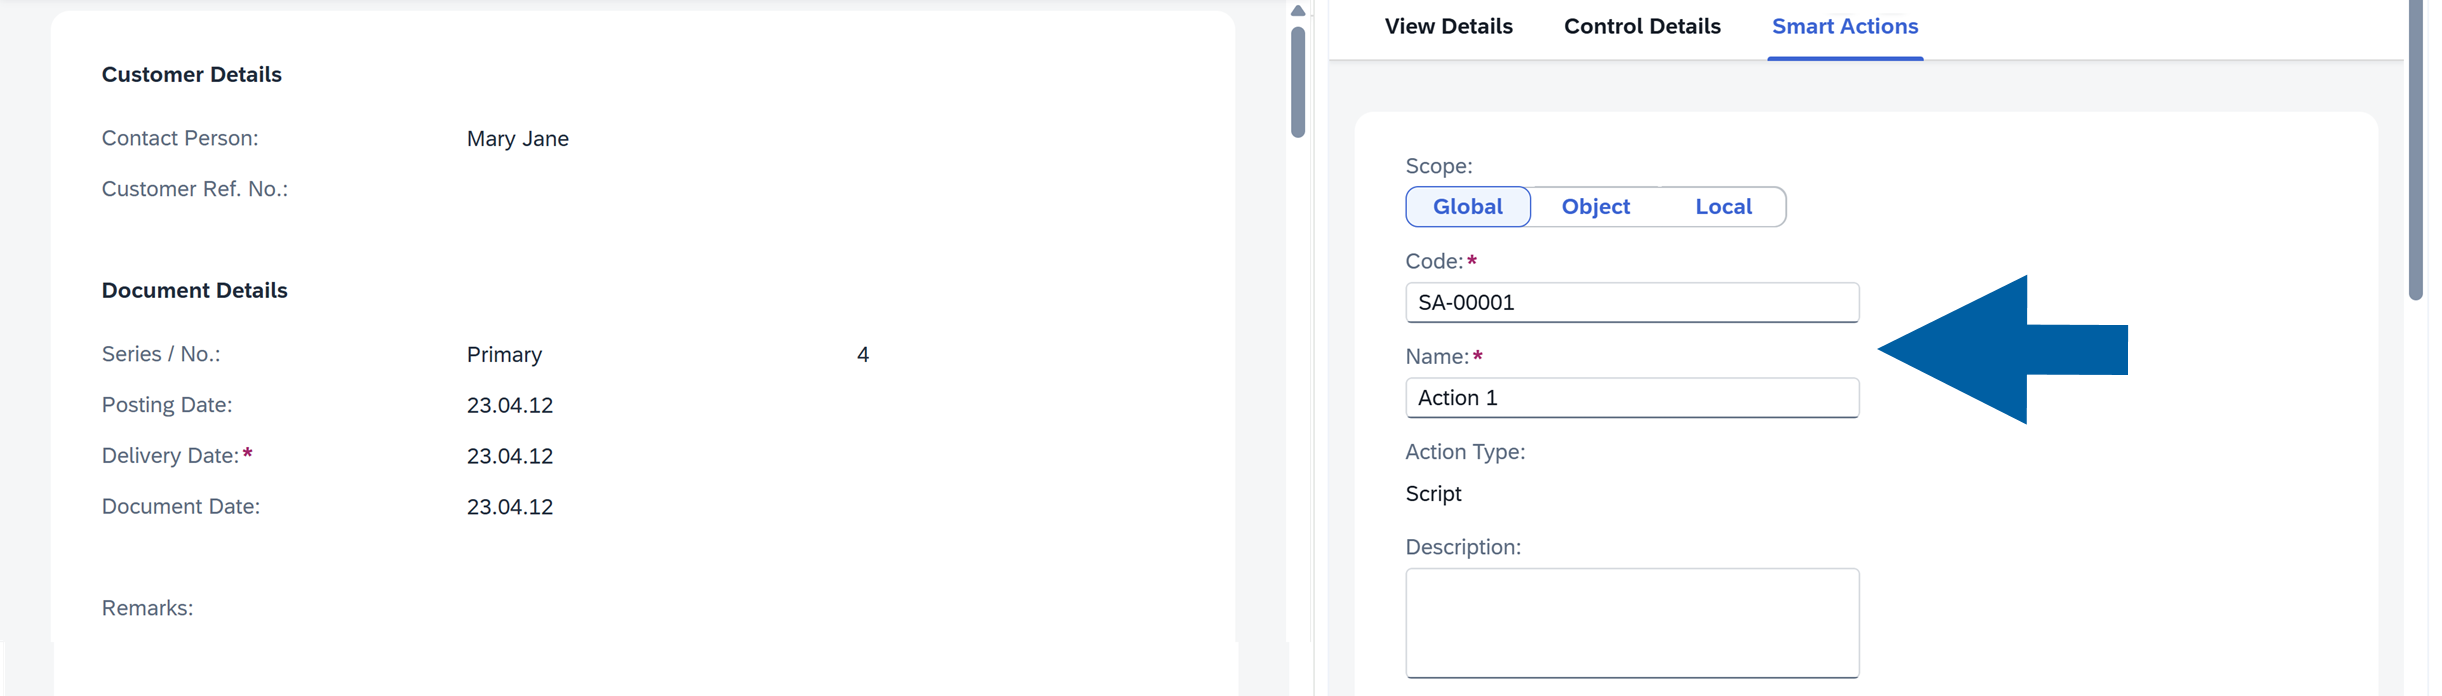
Enter the action Name. Optionally, you can also change the action Code.
-
(Optional) Add a Description of the action.
-
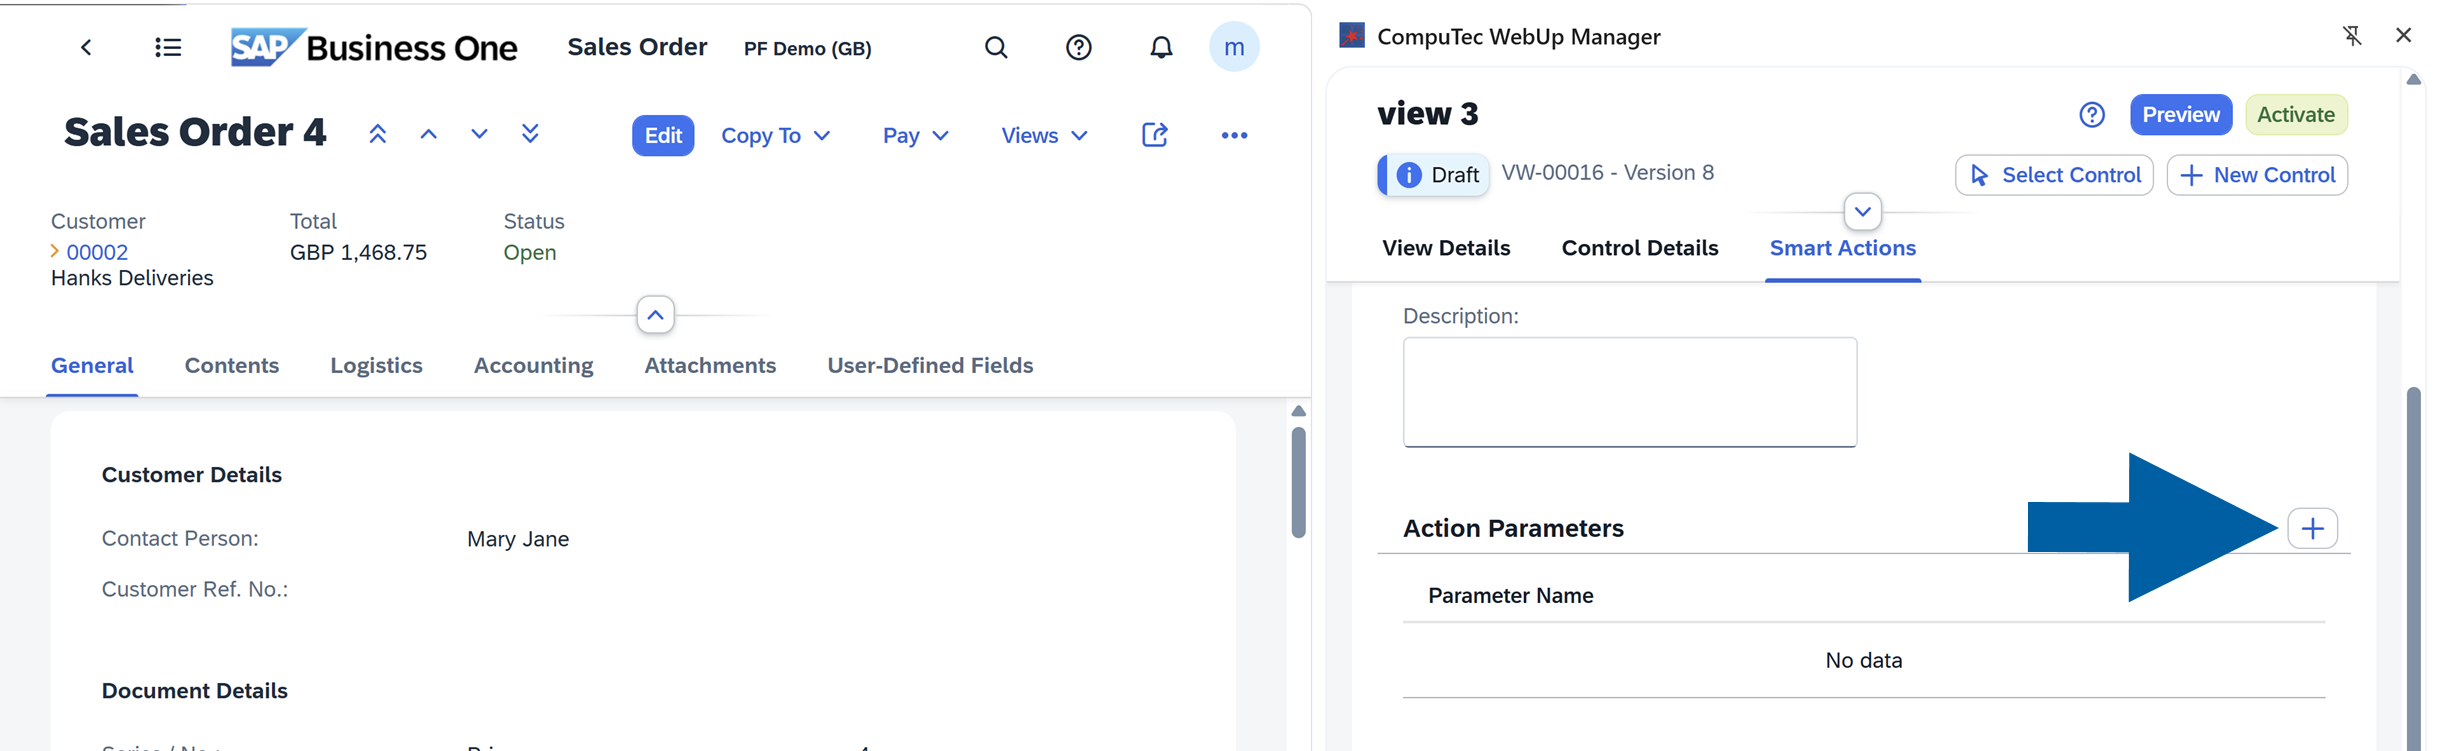
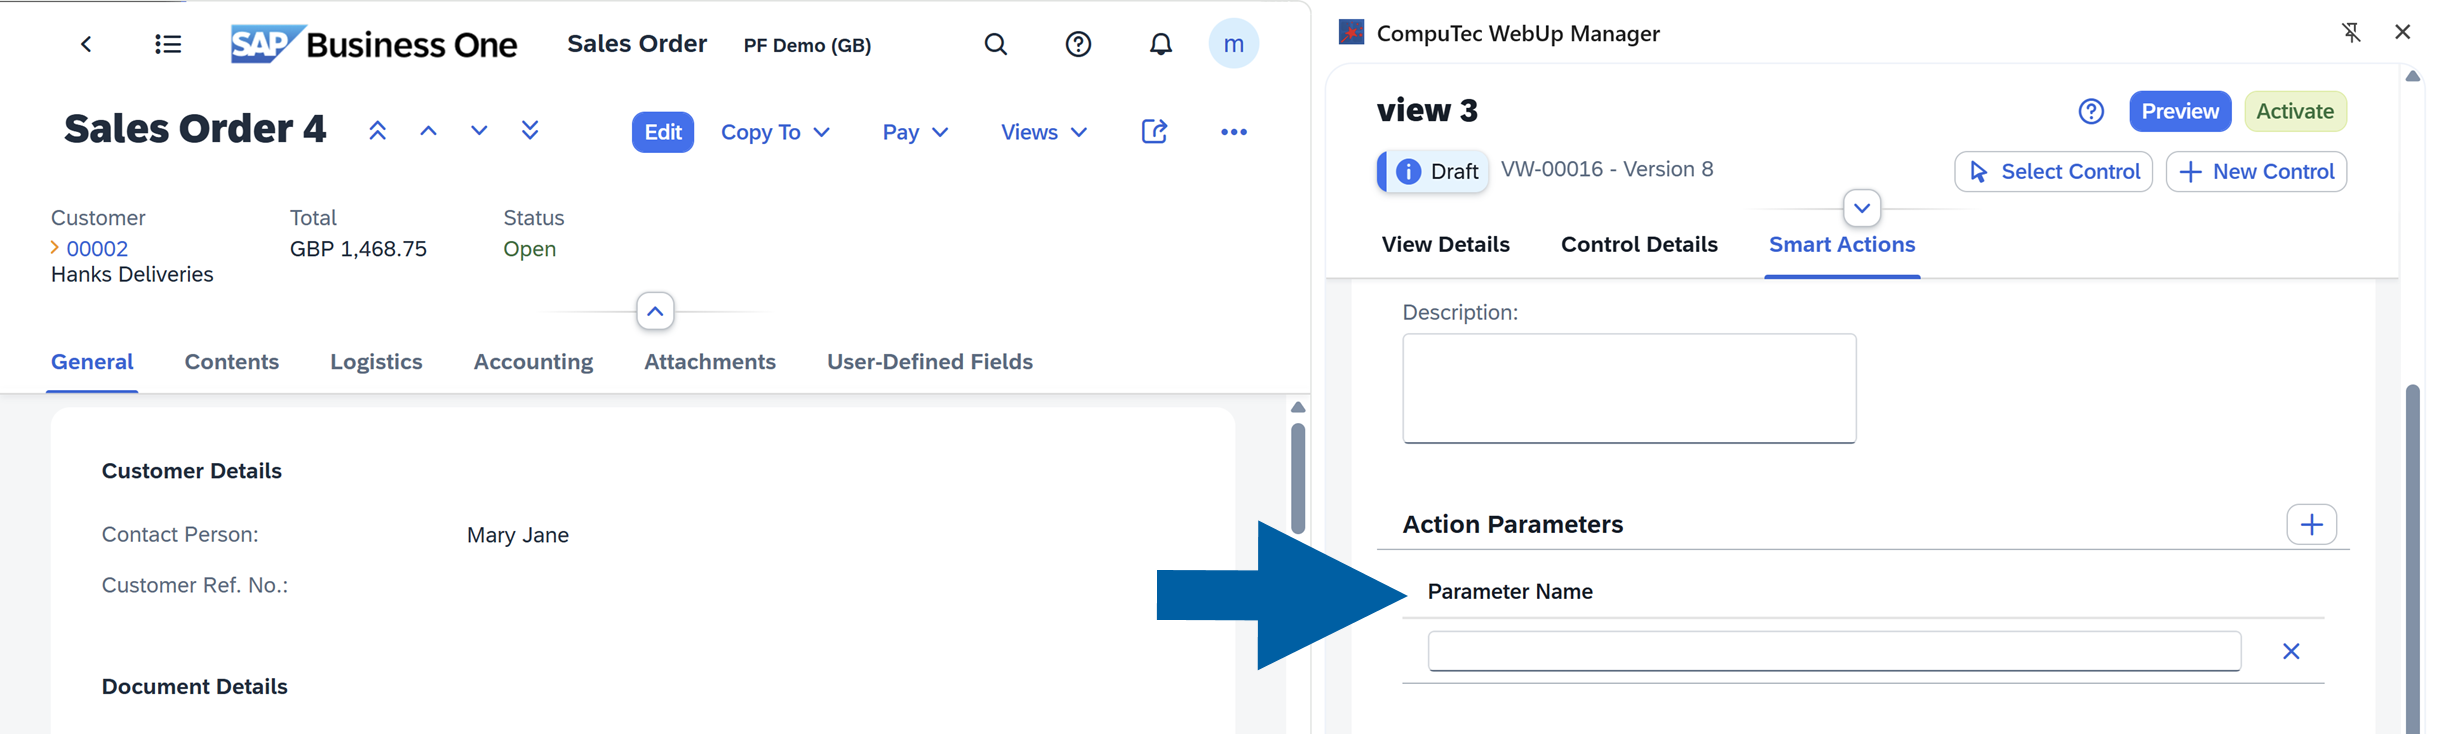
In Action Parameters, use the plus (+) icon to add new parameters.
 info
infoIn this step, enter only the Parameter Names. You will assign their values later when attaching a Smart Action to an Event for the selected control.
-
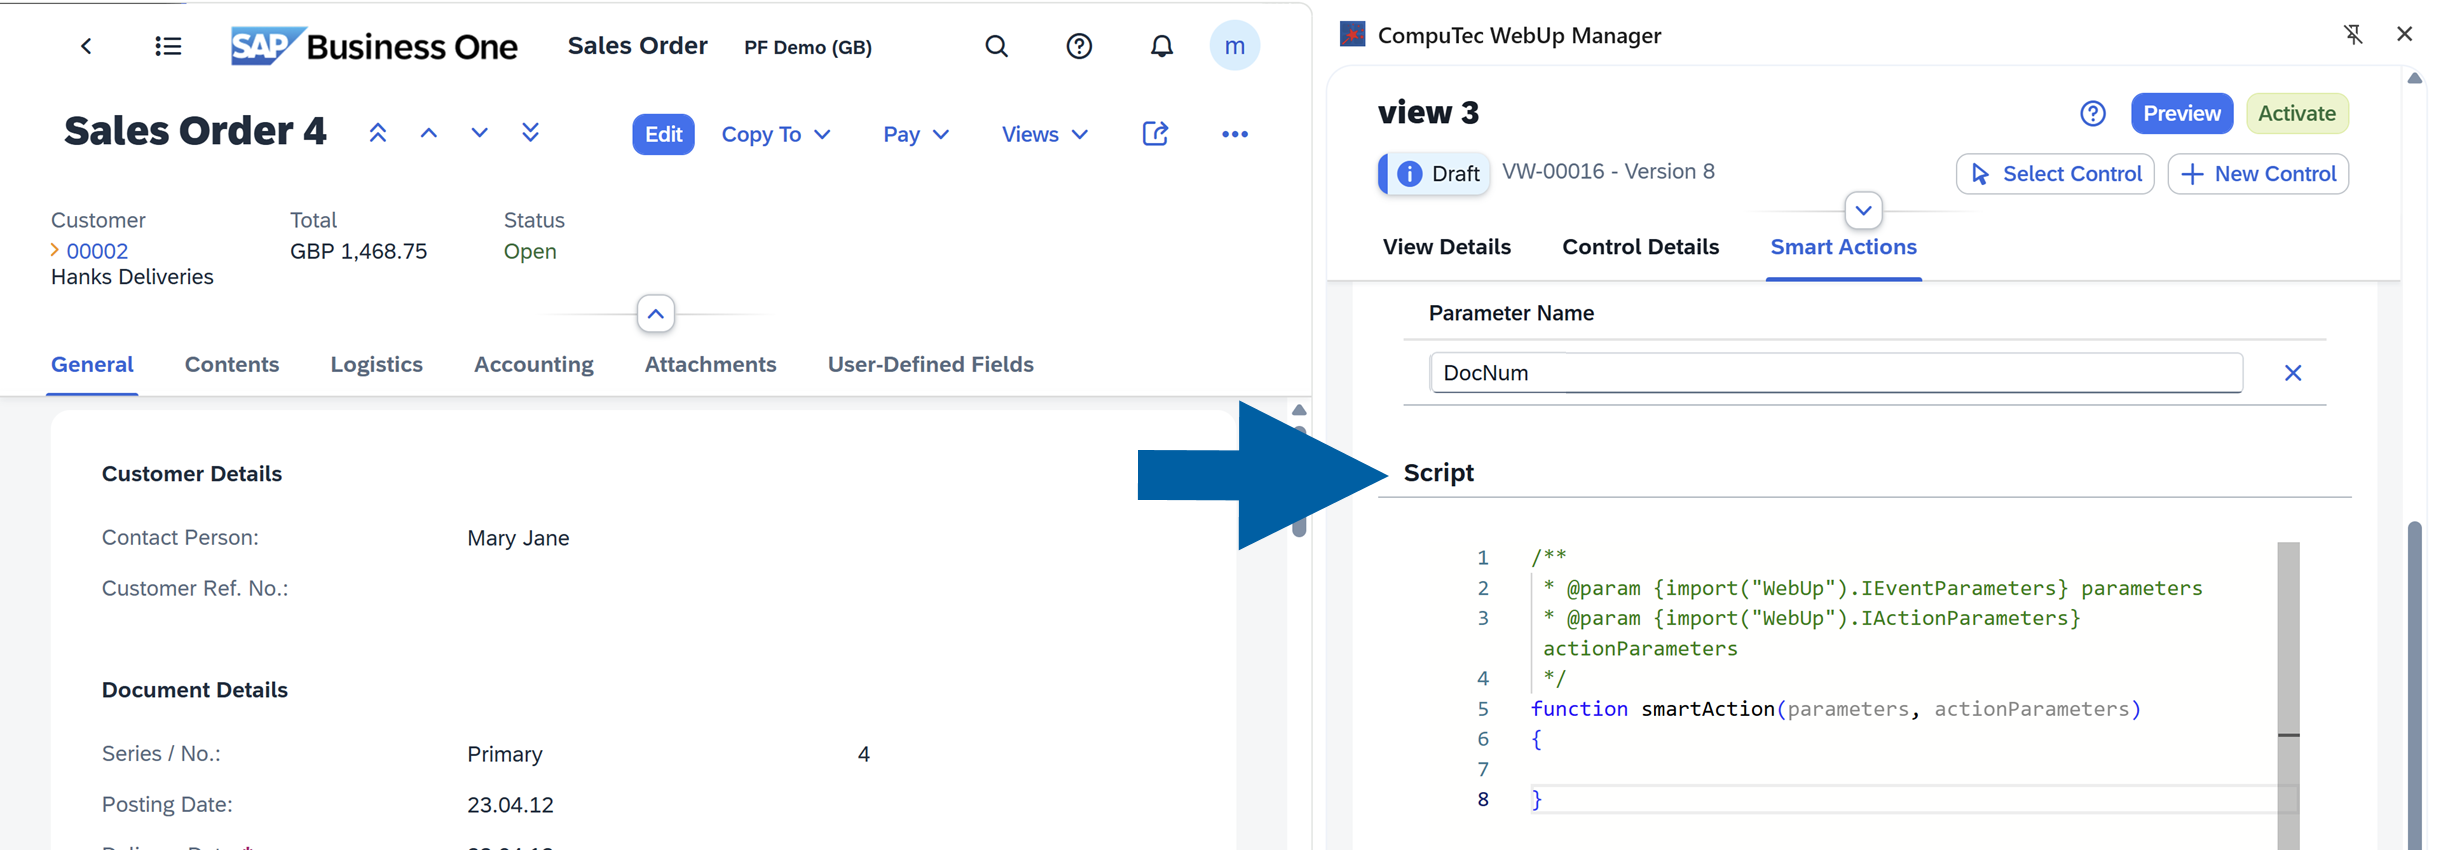
Enter your Script.
 info
infoYou can right-click inside the script editor to insert ready-made snippets such as
show confirmation,create activity, orget table row by key.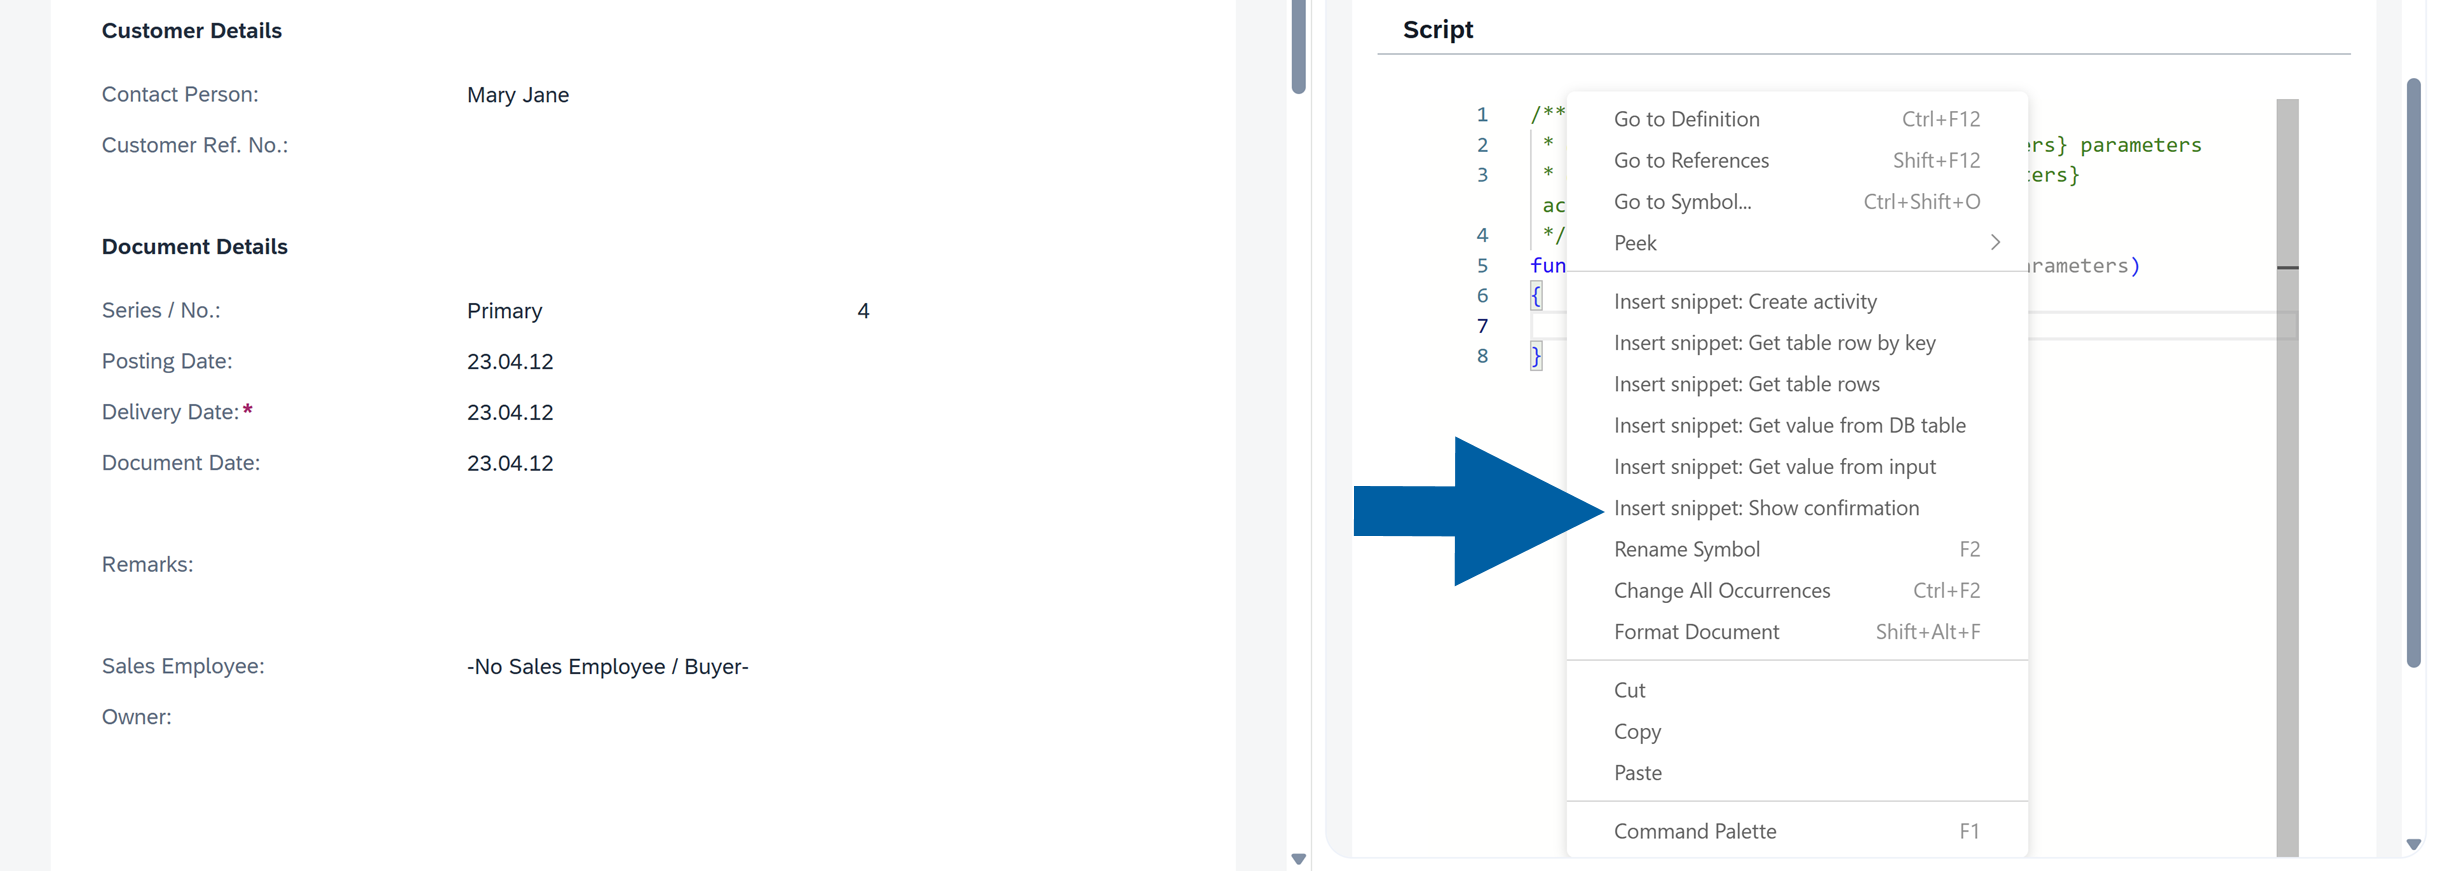
-
Add parameters to your script using the following syntax:
${action.Parameters.parameter_name}. Replaceparameter_namewith the name of your parameter. In our example, we useDocNumas the Parameter Name.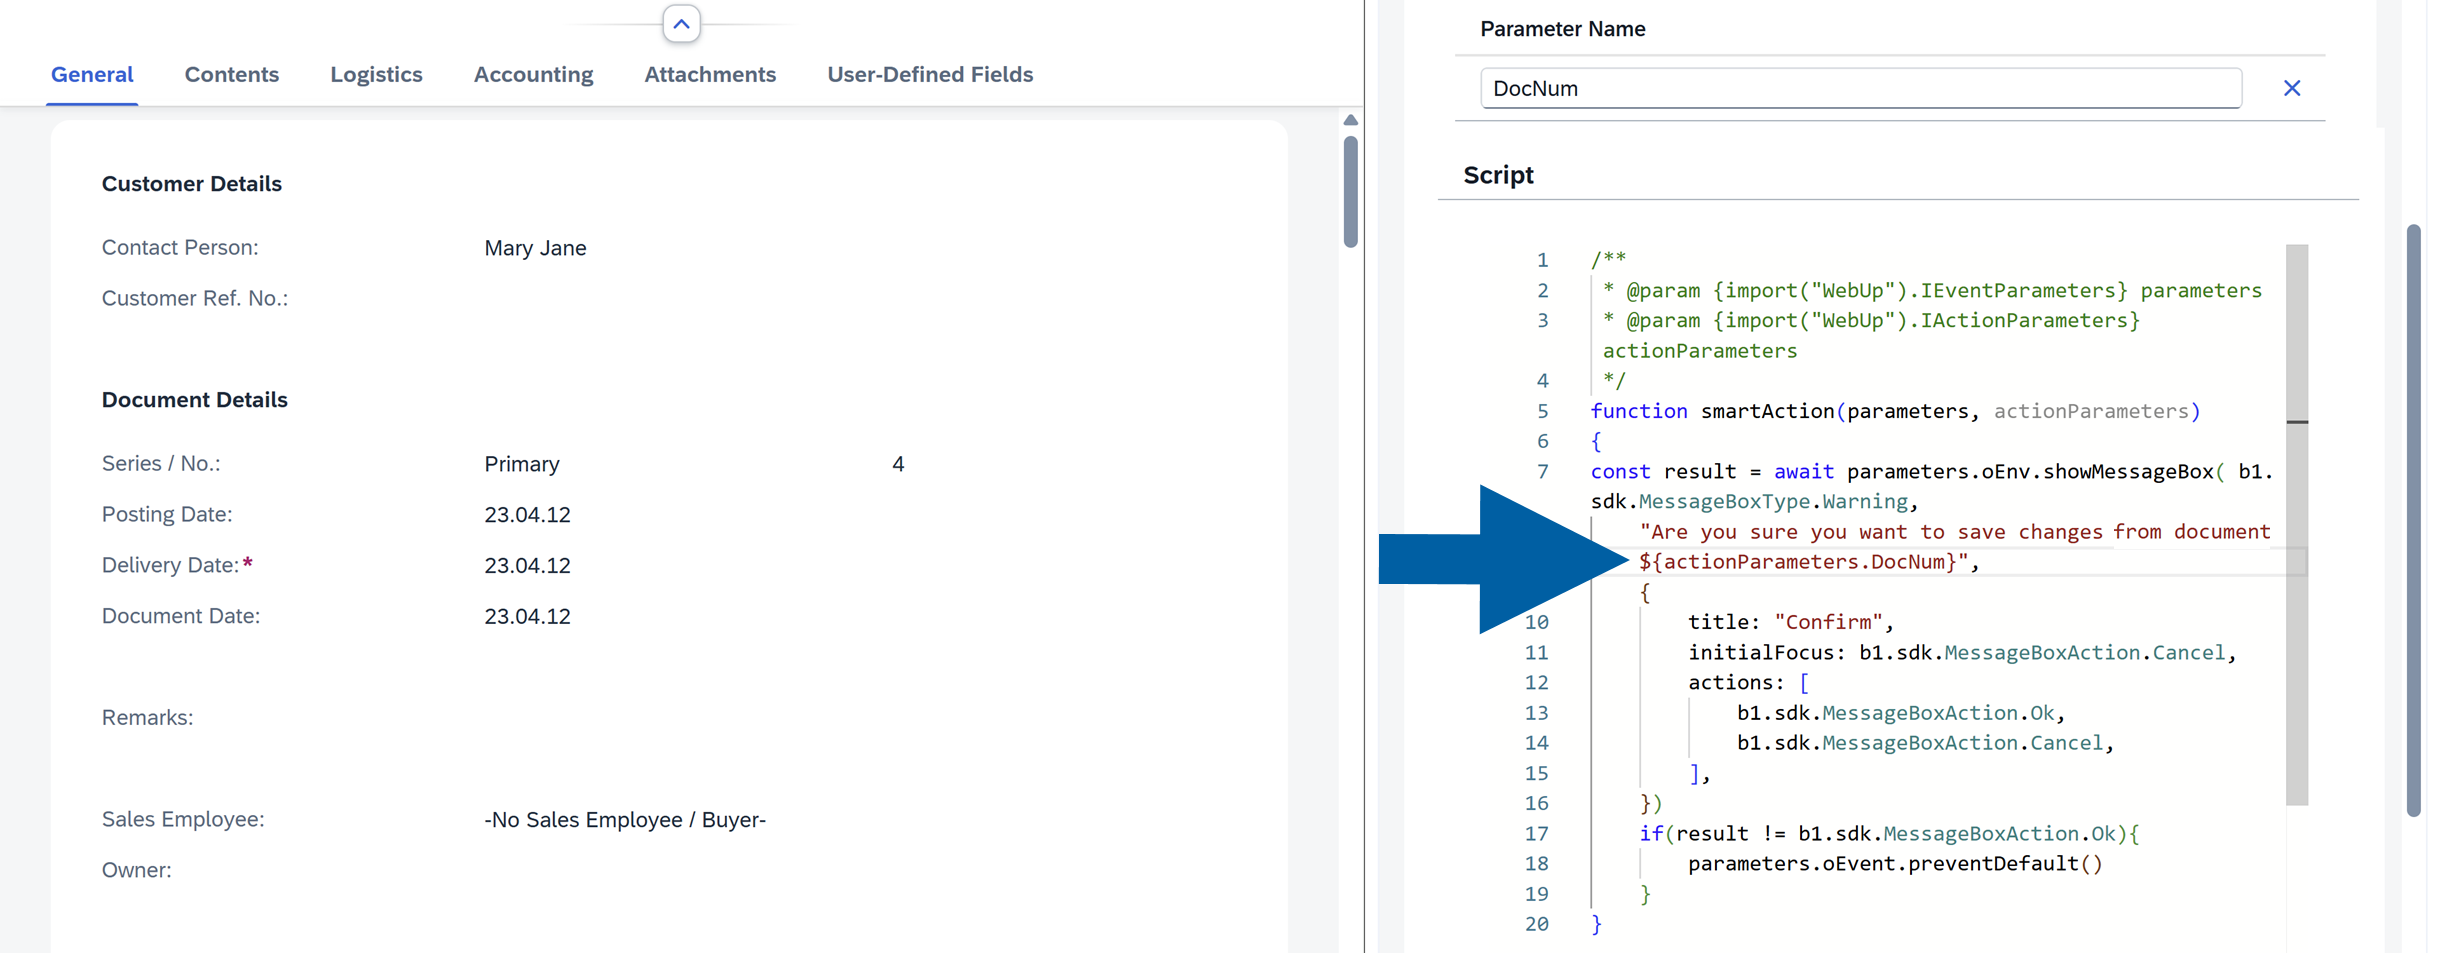
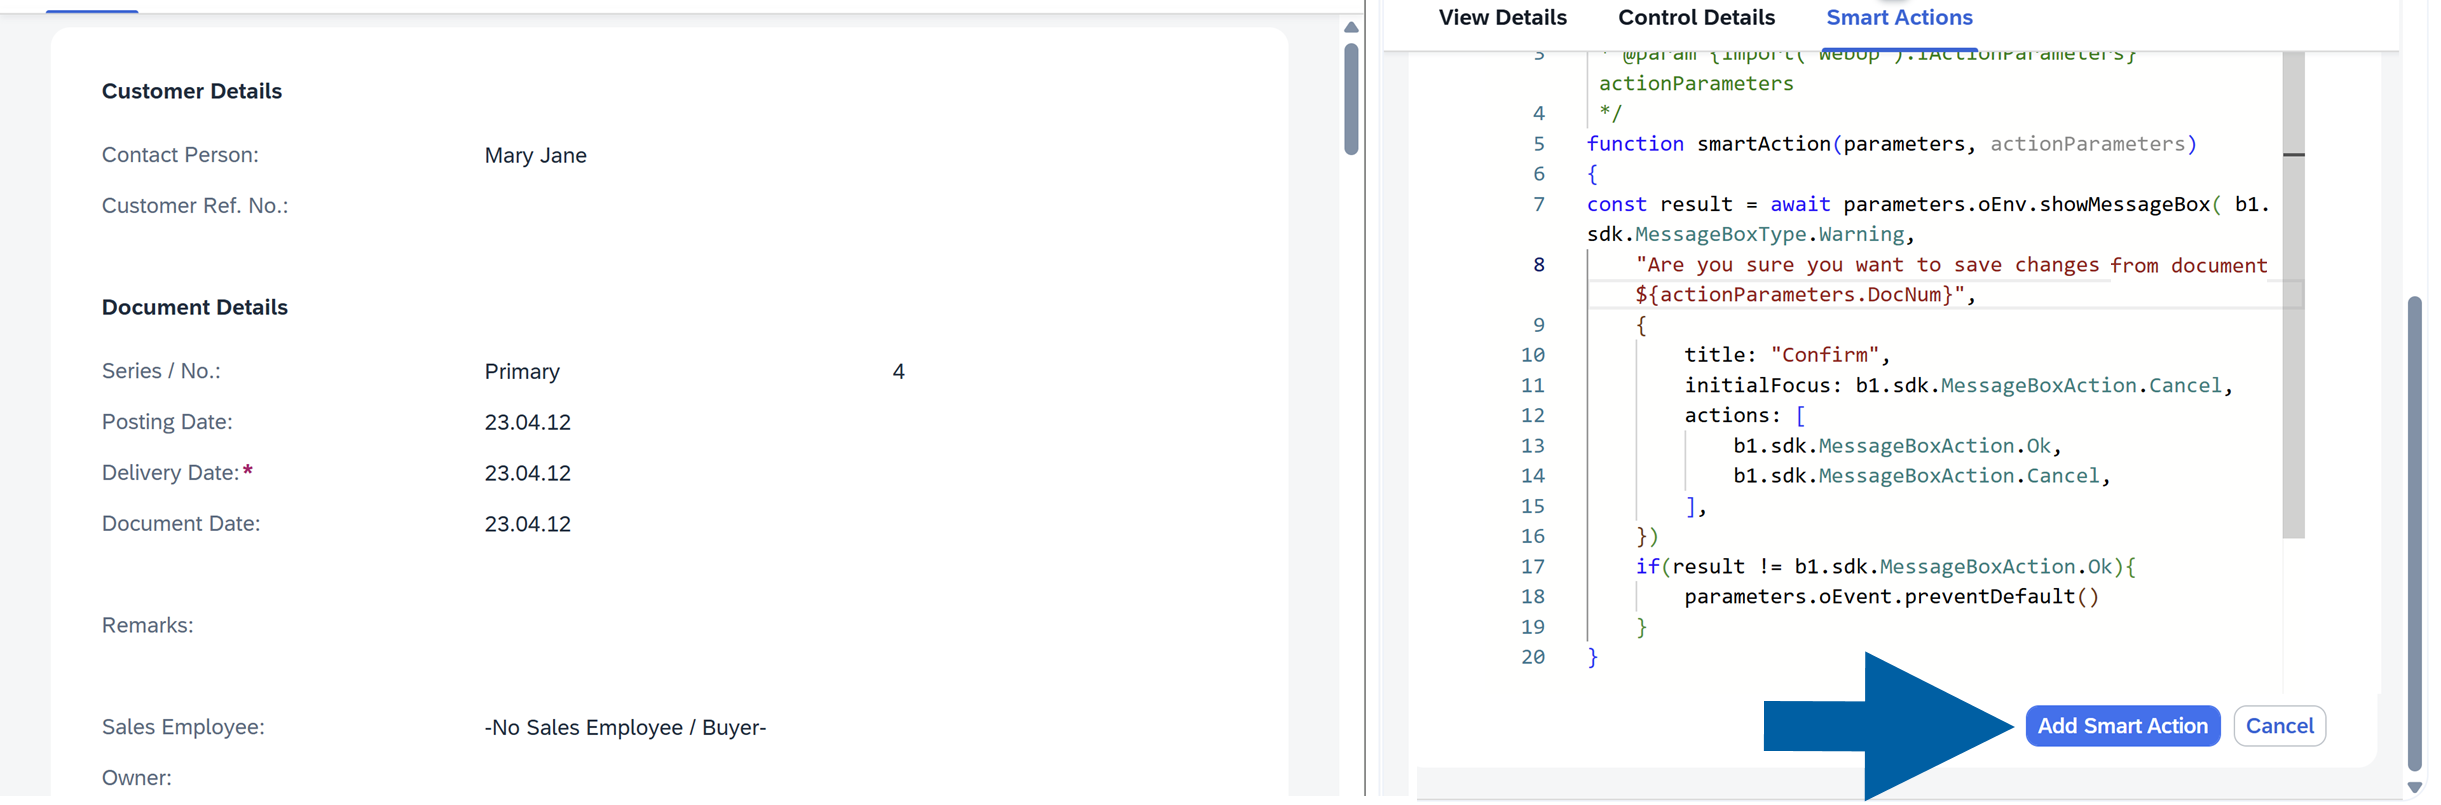
-
Click Add Smart Action.
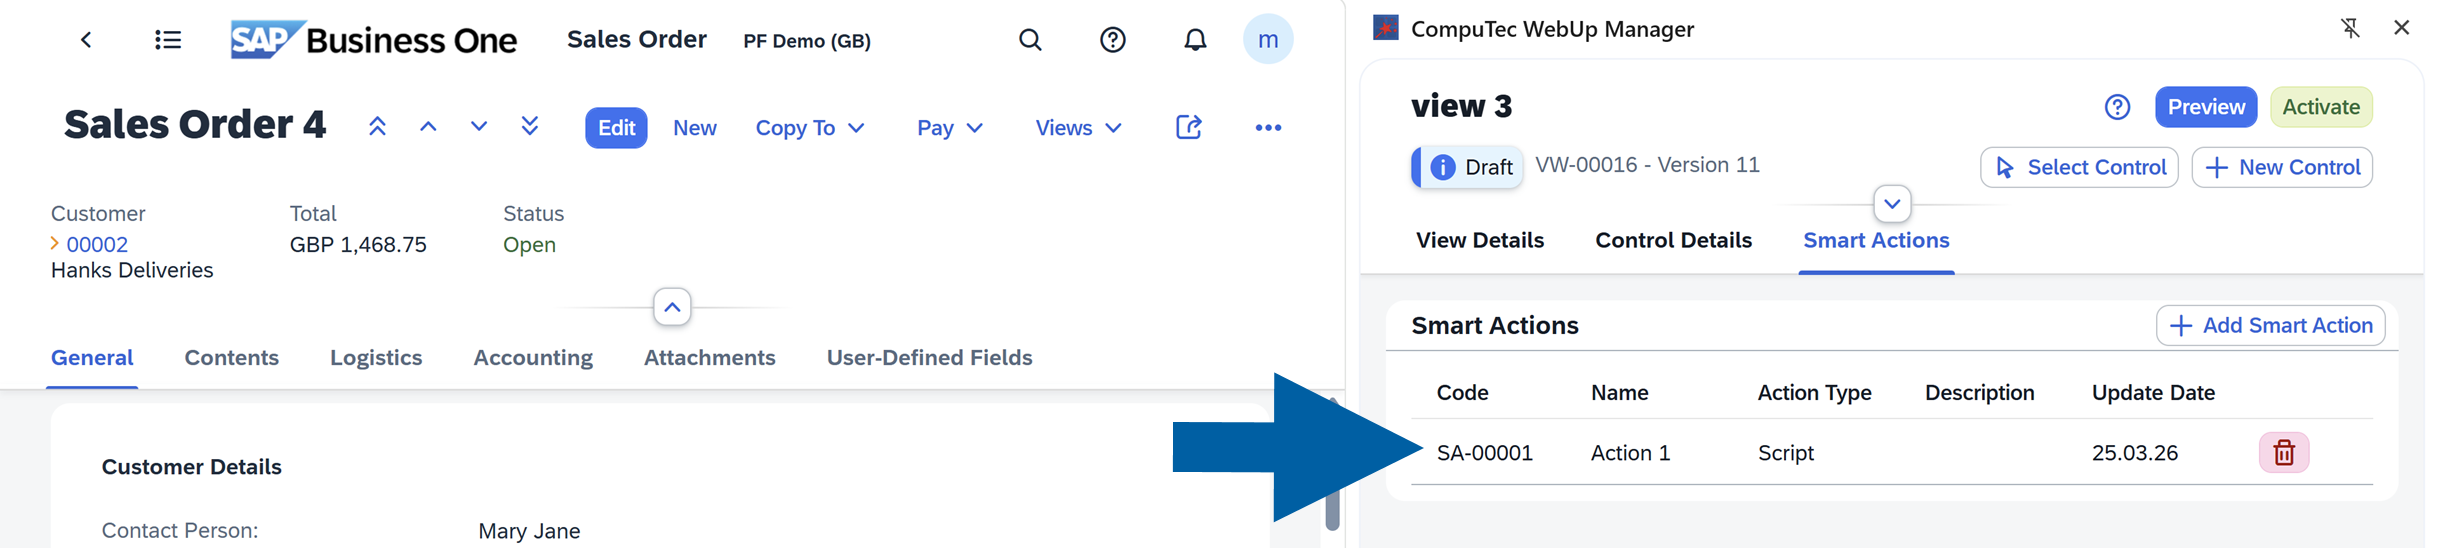
-
Done! Now you can see your Smart Action on the list.
Step 2: Assign the Smart Action to a Control
To assign the Smart Action to a control, follow these steps:
-
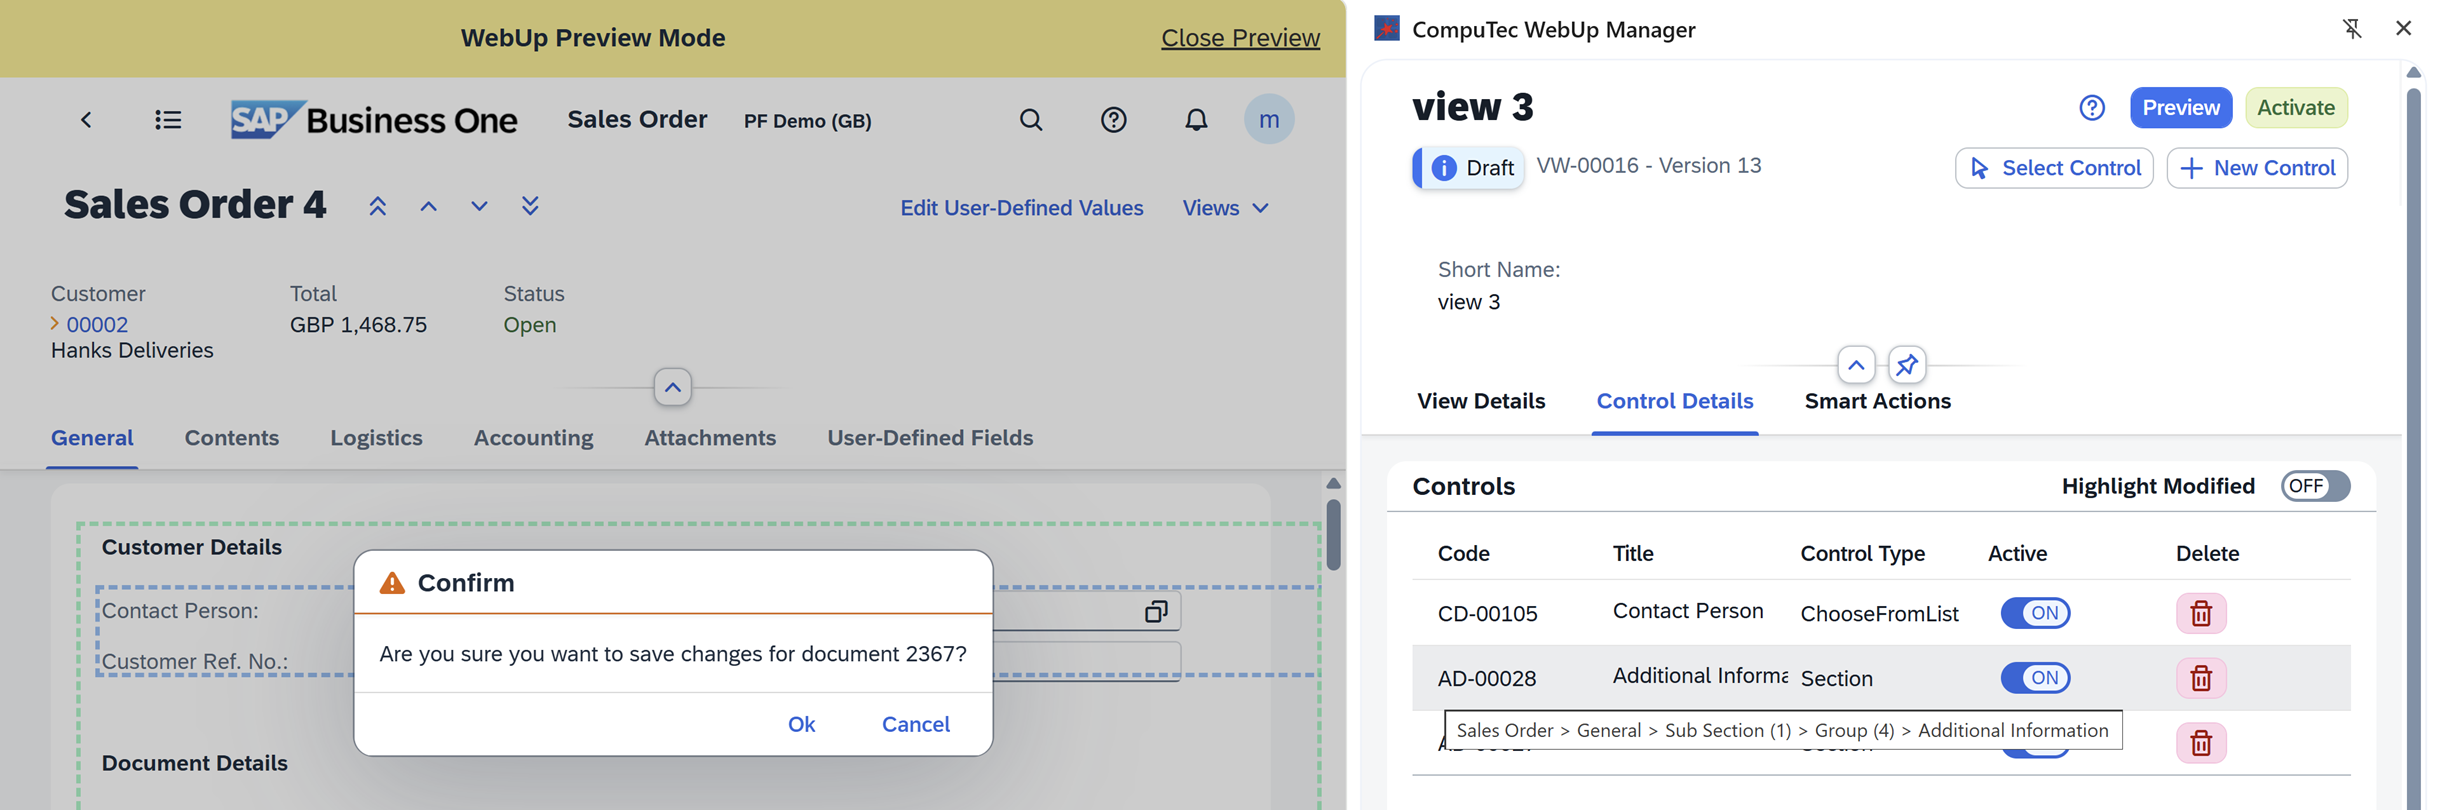
Open your screen in SAP Business One Web Client. In our example, we want our Smart Action to trigger a confirmation window after making changes in
Contact Personfield of the Sales Orders, so we open Sales Order 4 in SAP Business One Web Client. -
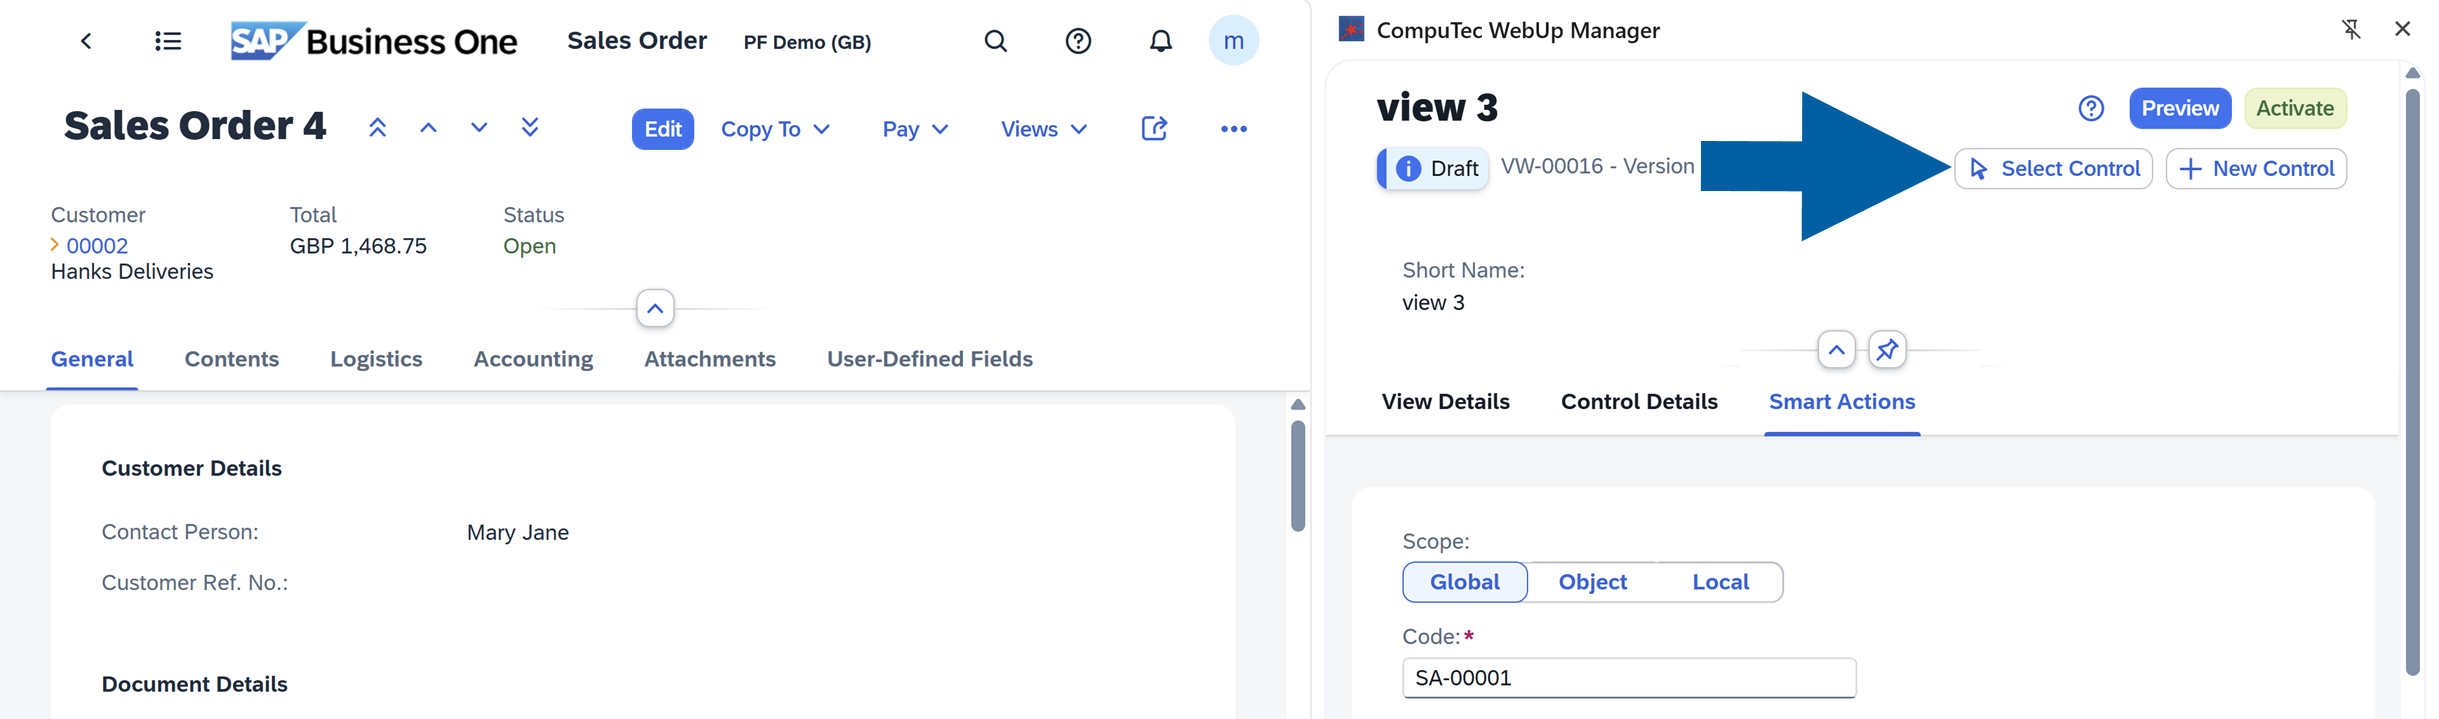
In the Computec WebUp Manager side panel, click Select Control.
-
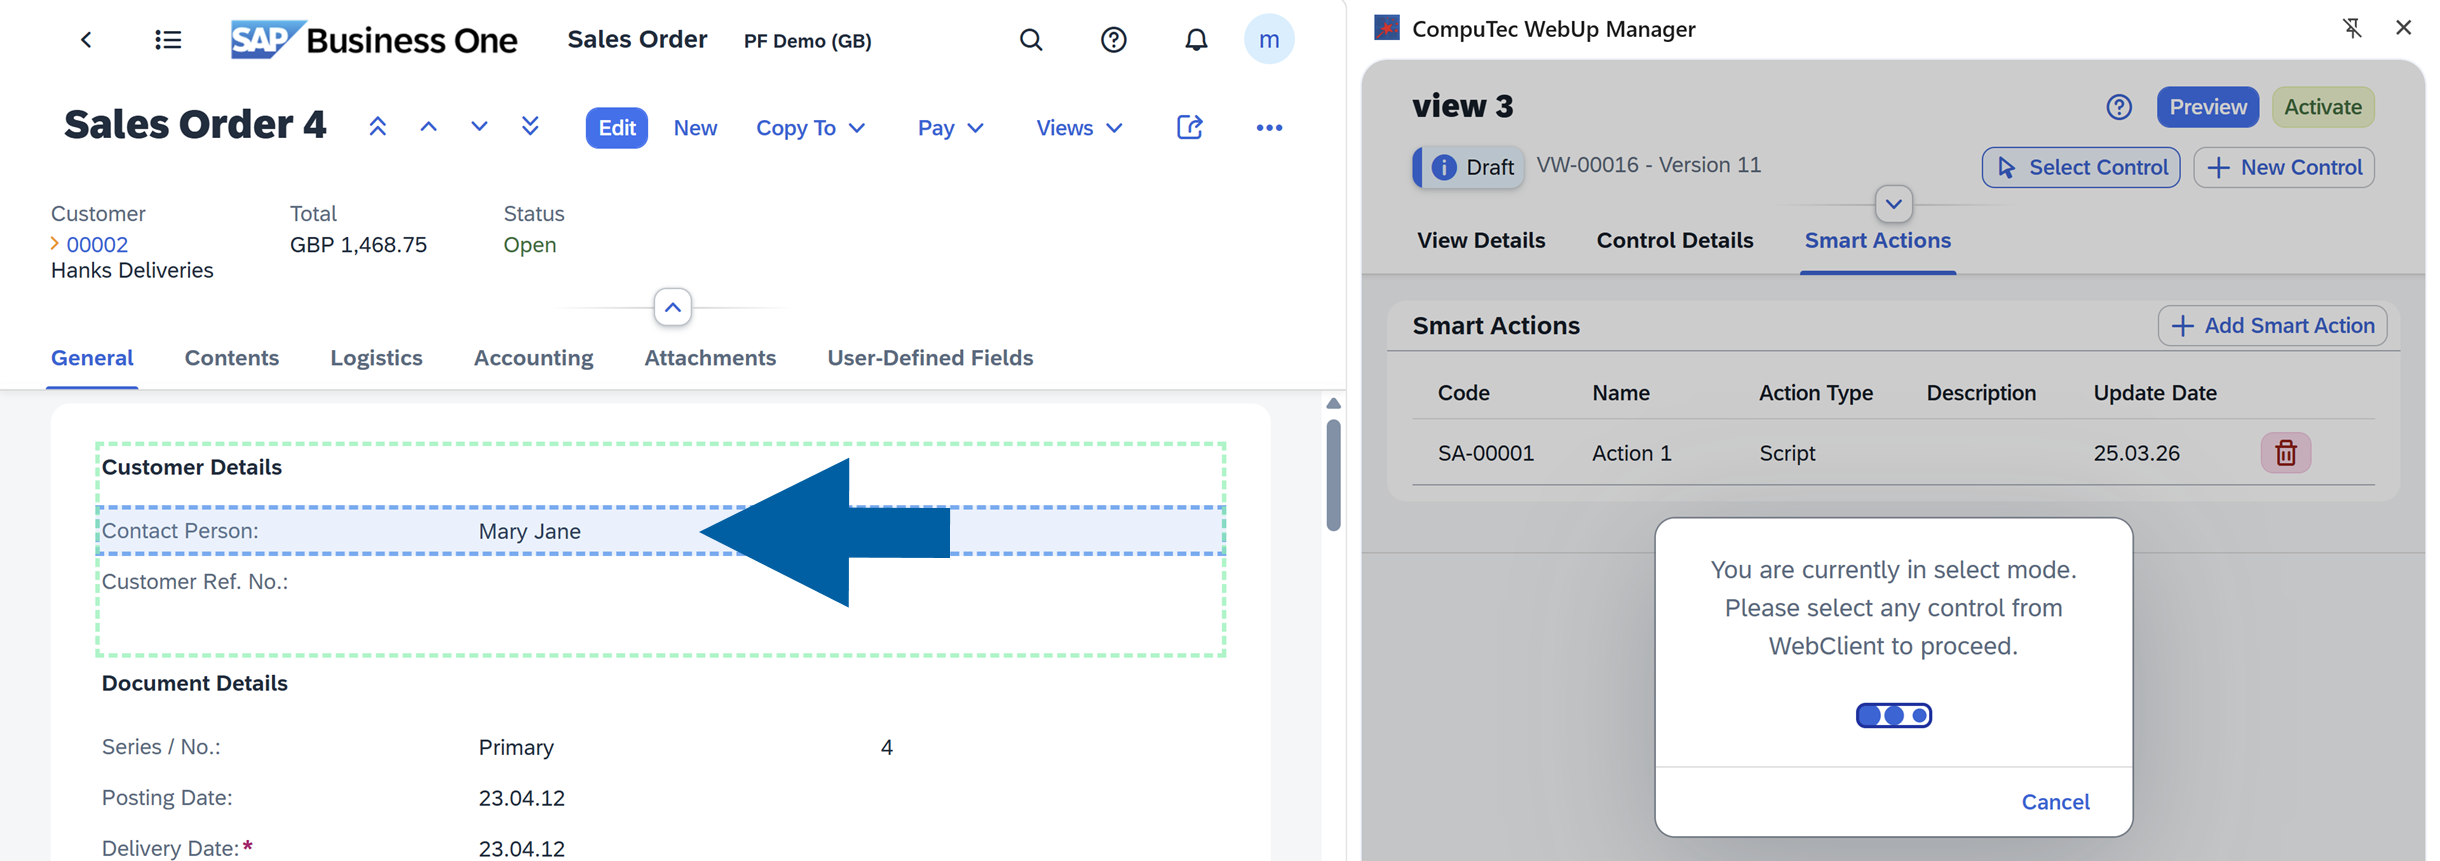
In SAP Business One Web Client, click a field, button, or UI element to select it.
-
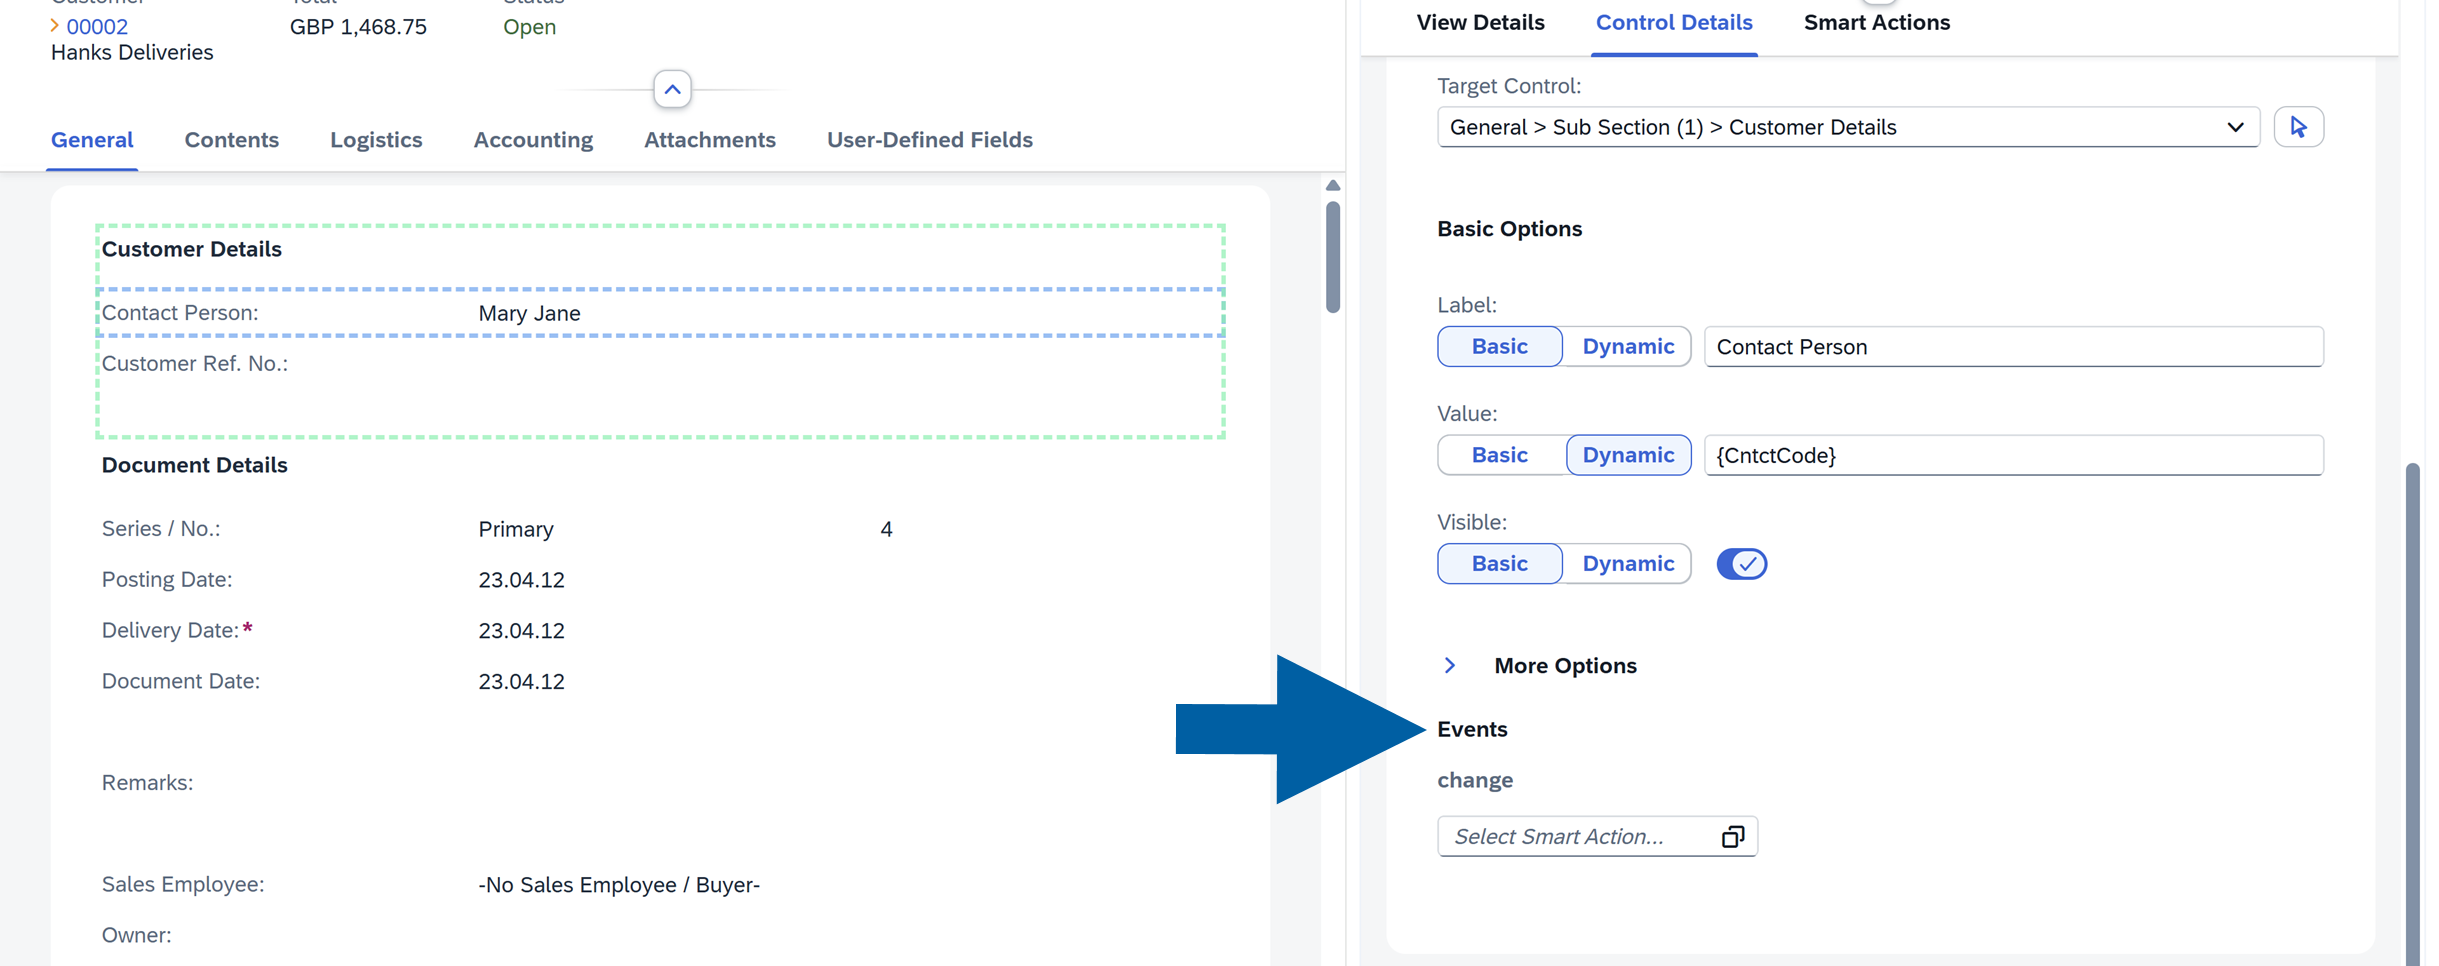
In CompuTec WebUp Manager side panel on the right, go to Control Details > More Options > Events.
-
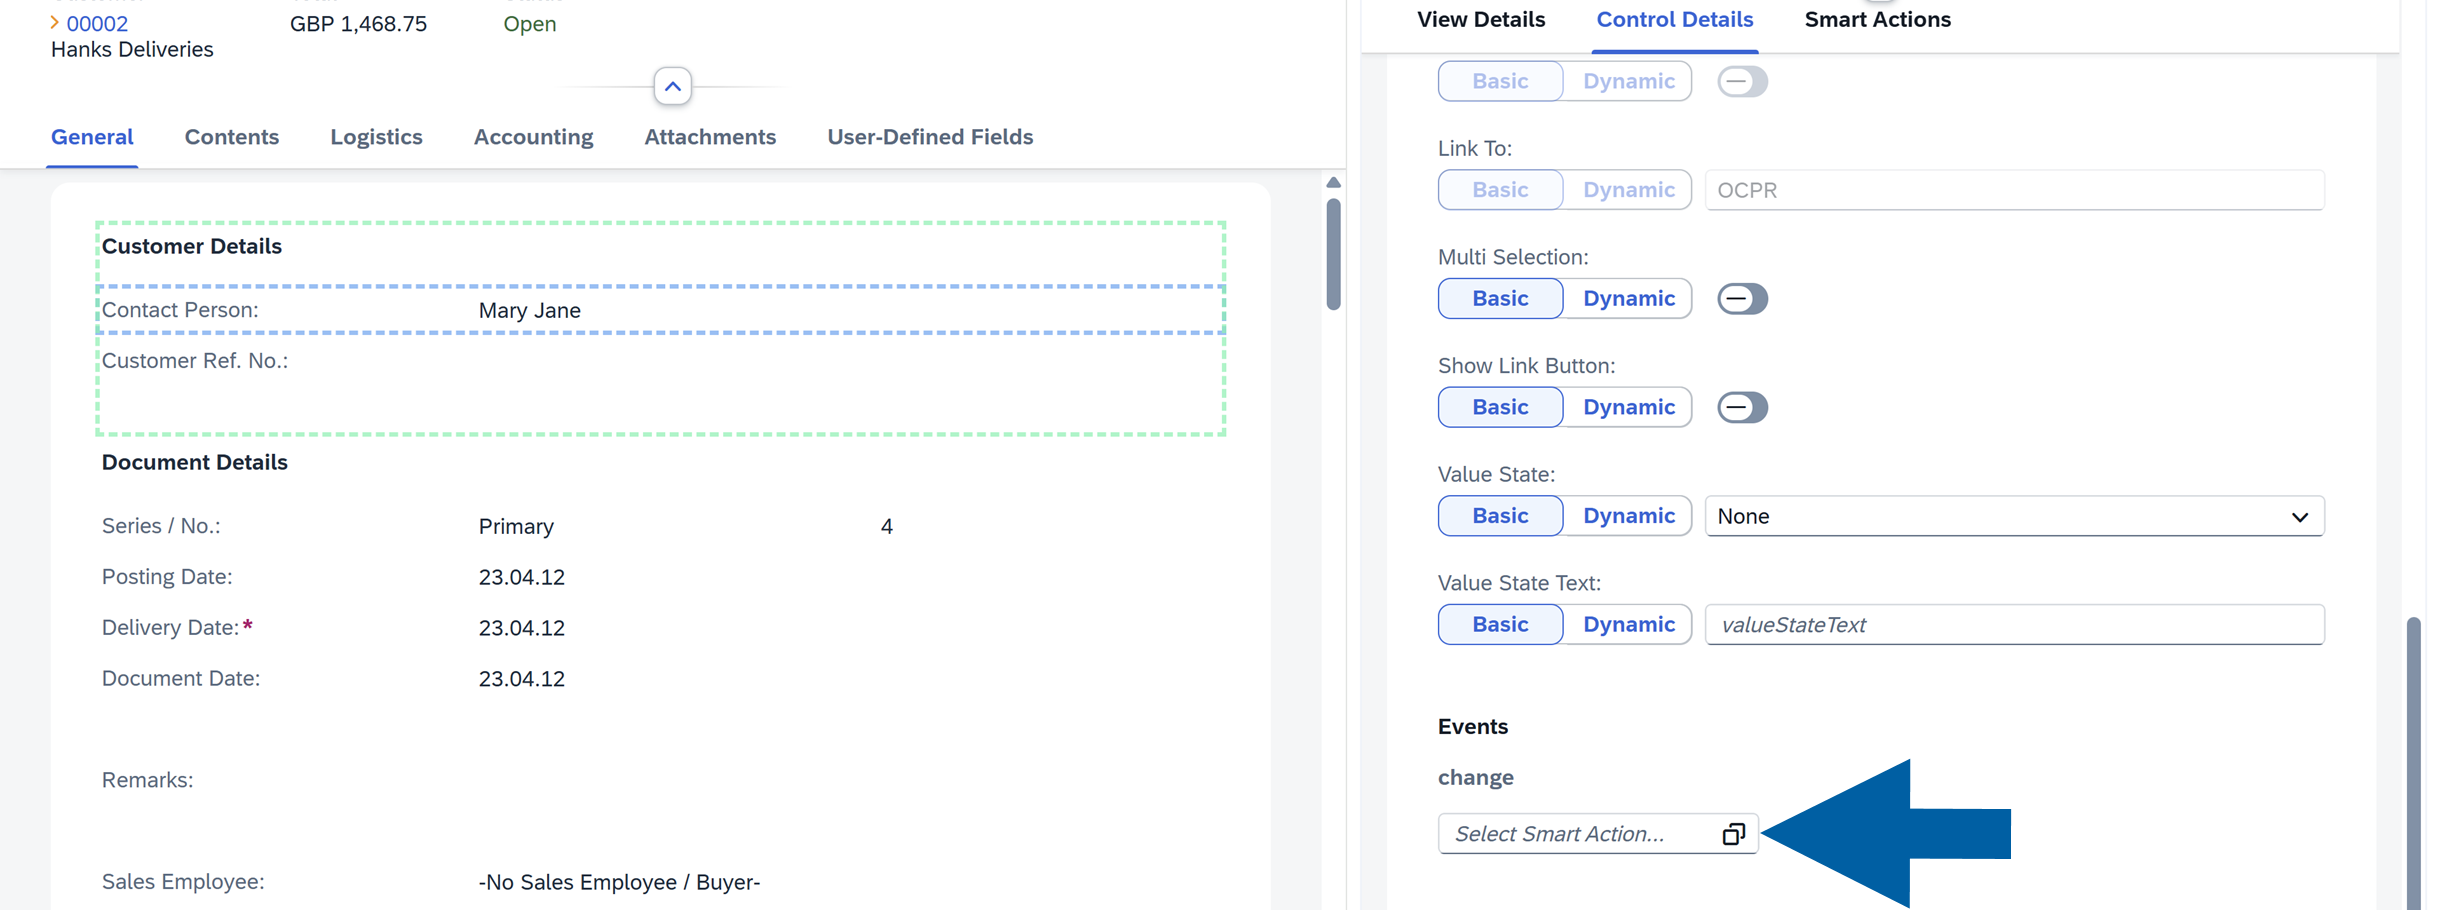
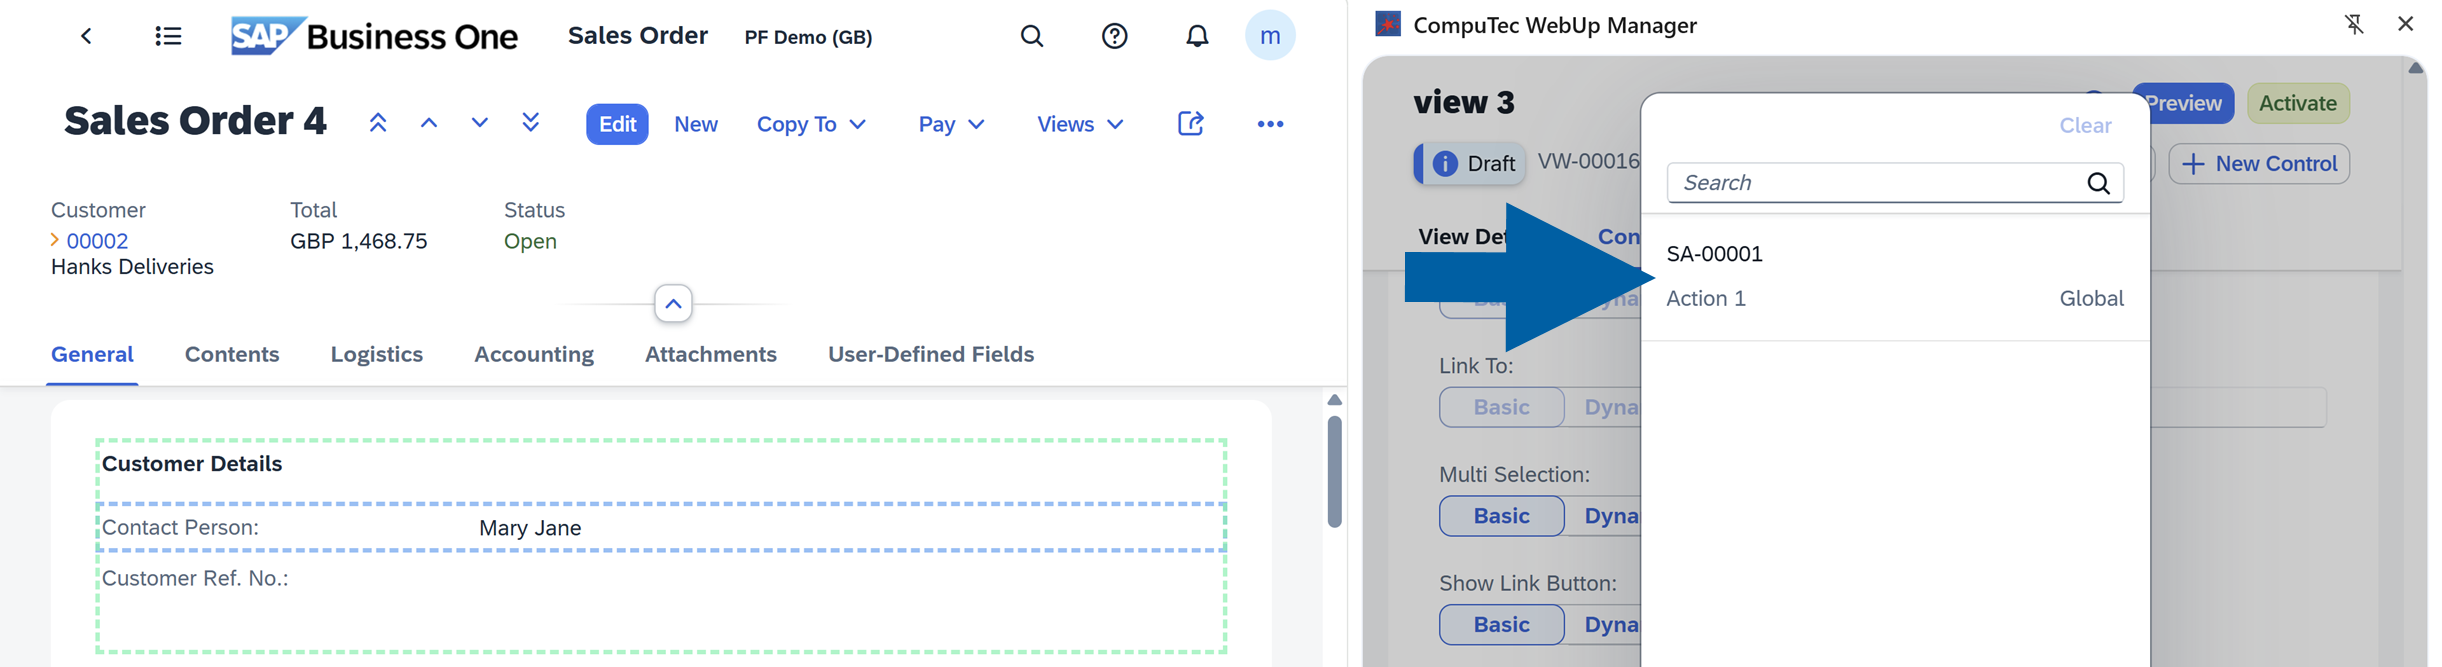
Click on Select Smart Action field to open the list of available Smart Actions.
-
Choose your Smart Action from the list.
-
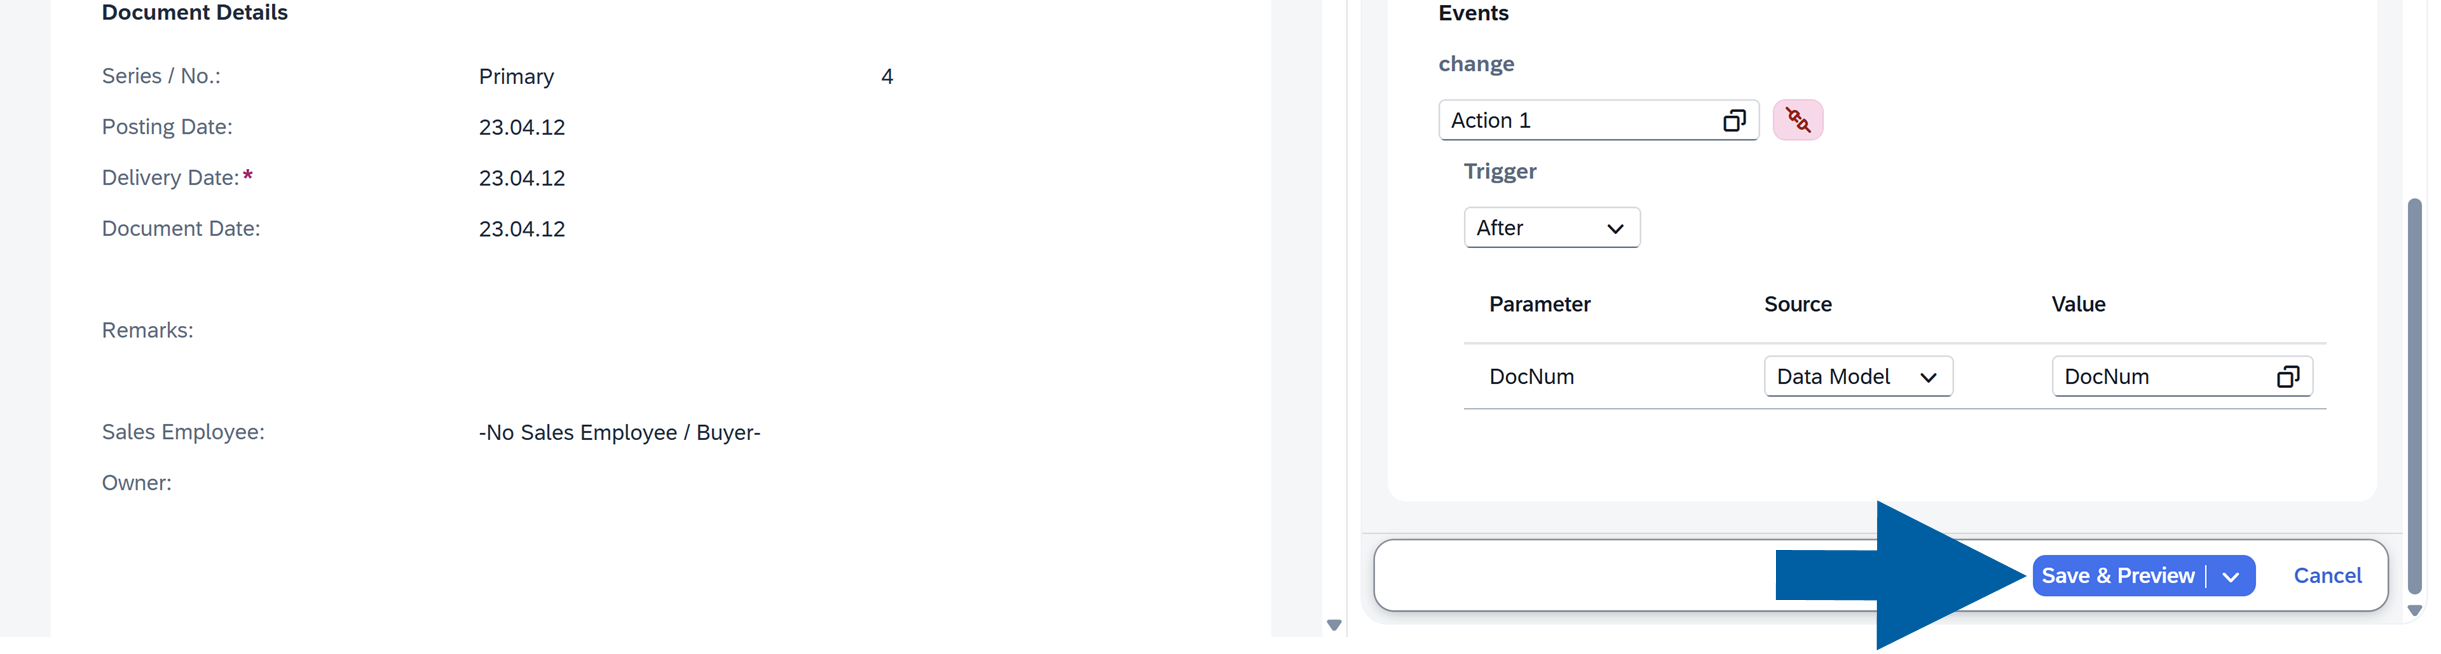
In Triggers, choose when your action should run:
No Trigger,After, orBeforethe event occurs.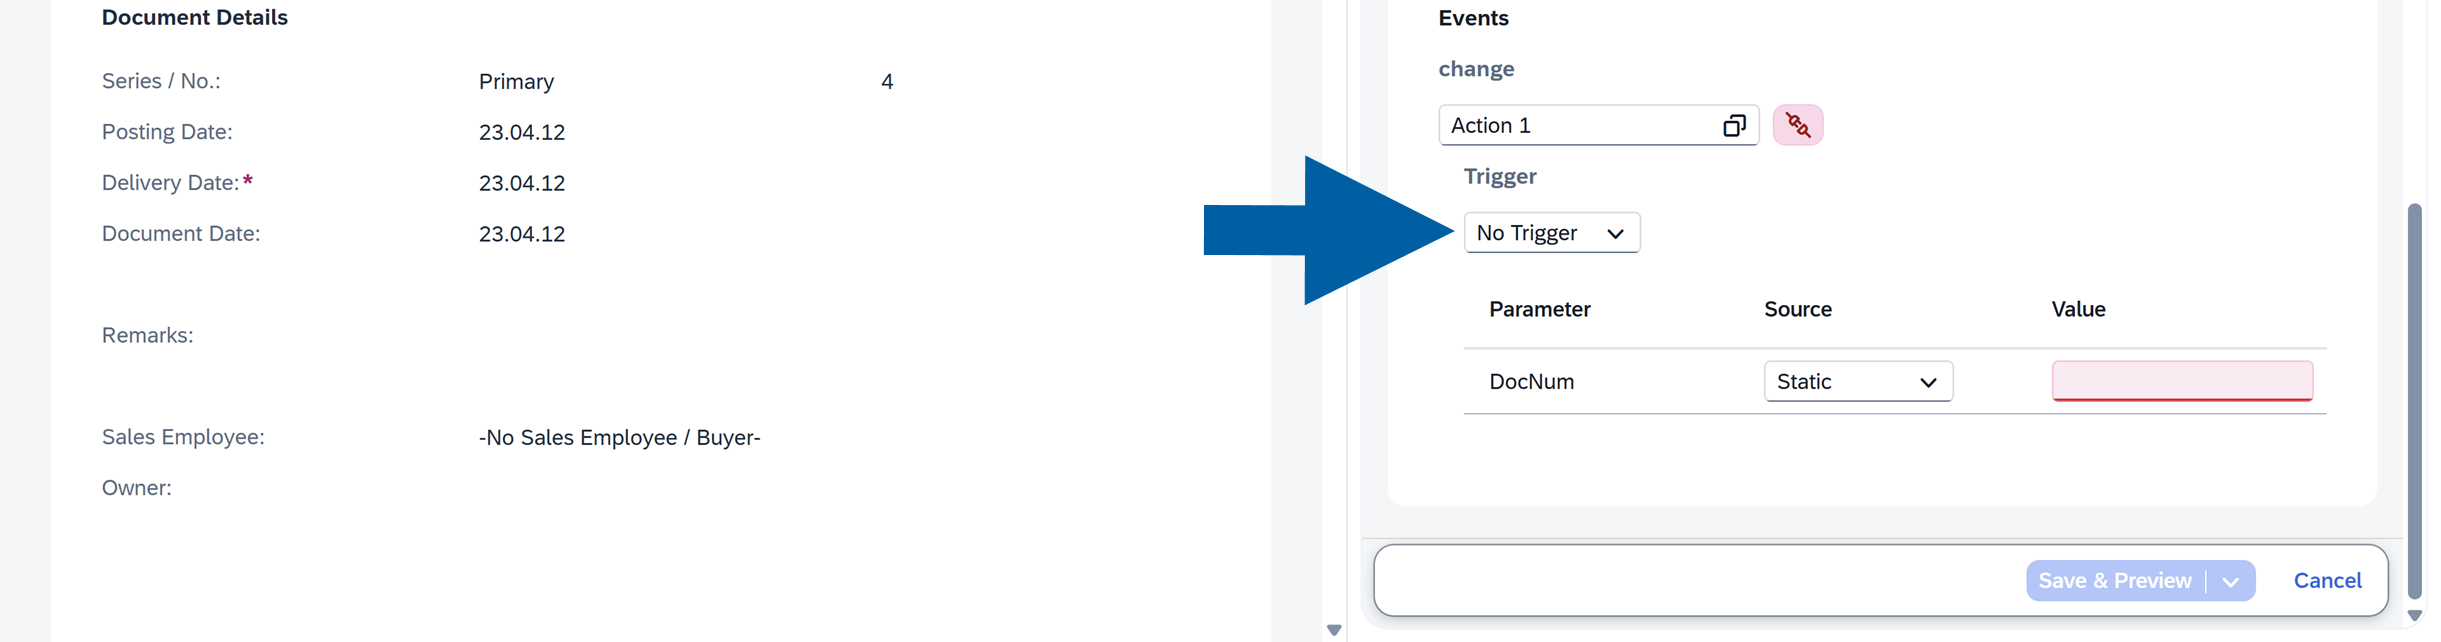
-
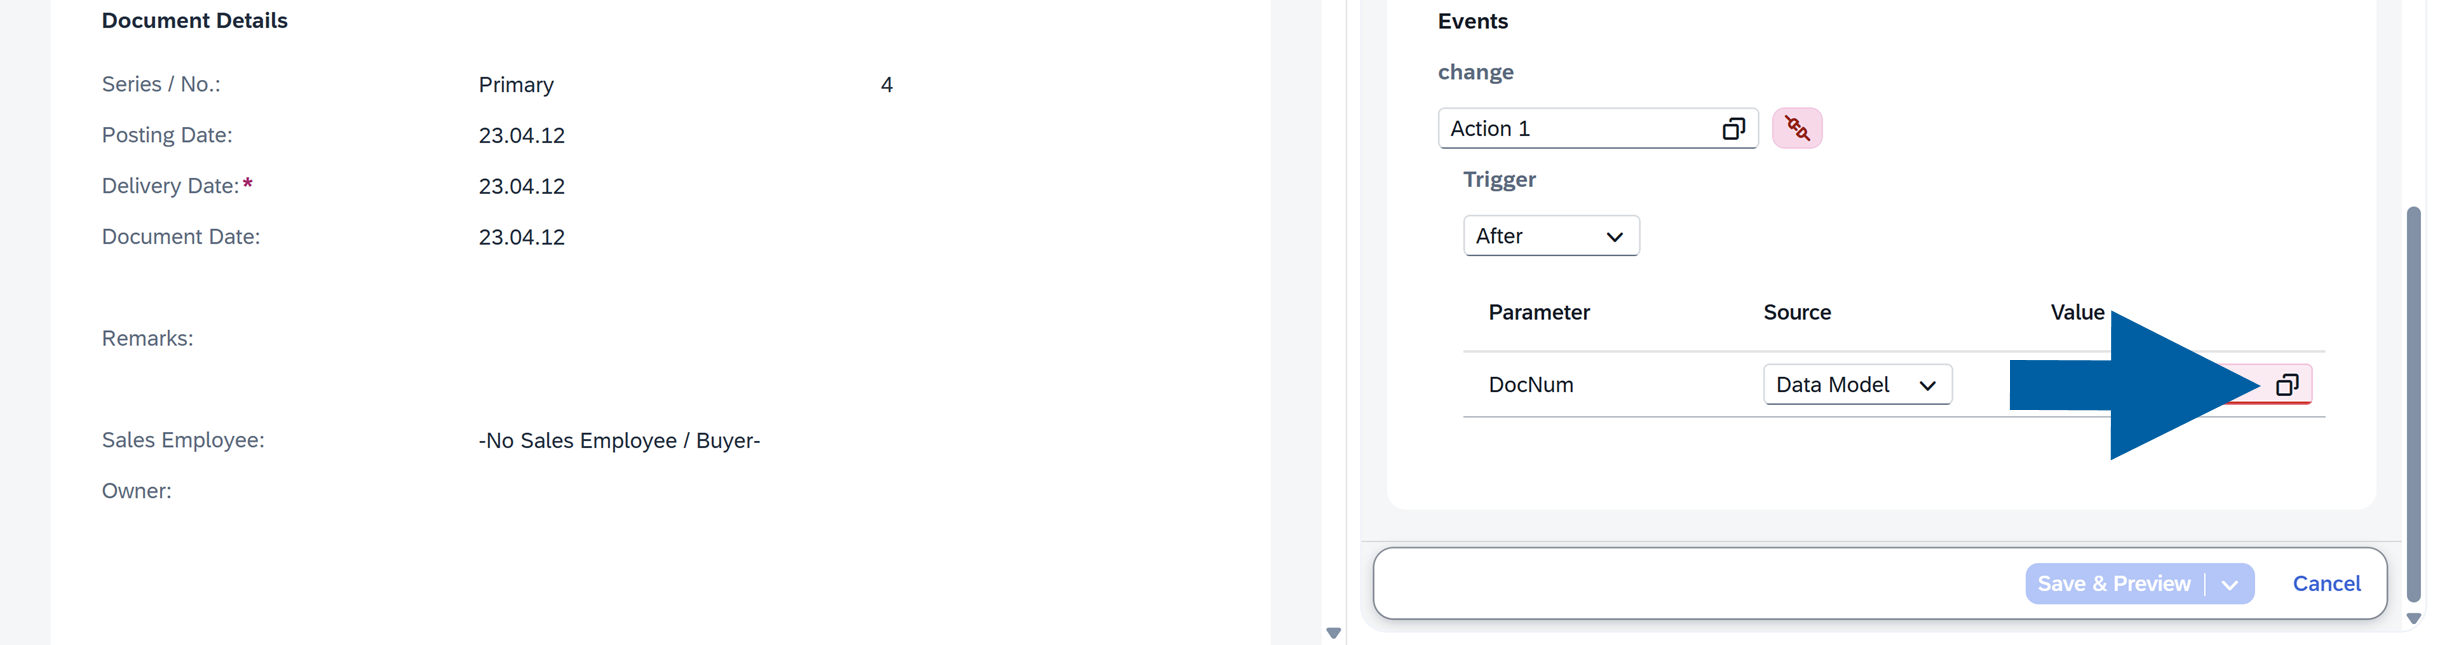
Select the Source for your Smart Action:
- Static: A fixed value you enter manually
- Data Model: A dynamic value from SAP Business One (e.g.,
DocNum,CardCode)

-
Click the collection icon to see the list of available values.
-
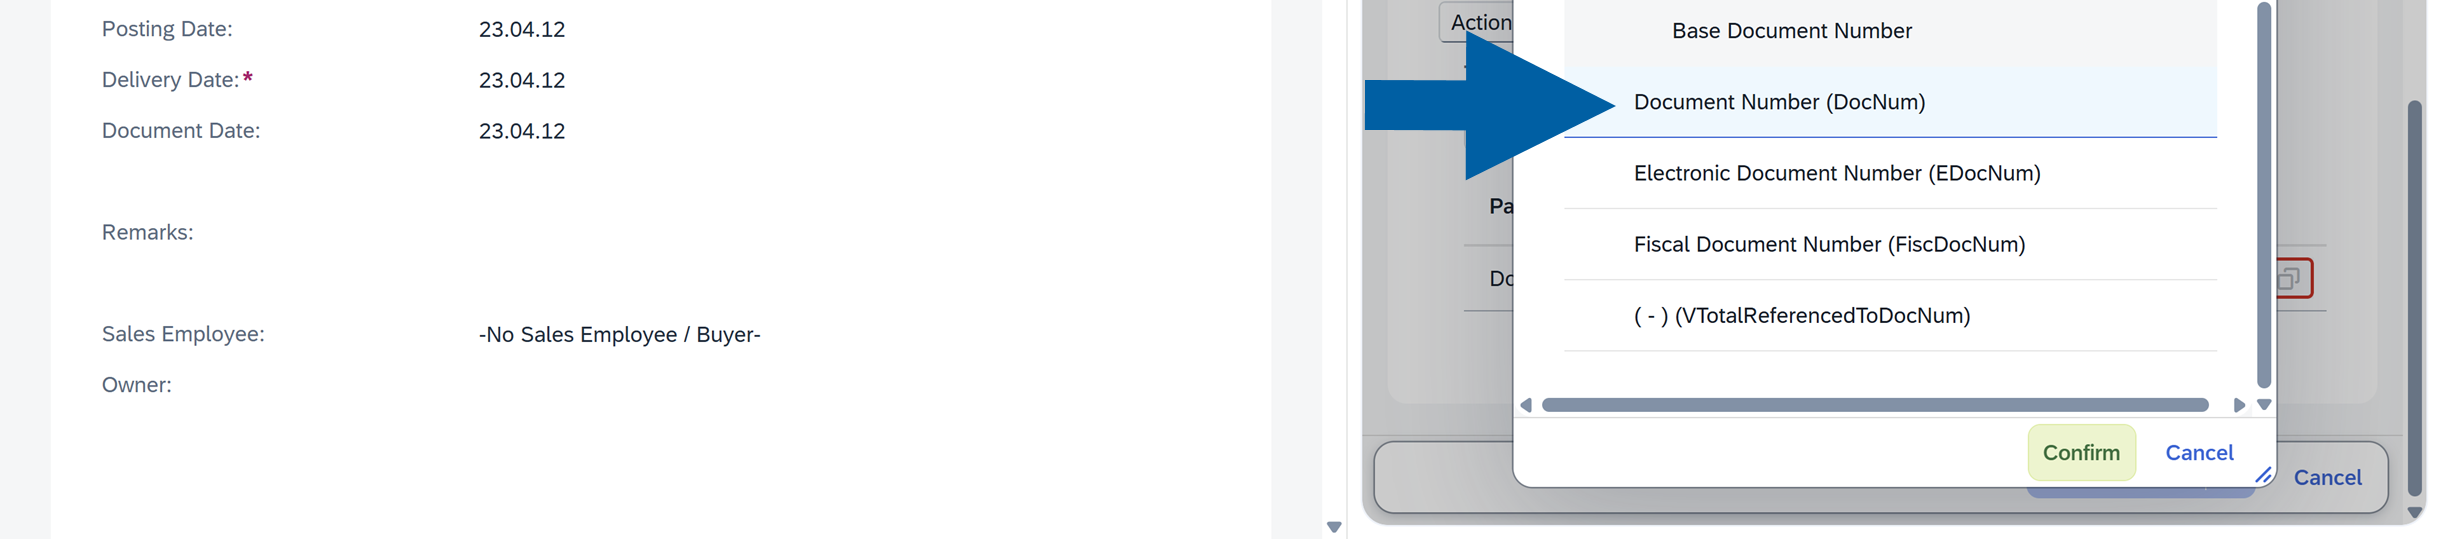
Choose your value from the list and click Confirm.
-
Click Save & Preview.
-
In preview mode, test your action.
-
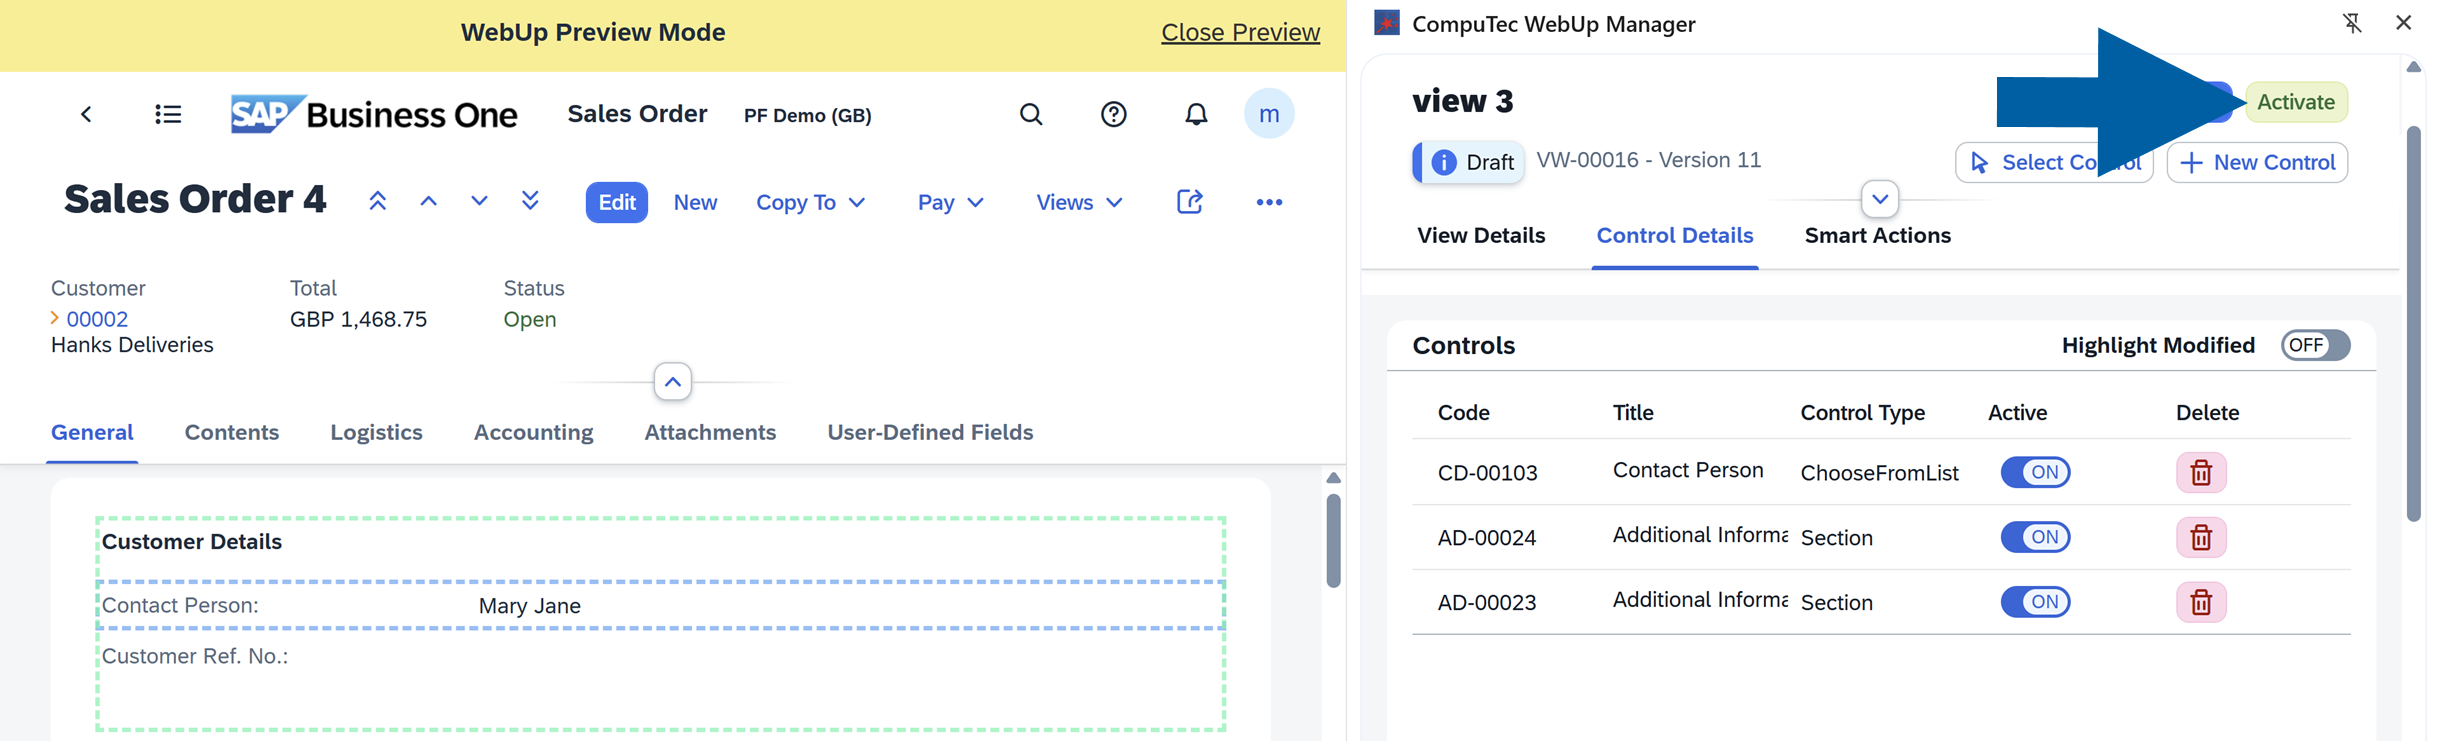
If you like the results, click Activate.
-
Done! You’ve added and activated your Smart Action.
Smart Actions use cases
-
Prevent accidental data changes:
Sales teams may unintentionally update pricing fields. You can trigger a confirmation popup when a user changes a price field (for example:Are you sure you want to change the price?). -
Improve data quality:
Users may forget to complete required fields such asProjectorCost Center. You can attach a Smart Action to the field’sOn Changeevent to validate input immediately and display a warning if the field is empty. -
Trigger actions from buttons:
Companies may need a quick way to log activities directly from a document. You can create a custom button and attach a Smart Action to trigger an action on button press (for example,create an activity via Service Layer). -
Show context-aware confirmations:
Users may need additional clarity before saving important documents. You can use parameters to display dynamic confirmation messages (for example:Do you want to save changes for document 10567?).
Debug Smart Actions
When developing or troubleshooting Smart Actions, you can use the standard JavaScript debugger statement to pause script execution and inspect the action in your browser's developer tools.
The debugger statement tells the browser to stop execution at a specific line and allows you to examine variables, parameters, and script behavior step by step.
Use the debugger statement
To debug a Smart Action, follow these steps:
-
In CompuTec WebUp Manager, open your Smart Action Script.
-
Navigate to action Script and add the following statement where you want execution to pause:
debugger;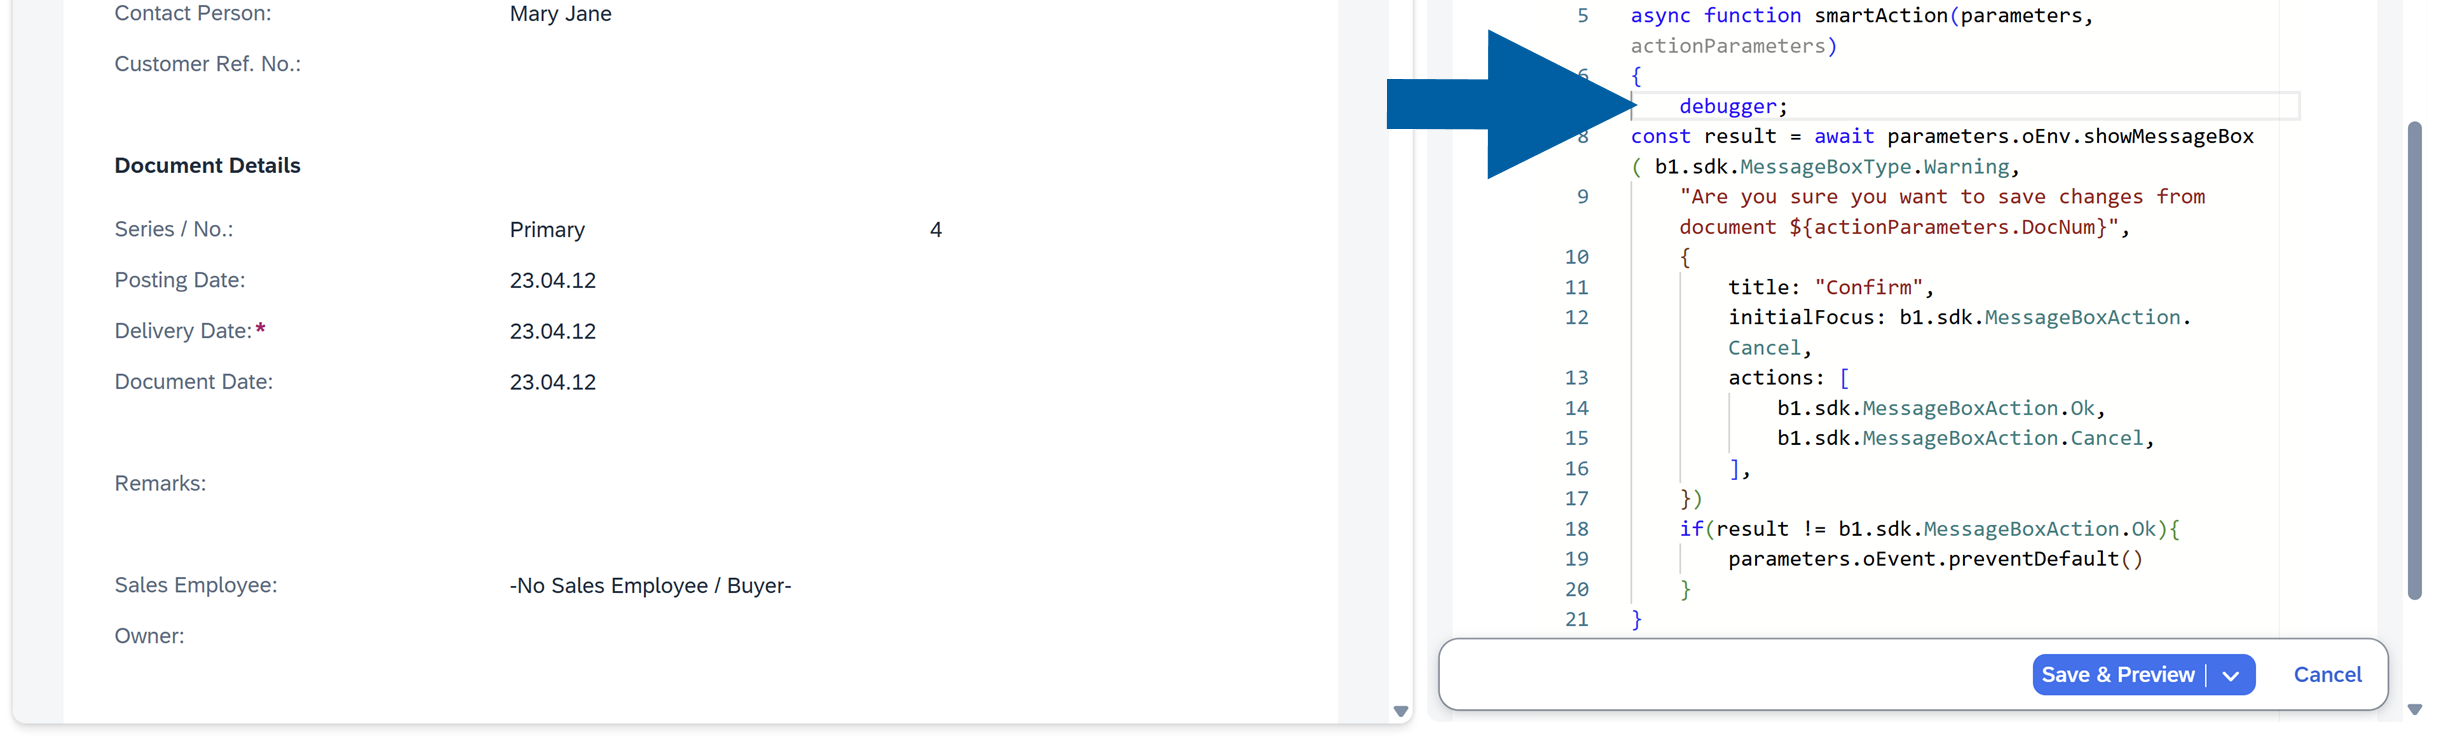 info
infoYou can add a single or multiple
debuggerstatements throughout the script.Example:
{
debugger;
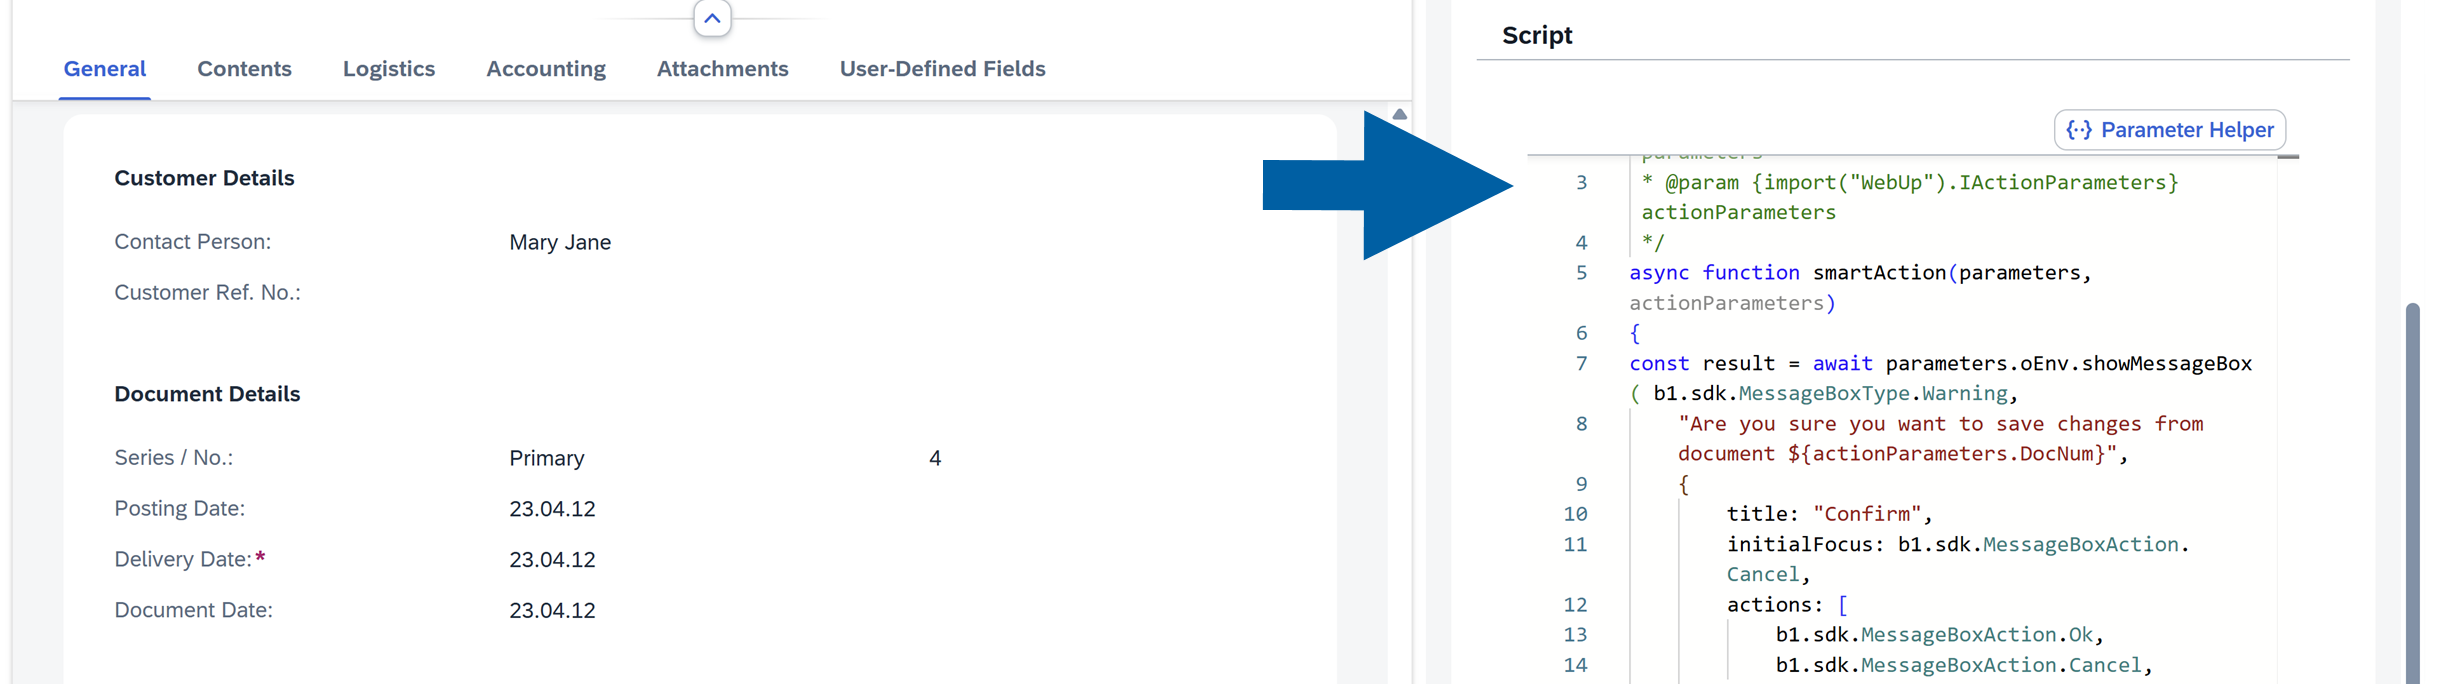
const result = await parameters.oEnv.showMessageBox( b1.sdk.MessageBoxType.Warning,
"Are you sure you want to save changes from document ${actionParameters.DocNum}",
{
title: "Confirm",
initialFocus: b1.sdk.MessageBoxAction.Cancel,
actions: [
b1.sdk.MessageBoxAction.Ok,
b1.sdk.MessageBoxAction.Cancel,
],
})
if(result != b1.sdk.MessageBoxAction.Ok){
parameters.oEvent.preventDefault()
}
debugger;
}In this example, the script pauses twice, allowing you to inspect the execution flow at different stages.
-
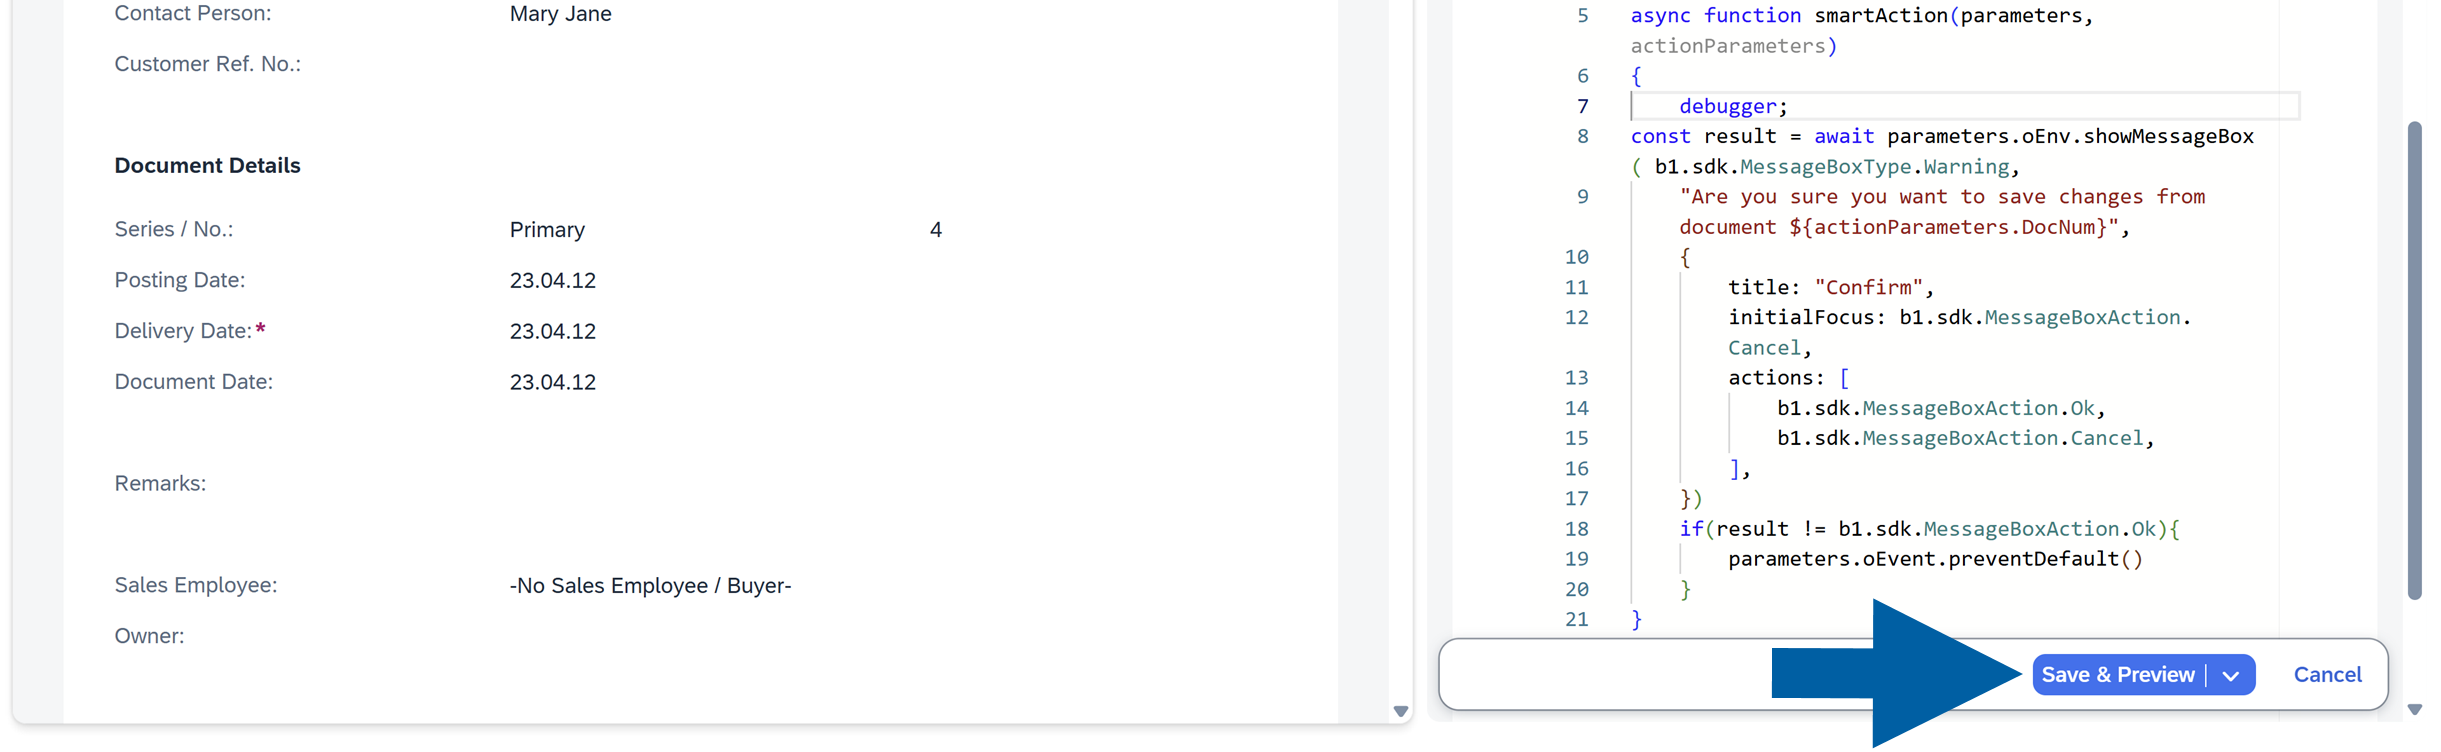
Click Save & Preview.
-
(optional) Assign the Smart Action to a control or event if it is not already assigned, and then click Save & Preview.
-
Open your browser's developer tools:
- Right-click anywhere in the WebUp Preview Mode screen.
- Select Inspect.

-
Go to the Sources tab in the developer tools.
-
Trigger the Smart Action, for example, click a button or modify a field that runs the action.
-
Done! When execution reaches a
debuggerstatement, the browser automatically pauses the script.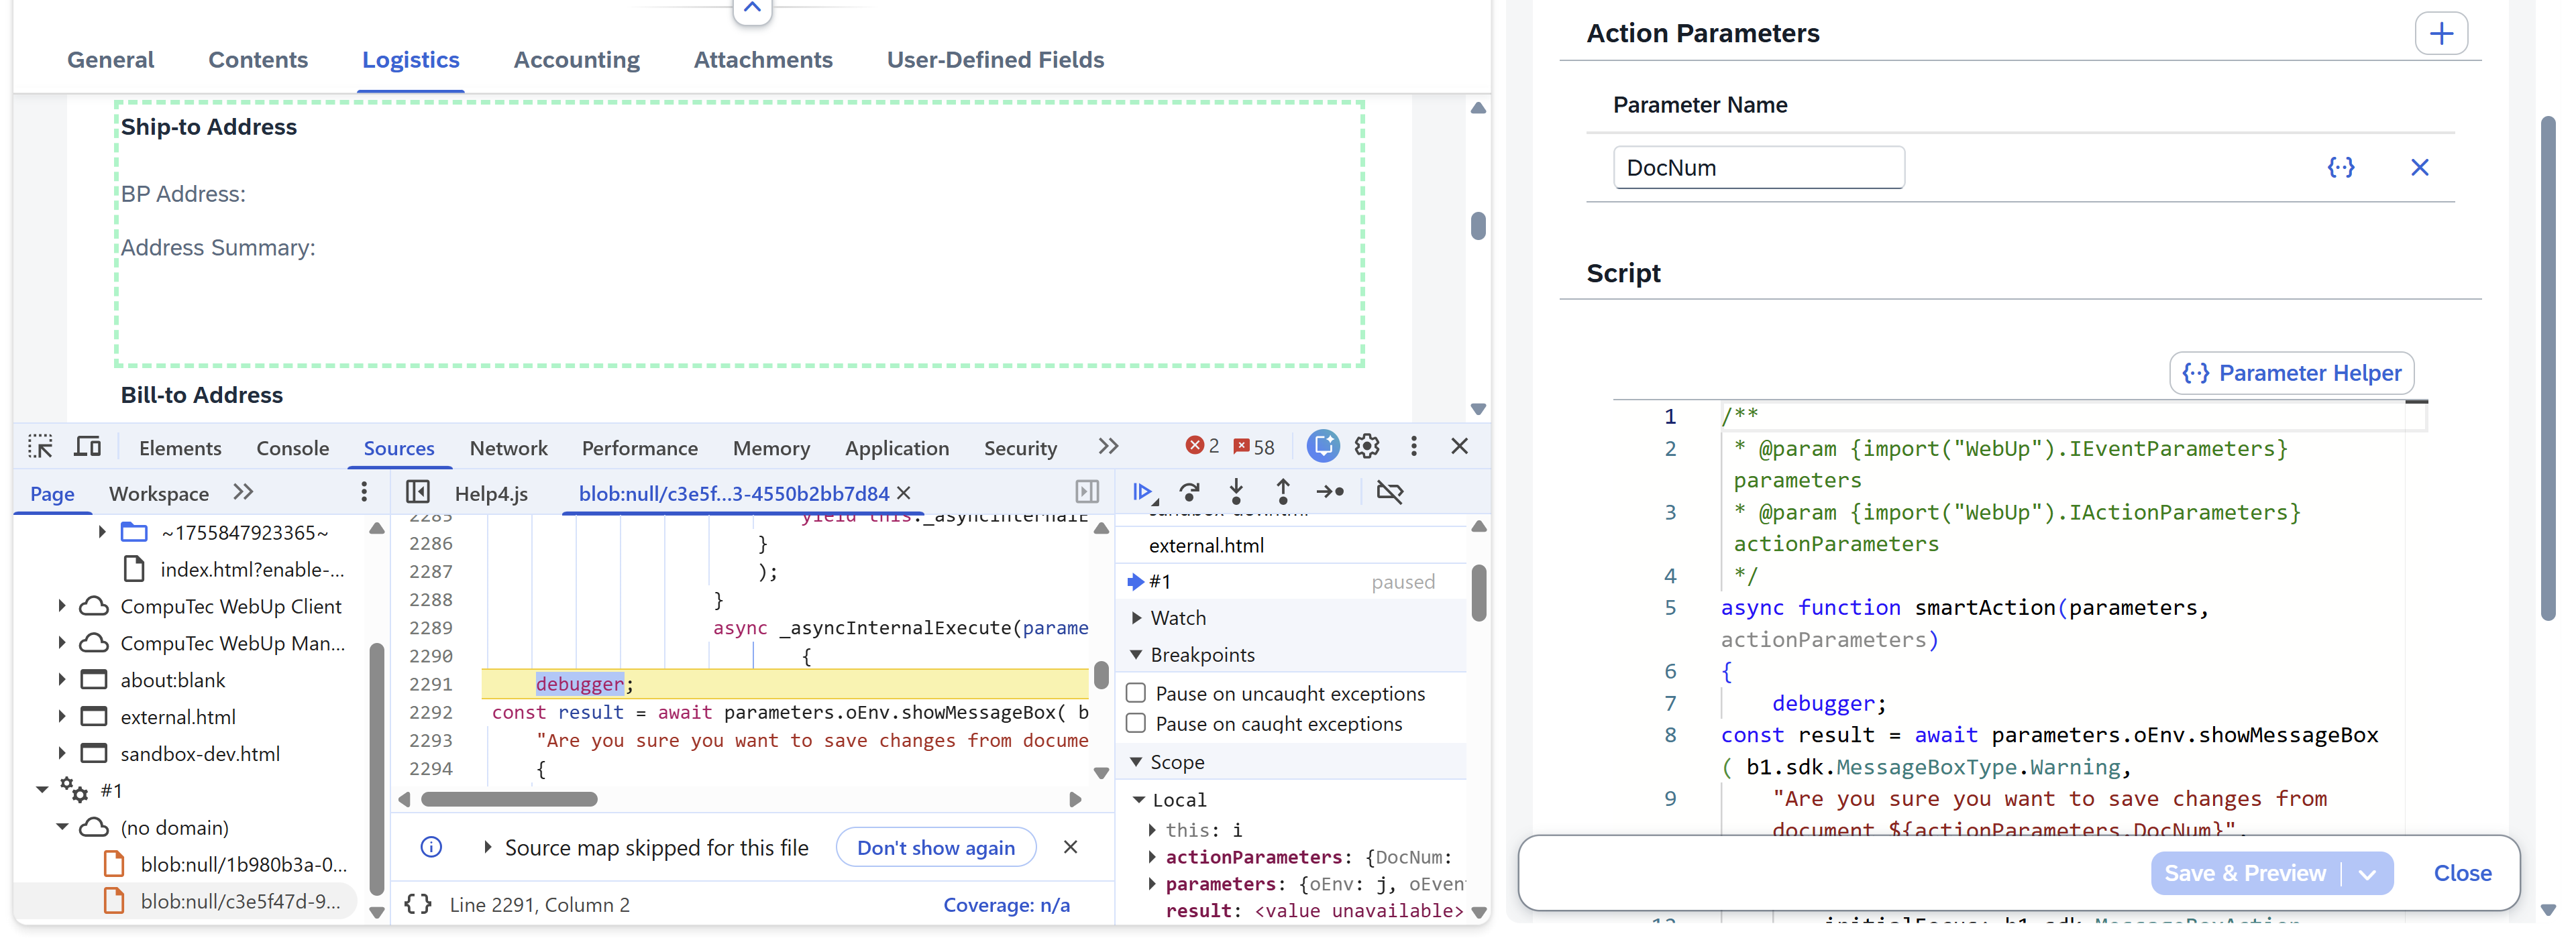
While the script is paused, you can:
- Review variable values.
- Inspect Smart Action parameters.
- Check the call stack.
- Evaluate expressions in the console.
- Step through the code line by line.
- Identify script errors and unexpected behavior.
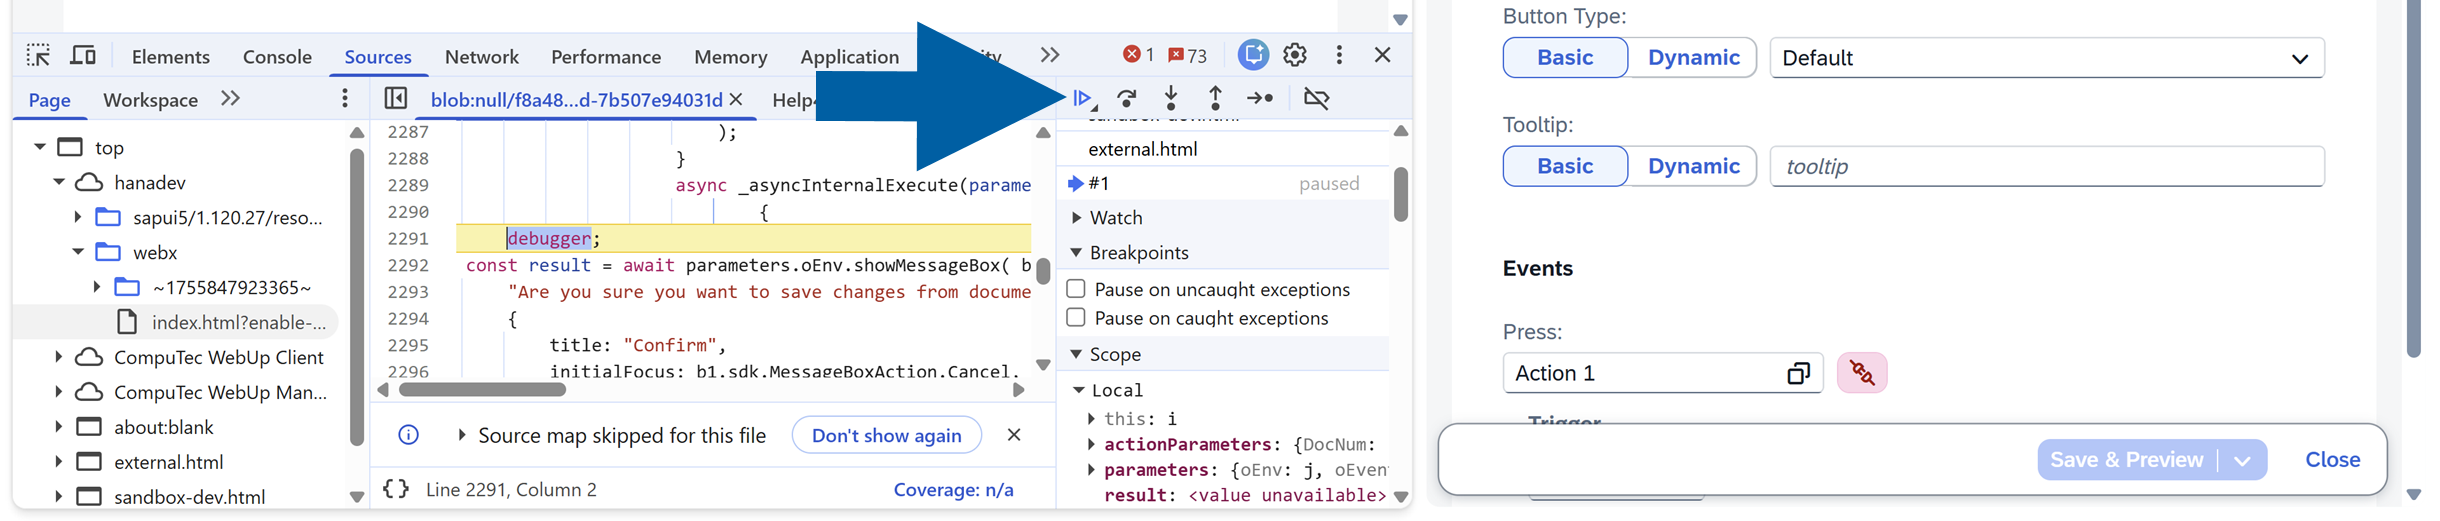
- Continue execution
-
After reviewing the paused state, click Resume script execution in the developer tools.
 note
noteThe script continues running until it finishes execution, or it reaches another
debuggerstatement.If multiple
debuggerstatements are present, execution pauses at each location, allowing you to inspect the script step by step.
Common debugging scenarios
Use the debugger statement to:
- Verify that parameter values are passed correctly.
- Confirm that conditional logic behaves as expected.
- Troubleshoot validation rules.
- Inspect data returned from SAP Business One.
- Identify the source of script errors.
Smart Actions best practices
- Use Global scope for reusable business logic
- Keep scripts modular and simple
- Use Parameters instead of hardcoding values
- Always test using Preview before activation
Smart Actions in Computec WebUp give you precise control over user interactions, helping you build more intuitive, reliable, and efficient processes in SAP Business One Web Client.