You are currently viewing documentation for CompuTec AppEngine 2.0 (.NET Framework), which will be supported only until December 31, 2026. After this date, the product will no longer receive regular support or maintenance updates. Read more
We recommend upgrading to CompuTec AppEngine 3.0 built on .NET 8, which provides better performance and a modern, centralized installation process for CompuTec ProcessForce and other CompuTec solutions.
Please note that CompuTec AppEngine 3.0 has a different architecture, and all CompuTec components need to be updated together to ensure full compatibility.
Please review the CompuTec AppEngine 3.0 documentation before starting your installation or upgrade process.
CompuTec AppEngine Plugin Template for TypeScript
CompuTec AppEngine is a powerful extension framework designed to help developers build custom plugins for SAP Business One. With the TypeScript plugin template, you can create scalable and maintainable plugins using modern technologies like TypeScript and UI5.
This guide walks you through the steps to set up your development environment, create a new plugin using the CompuTec AppEngine template, and configure your project for a streamlined development workflow.
Prerequisites
Before you begin, ensure the following software is installed on your machine: Node.js version 12 or higher.
Create New Plugin Project
Download
Navigate to the following address: https://www.nuget.org/packages?q=computec, and download the CompuTec.AppEngine.Templates package.
Adding
In the following example, we’ll be using a template designed for an CompuTec AppEngine plugin that features a UI5 and JavaScript frontend.
To install the template package, open Windows Terminal and run the following command:
dotnet new --install CompuTec.AppEngine.Templates::2.0.0
After installation, you'll see a confirmation message along with a list of installed templates. Currently, the package includes five ready-to-use plugin solution templates (tagged as 'Add-In' or 'Add-In/Web/Javascript'—these can be identified by the word 'plugin' in their names and short names), as well as seven plugin item templates (tagged as "Visual C# Items").
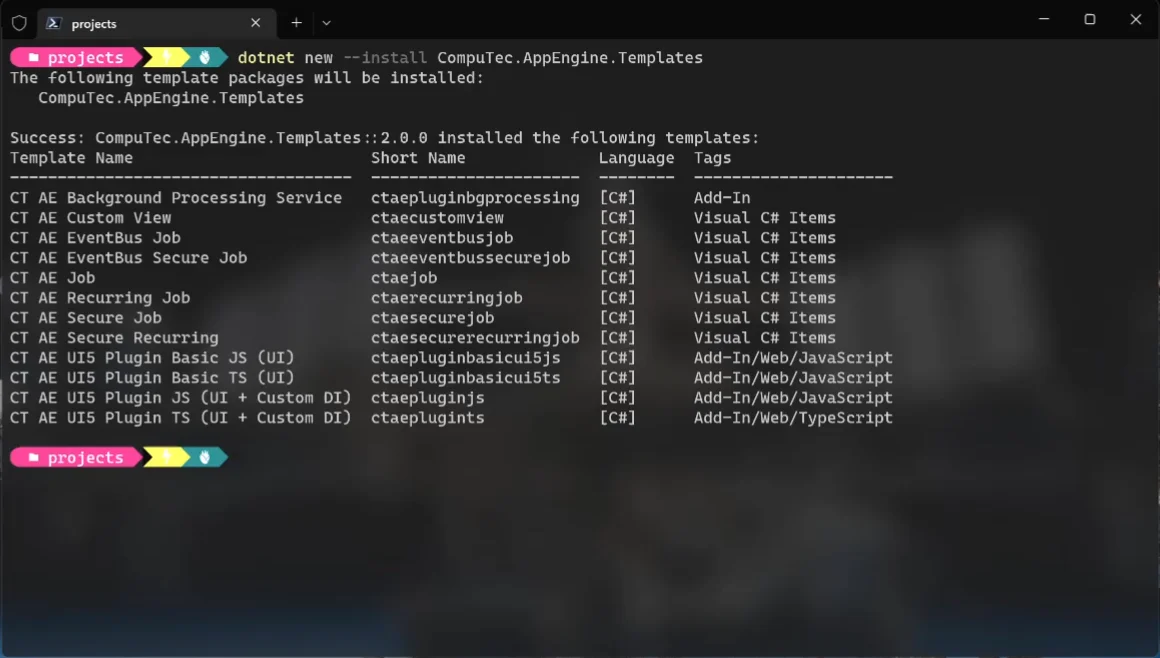
Once the package is installed, you can check the list again using the following command:
dotnet new --list AE
-
Create a new folder for your plugin project (e.g., FirstPlugin):
-
Go to the folder (cd .\FirstPlugin).
-
Next, use the following command to generate a new plugin project using the desired template (in this case, ctaeplugints). Make sure to include the two required parameters:RoutePrefix (testPlugin in this example) and PluginID (Compu:Tec.AppEngine.Plugin.Test in this example):
dotnet new ctaeplugints --RoutePrefix testPlugin --PluginId CompuTec.AppEngine.Plugin.Test
Visual Studio – Configure Project Build and Debug
-
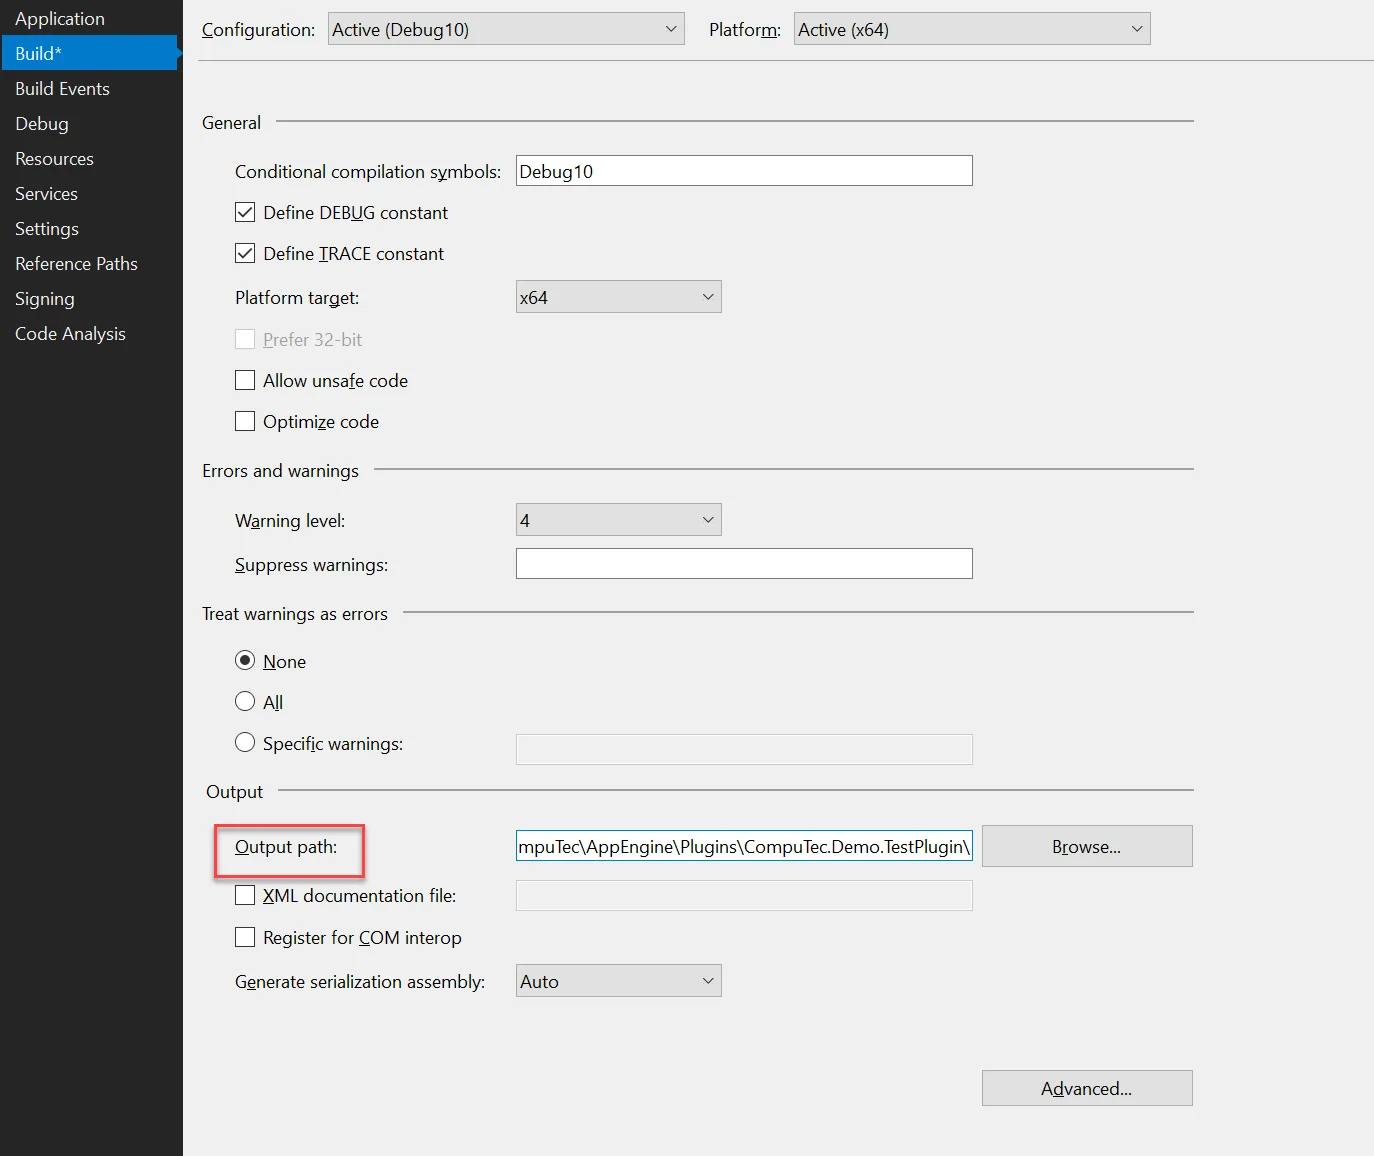
It's recommended to configure your project to build directly into the CompuTec AppEngine plugins directory, eliminating the need to manually copy files after each build.
- To do this, right-click on the plugin project and select properties.
- Open the Build tab, set up the Output path as shown below. CompuTec AppEngine stores all plugins in ProgramData/Computec/AppEngine/Plugins. Within this location, create a new folder named exactly as your plugin’s RoutePrefix (defined in the manifest.json file).
-
Once the build is complete, you can activate your plugin through the CompuTec AppEngine Administration Panel. For detailed instructions on this process, refer to the official documentation here. After activation, your plugin will be available and accessible via the CompuTec AppEngine Launchpad.
