Overview
The Weight Scale Module streamlines the Issue to Production process by integrating directly with weight scaling devices. It simplifies material issuance by providing a color-coded progress indicator, where the icon gradually fills with color to reflect the completion level of the process.
Clicking the options icon opens the Weighing Wizard, which guides users through a step-by-step process to create a weight-based Issue to Production.
The color of the icon reflects the progress of the material issuance process. A white icon represents 0% completion, and the color gradually fills as the process moves forward.
Before using this module, ensure that the weighing device is properly configured. Follow the setup instructions here.
Step 1: Choosing an Item
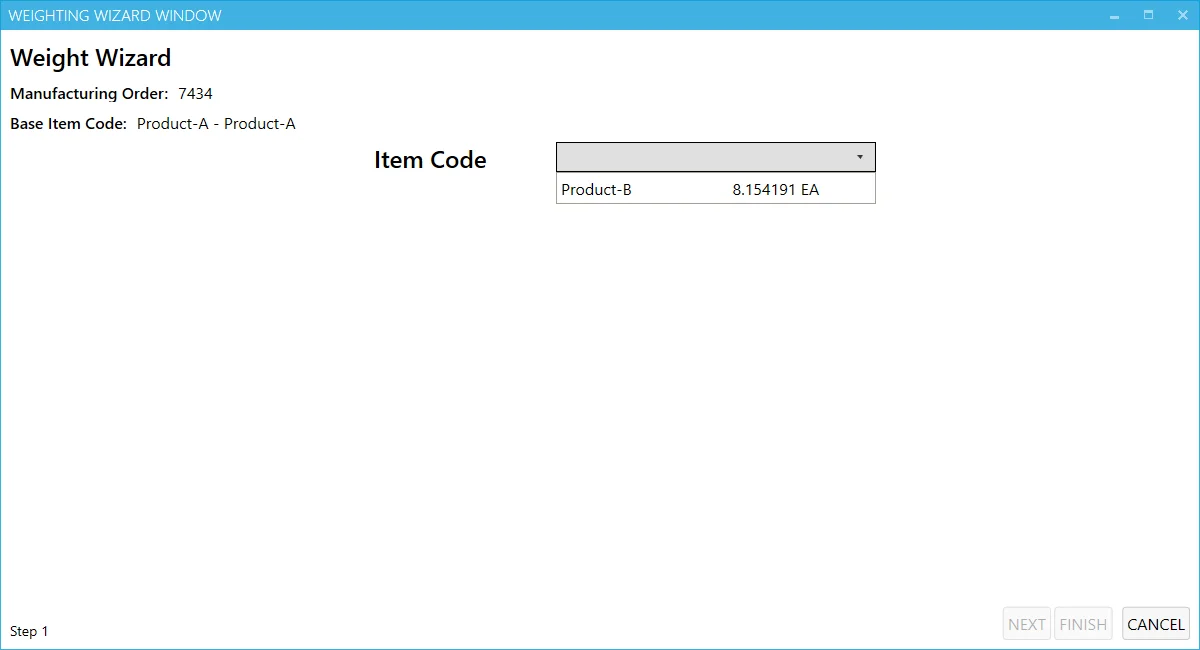
In this step, you’ll select the Manufacturing Order and the final goods item to be issued for production. The system will display the item row from a drop-down list, which also shows the remaining quantity to be issued.
Note: Currently, only Batch-managed Items are supported in the PDC weighting module.

Click "Next" after choosing an Item.
Step 2: Quantity Window
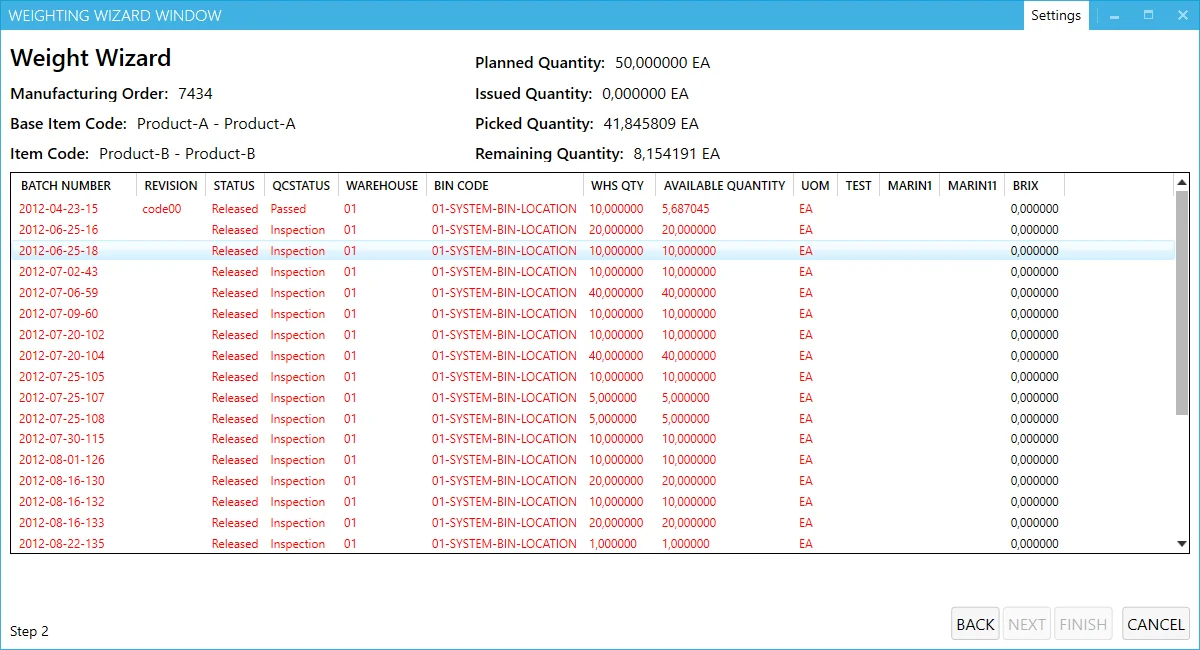
In this window, apart from the information from the previous step, the following quantity details can be seen:
- Planned (Manufacturing Order's planned quantity),
- Issued (already issued on other Issues to Production),
- Picked (the quantity that already is on Pick Orders but is not published yet).
For Batch-managed Items, the available batch for selection will be shown. The color of each batch indicates its availability according to batch status. If a batch is not in the Released status, the system will prompt the user to confirm the selection.

Click "Next" after choosing a Batch.
Step 3: Weighing
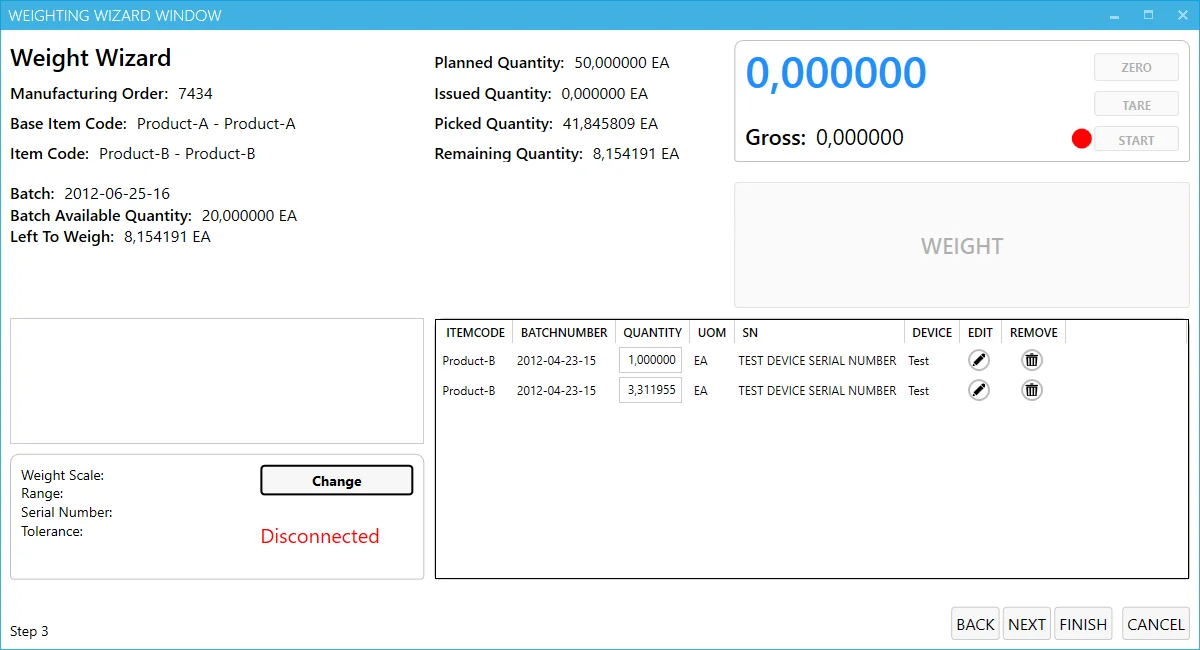
The Weighing Window consists of four key panels:
-
Upper Left: displays previously selected item details, including available and remaining quantities.
-
Lower Left: displays the connected weighing device. Users can change the device by selecting from the list of defined devices.
-
Lower Right: lists previous issues within the current weighing document (modifiable only by Management Board users).
-
Upper Right: displays live weight readings from the weighing device with the following options:
- Zero: resets the scale to zero.
- Tare: excludes the weight of the container from the final weight.
- Start/Stop: Begin or end the weighing process (Controls the weighing process).
- Weight: displays the final weighed value.
- Gross: The combined weight of both the container and material (if Tare is used).
If the weighed value exceeds the remaining quantity, the field turns red, preventing the user from saving. Similarly, if the batch available quantity is exceeded, it also turns red.
Click the "Weight" button to save the weighted/measured value.

Step 4: Summary
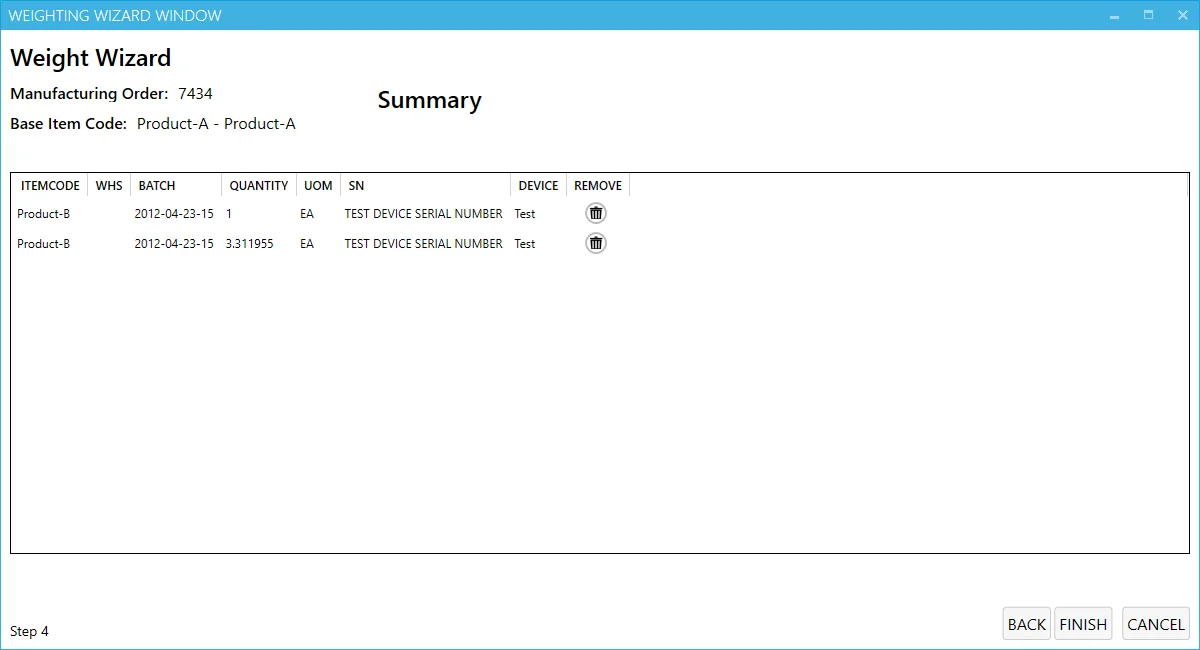
In the final step, you will see a summary of the entire Issue to Production process. Review the details, and click "Finish" to complete the process and record the issue to production.
