You are currently viewing documentation for CompuTec AppEngine 3.0 (.NET 8).
If you are working with older environments, you may need the documentation for CompuTec AppEngine 2.0 based on .NET Framework: https://learn.computec.one/docs/appengine/2.0/.
Please note that CompuTec AppEngine 2.0 will be supported only until December 31, 2026. After this date, the product will no longer receive regular support or maintenance updates. Read more
As CompuTec AppEngine 3.0 introduces a new architecture, all CompuTec components must be updated together to ensure full compatibility.
Please review the CompuTec AppEngine 3.0 documentation before starting your installation or upgrade process.
Plugin Installation
Plugins in CompuTec AppEngine are installed using the Plugins page in the CompuTec AppEngine Administration Panel.
The installation and configuration process includes:
-
Download the plugin: The plugin is added to the CompuTec AppEngine repository.
-
Install the plugin: Installation prepares the plugin for use in a specific company. It:
- assigns the plugin to the company
- applies any required database changes
-
Activate it on the Computec AppEngine instance: Activation makes the plugin available for use in the system. It:
- assigns the plugin to an AppEngine instance
- enables its functionality at runtime
The system automatically handles dependencies and version compatibility.
Only one version of a plugin can be active on a single CompuTec AppEngine instance at a time.
Before you start
Before you start, make sure that:
- CompuTec AppEngine is installed and activated. Read more
- You have access to the CompuTec Administration Panel
- At least one CompuTec AppEngine instance is configured and active. Read more
- Disable any custom code in the
SP_TransactionNotificationandSP_PostTransactionNoticestored procedures before installing the plugins. After the installation is completed successfully, you can re-enable your custom code.
Install and activate a plugin
To install and activate a CompuTec AppEngine 3.0 plugin, follow these steps:
-
Log in to CompuTec AppEngine Administration Panel.

-
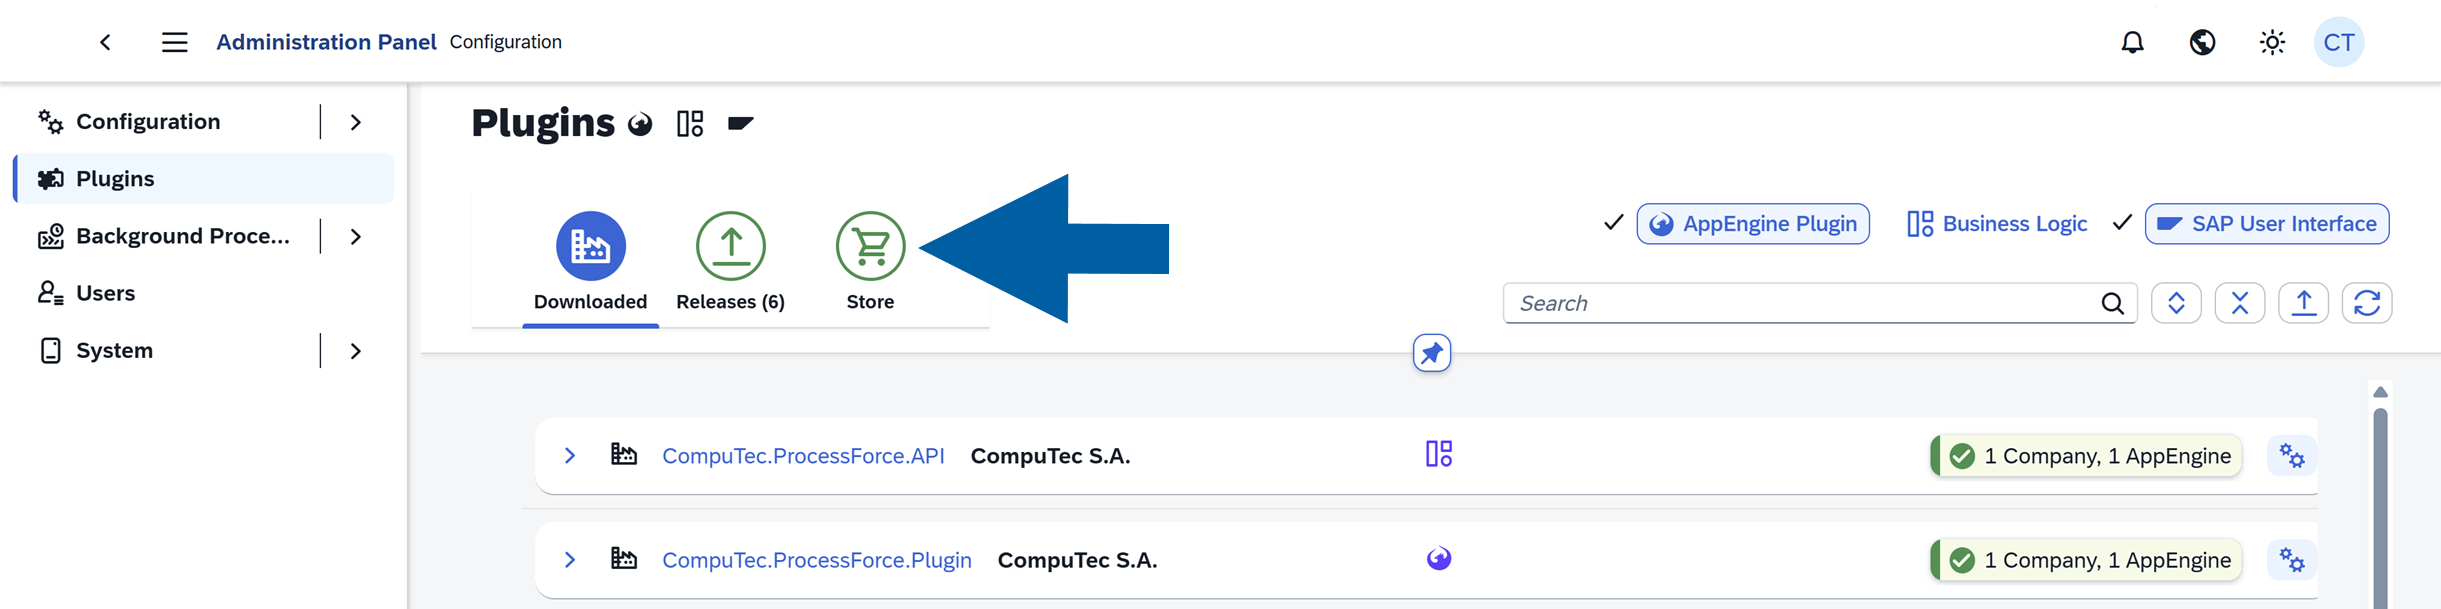
Go to Plugins.

-
Navigate to Store.
-
Find the plugin you want to install:
-
Use the Search field

-
or filter by plugin type : AppEngine Plugins, Business Logic, or SAP User Interface plugins

noteBusiness Logic plugins are typically installed automatically as dependencies when required by another plugin. You do not need to select or install them manually.
-
-
Click Get... next to the plugin name on the list to install the latest plugin version.

-
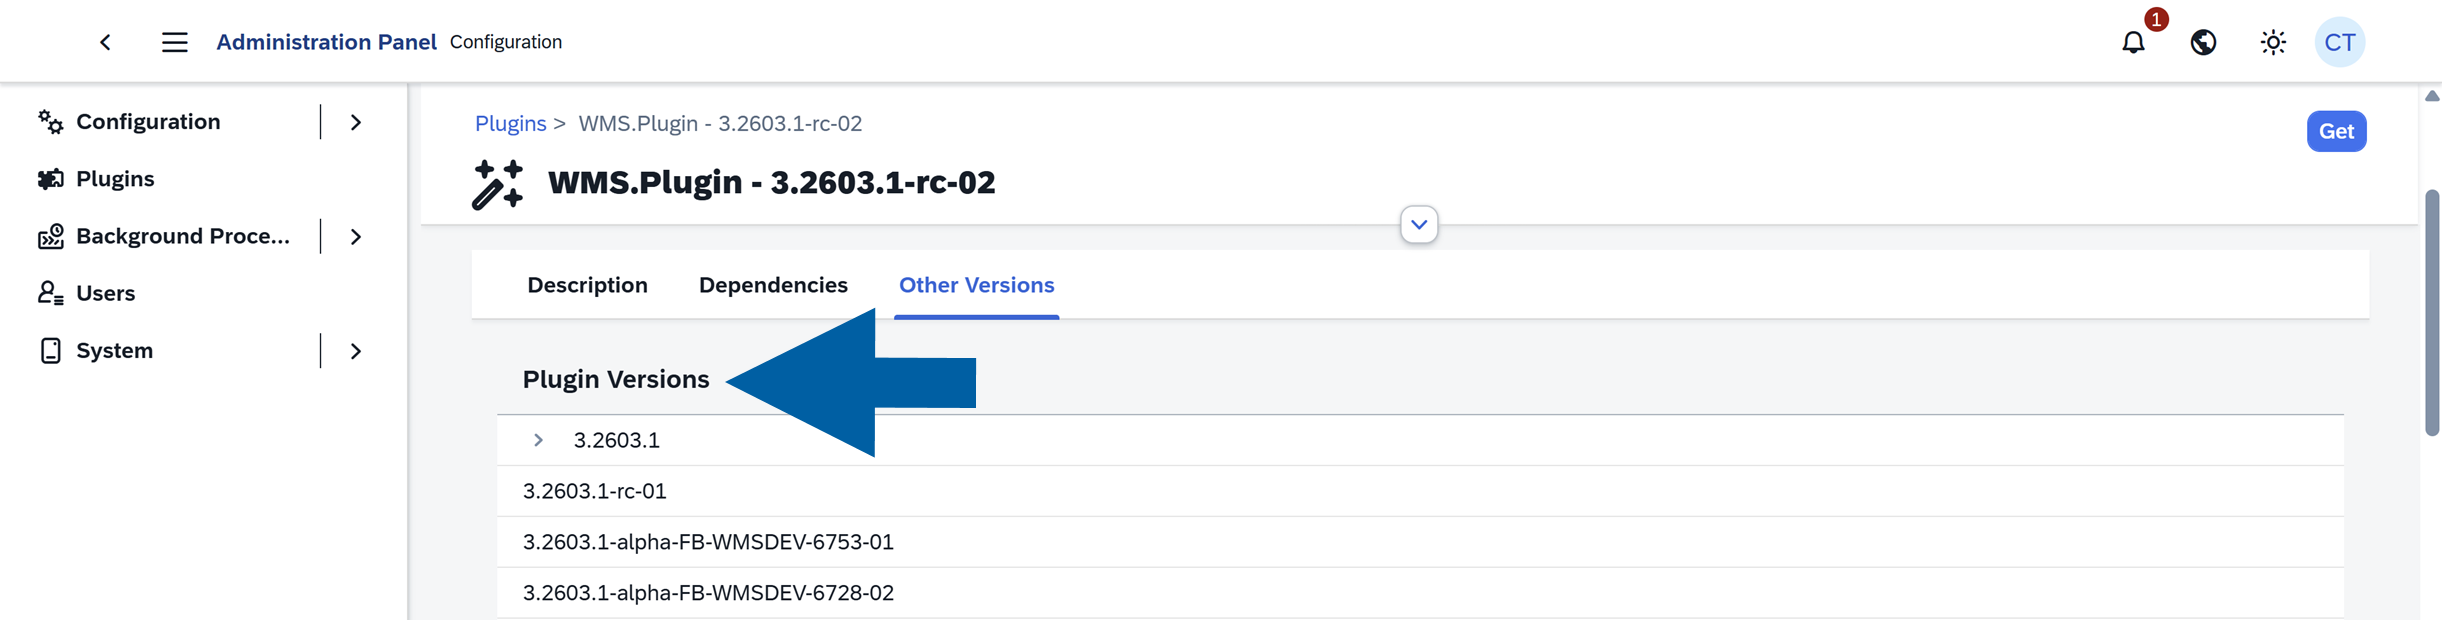
(optional) To install a different version of the plugin:
-
Click the plugin name or the arrow next to the version number and click Find different version.

-
You will see the plugin details with all the available versions. Read more
-
Find the version you want to install and click Get.

-
-
Click Get & Install next to the chosen plugin version.

-
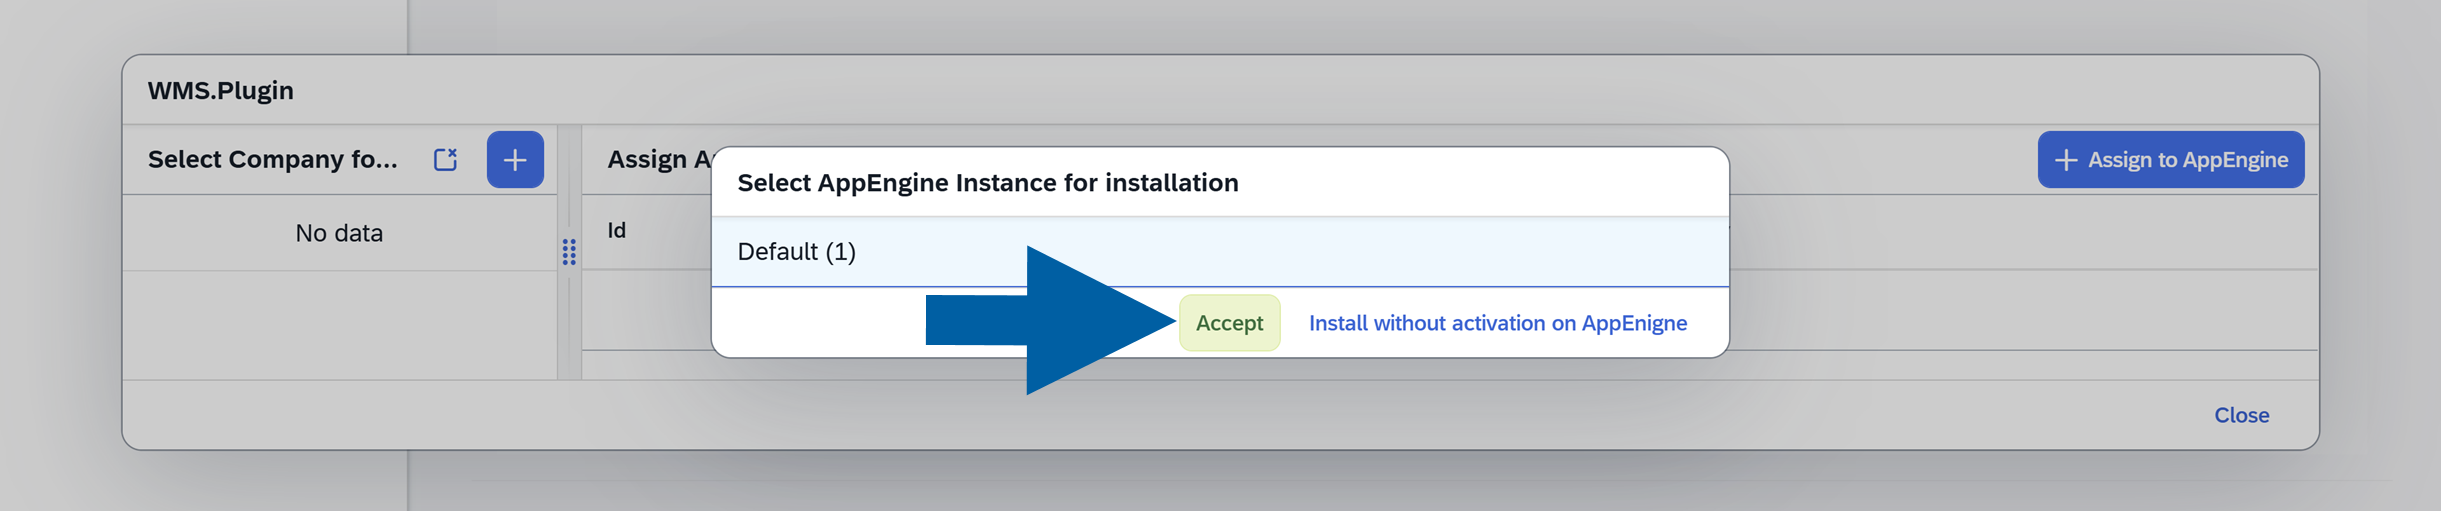
Select Company for installation and click Accept.

-
Select CompuTec AppEngine Instance for installation and click Accept.
-
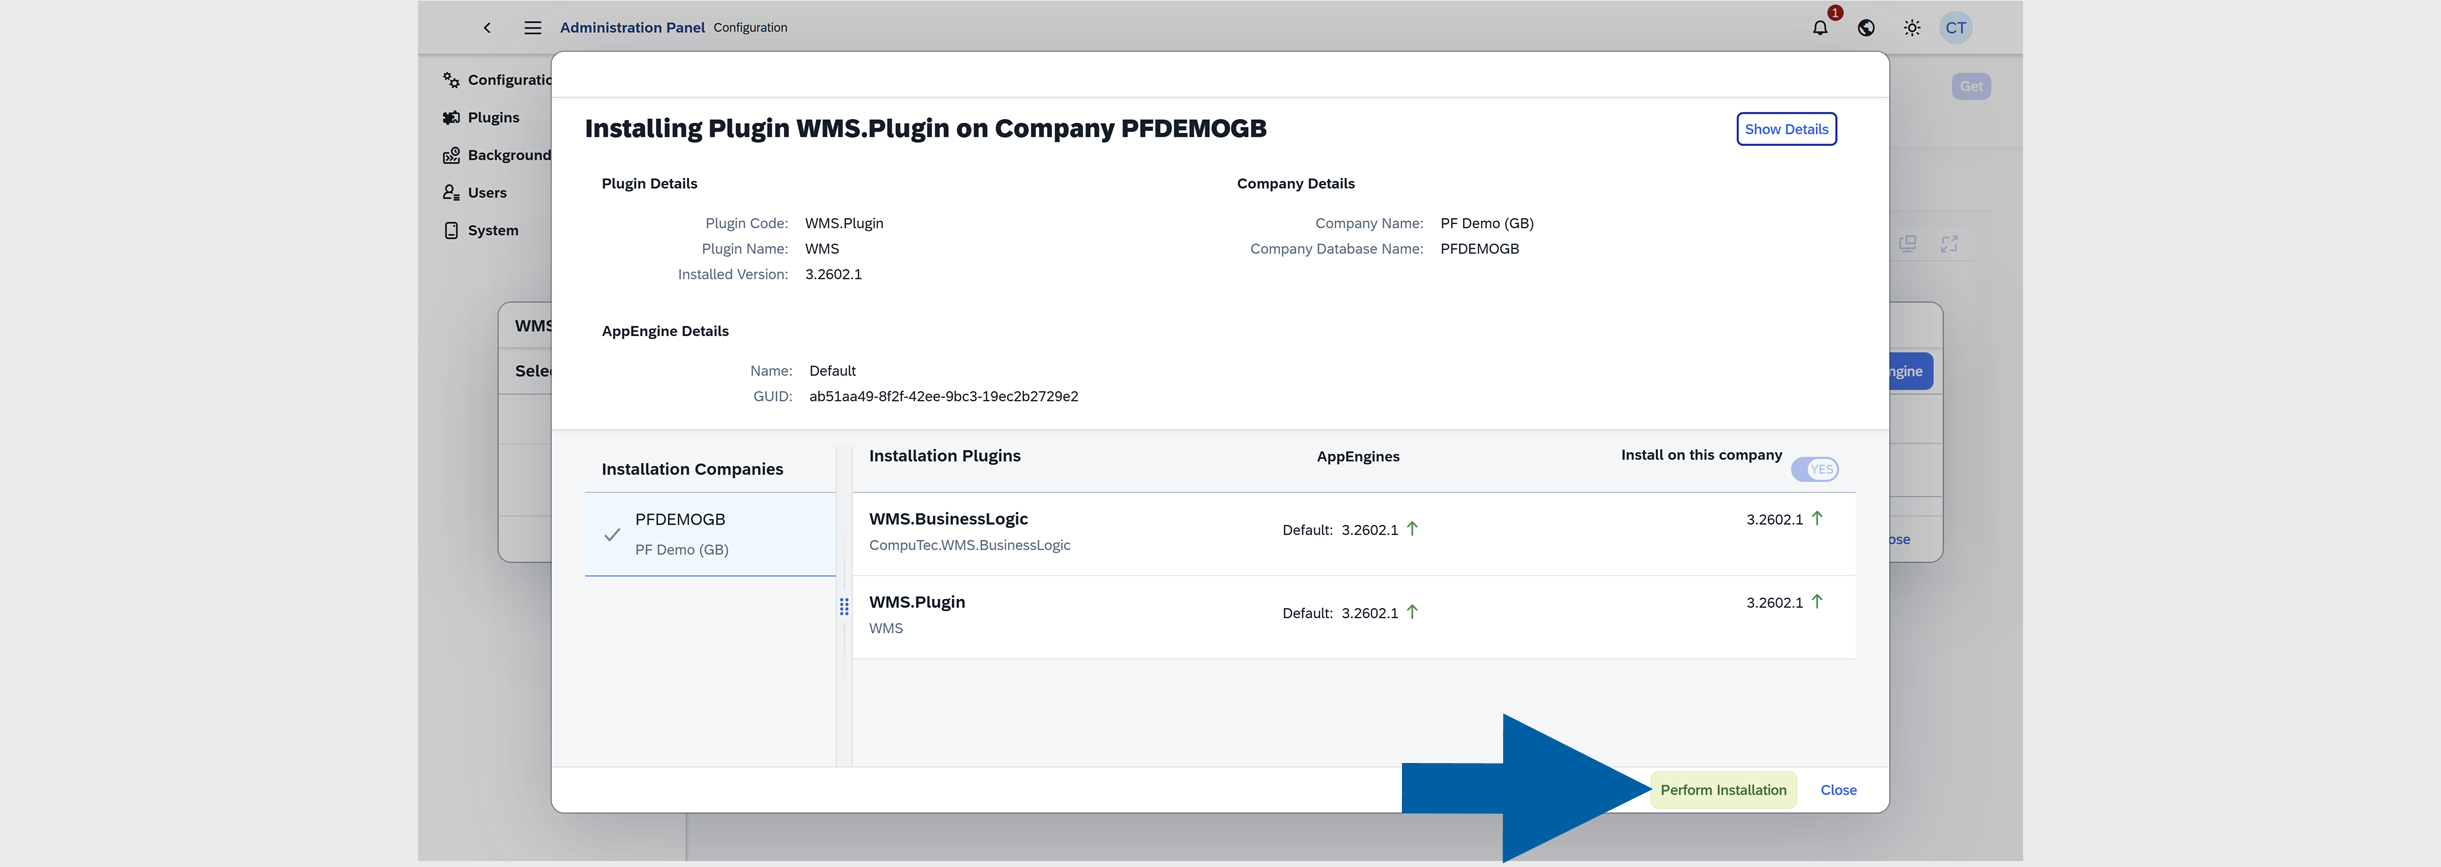
Review the installation details and click Perform Installation.
-
Click OK to confirm the plugin installation.

-
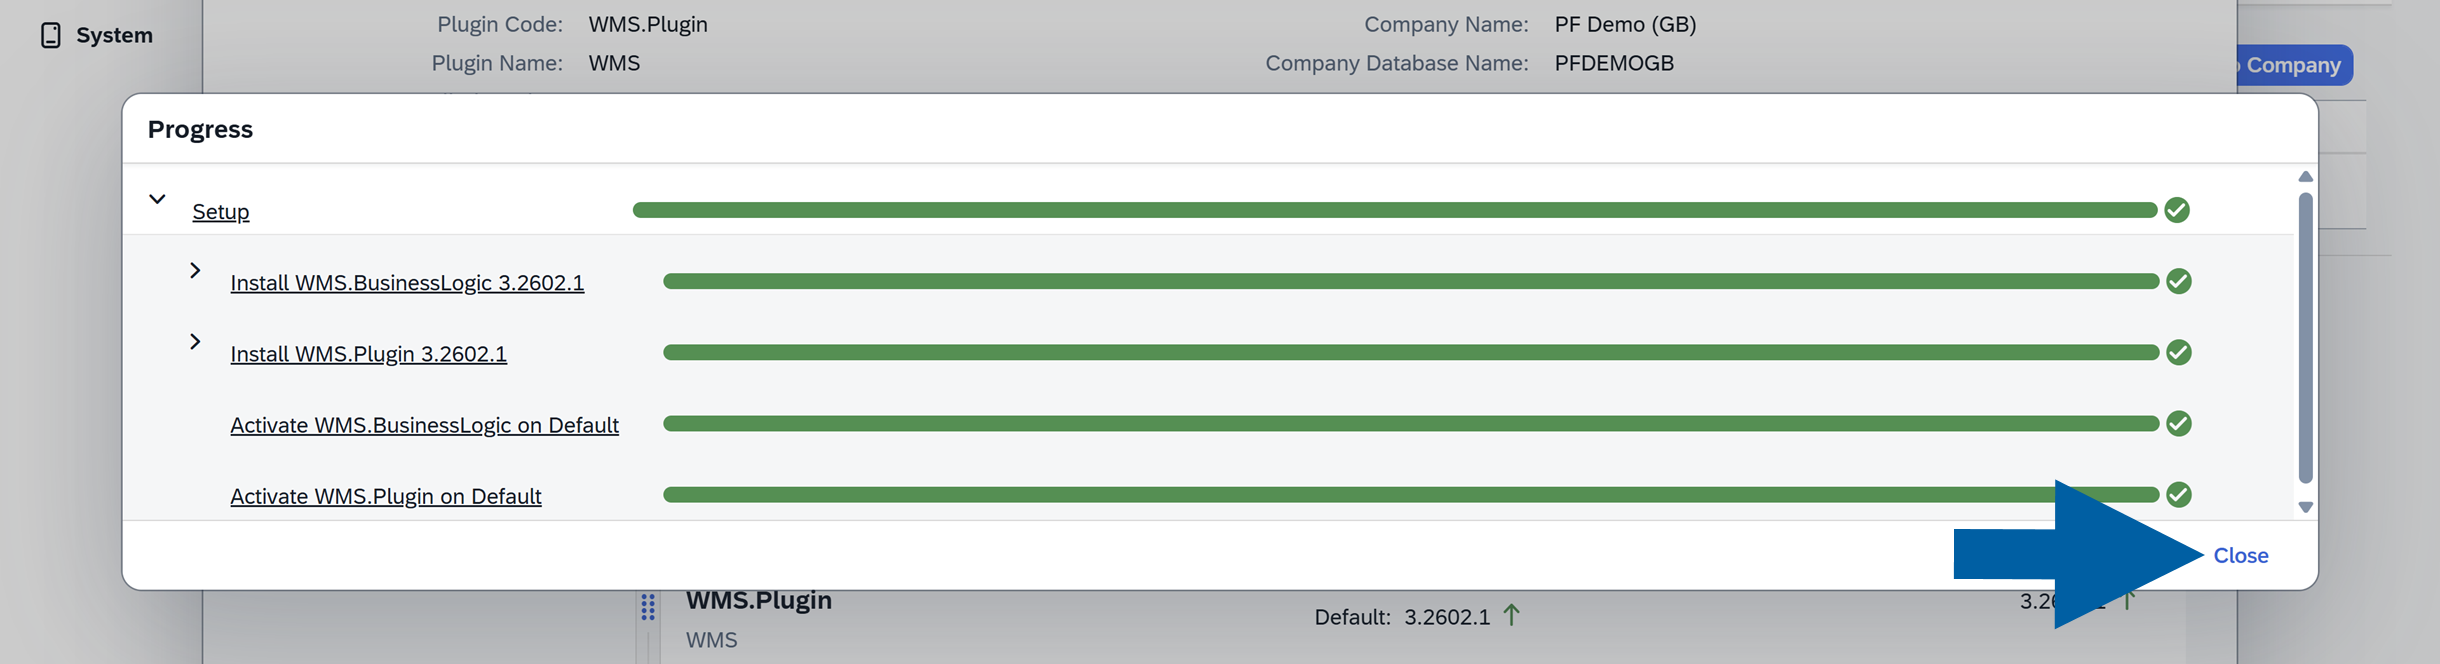
You can now track the installation progress. Once the installation is complete, click Close.
-
Click Yes to restart the CompuTec AppEngine.

-
Once the restart is complete, click OK.

-
Done! The plugin is now installed and ready to use.
You don’t need to manage dependencies manually. During the installation, the system automatically:
- installs all required plugins
- ensures compatible versions are used
- includes any missing components
This allows you to continue with the setup without additional configuration steps.
After installation
After successful installation:
-
the plugin appears in the Downloaded tab
-
it is assigned to the selected Company
-
it is active on the selected CompuTec AppEngine Instance
-
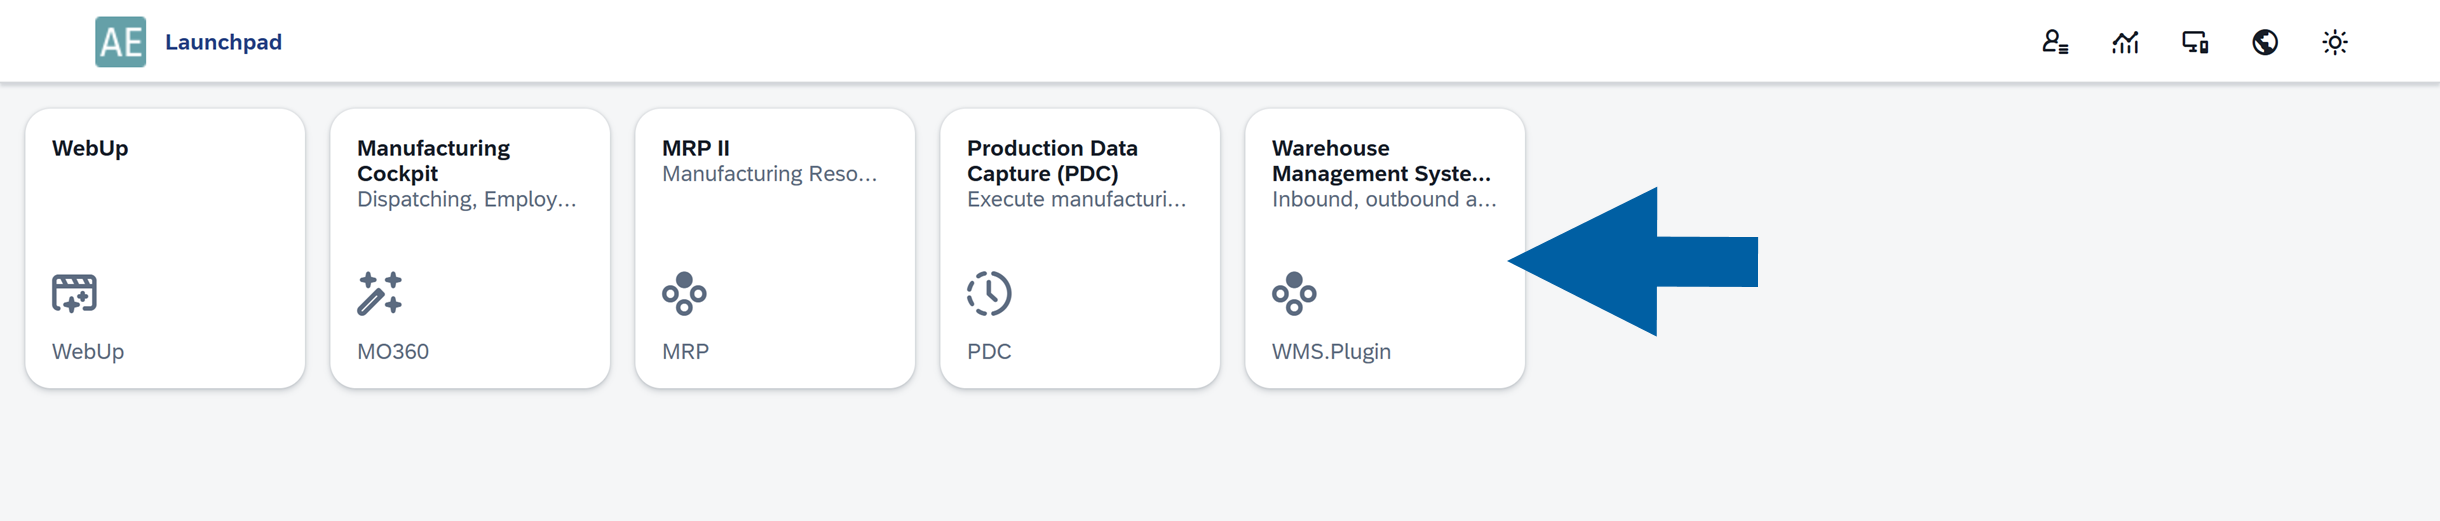
in most cases, the plugin is available in the CompuTec AppEngine Launchpad
To learn about new features or changes, refer to the plugin’s documentation.