Parameters
Parameters in CompuTec WebUp are reusable values that you define once and use in many places in your customized view. For example, you can show the document number as the text of a button. The text changes when the user opens another document.
You create Parameters in the Parameters tab of CompuTec WebUp Manager. There are two Parameter types: Binding Expression and Custom Model.
A Parameter is not the same as an Action Parameter. An Action Parameter belongs to one Smart Action, and you define it in the Smart Actions tab. For more information, see Create a new Smart Action.
Key functions of Parameters
With Parameters, you can:
- Define a value once and reuse it in many controls and Smart Actions
- Show dynamic values, such as the document number, in control properties
- Combine static values and document fields in one model
- Change a Parameter once and update every control that uses it
Parameter types
- Binding Expression – A value built from document data. You build the expression from ready-made blocks, so you don't write code. The value changes with the document that the user opens.
- Custom Model – A group of named properties. Each property has a static value or a dynamic value from the document. Use a Custom Model to share several values together.
Create a Parameter
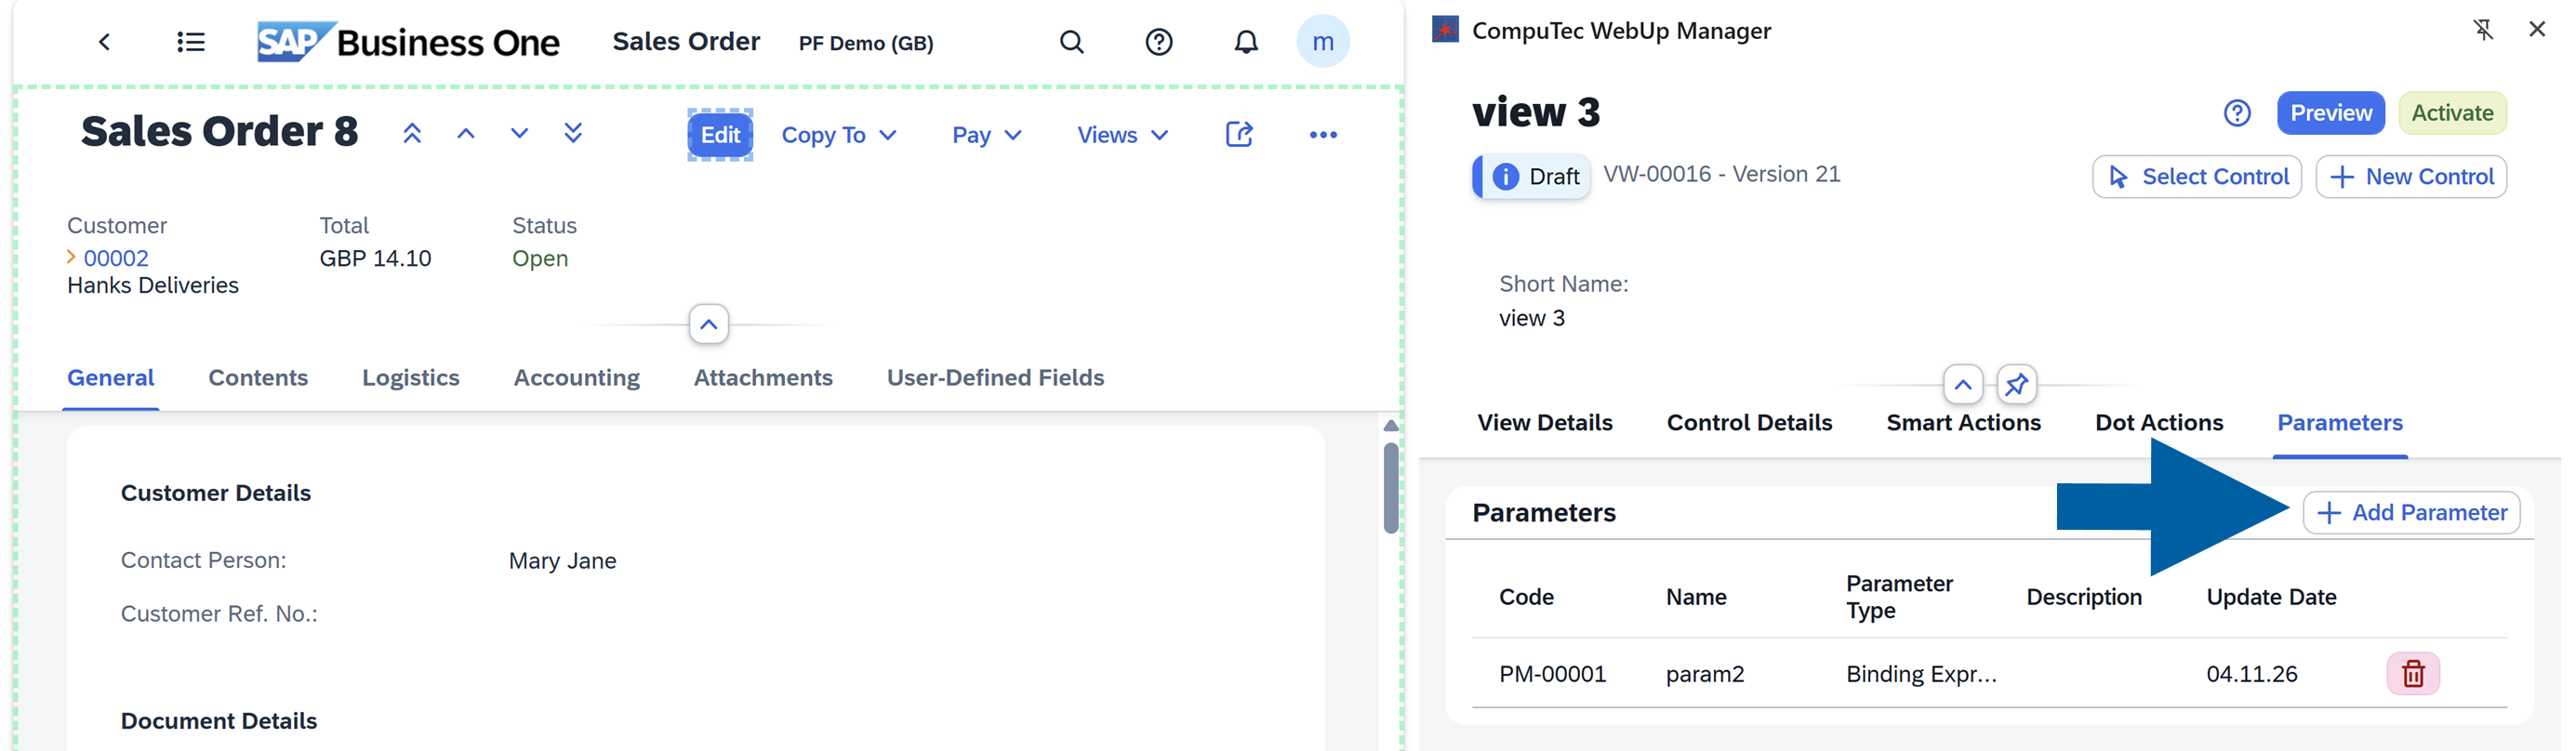
The Parameters tab lists all Parameters with their Code, Name, Parameter Type, Description, and Update Date.
Create a Binding Expression Parameter
To create a Binding Expression Parameter, follow these steps:
-
Open your screen in SAP Business One Web Client, and then go to the Parameters tab in the CompuTec WebUp Manager side panel.
NoteYou must be in edit mode. If the view is Active, click Edit first.

-
Click Add Parameter.
-
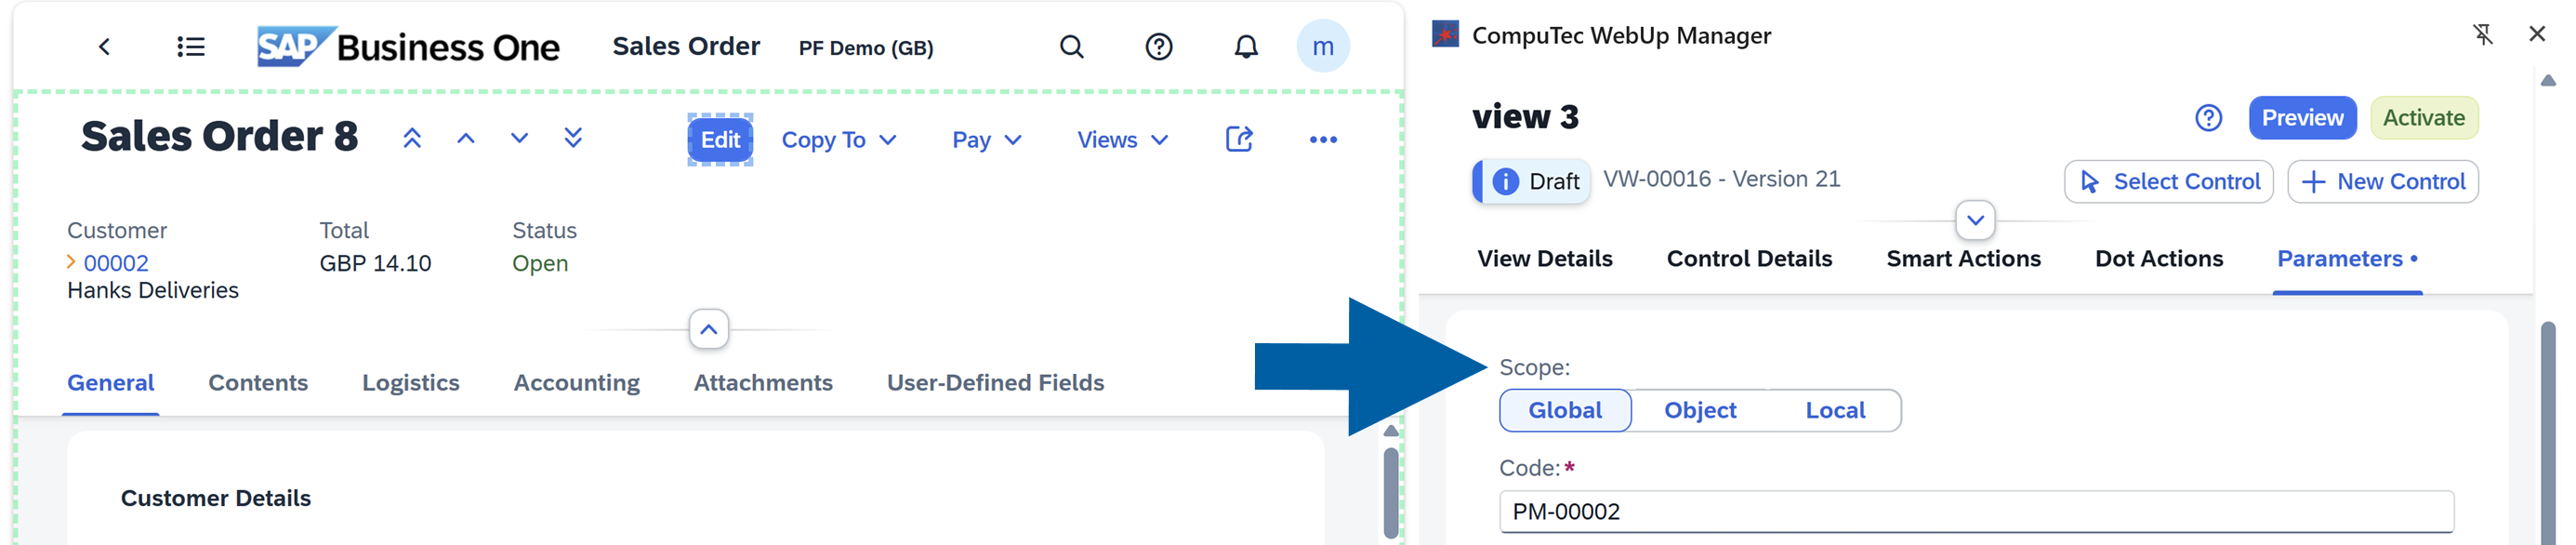
Select the Scope. You can choose from three types:
- Global – Available in all views and all document types.
- Object – Available in all views of one object, for example Sales Order, across all its view versions.
- Local – Available only in the current view version.
-
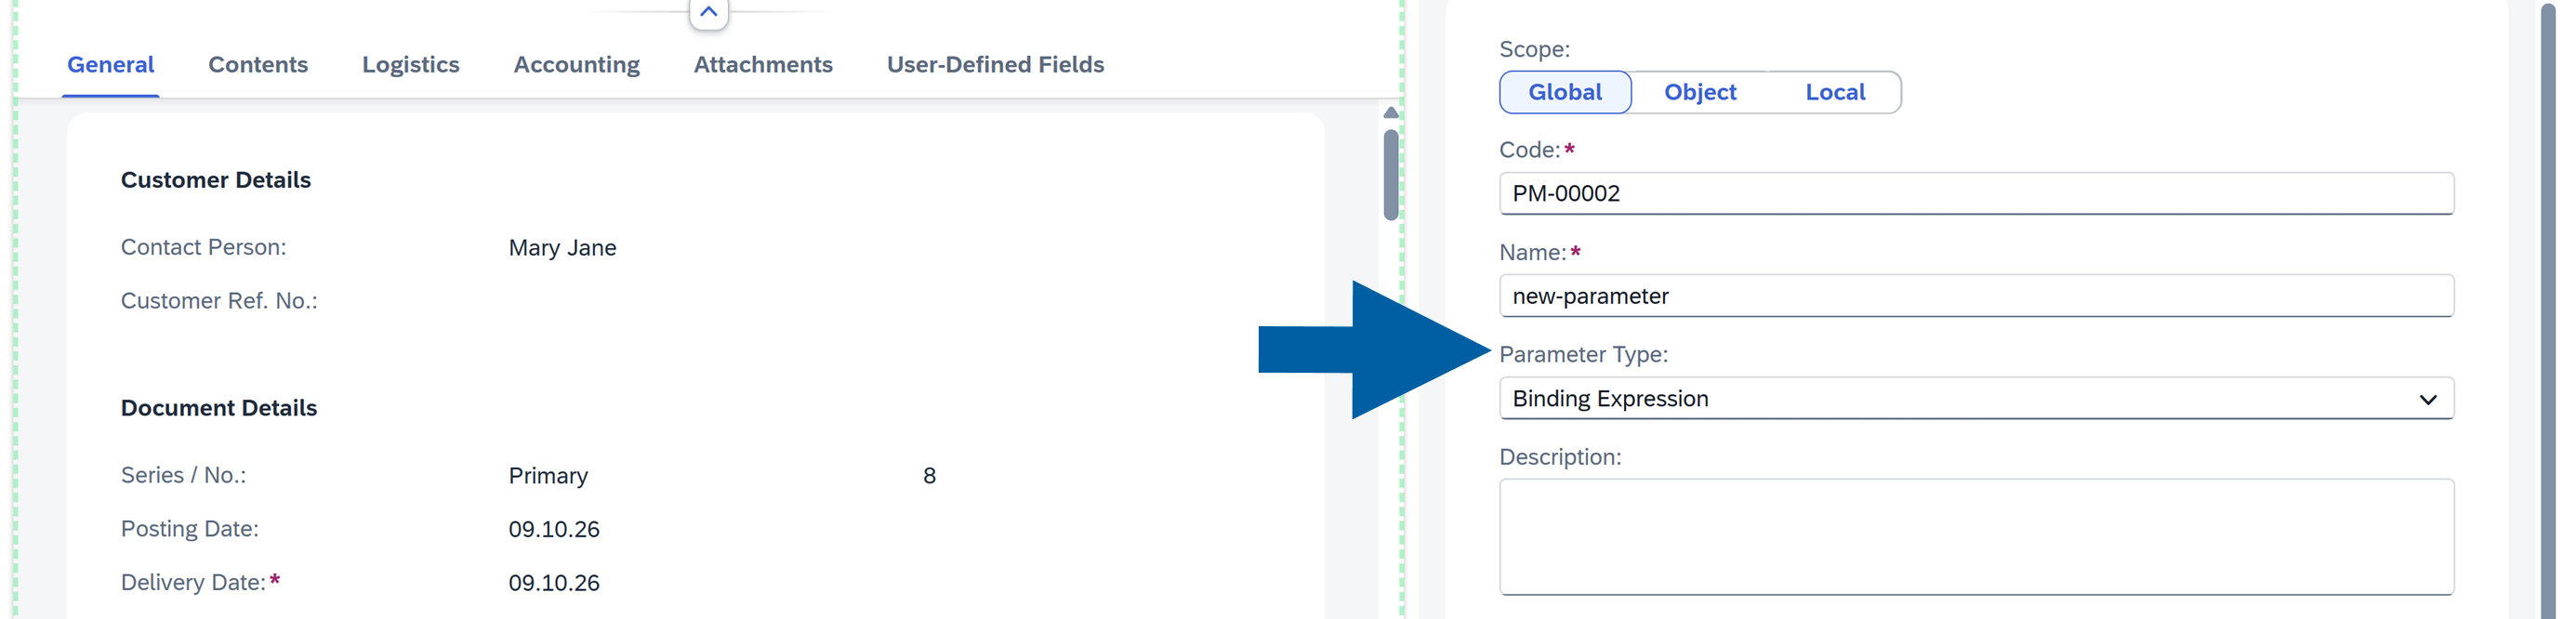
Check the Code. CompuTec WebUp fills it in automatically, but you can edit it.
-
In Name, enter a name for the Parameter.
-
In Parameter Type, select Binding Expression.
-
(Optional) In Description, enter a description.
-
Choose the Parameter Type. In our example, we choose Binding Expression. Read more
-
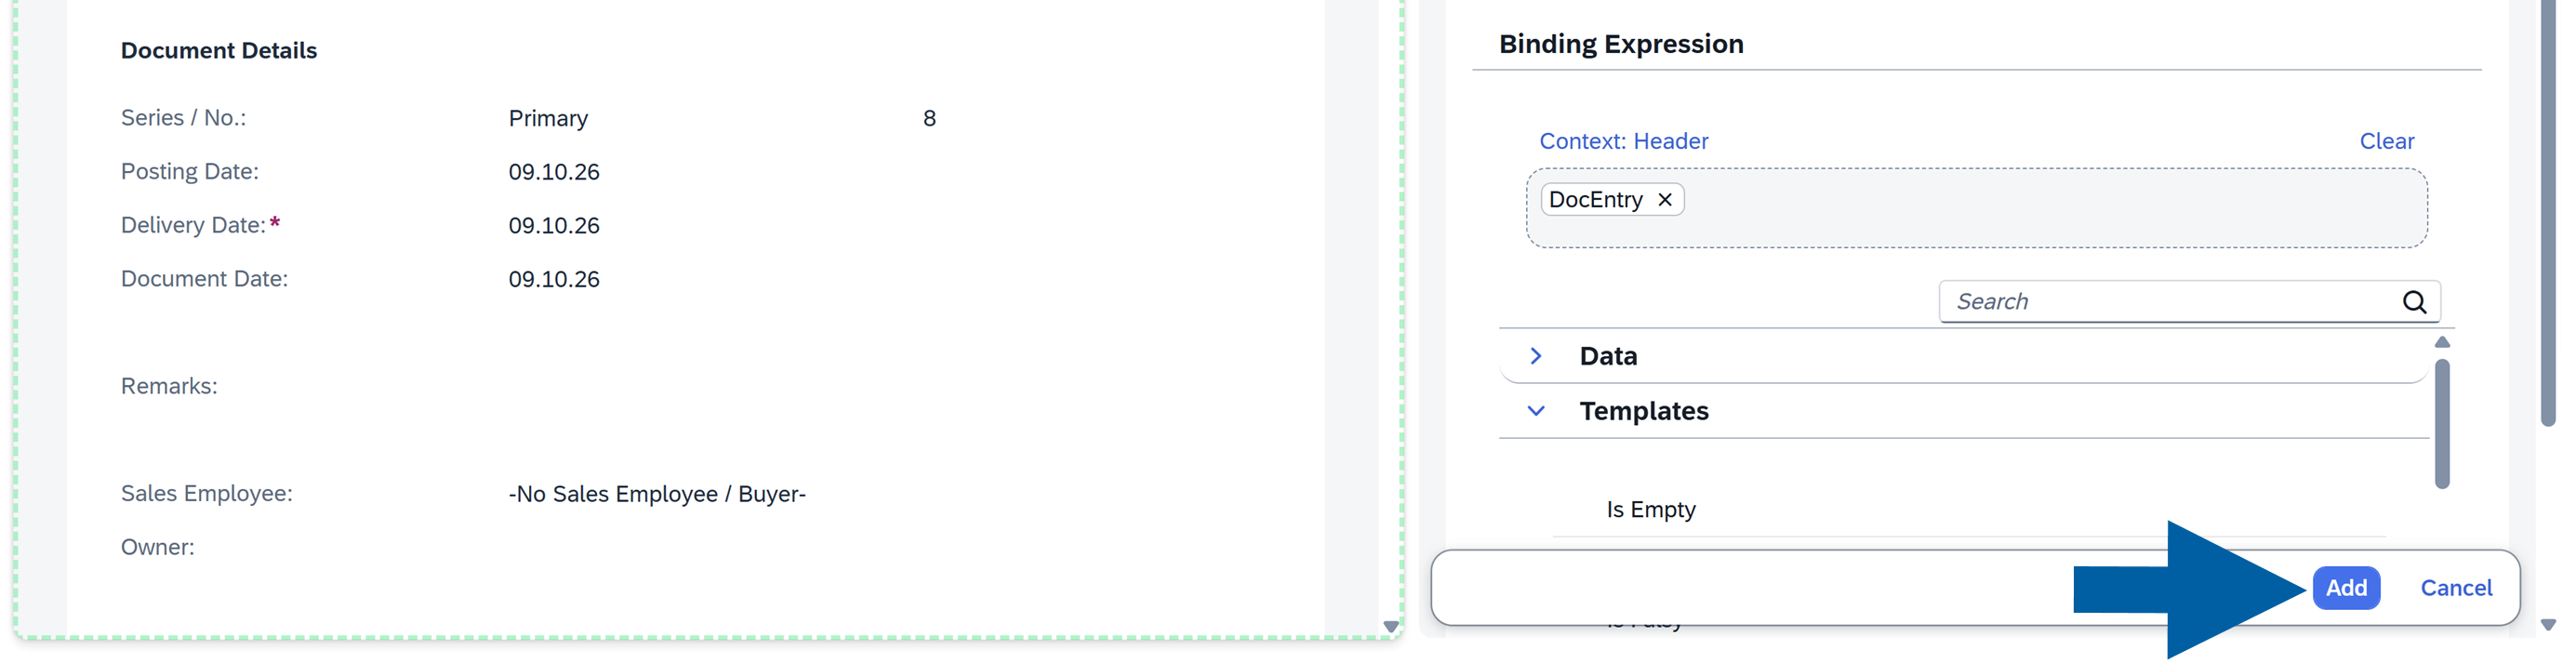
In Binding Expression, build the expression:
- Find the element you need. Expand Data or Templates, or use the search box.
- Drag the element to the expression area. In our example, we drag
DocEntryfrom Data.
 Info
The expression editor shows the data context of the expression, for example Header. To remove one element, click x next to it. To remove the whole expression, click Clear.
-
Click Add.
-
Done! The new Parameter is on the list in the Parameters tab.
Create a Custom Model Parameter
To create a Custom Model Parameter, follow these steps:
-
Open your screen in SAP Business One Web Client, and then go to the Parameters tab in the CompuTec WebUp Manager side panel.
NoteYou must be in edit mode. If the view is Active, click Edit first.
-
Click Add Parameter.
-
Select the Scope.You can choose from three types:
- Global – Available in all views and all document types.
- Object – Available in all views of one object, for example Sales Order, across all its view versions.
- Local – Available only in the current view version.
-
In Name, enter a name for the Parameter.
-
In Parameter Type, select Custom Model.
-
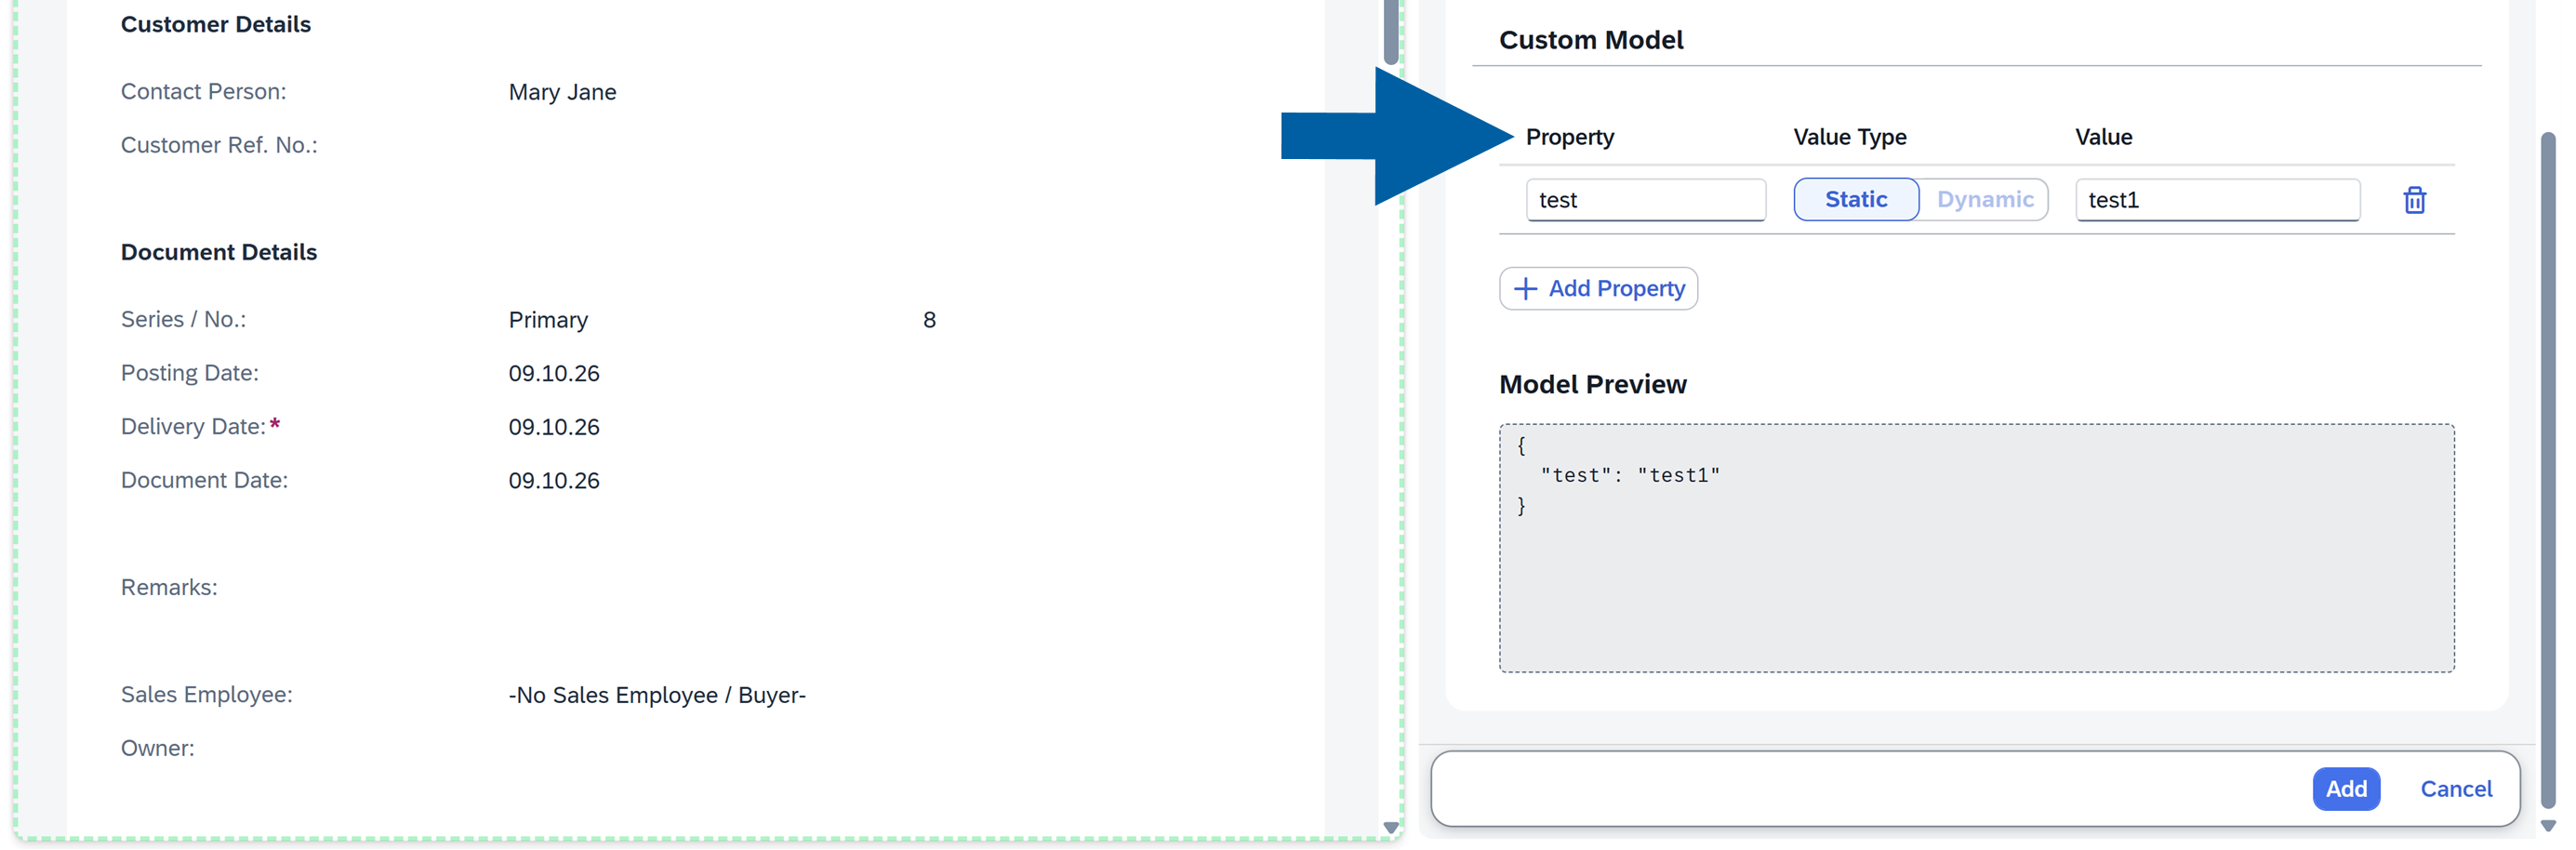
In Property, enter the name of the first property.
-
In Value Type, select Static or Dynamic.
-
In Value, enter the value:
- If you selected Static, enter a fixed value. The value can be empty.
- If you selected Dynamic, choose a field from the document.
-
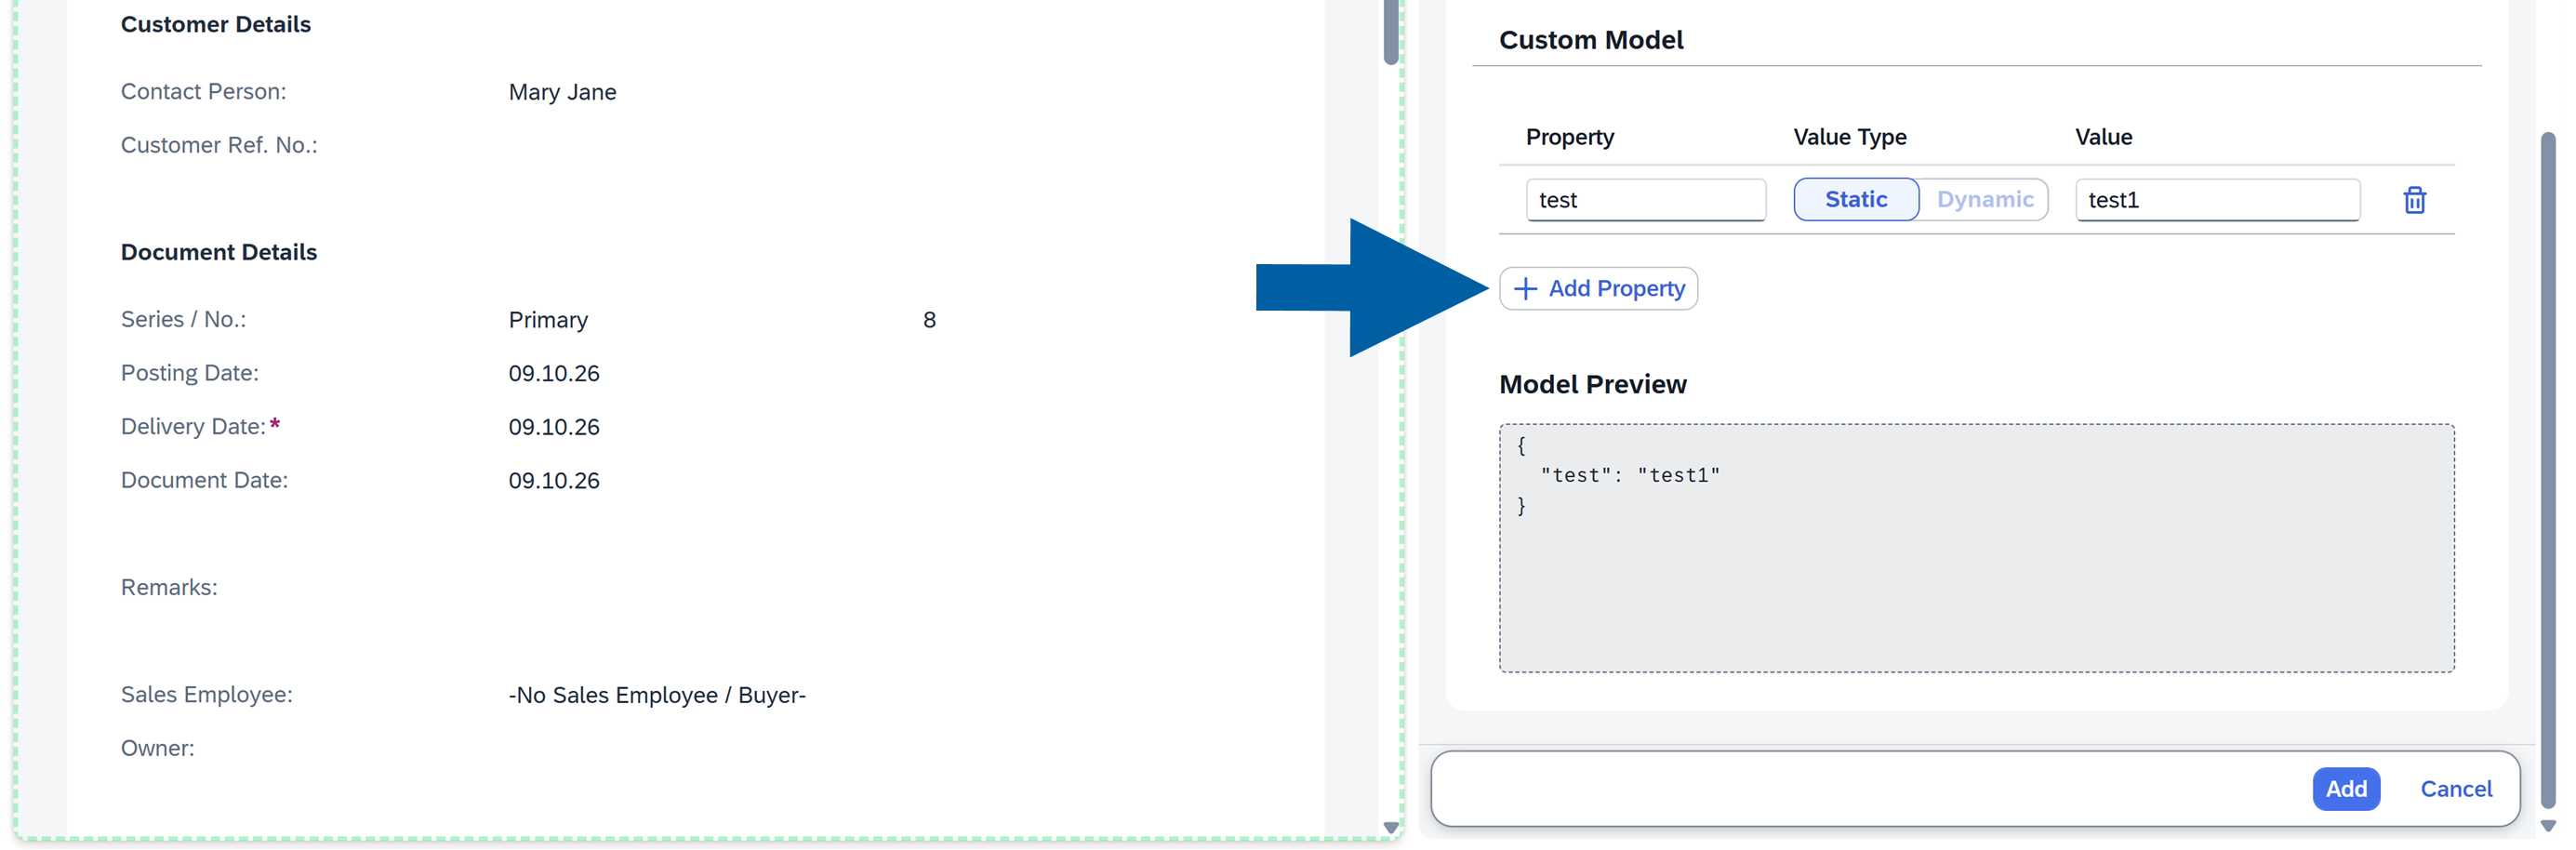
(Optional) To add more properties, click Add Property, and then repeat steps 6 to 8.
-
Check Model Preview. It shows the properties with their current values.
-
Click Add.
-
Done! The new Parameter is on the list in the Parameters tab.
Use a Parameter in a control property
You can use a Parameter as the value of a control property. In this example, a button shows the document key of the open Sales Order as its text.
To use a Parameter in a control property, follow these steps:
-
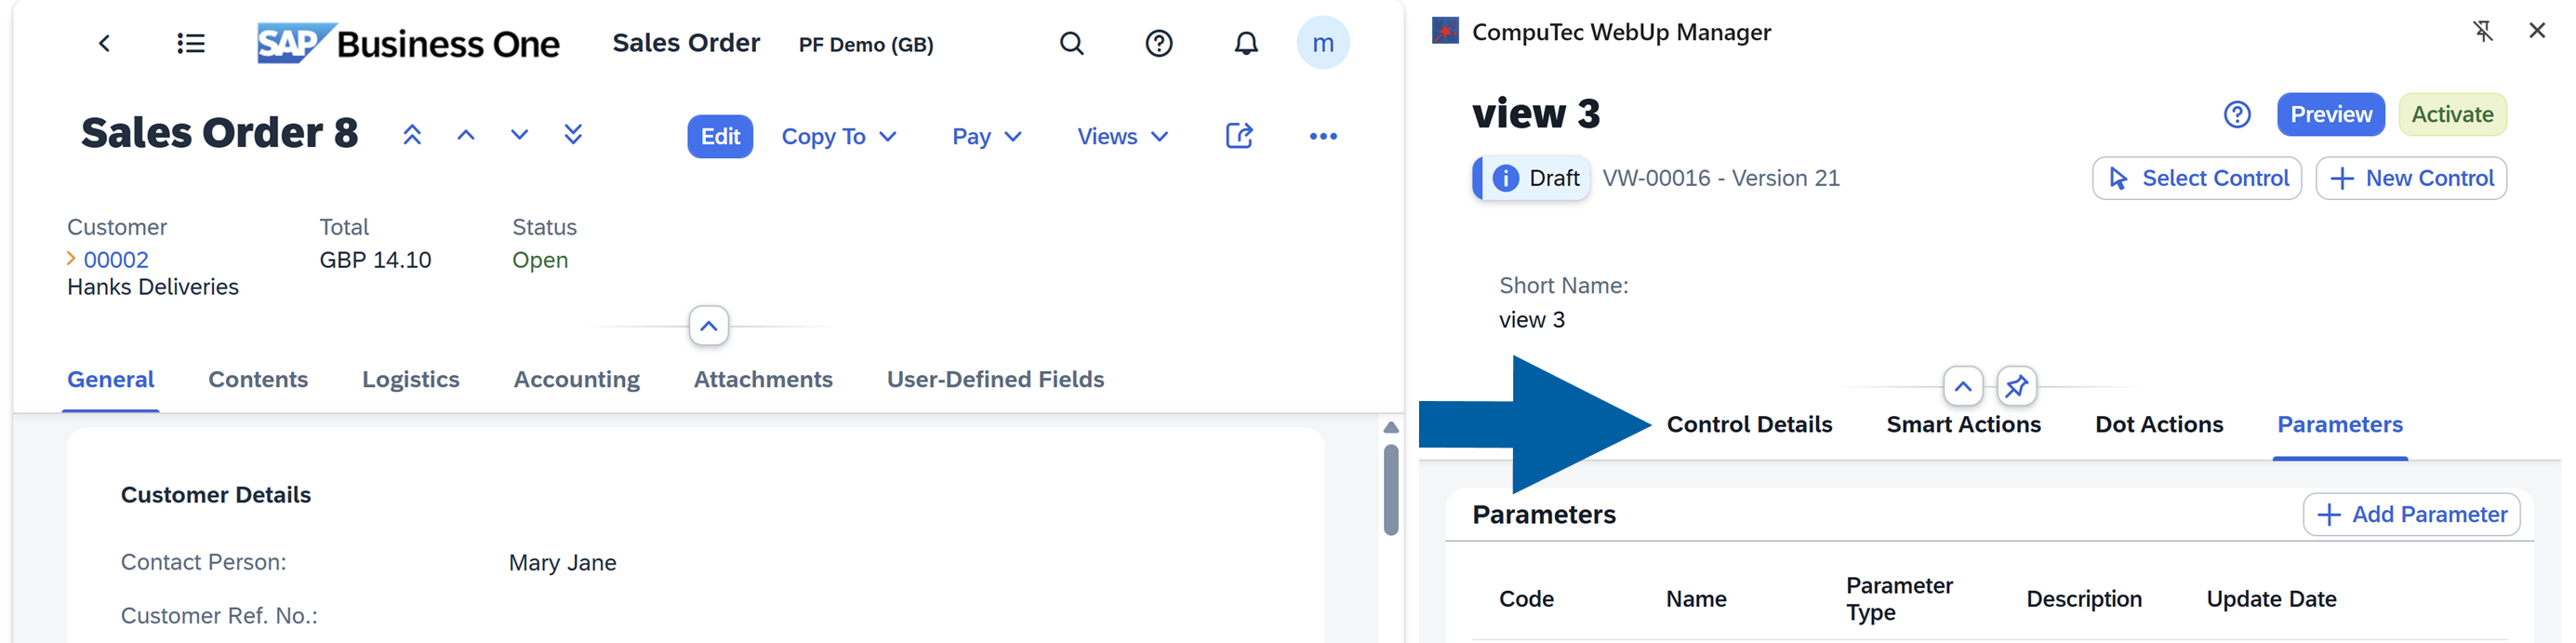
In the CompuTec WebUp Manager side panel, go to Control Details.
-
Select a control from the list, or click Select Control and select it in SAP Business One Web Client. In our example, we select a button.
 Note
You must be in edit mode. If the view is Active, click Edit first.
-
Scroll down to Basic Options of the selected control.
-
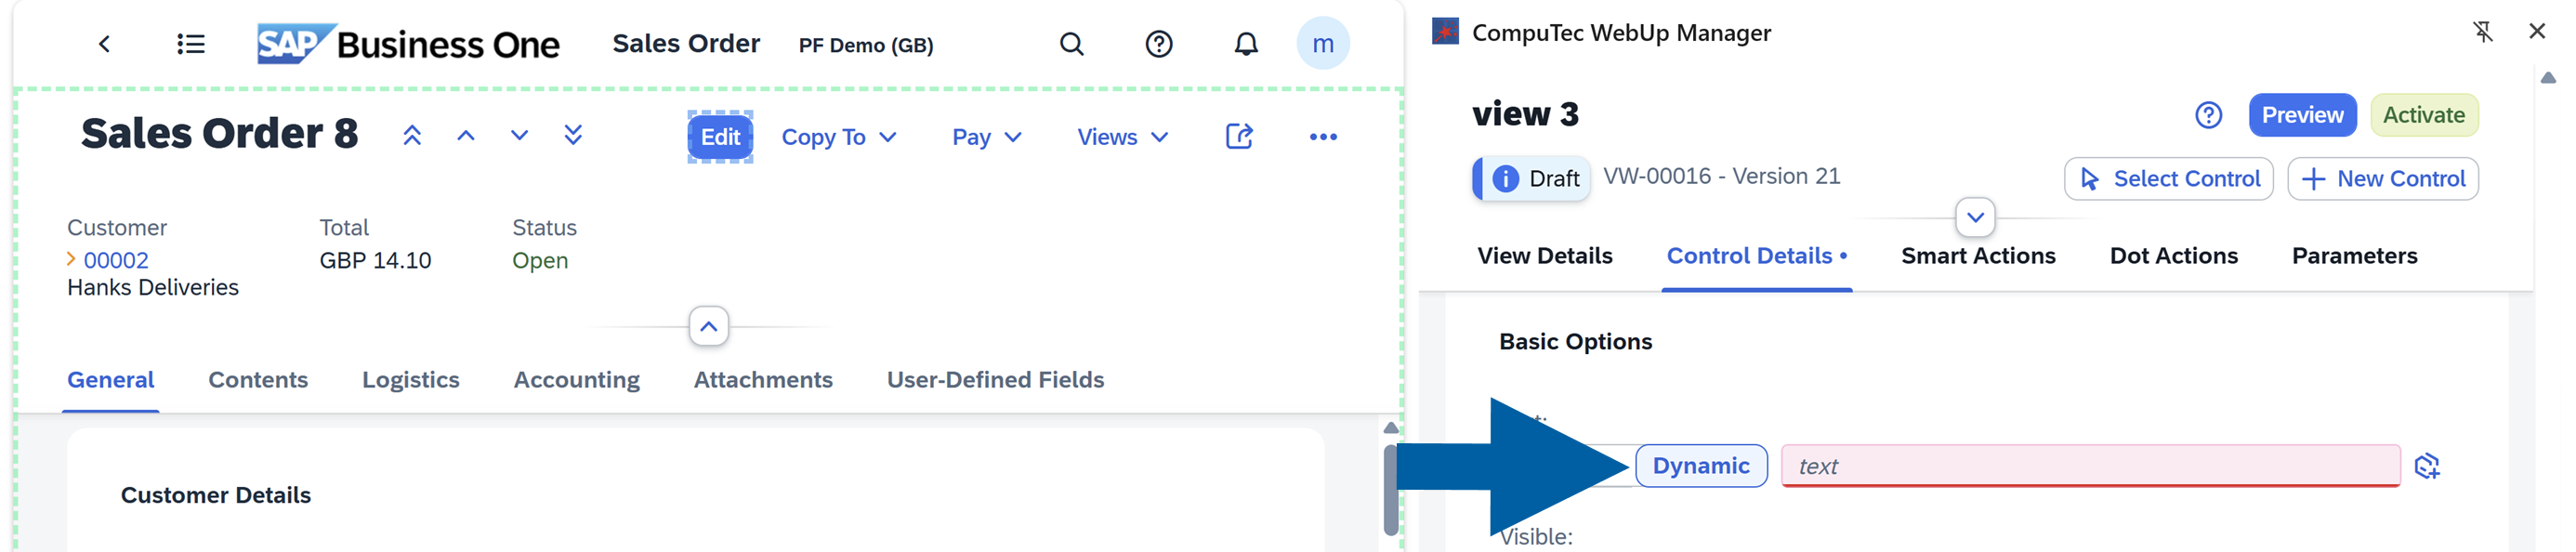
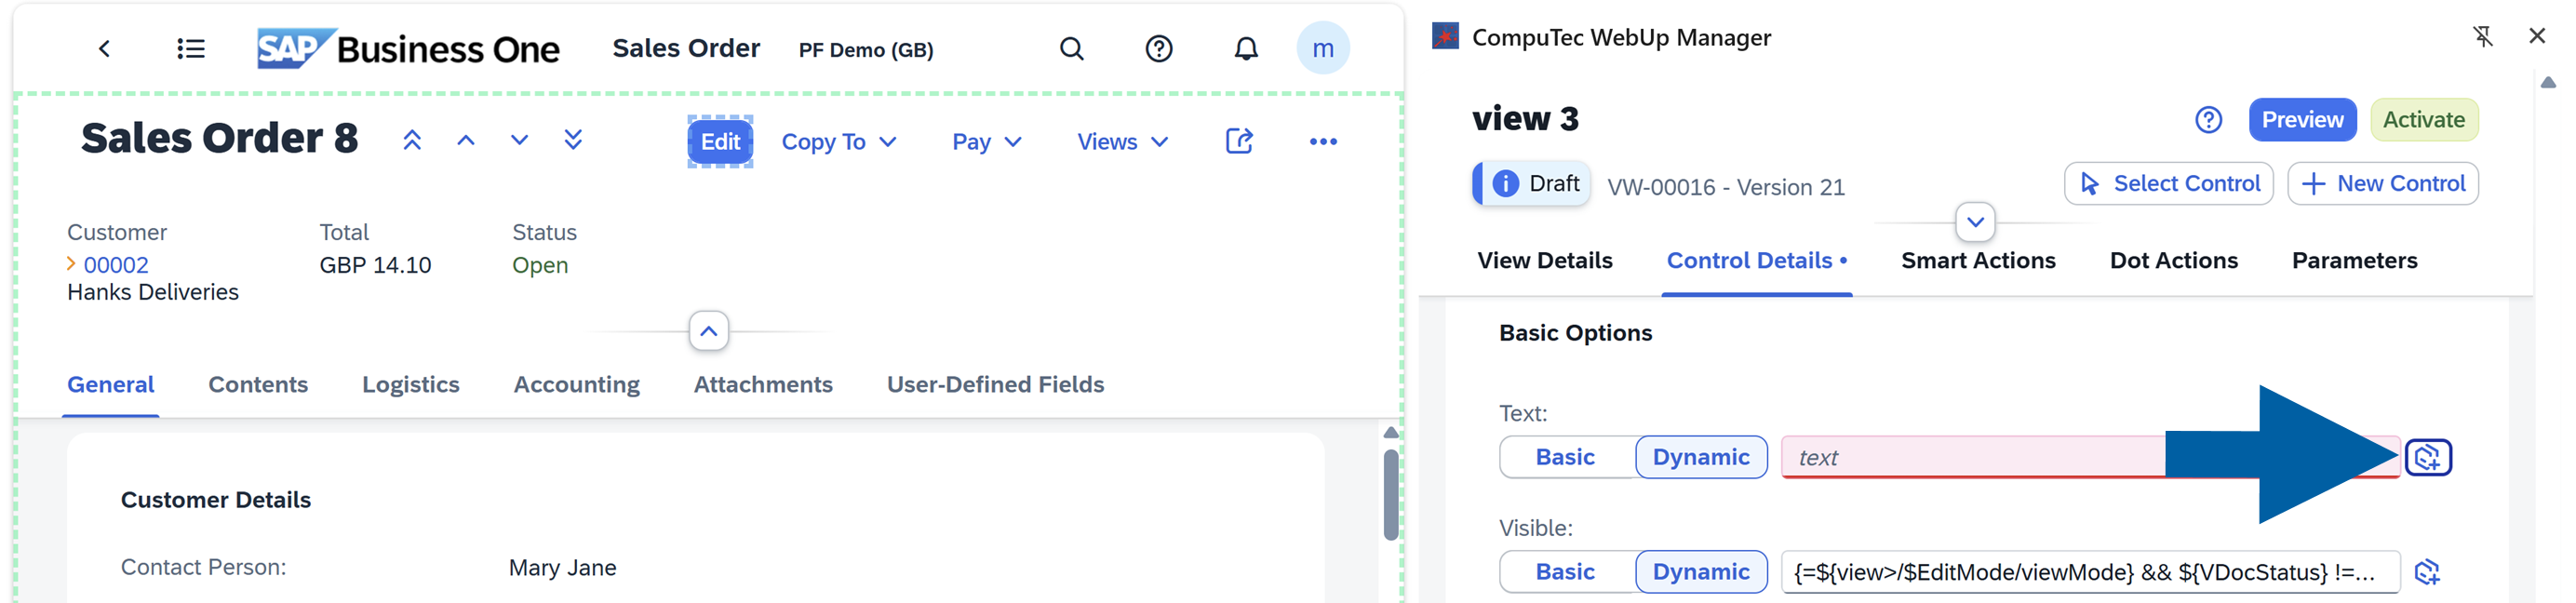
For Text, select Dynamic.
-
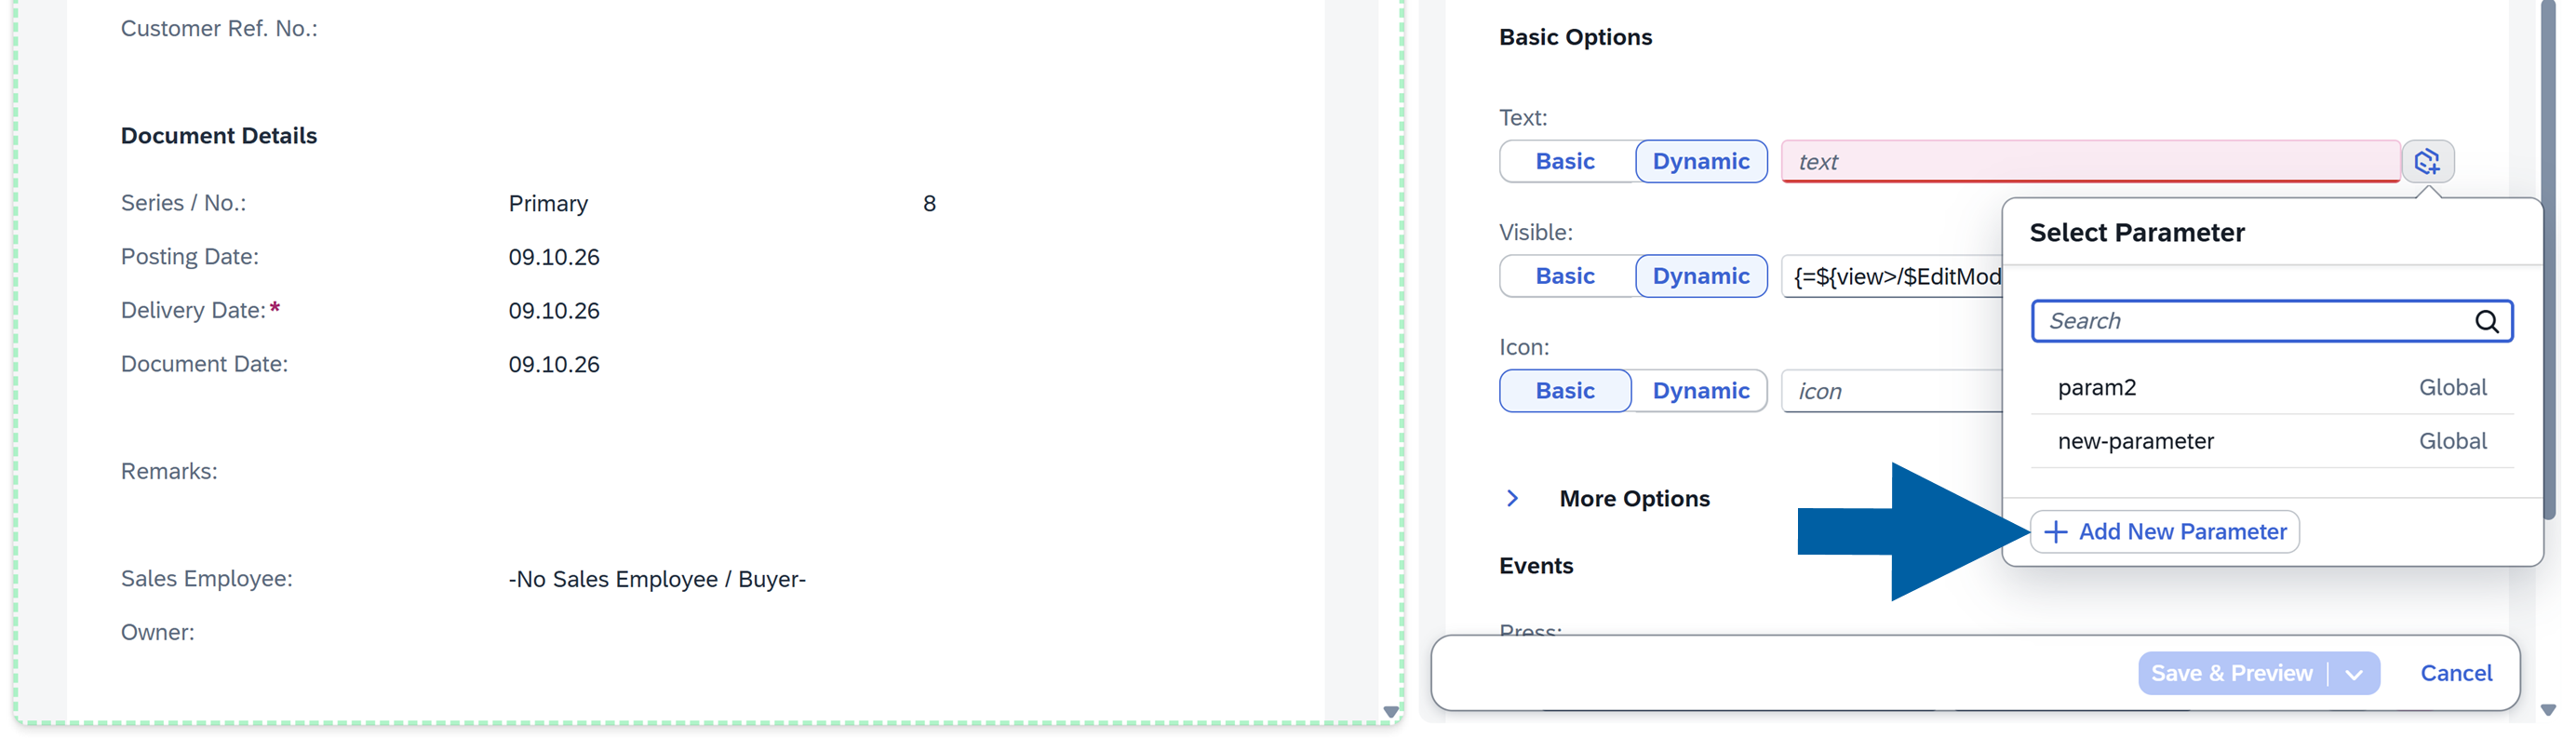
Click the icon at the end of the Text field to open Select Parameter.
-
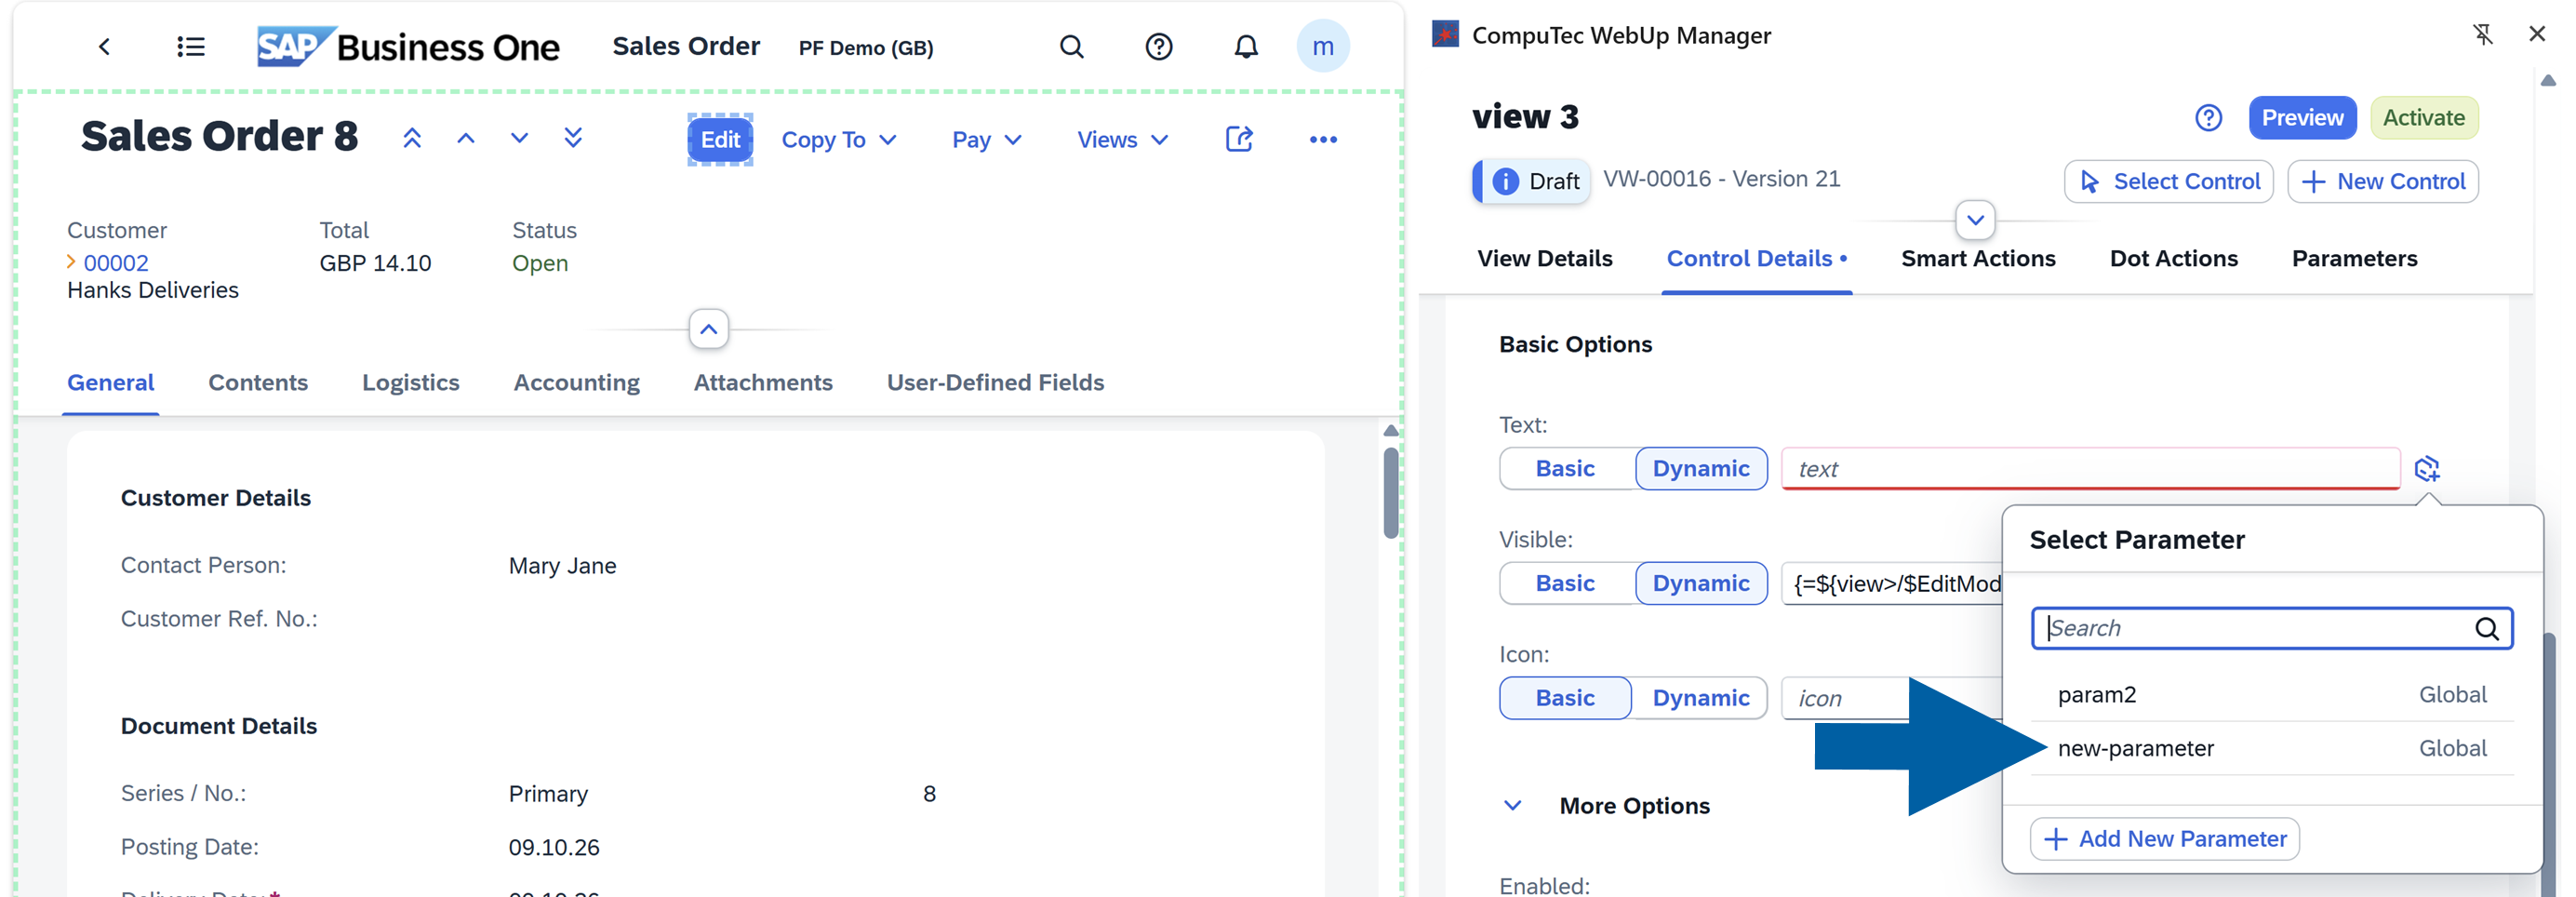
Select your Parameter from the list. The list shows the scope of each Parameter.
-
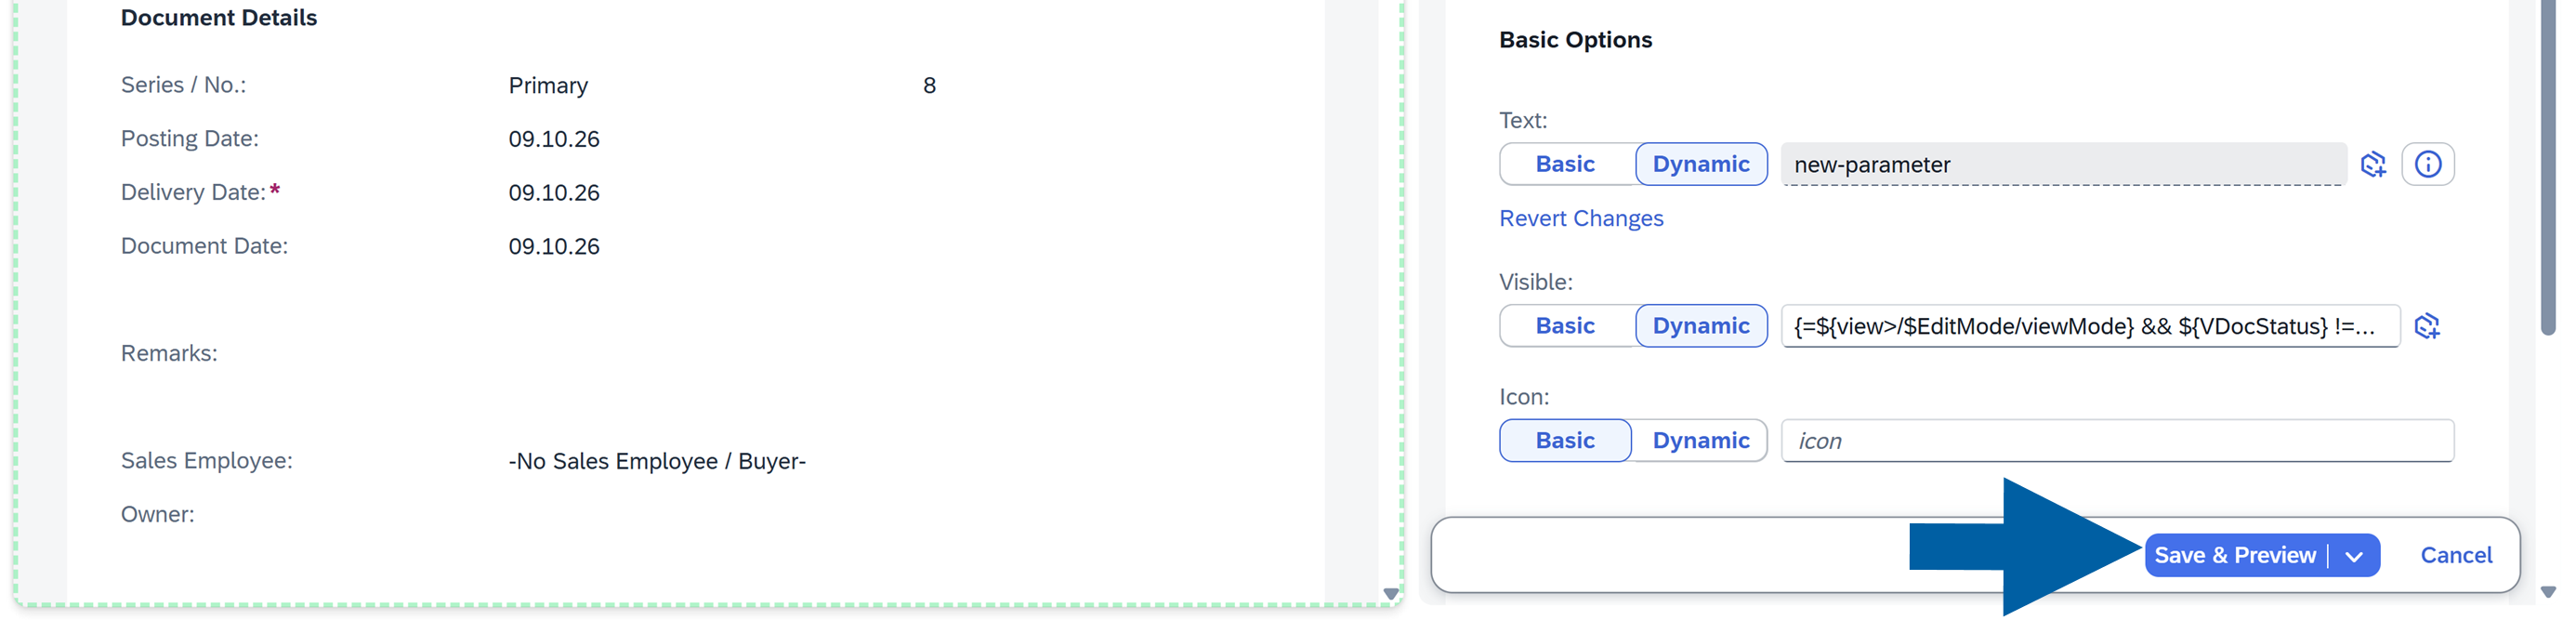
Click Save & Preview.
-
In preview mode, check the button text. In our example, the button shows the
DocEntryvalue of the open Sales Order.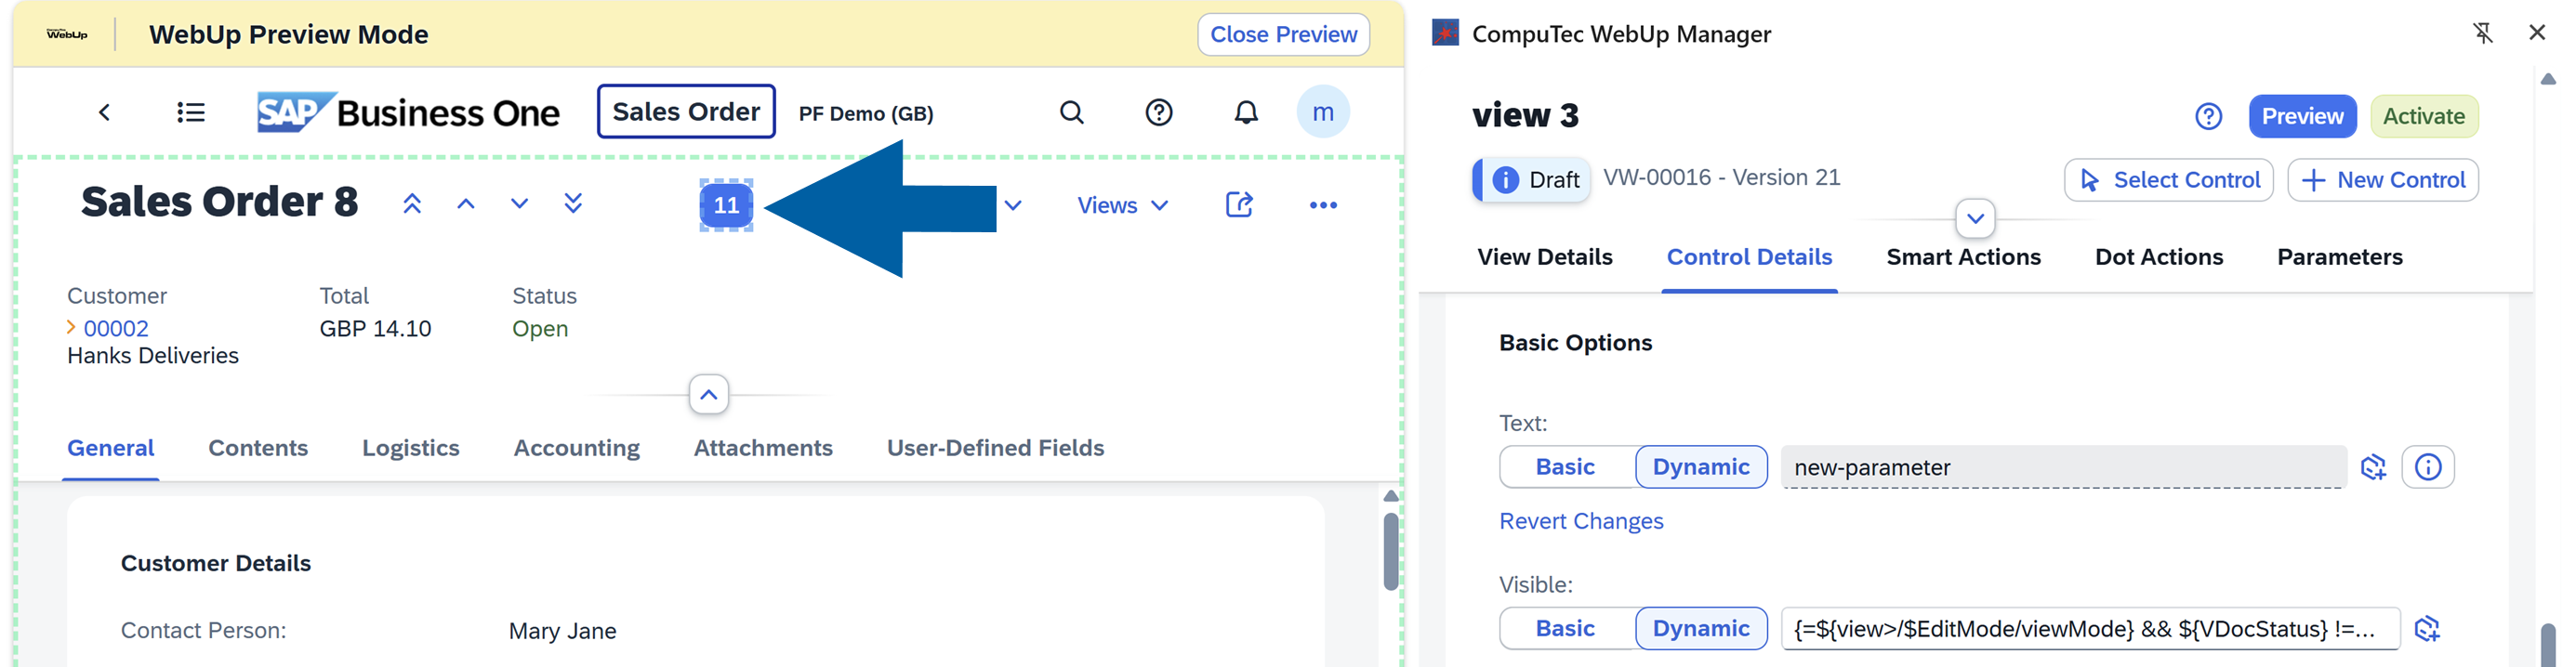
-
If you like the results, click Activate.
-
Done! The control uses the Parameter. When the user opens another document, the text changes with it.
Required control properties are marked and must have a value before you can save the control.
Create a Parameter from a control property
You can create a new Parameter while you edit a control property, so you don't leave the control.
To create a Parameter from a control property, follow these steps:
-
In Control Details, select the control and go to Basic Options.
-
For the property, select Dynamic, and then click the icon at the end of the field.
-
In Select Parameter, click Add New Parameter.
-
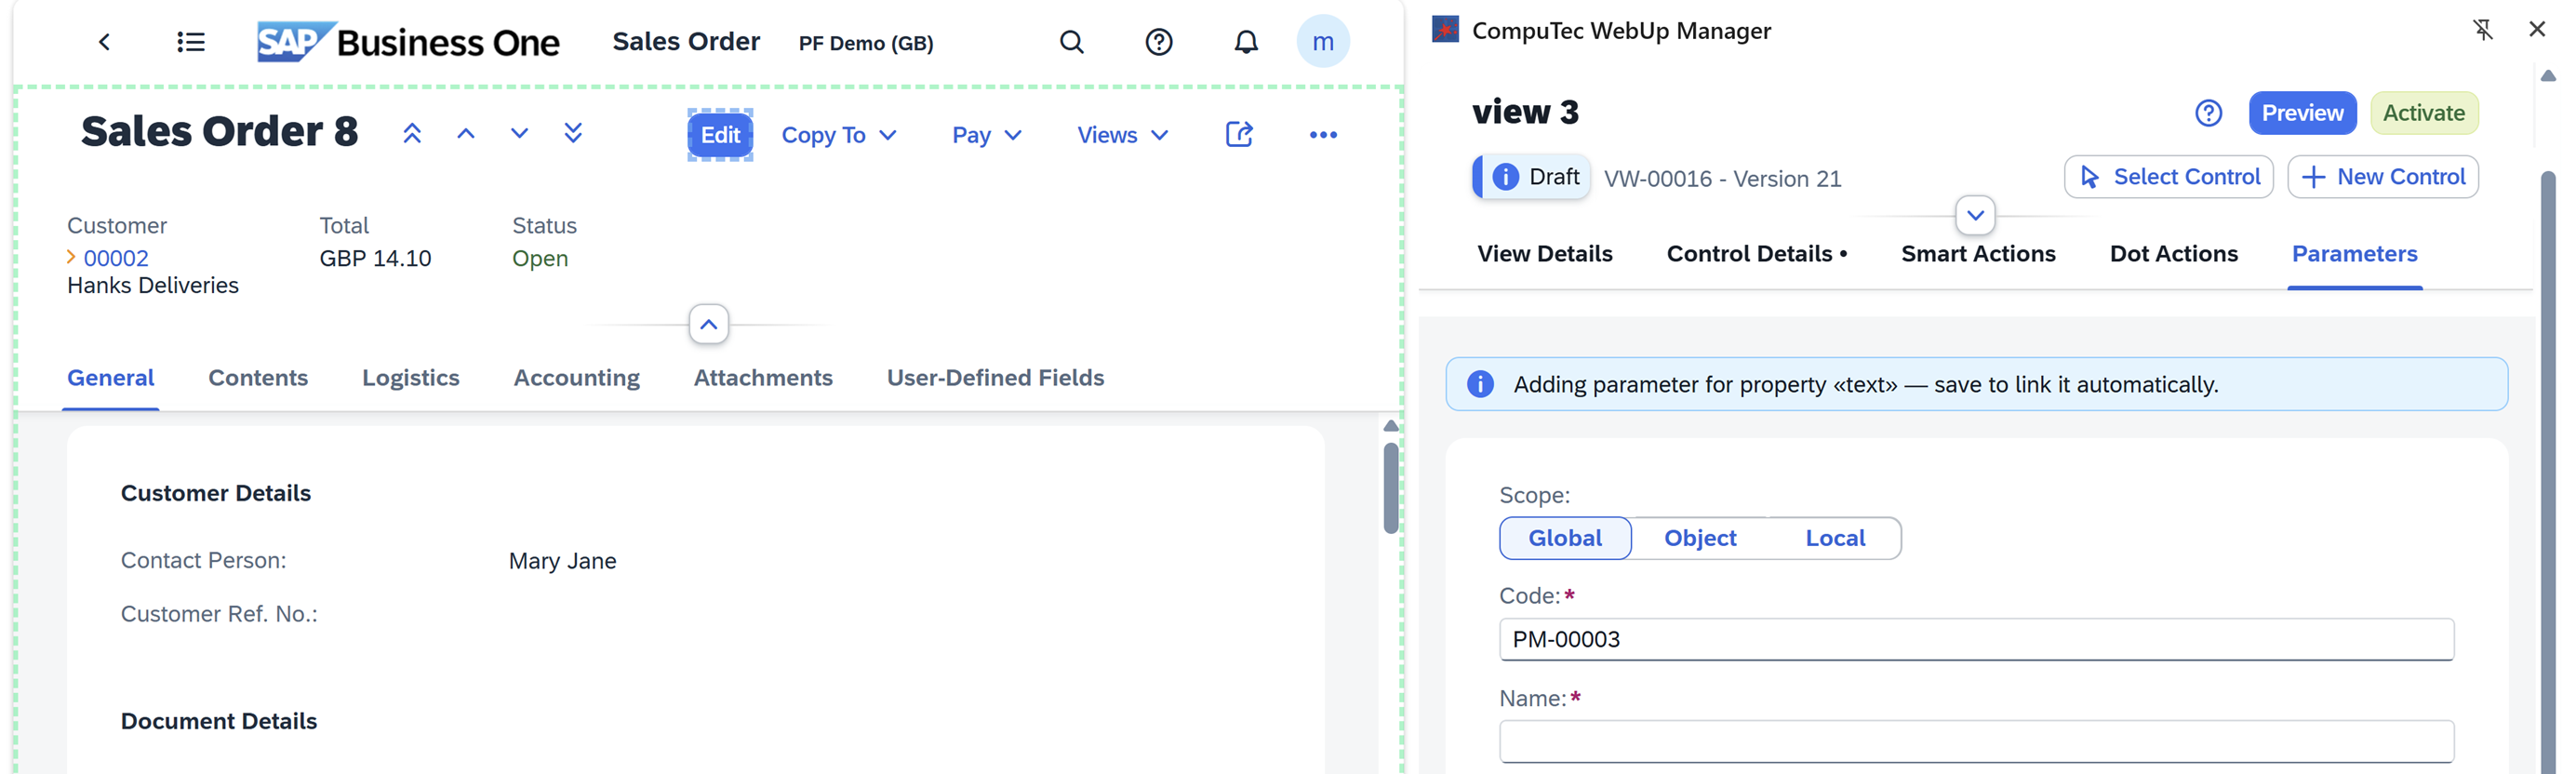
Define the Parameter. For details, see Create a Parameter.
-
Click Add.
-
Done! CompuTec WebUp links the new Parameter to the property automatically.
If you leave the editor with unsaved changes, CompuTec WebUp warns you. You can keep editing or discard the changes. If you discard them, the connection to the original field is not lost.
Use a Parameter in a Smart Action
You can use a Parameter as the Source of an Action Parameter when you assign a Smart Action to an event.
To use a Parameter in a Smart Action, follow these steps:
-
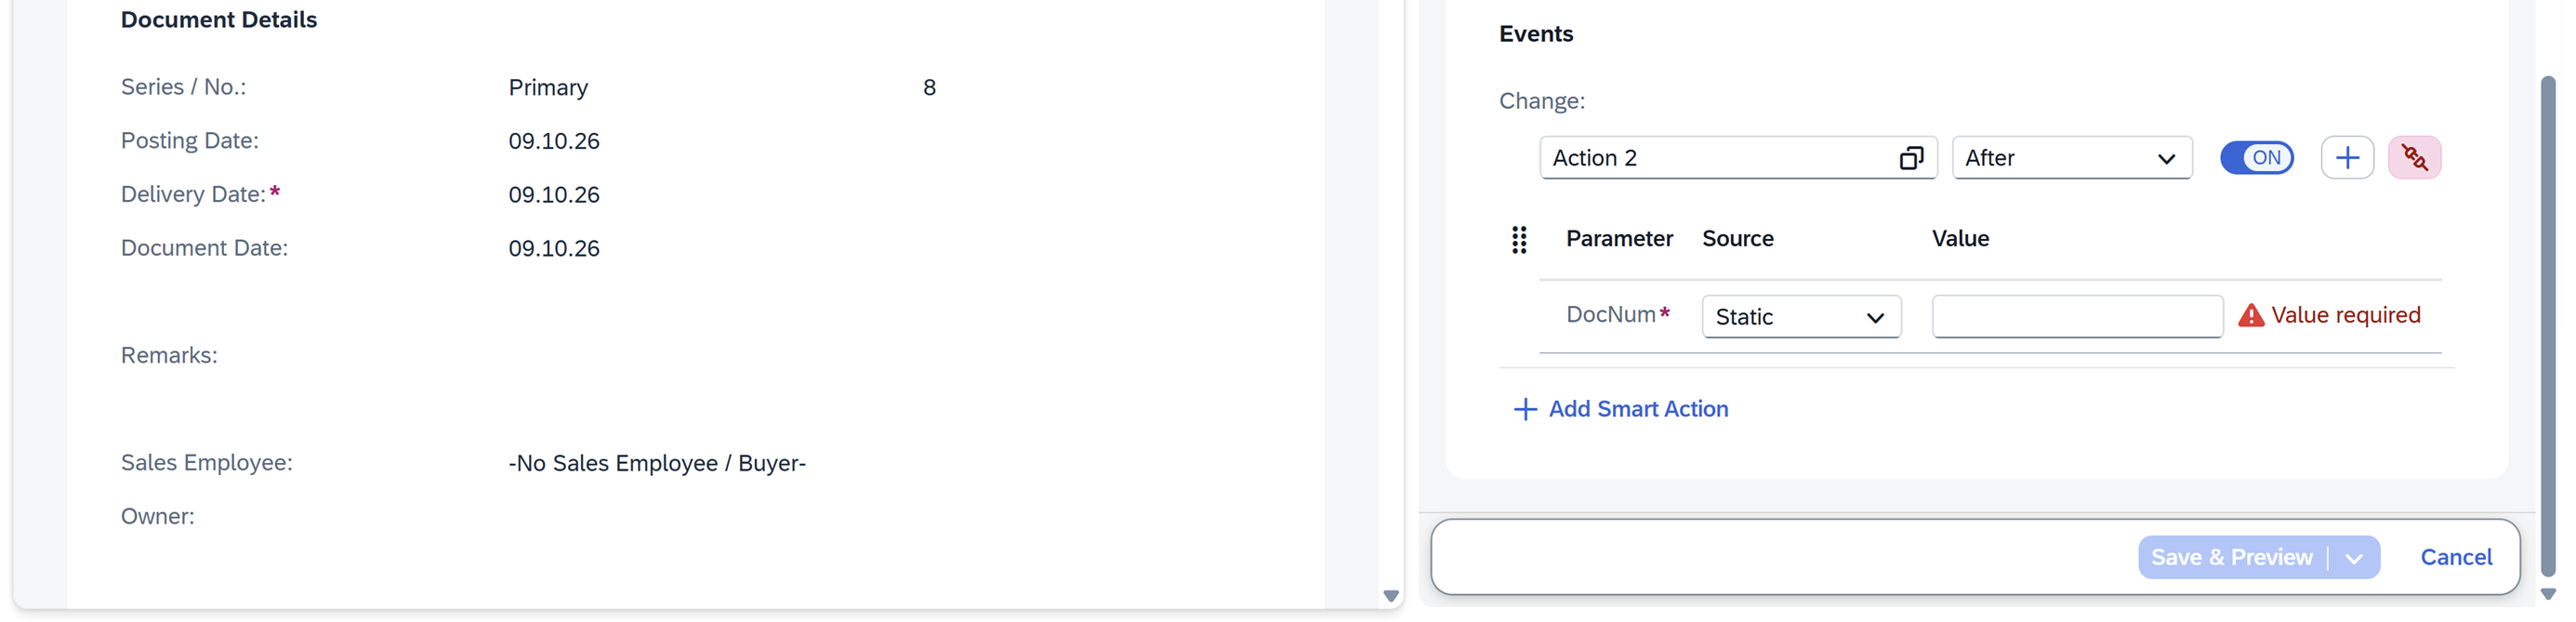
Assign the Smart Action to a control event. For details, see Assign the Smart Action to a Control.
-
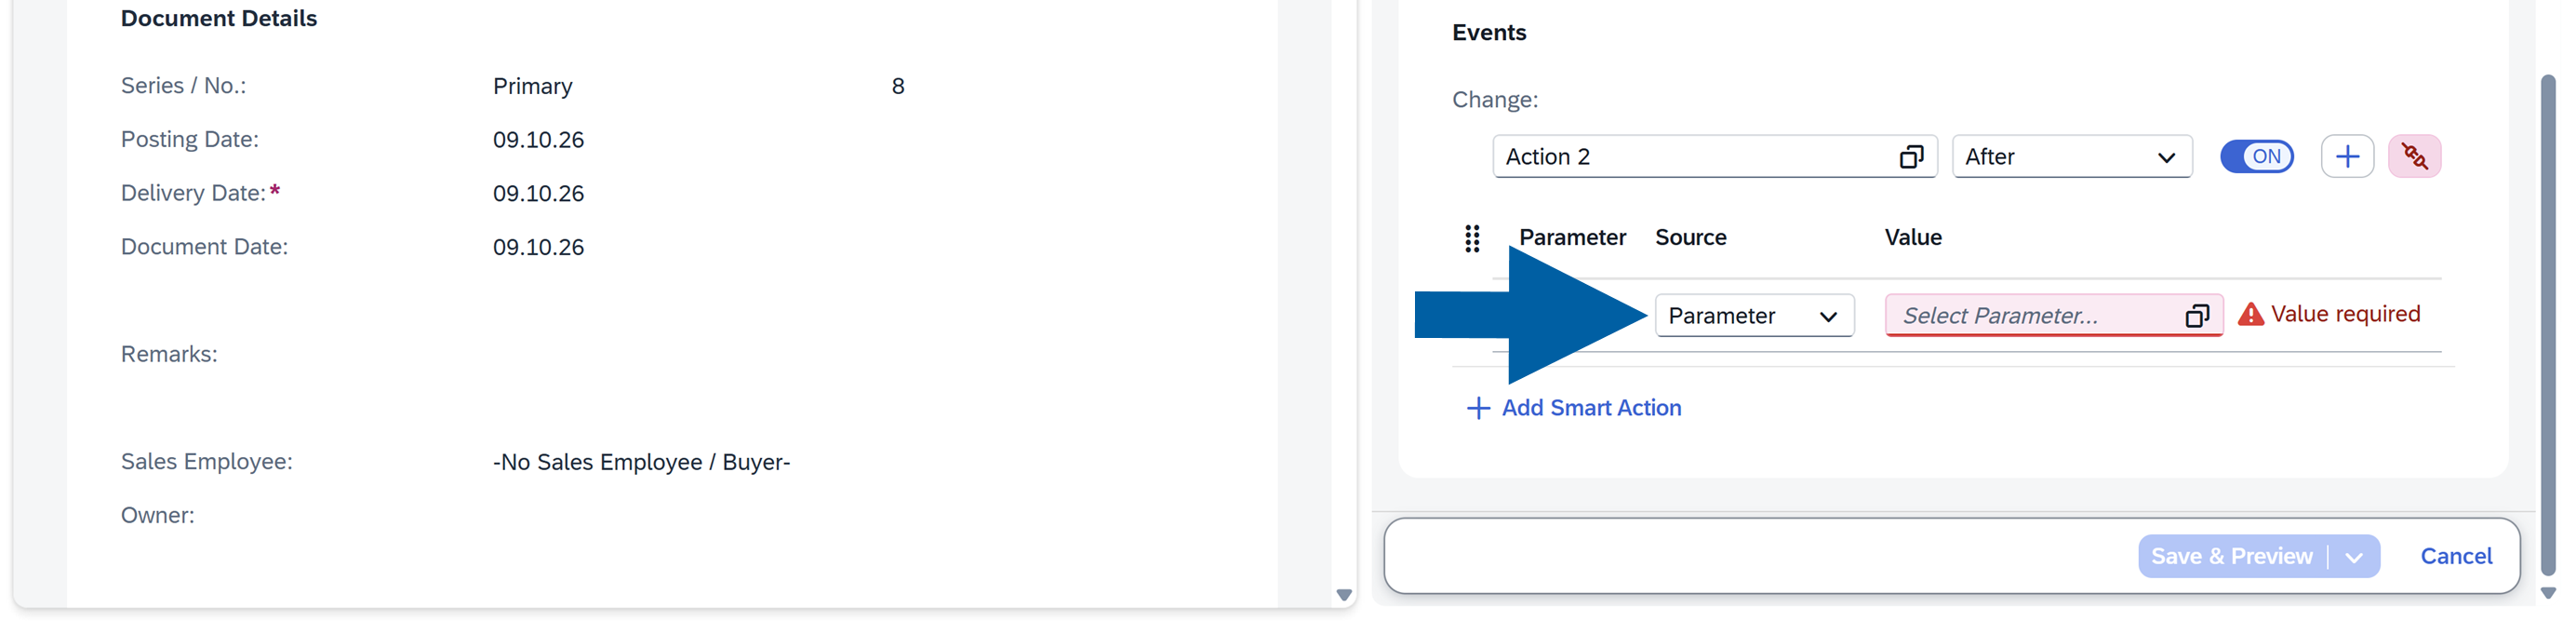
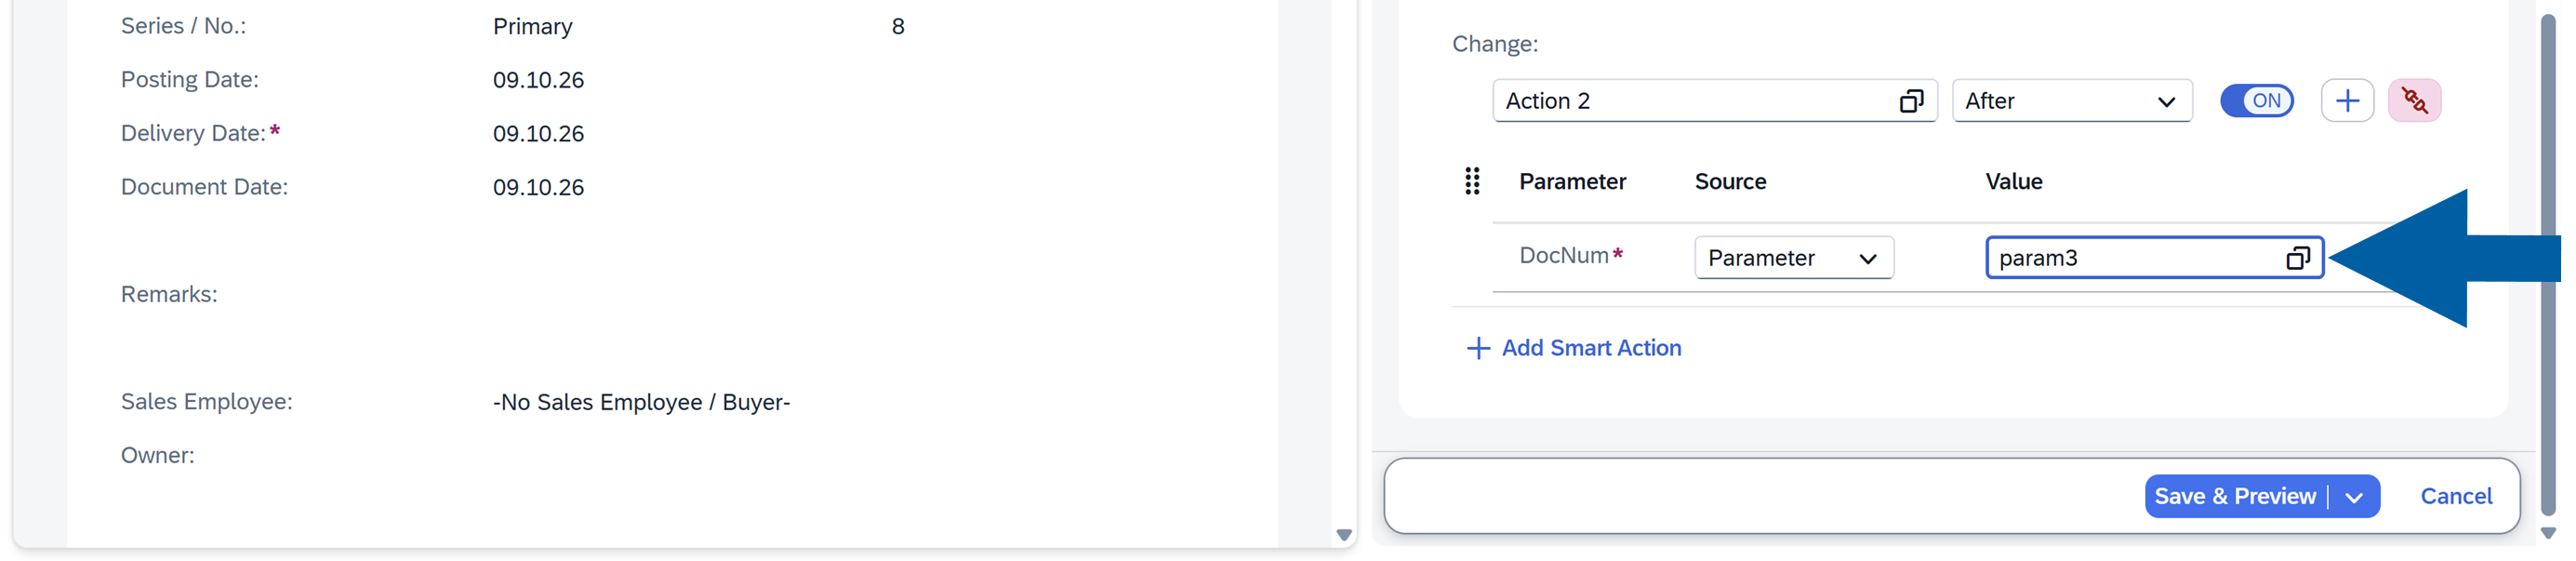
In the Source column, select Parameter for the Action Parameter.
-
Select your Parameter from the list.
-
Click Save & Preview.
You can't use every Parameter type in every place. For example, a Binding Expression Parameter is not supported as the Source of an Action Parameter. In this case, CompuTec WebUp shows an error that says you can use only a Data Model. Custom Model Parameters can be used in Smart Action event bindings.
Parameters best practices
- Give each Parameter a descriptive Name and a Description, so other consultants know what it does
- Use a Parameter instead of repeating the same expression in many controls
- Always test using Preview before activation
Next steps
See Smart Actions to use Parameters as sources for Action Parameters, and Dot Actions to run Smart Actions from the command palette.