You are currently viewing documentation for CompuTec AppEngine 3.0 (.NET 8).
If you are working with older environments, you may need the documentation for CompuTec AppEngine 2.0 based on .NET Framework: https://learn.computec.one/docs/appengine/2.0/.
Please note that CompuTec AppEngine 2.0 will be supported only until December 31, 2026. After this date, the product will no longer receive regular support or maintenance updates. Read more
As CompuTec AppEngine 3.0 introduces a new architecture, all CompuTec components must be updated together to ensure full compatibility.
Please review the CompuTec AppEngine 3.0 documentation before starting your installation or upgrade process.
Use CompuTec REST/OData API
Overview
CompuTec AppEngine provides a REST and OData API that allows external systems and tools to communicate with CompuTec solutions such as CompuTec ProcessForce running on SAP Business One.
Using the API, you can automatically read data from the system, create documents, or update existing records without manually entering data in SAP Business One.
Typical REST/OData API use cases include:
- Integrating CompuTec with external systems (for example e-commerce, or custom applications)
- Automating repetitive processes
- Creating or updating documents programmatically
- Retrieving operational data for reporting or monitoring
About API
An API (Application Programming Interface) is a way for different software systems to communicate with each other. Instead of manually clicking buttons in the application interface, another system can send a request to the API. The API processes the request and returns a response.
For example, an API request could:
- Create a Pick Order
- Retrieve information about production orders
- Update item quantities
- Post a new Receipt
This makes it possible to automate operations and connect CompuTec with other systems.
The general workflow for using the API is:
- Send a request to
/api/loginto log in. - After successful authentication, send additional API requests using the same session.
About CompuTec API Documentation
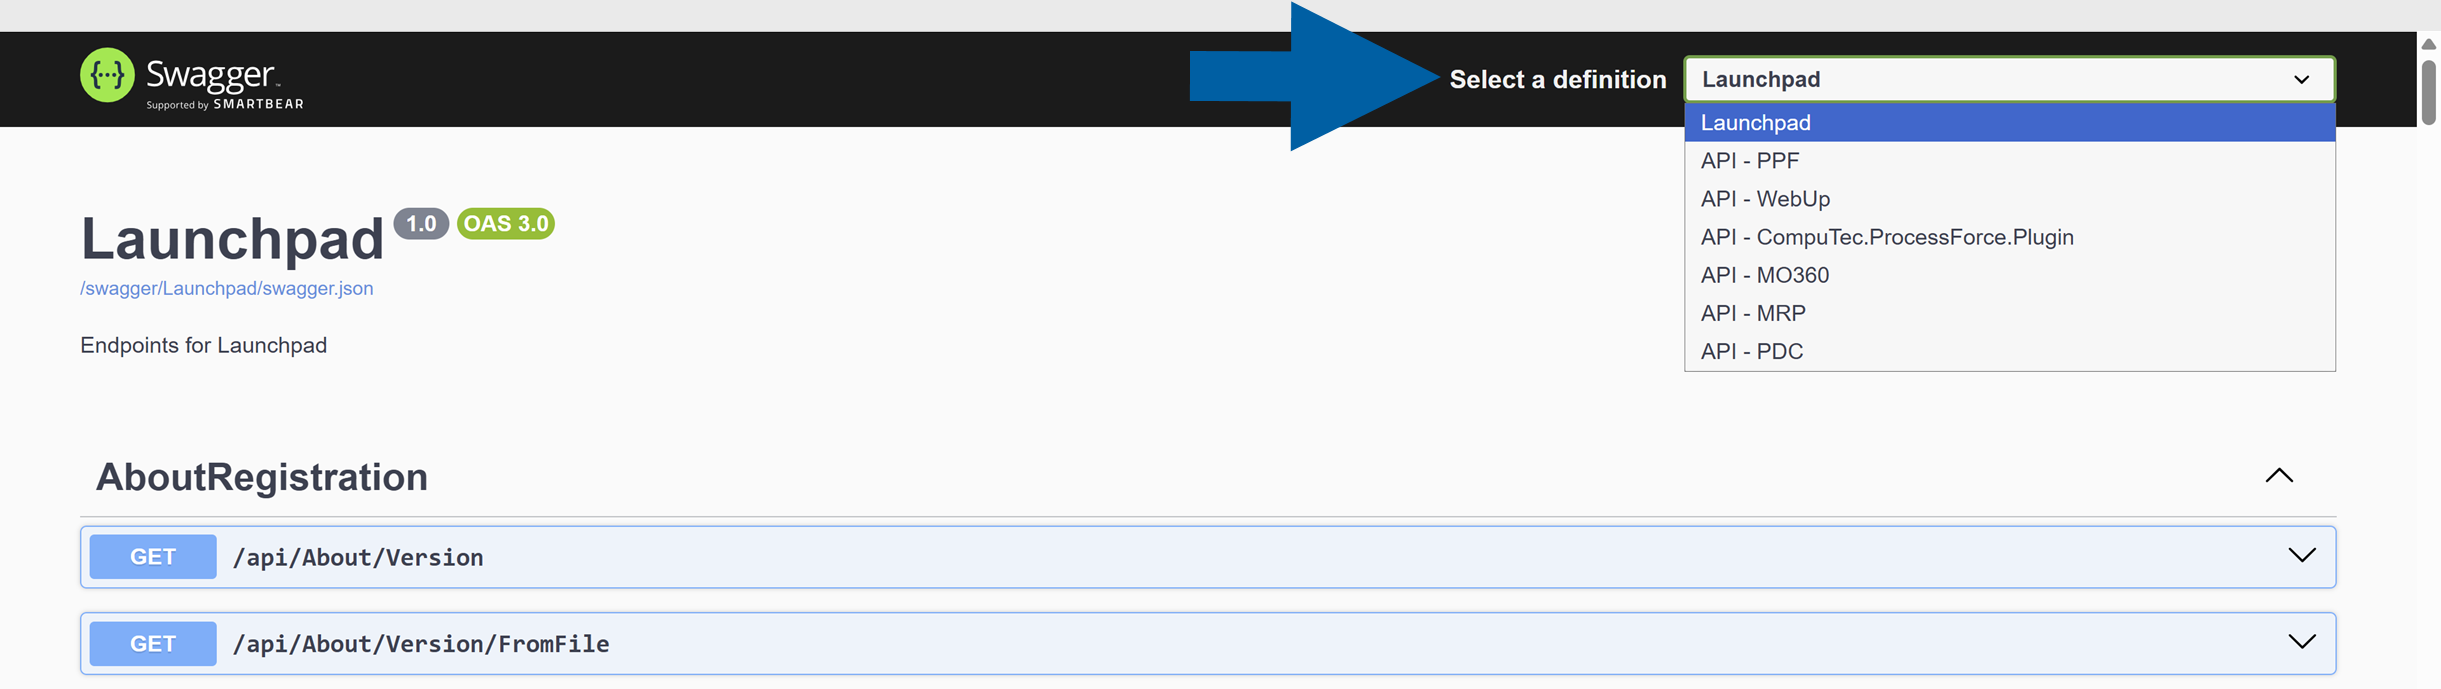
CompuTec provides an interactive API documentation using Swagger.
Swagger allows you to:
- Browse available API endpoints
- See request formats
- Test API calls
- View example responses
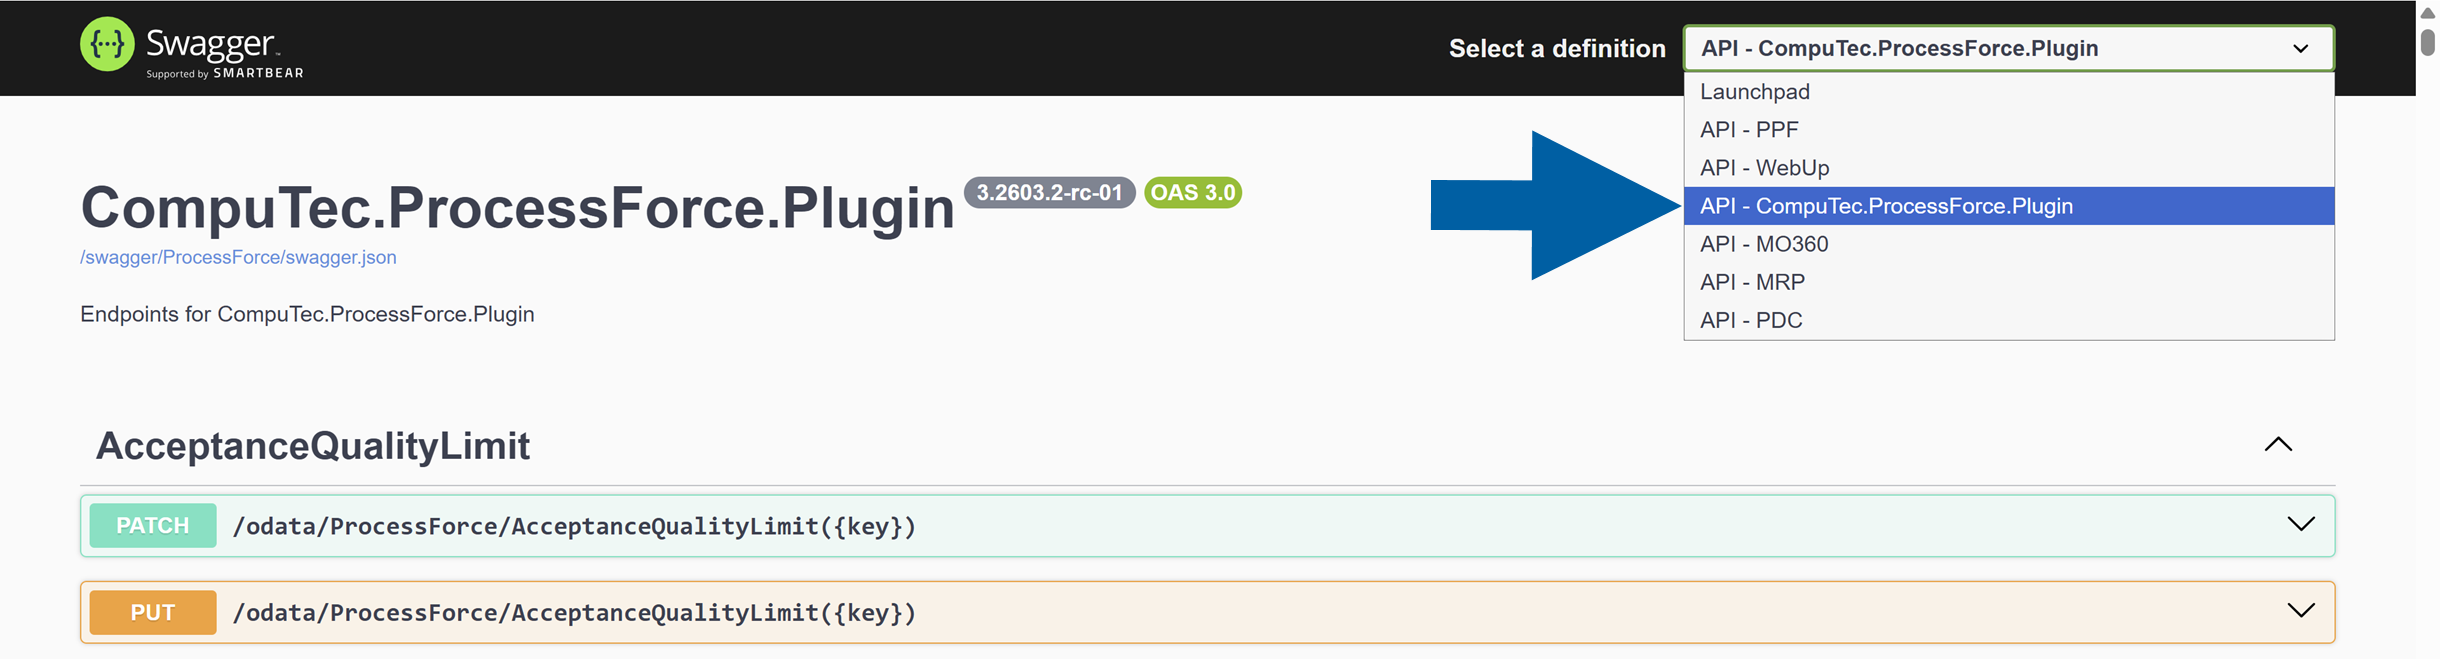
Access CompuTec REST/OData API documentation
To see all available CompuTec REST and OData API endpoints, follow these steps:
-
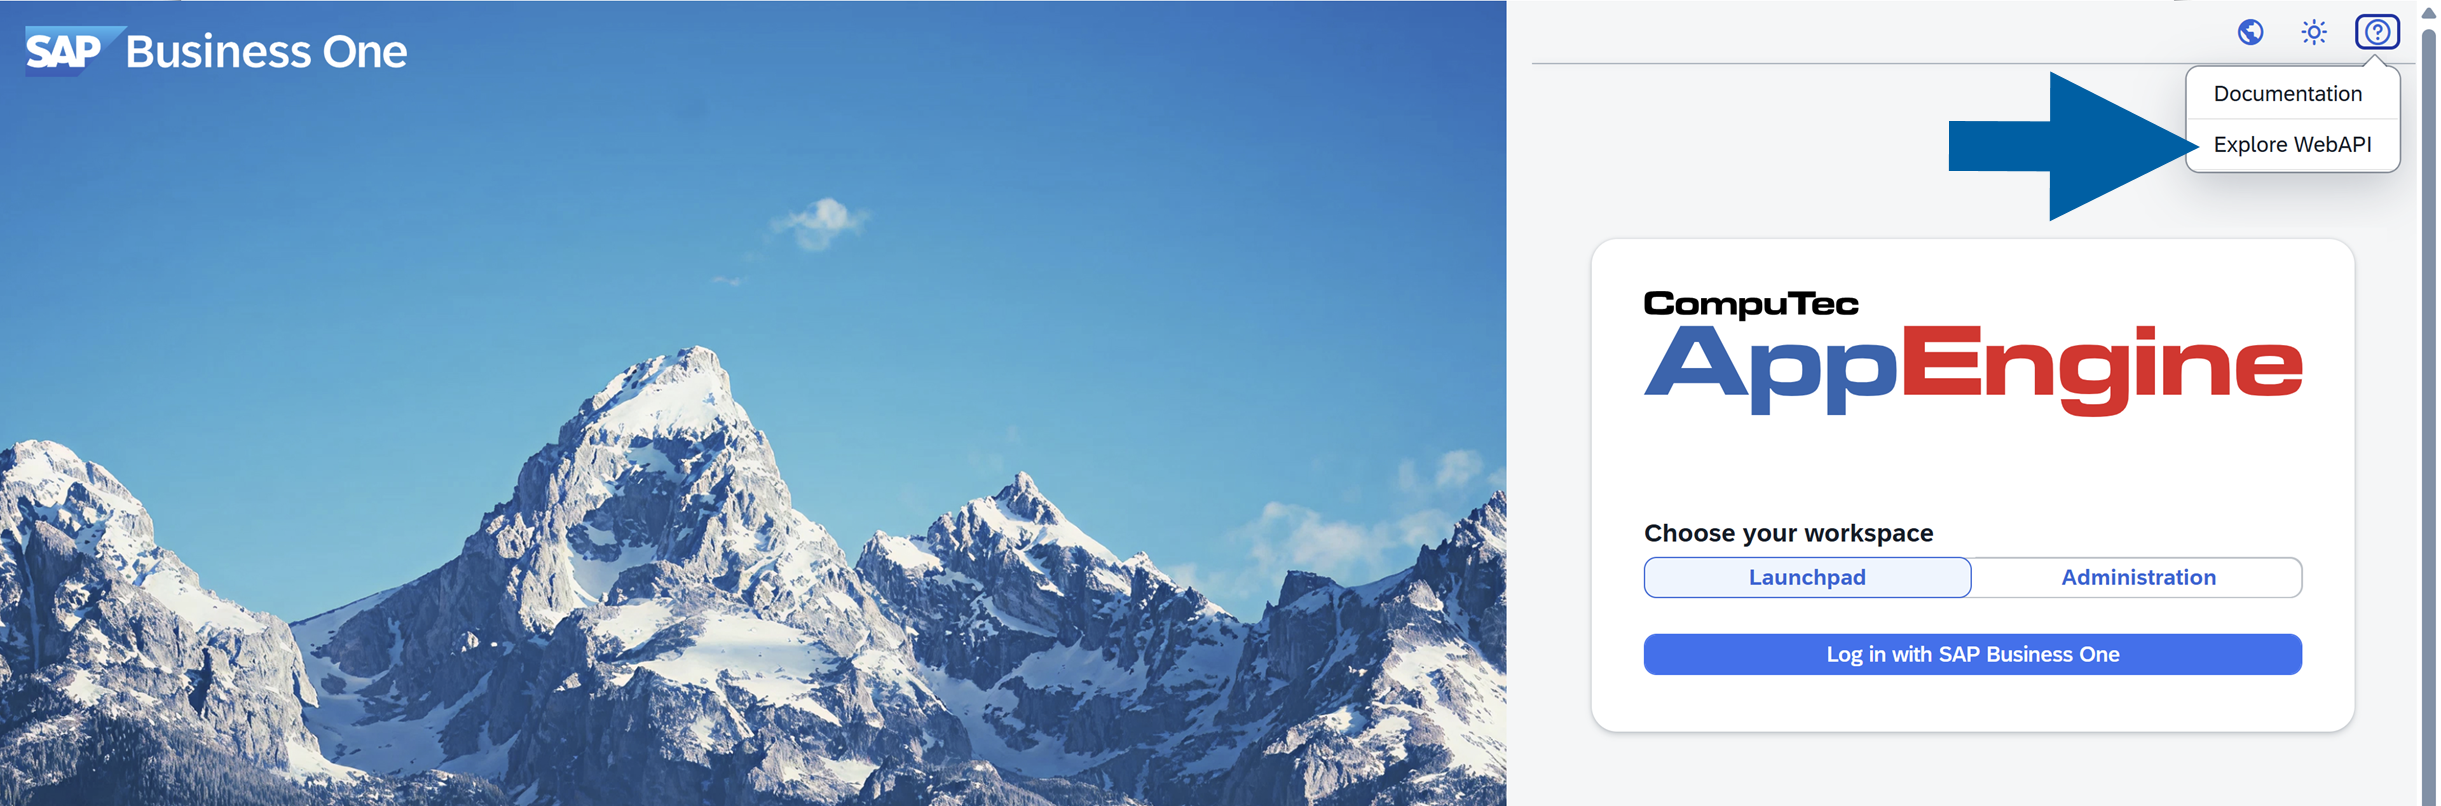
Open the CompuTec AppEngine login screen in your browser.
-
Click the help icon.
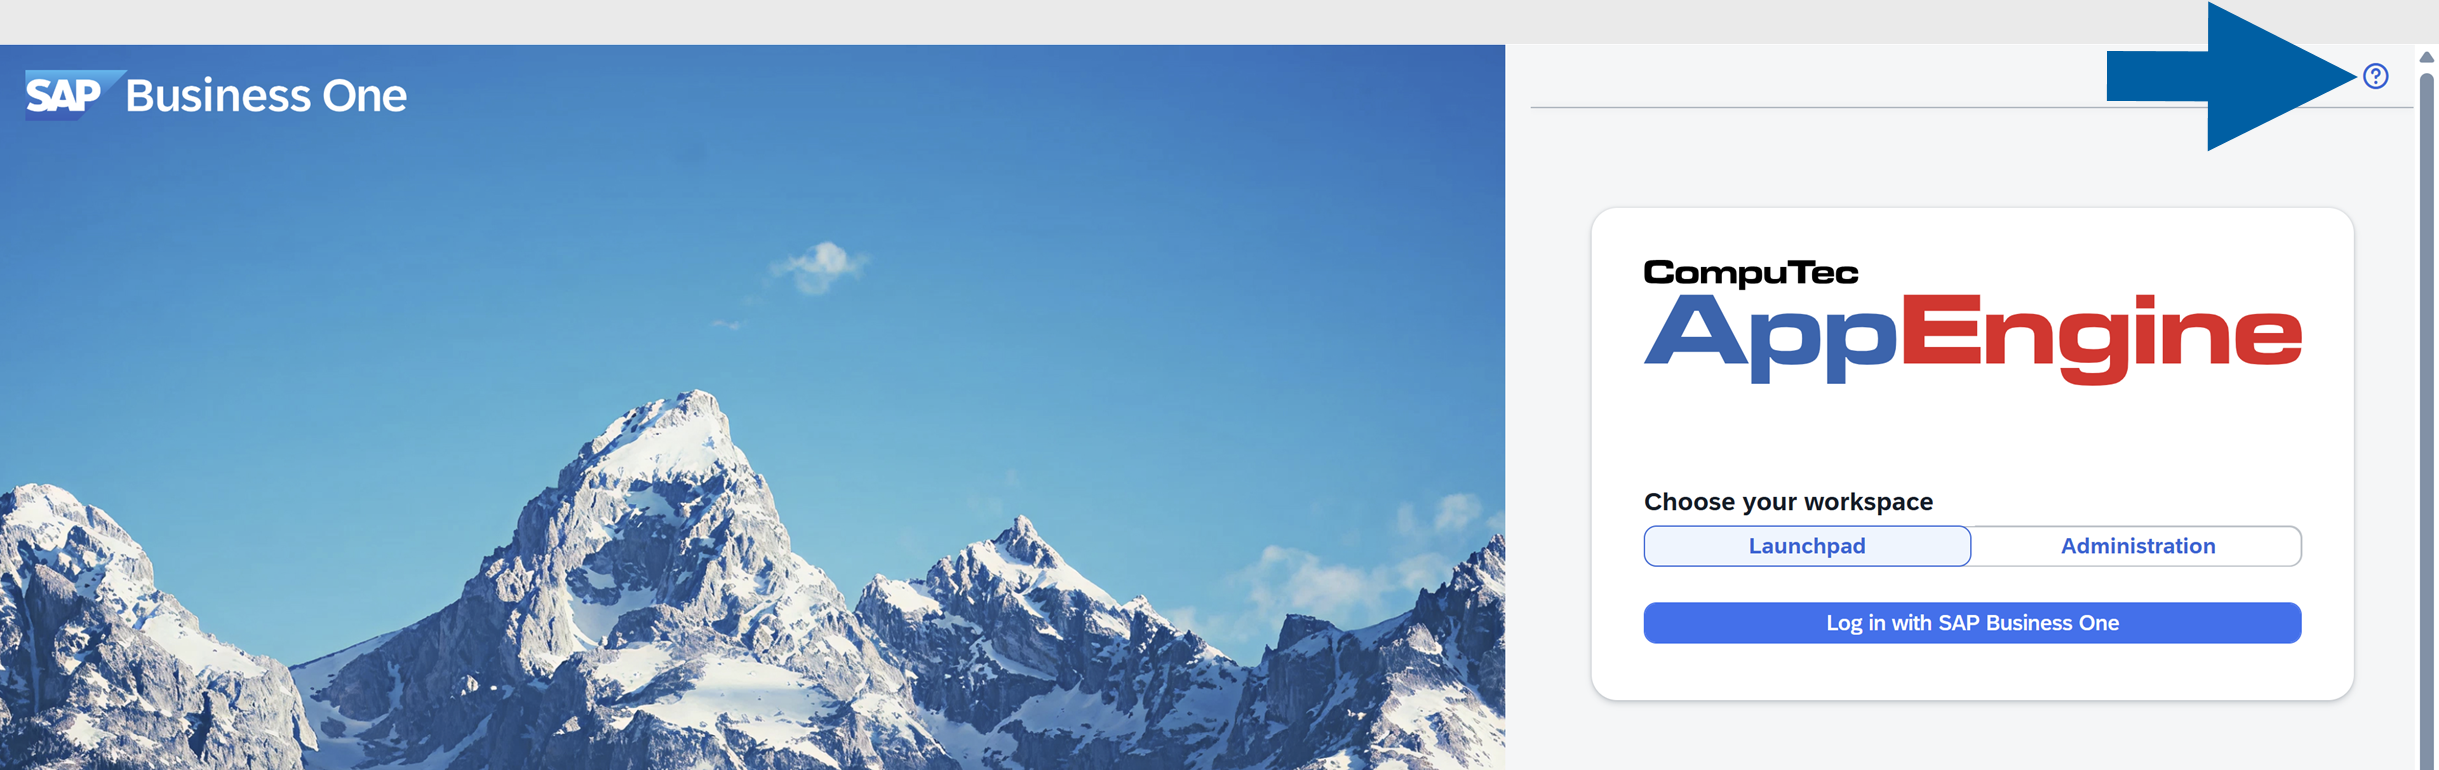
-
Click Explore WebAPI.
-
The Swagger site will open. Now you can browse all available REST and OData API endpoints.
noteThe list of available API endpoints depends on the plugins installed and activated in your CompuTec AppEngine instance.
Log in to use CompuTec API
There are two ways to access and use the API:
- Using an external integration tool (for example Postman or Visual Studio Code REST client)
- Using Swagger through the CompuTec AppEngine Launchpad
Log in using Postman or another integration tool
This method is typically used when building system integrations, testing API calls, or developing custom automations.
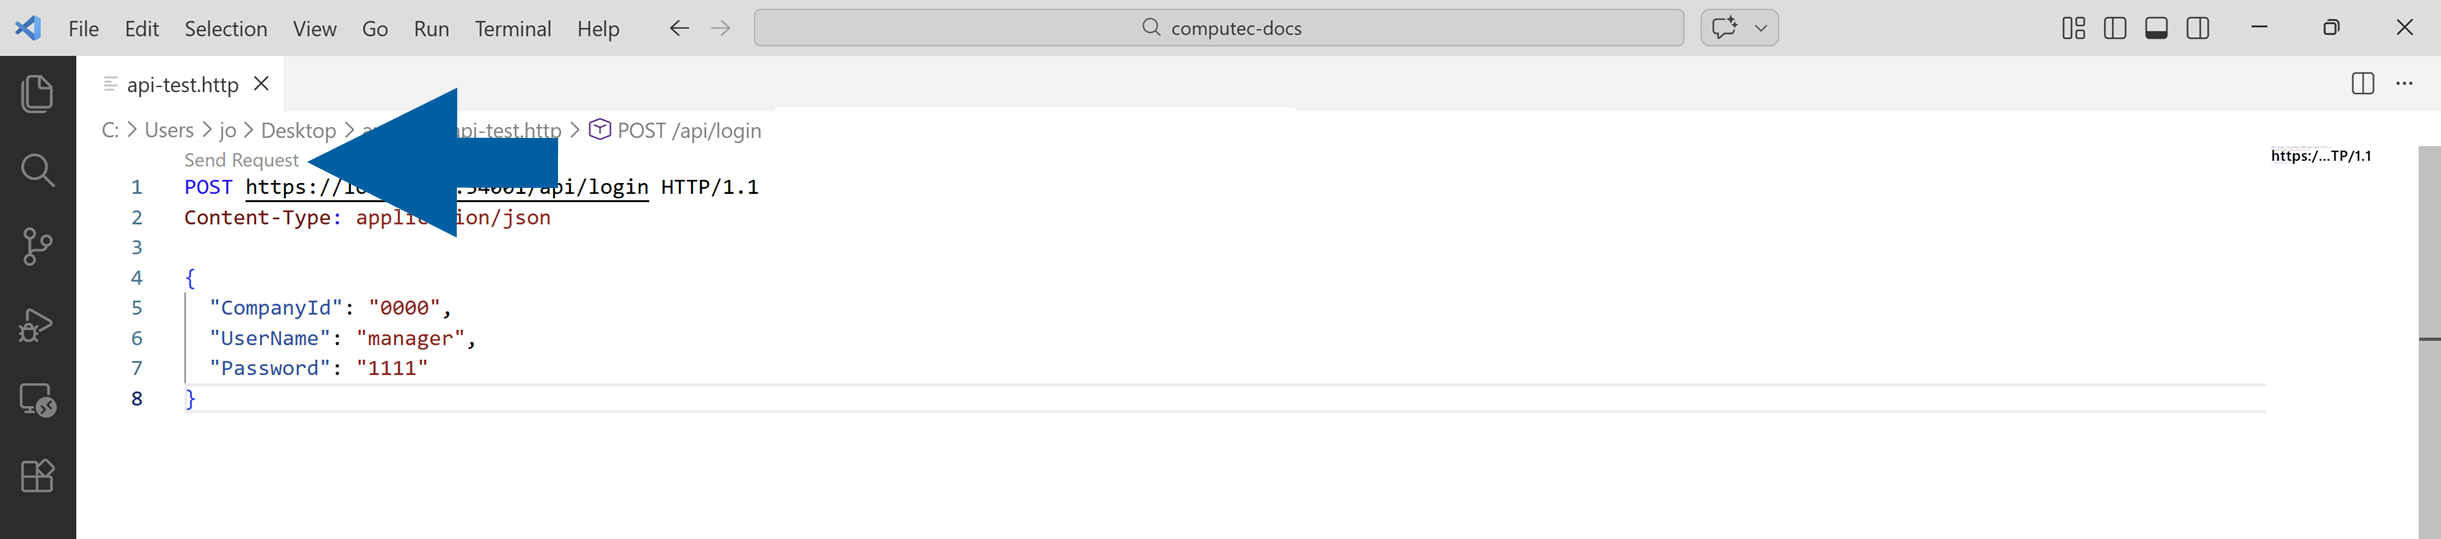
To log in using an integration tool, follow these steps:
- Open Postman, Visual Studio Code integration or any other external tool.
- Create a new request or .rest file.
- In the file, paste the login request.
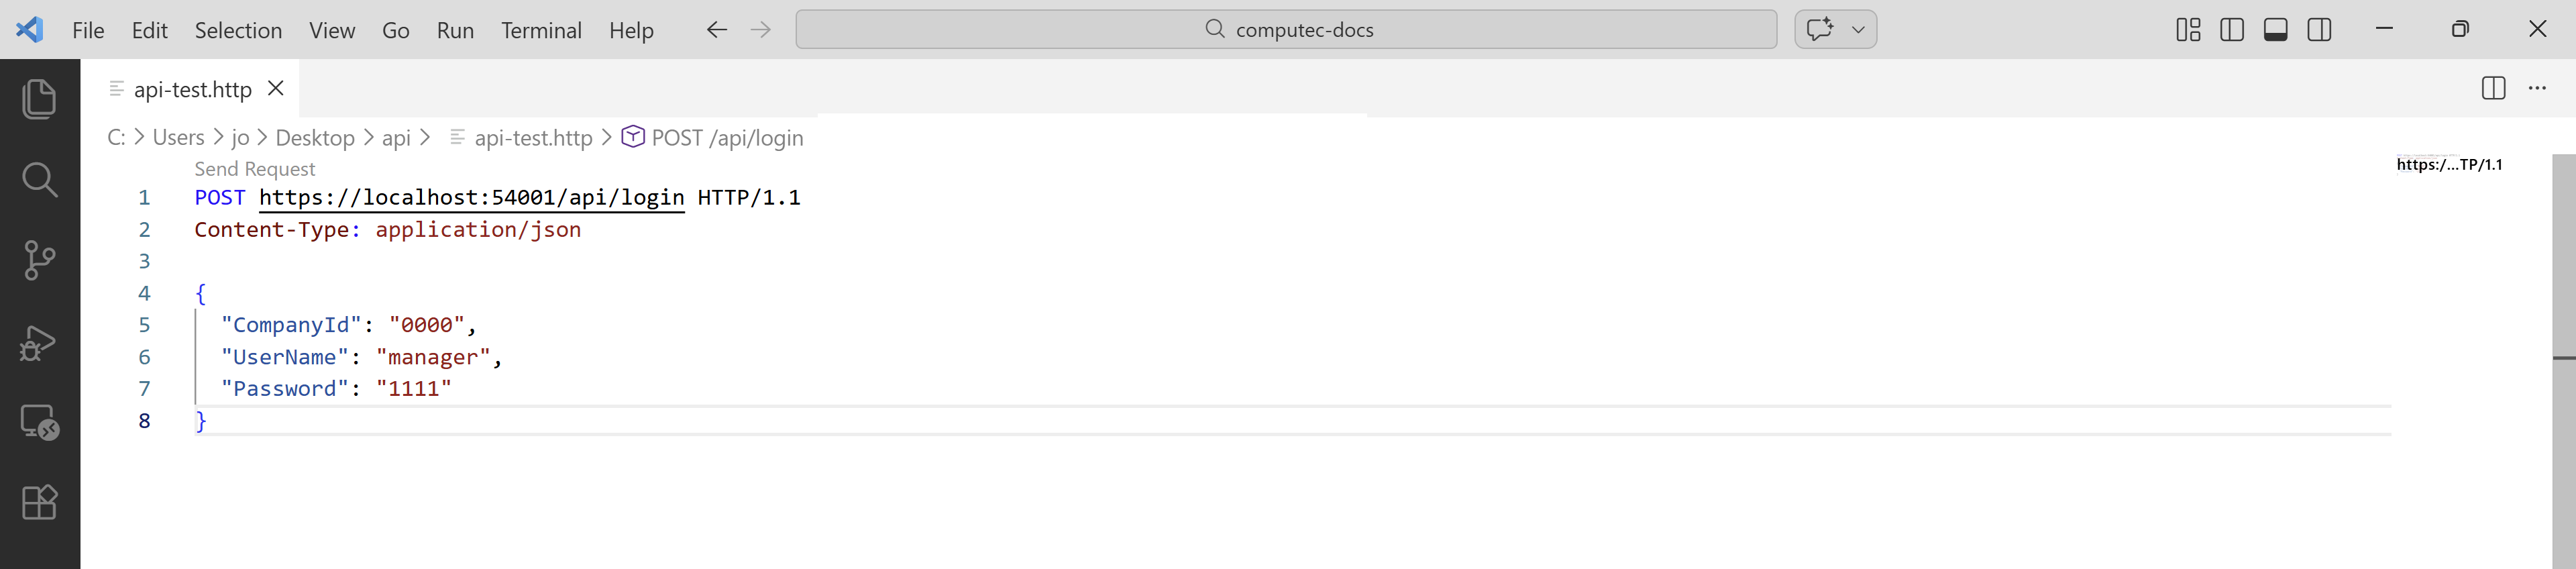
Example of the login request:
POST https://localhost:54001/api/login HTTP/1.1
Content-Type: application/json

{
  "CompanyId": "0000",
  "UserName": "manager",
  "Password": "1111"
}
You have to replace the sample values with credentials from your own environment.
-
The API address (for example
https://localhost:54001): depends on where your CompuTec AppEngine is installed and where you are connecting from. If CompuTec AppEngine is installed on another server, replacelocalhostwith the appropriate server name or IP address. -
CompanyId: the ID of the company configured in your CompuTec AppEngine instance
-
UserName: your SAP Business One user name
-
Password: the password for that SAP Business One user
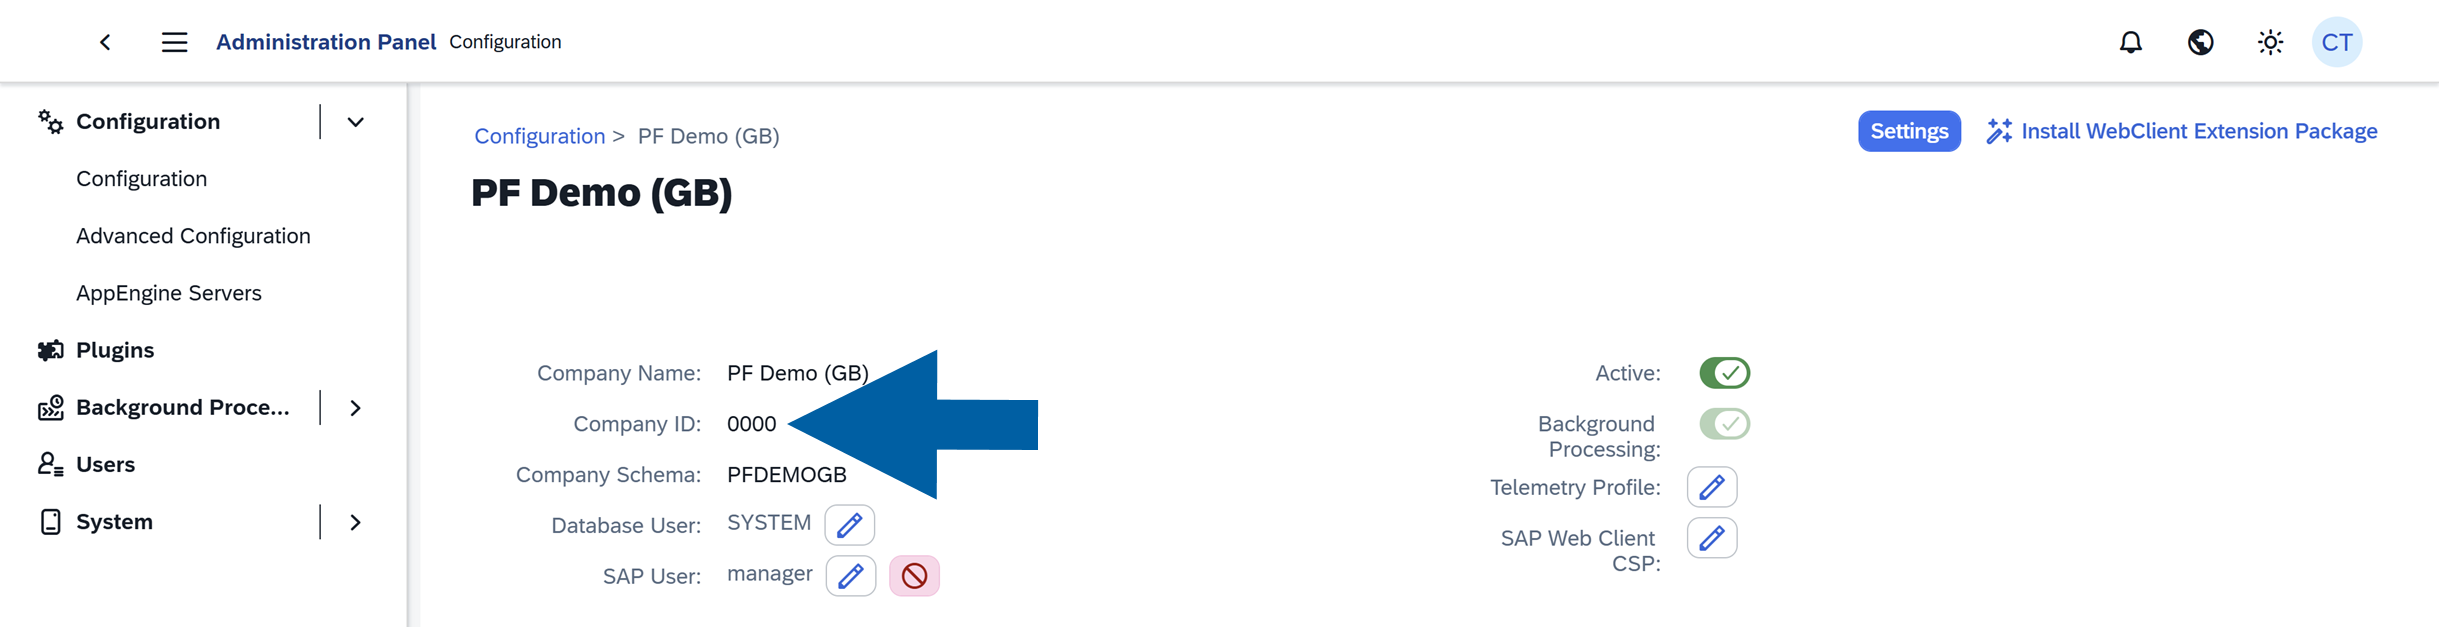
To find your Company ID:
-
Log in the CompuTec AppEngine Administration Panel.
-
Go to Configuration.
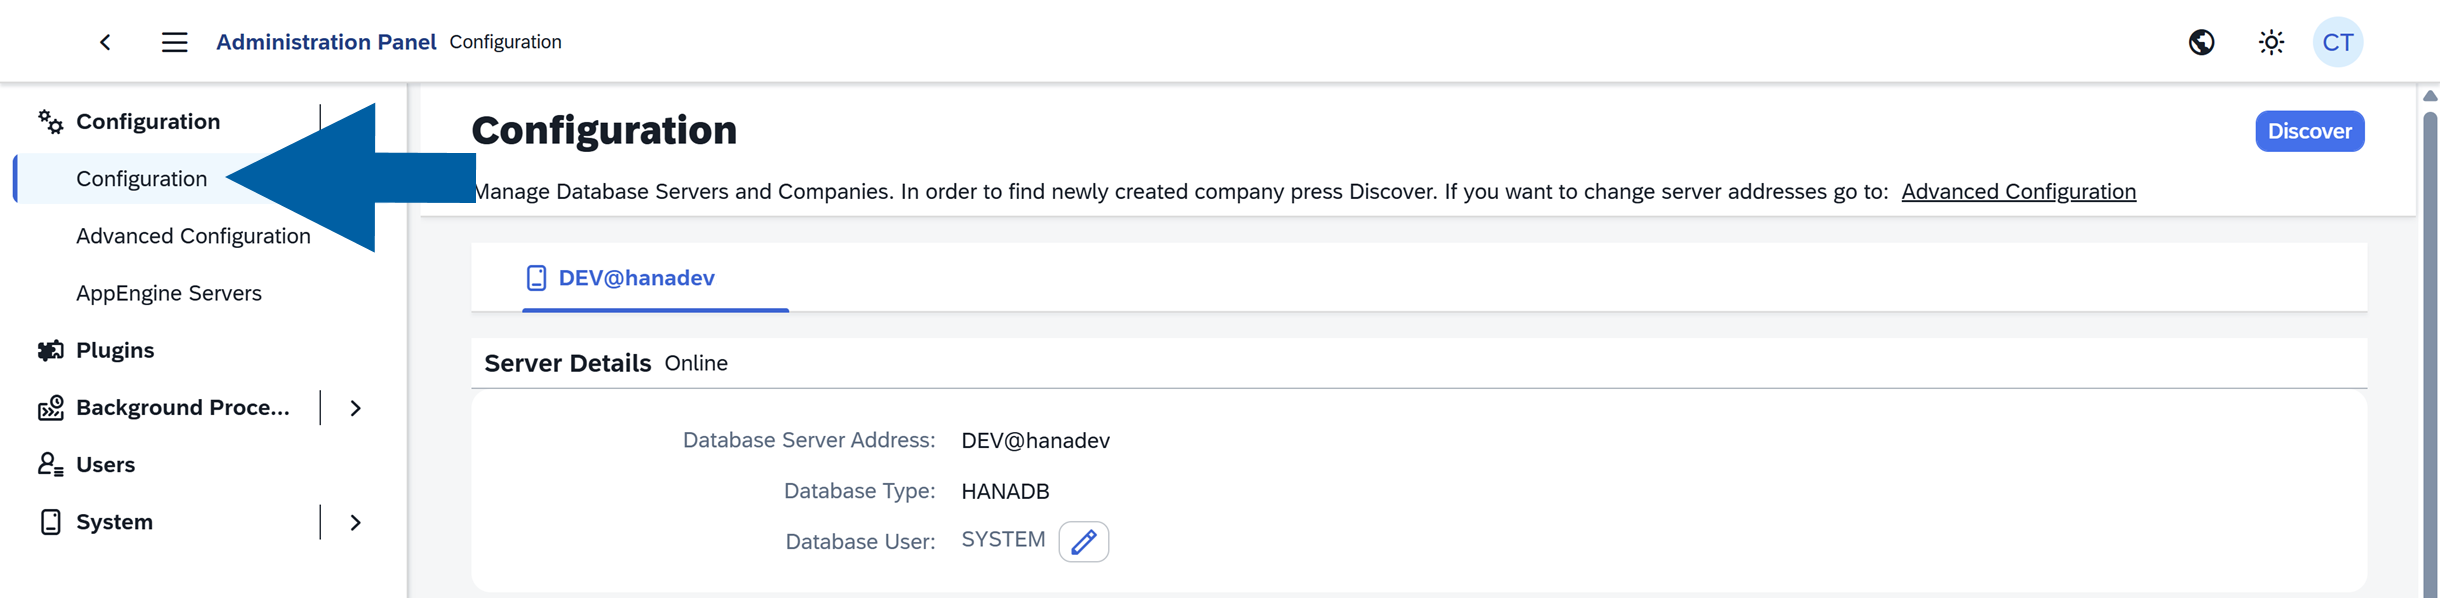
-
Select your company.
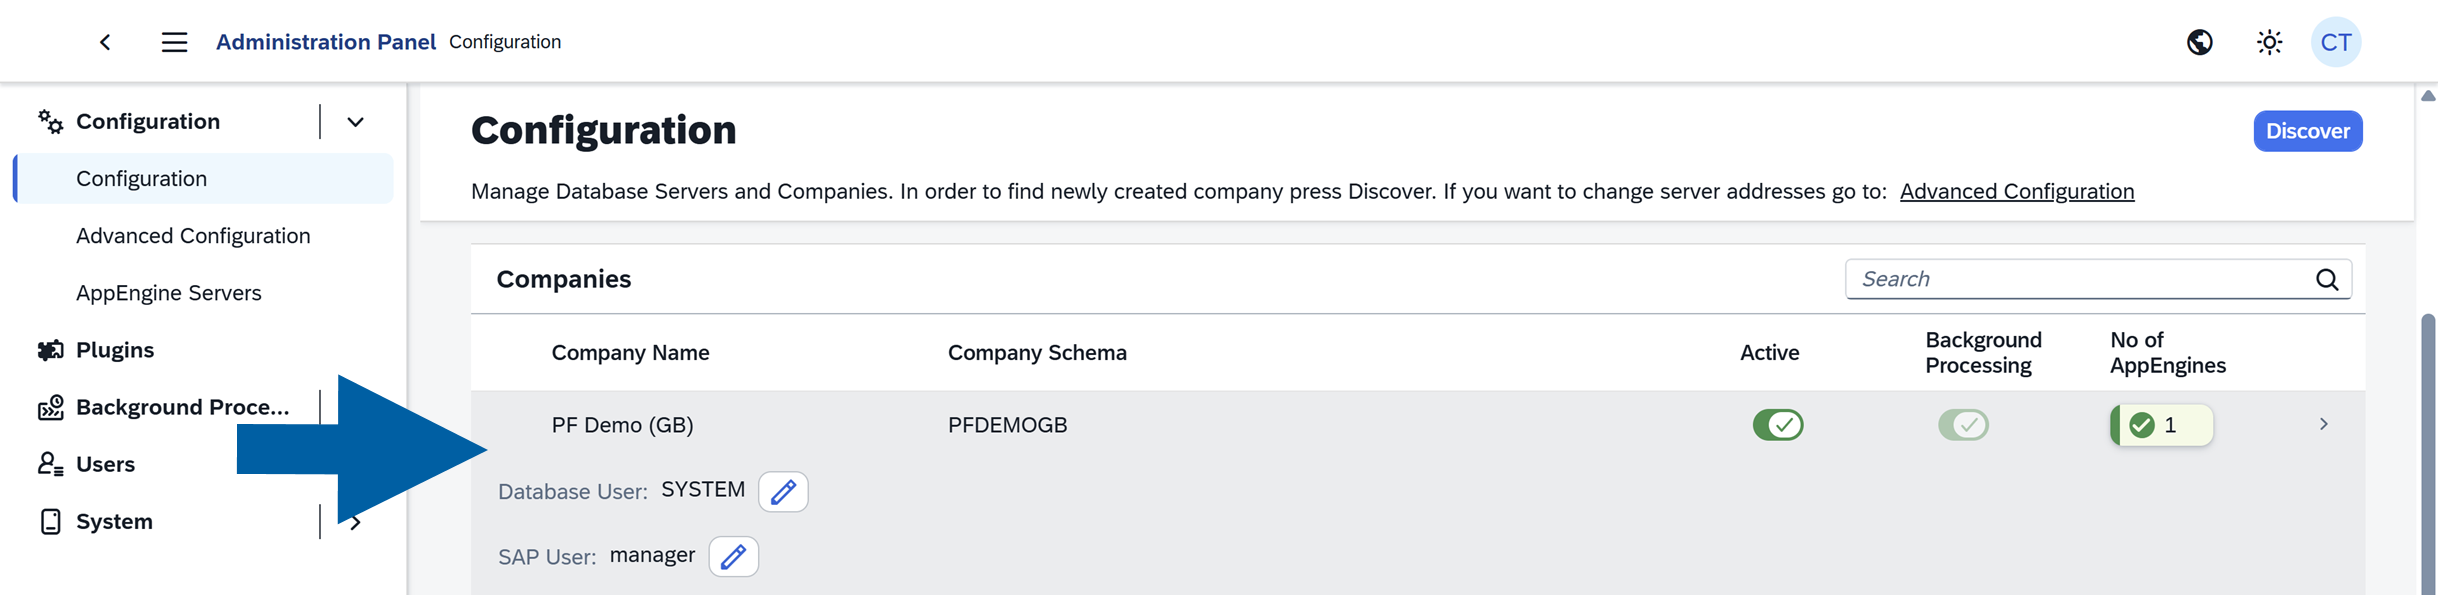
-
You can see the Company ID under the Company Name.
-
Click Send Request.
-
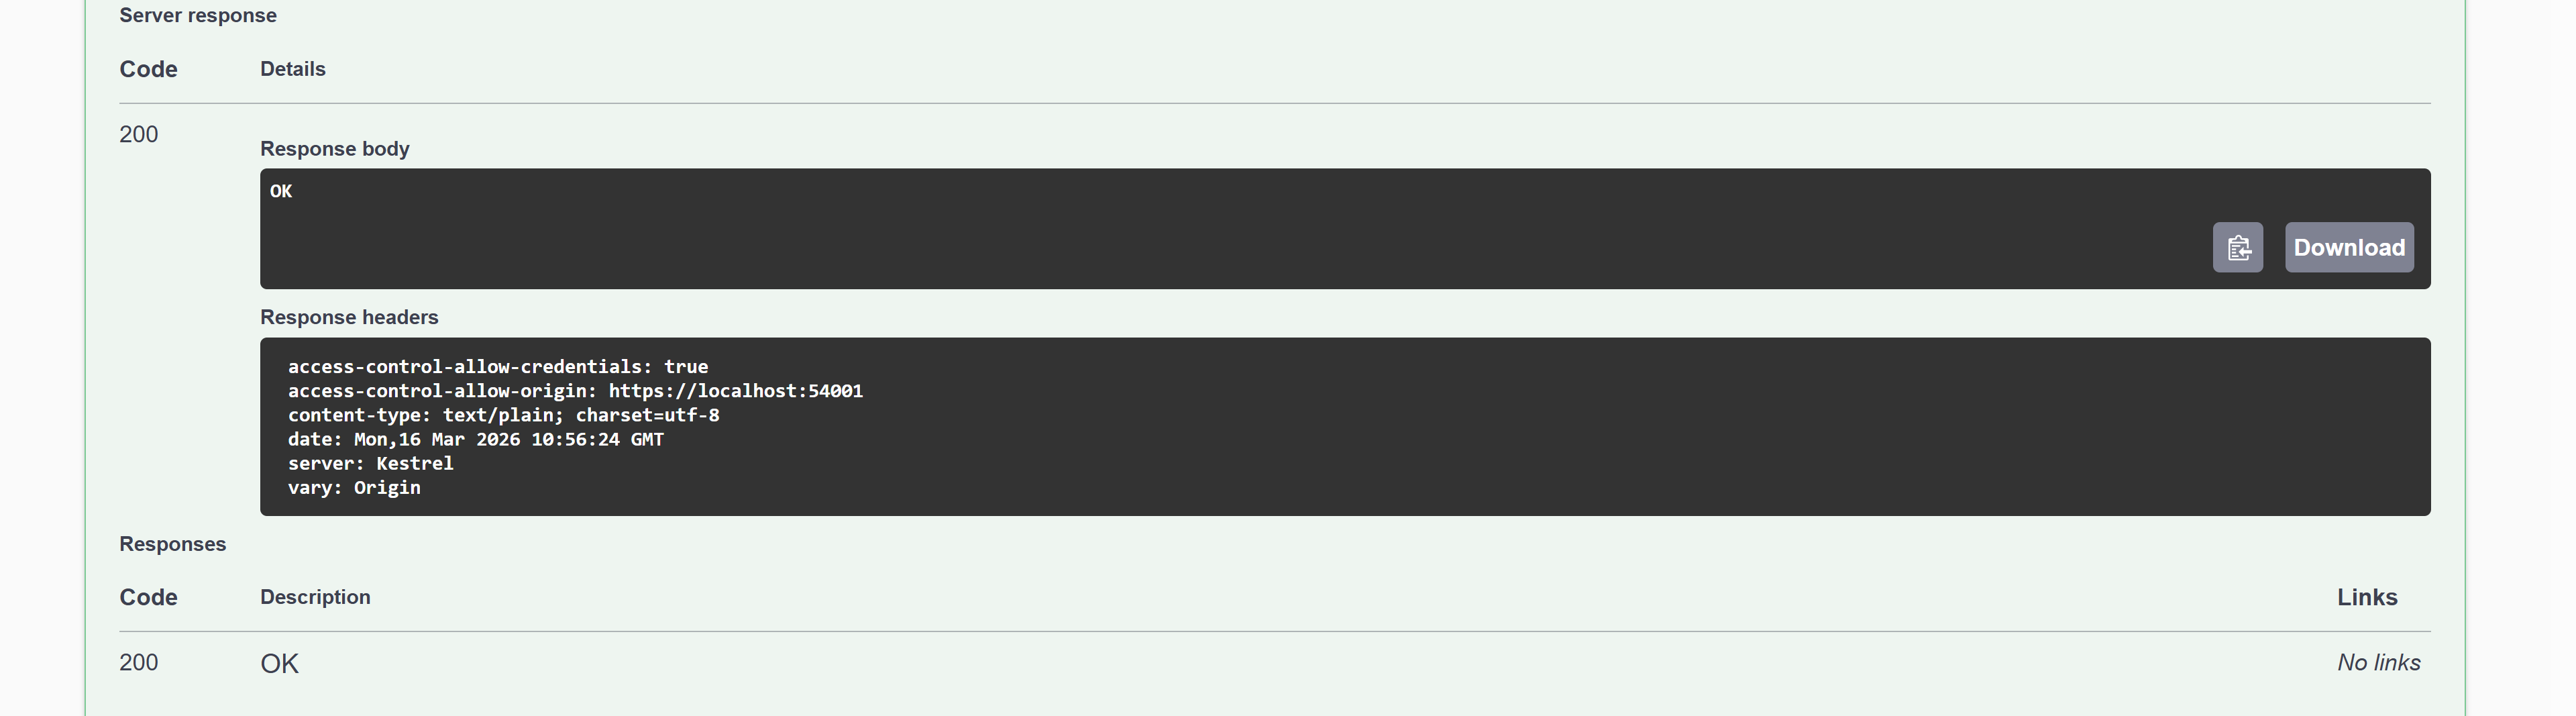
If the login is successful, the API returns an OK response.
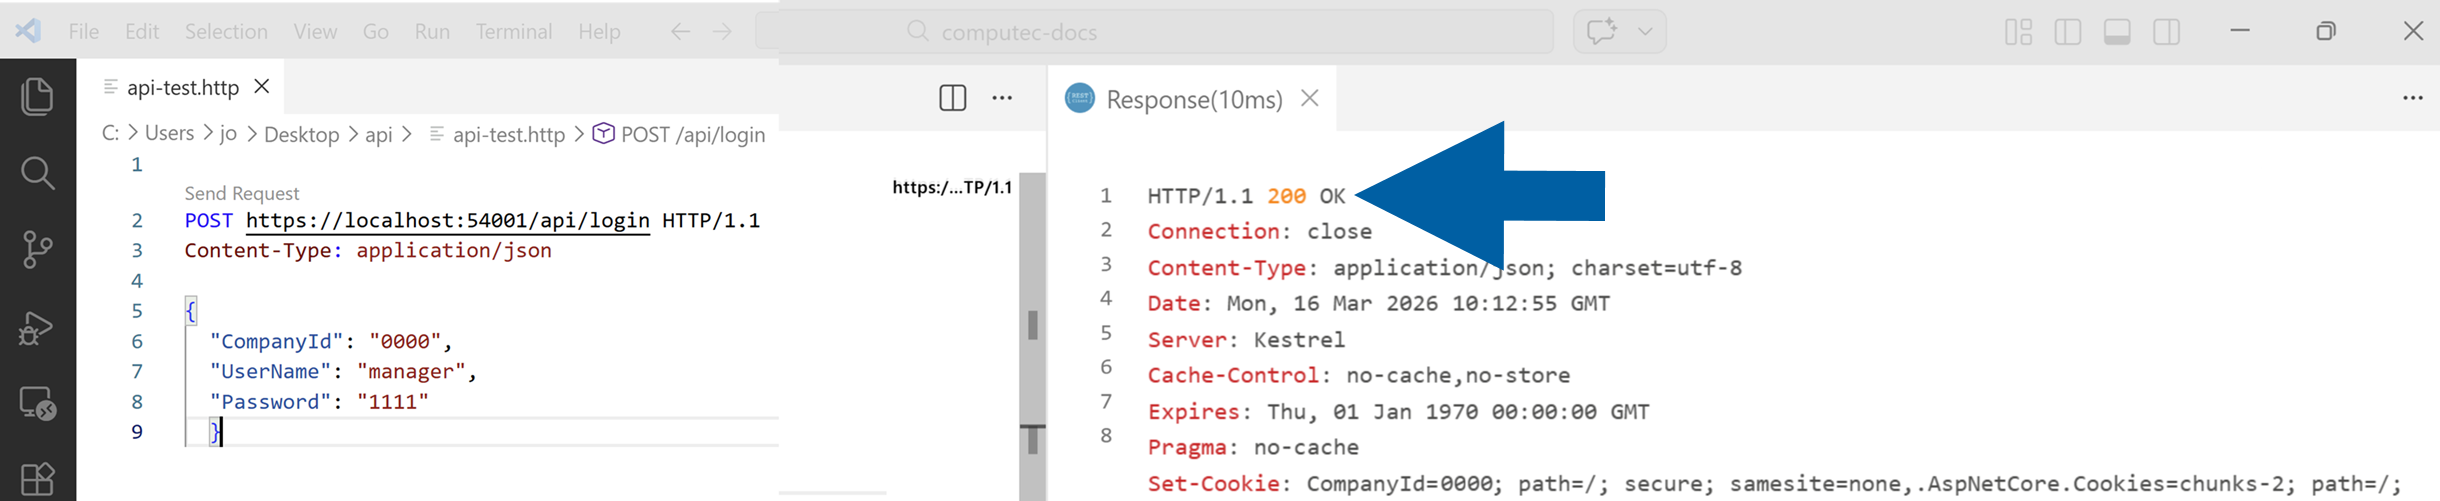
-
Done! The API session is authenticated, and you can begin sending further requests.
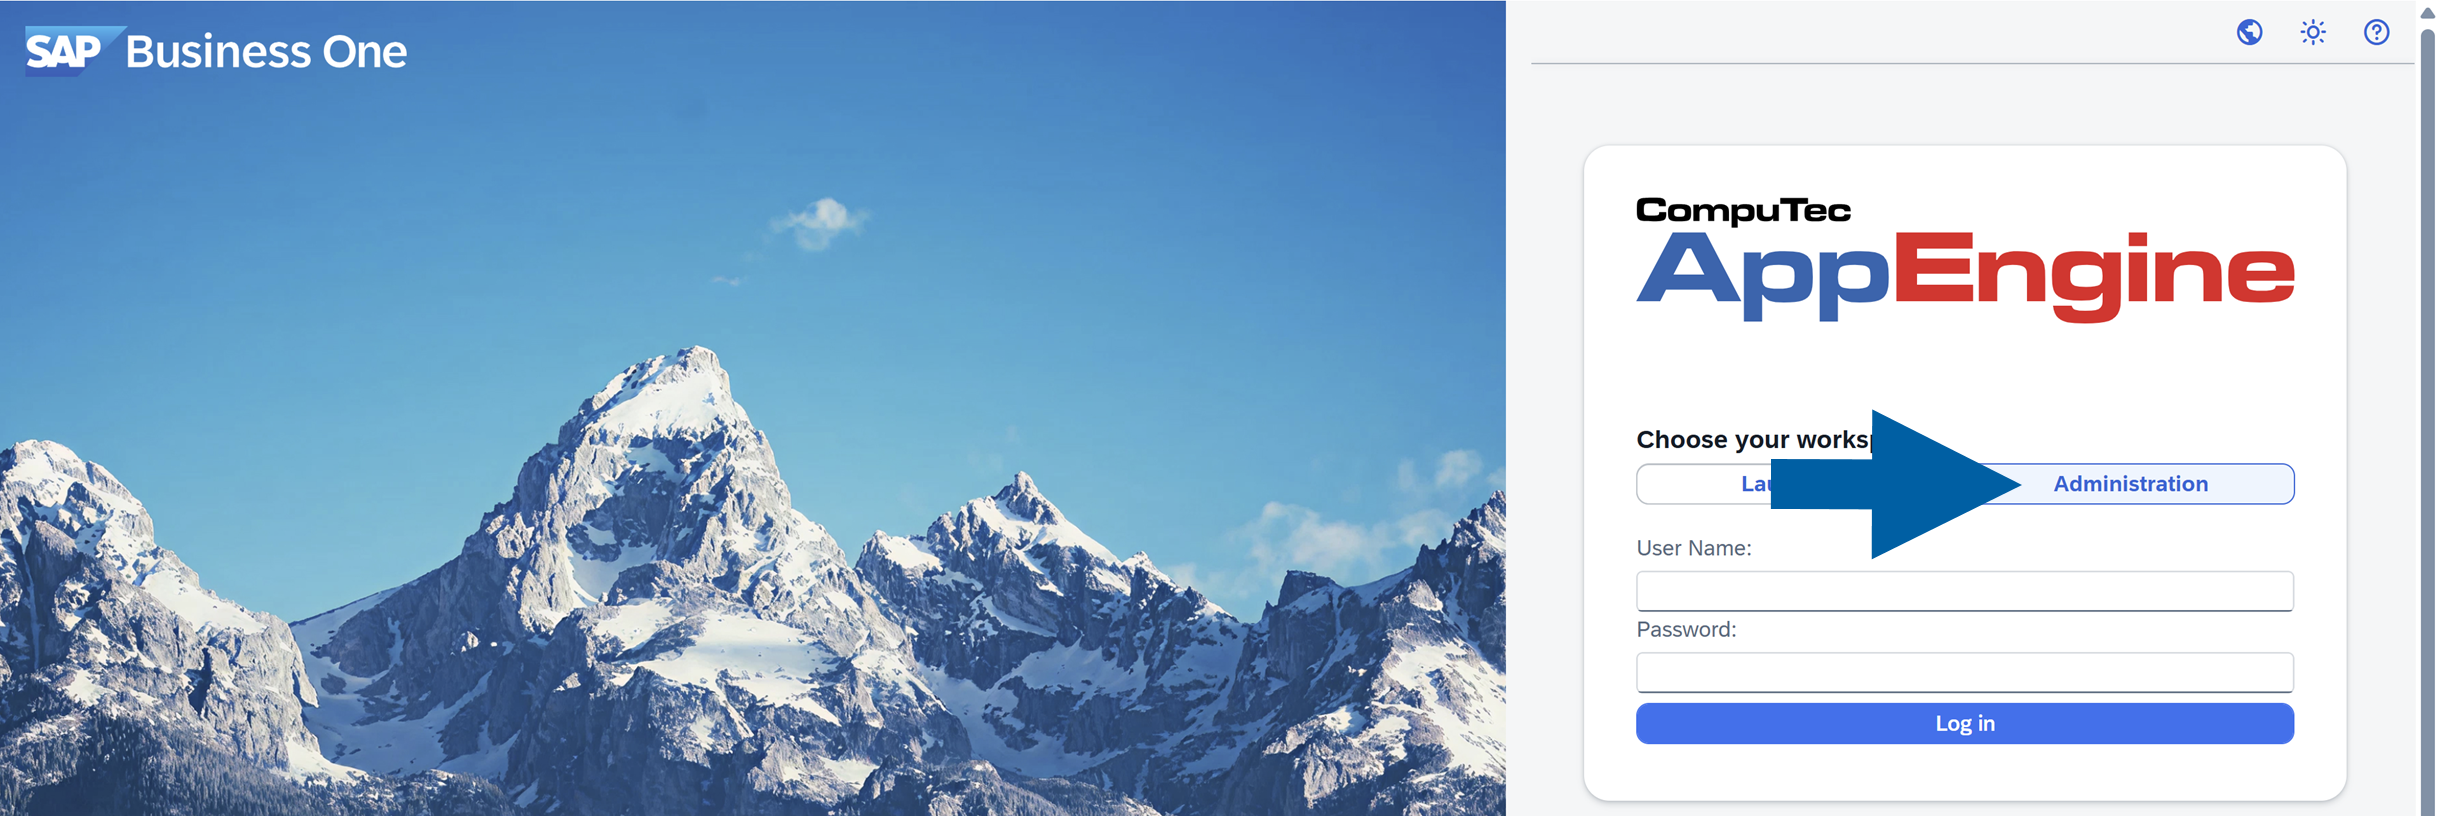
Log in using the CompuTec AppEngine Launchpad and Swagger
This method allows you to test API calls directly in the browser without using external tools such as Postman or Visual Studio Code.
To access the API through Swagger, follow these steps:
-
Open CompuTec AppEngine Launchpad and log in.
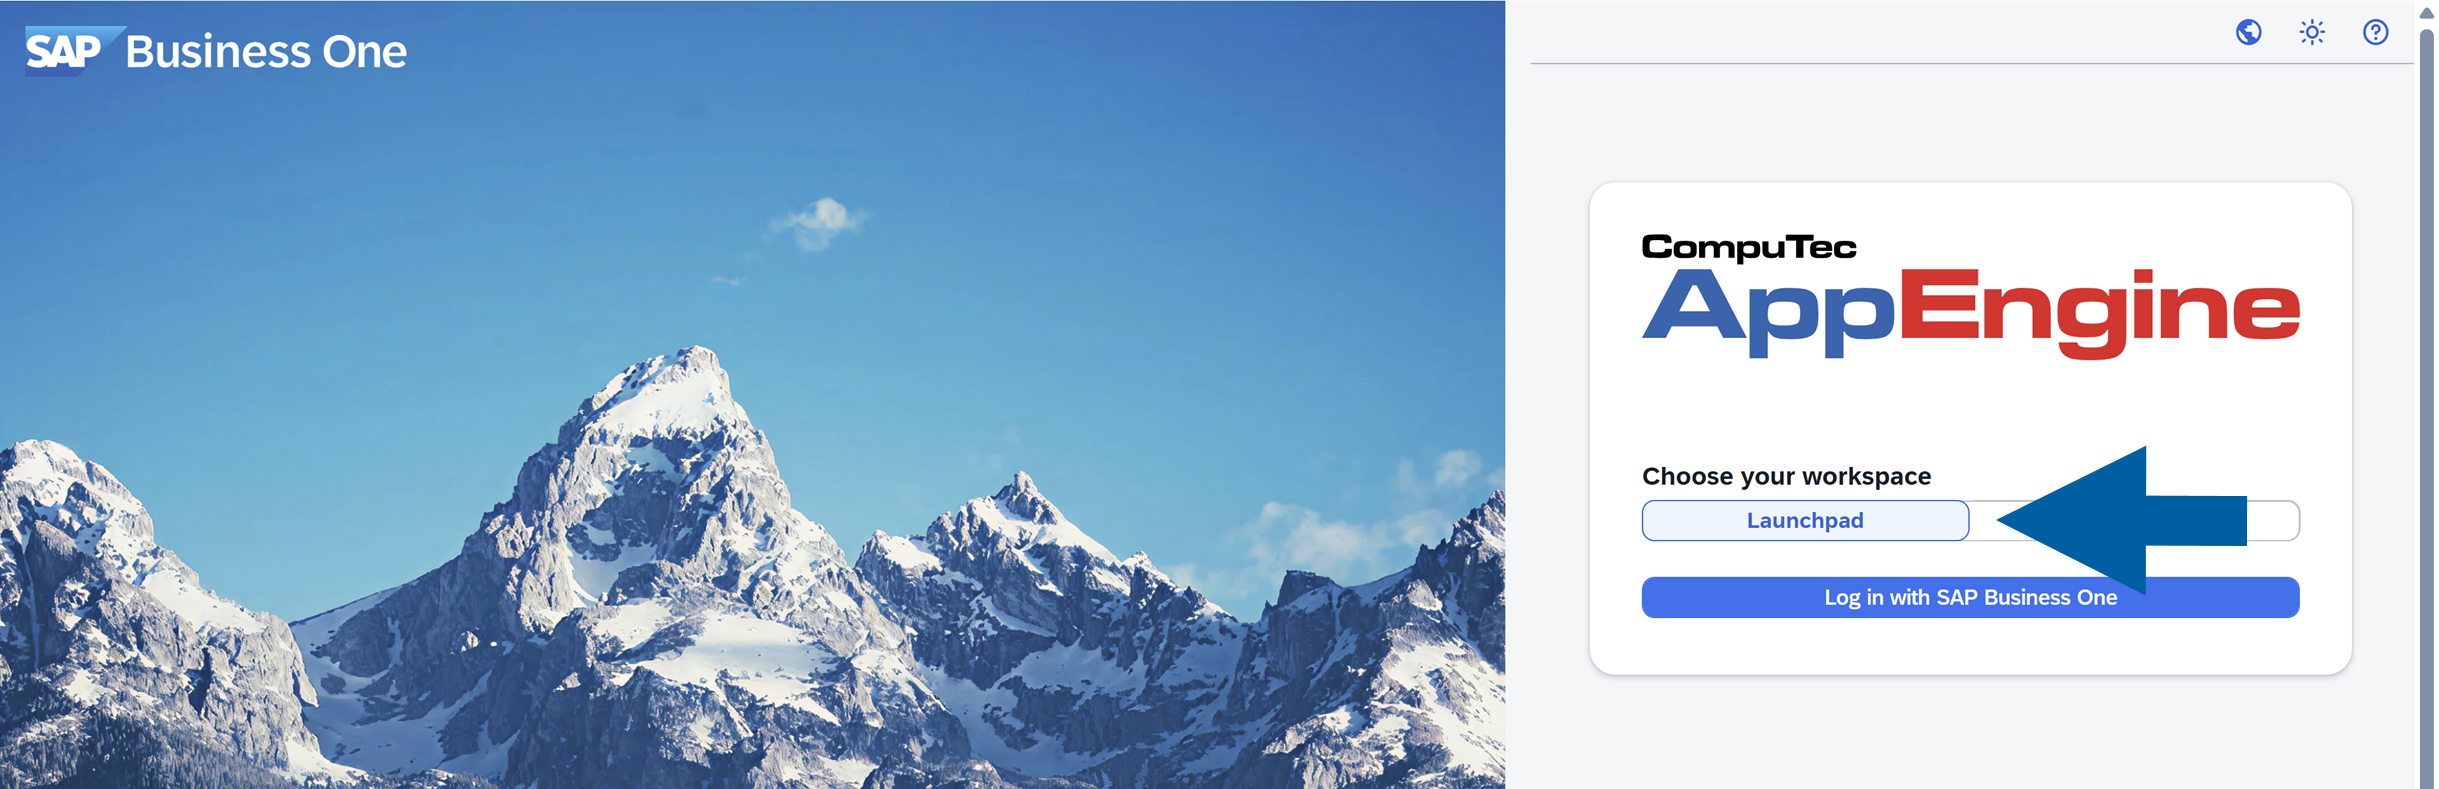
-
Select the company you want to work with and keep the session active.
-
Open the Swagger documentation in another browser window: use this link or access it using the help icon on the login screen.
-
Click Explore WebAPI.
-
Done! You’re now logged in, and you can immediately start testing API endpoints.
noteIf Swagger is opened without an active Launchpad session (for example by opening the Swagger URL directly, using another browser, or an incognito session), you must authenticate using the
/api/loginAPI endpoint.To log in:
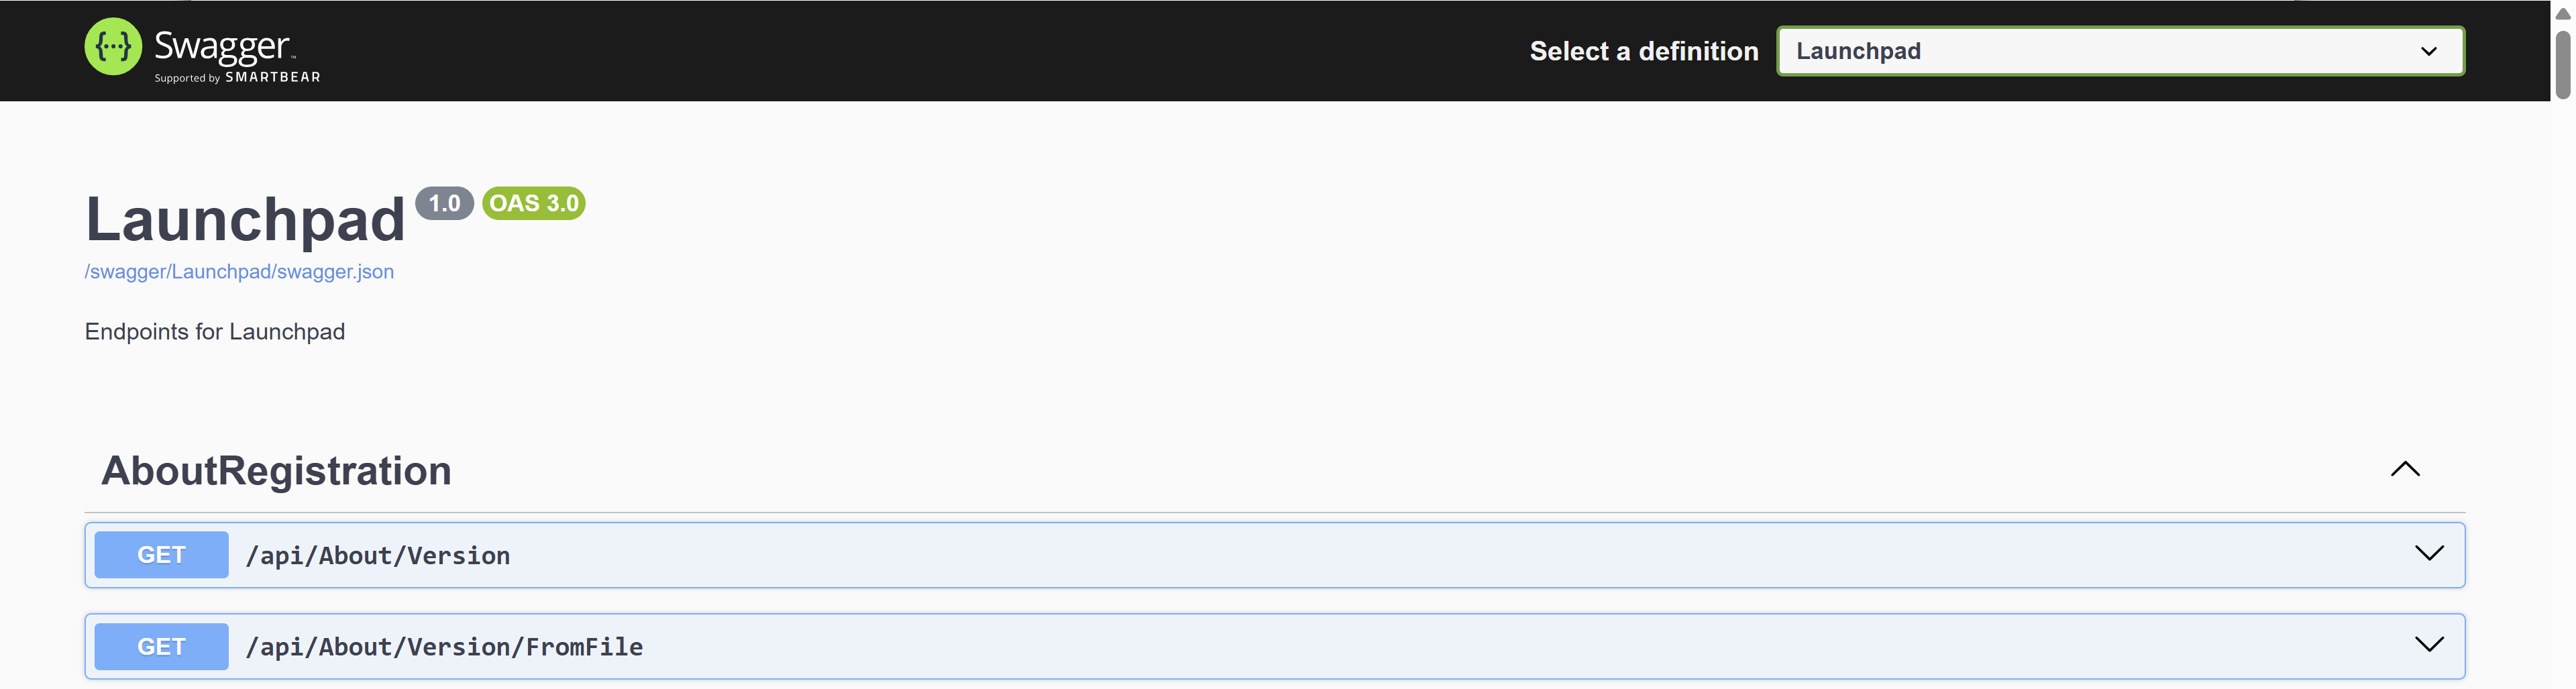
-
Open the Launchpad definition in Swagger.

-
Scroll to the Login section.
-
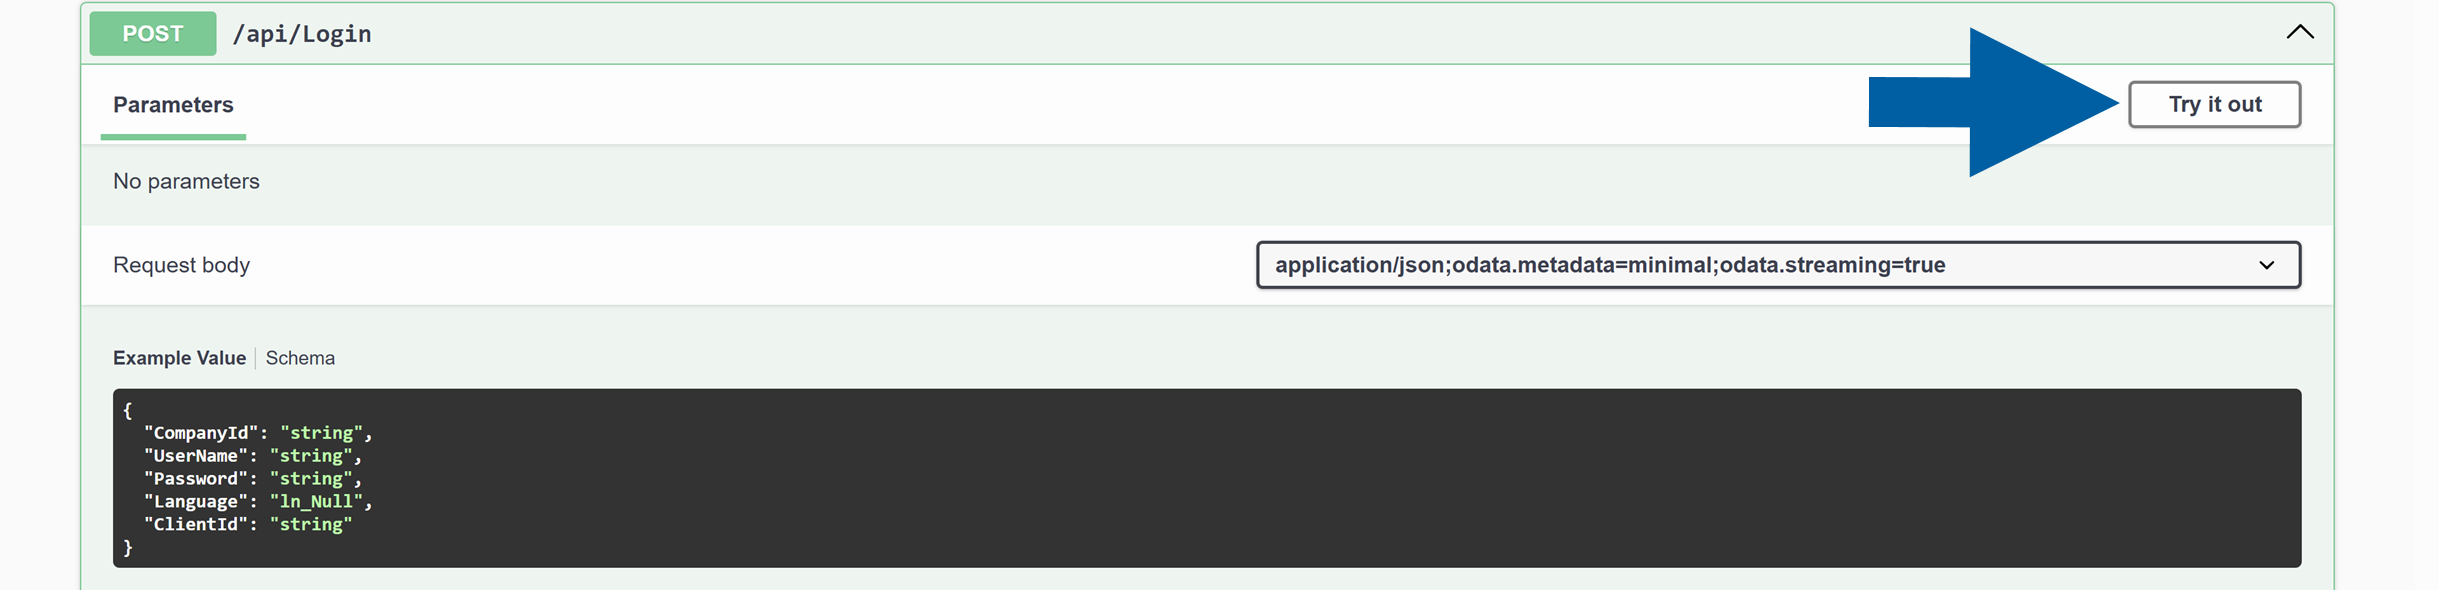
Select the /api/Login endpoint.

-
Click Try it out.
-
In Parameters, change the example to your own credentials:
-
CompanyId: the ID of the company configured in your CompuTec AppEngine instance.
You can find it after logging in to CompuTec AppEngine Administration Panel > Configuration. After you select your company, you’ll find the Company ID under the Company Name. -
UserName: your SAP Business One user name
-
Password: the password for that SAP Business One user
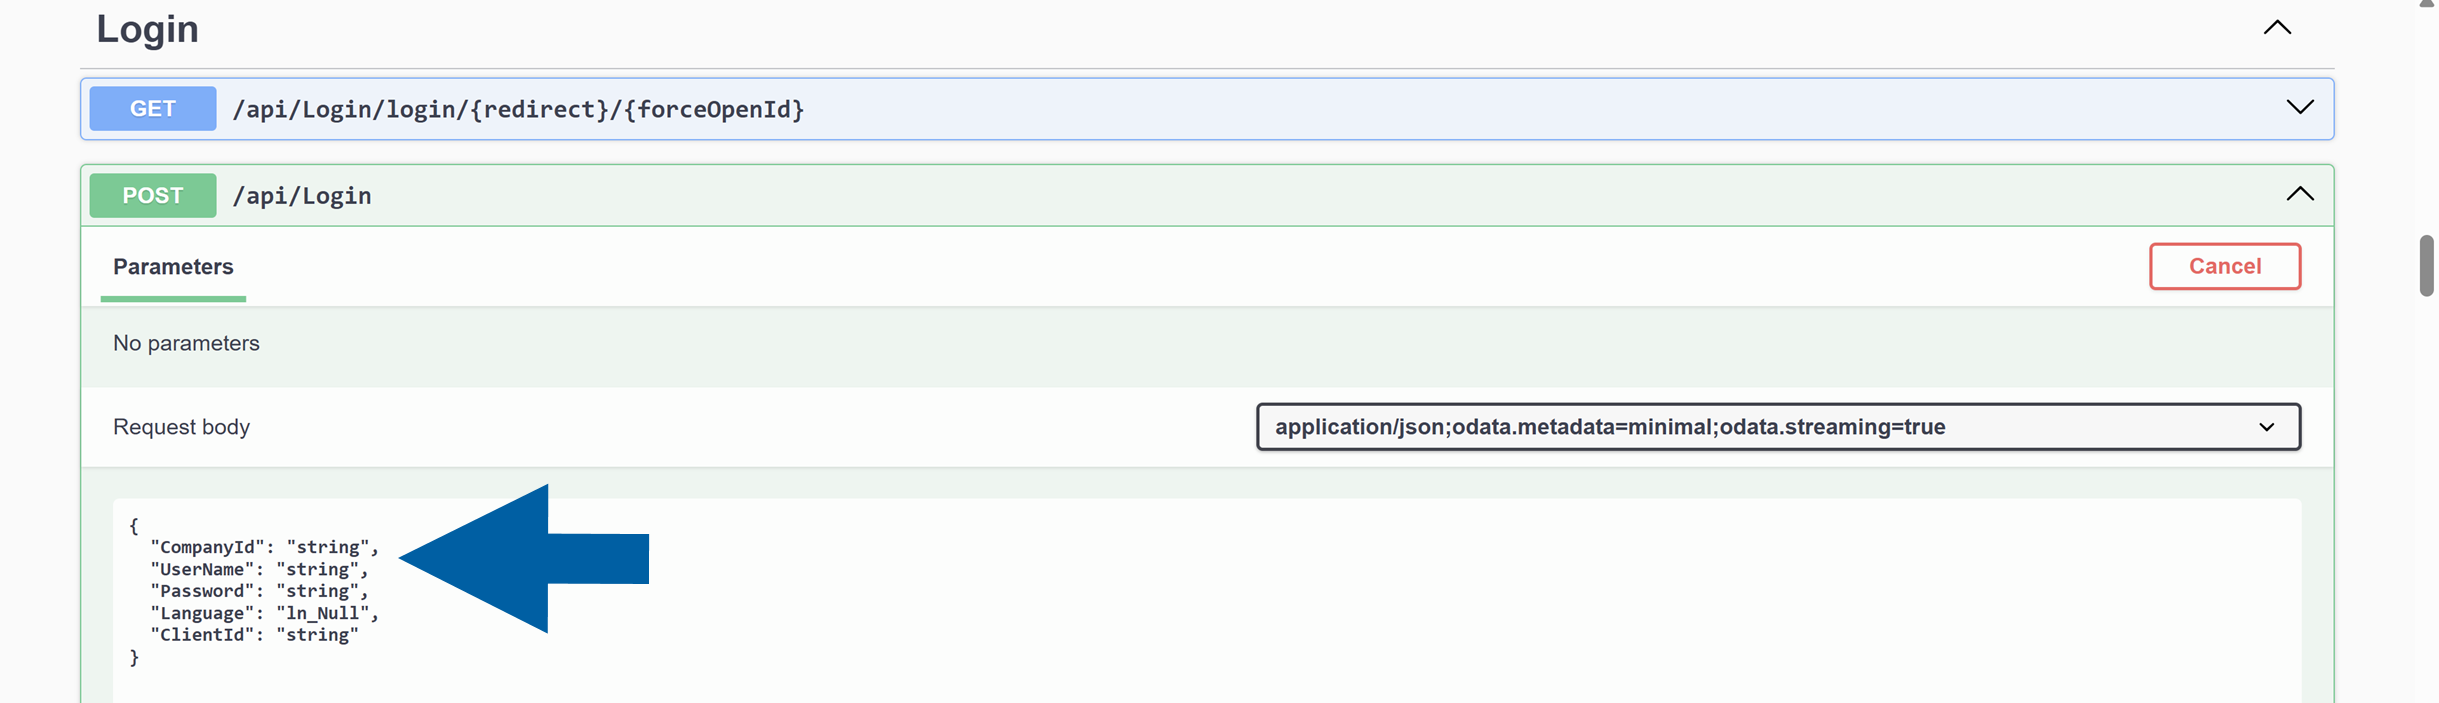
-
-
Click Execute.

-
If the login is successful, the API returns an OK response. This means the API session is authenticated and you can begin sending further requests.
-
Use cases
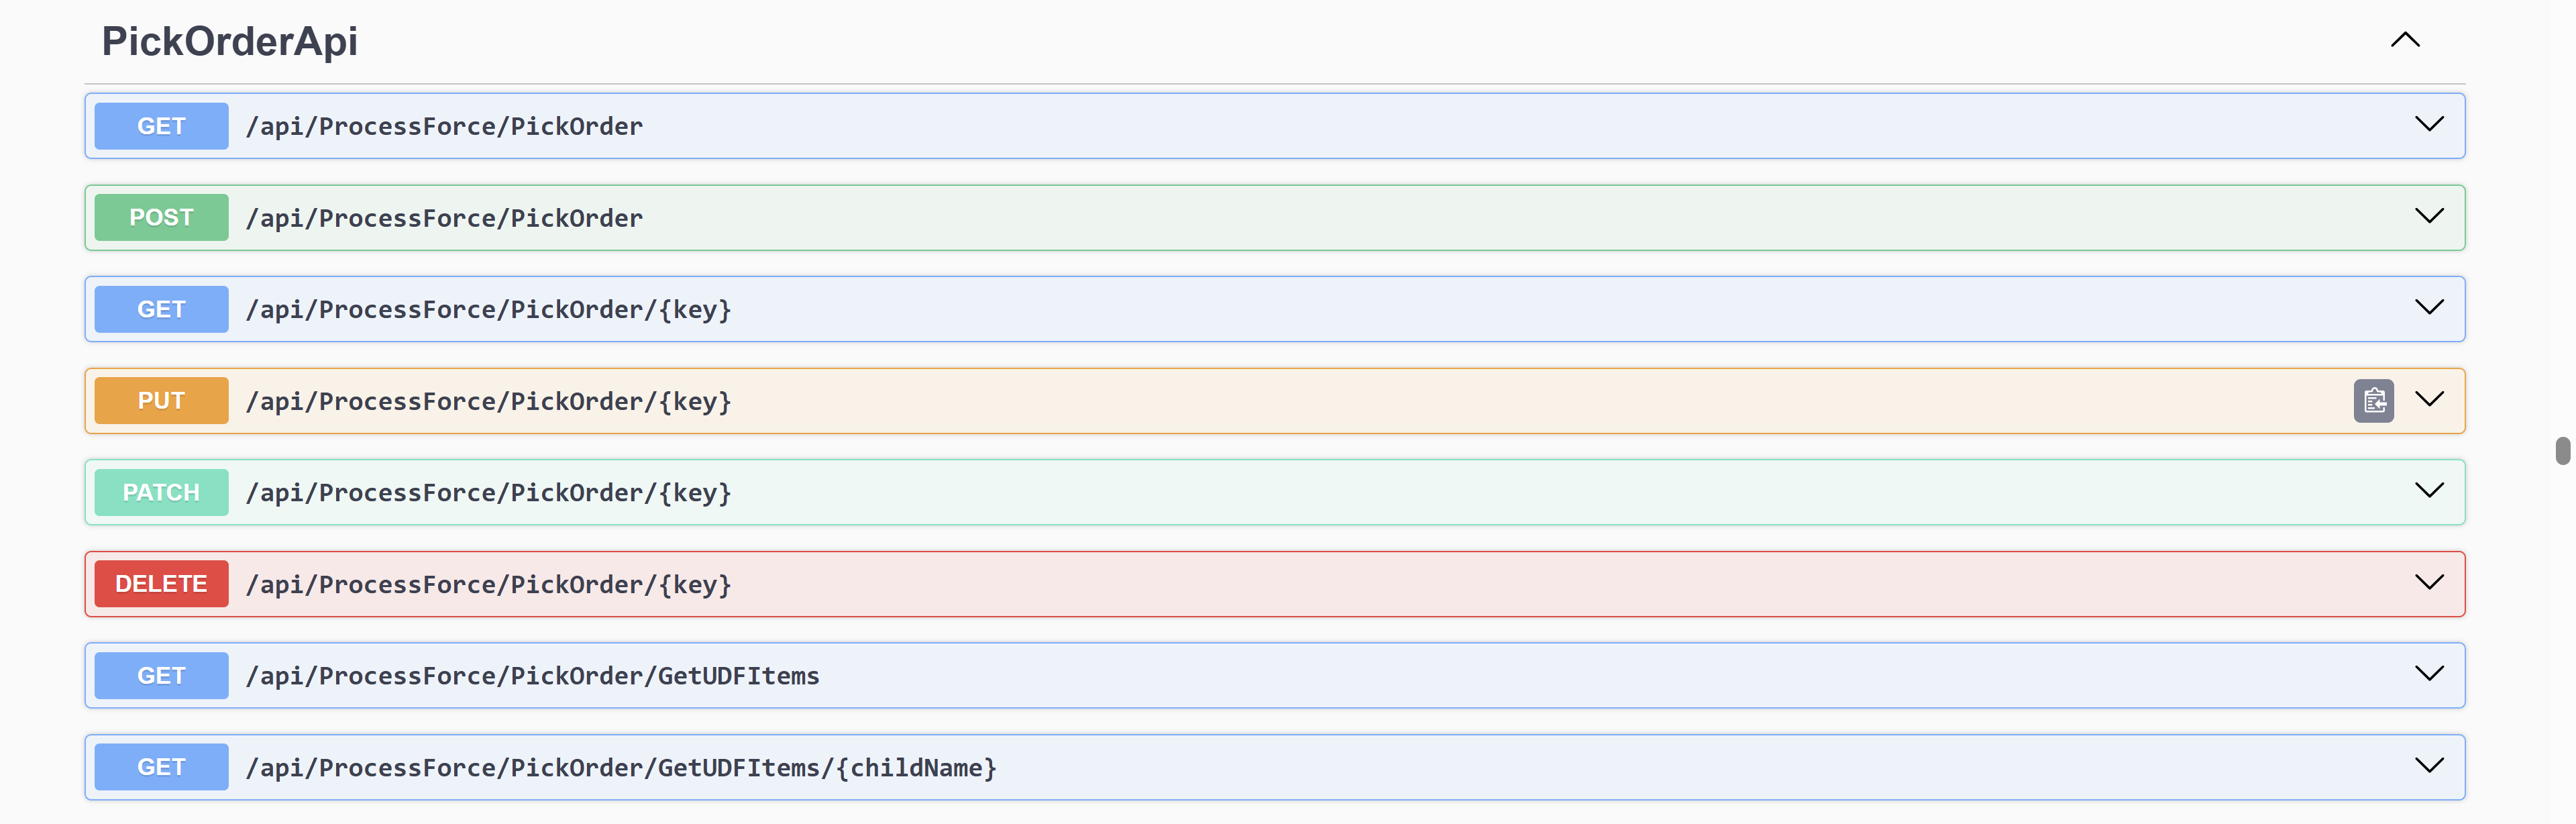
Create a Pick Order
Creating a Pick Order through the API is a two-step process:
- Create an empty Pick Order document
- Update the Pick Order with item details
You can find a list of all the available methods in the CompuTec REST and OData API documentation in Swagger.
Step1: Create an empty Pick Order
Example request:
POST http://localhost:54000/api/ProcessForce/CreatePickOrderForProductionIssue
Content-Type: application/json
{
"ManufacturingOrderDocEntries":
[ 1799]
}
In our example, 1799 is Manufacturing Order DocEntry. Replace this value with the DocEntry from your own Manufacturing Order.
Example with additional parameters:
POST http://localhost:54000/api/ProcessForce/CreatePickOrderForProductionIssue
Content-Type: application/json

{
"IssueType":"Operations",
"LineNumbers":  {
  "1086": [
    1
  ]
  },
"ManufacturingOrderDocEntries":
[ 1796]
}
This request creates a Pick Order document without a list of items to issue.
Step 2: Update the Pick Order with item details
To update the Pick Order, you must provide the DocEntry number of the created document.
Example for batch-managed items:
PATCH http://localhost:54000/odata/ProcessForce/PickOrder(166)
Content-Type: application/json

{
  "RequiredItems": [
    {
      "U_PickedQty": 0.2,
      "U_ItemCode": "Active-Item-02",
      "U_LineNum": 1,
      "PickedItems":
      [
        {
          "U_ItemCode": "Active-Item-02",
          "U_BnDistNumber": "2012-04-18-3",
          "U_Quantity": 0.1
        },
        {
          "U_ItemCode": "Active-Item-02",
          "U_BnDistNumber": "2012-04-18-3",
          "U_Quantity": 0.1
        }
      ]
    }
  ]
}
Example for non-batch-managed items:
PATCH http://localhost:54000/odata/ProcessForce/PickOrder(157)
Content-Type: application/json

{
  "RequiredItems": [
    {
      "U_PickedQty": 0.1,
      "U_ItemCode": "Label-01",
      "U_LineNum": 2

    }
  ]
}
Create a Pick Receipt
Pick Receipt creation also requires two steps.
- Create an empty Pick Receipt
- Add item details
The system will automatically create related inventory documents in the background:
- Goods Issue when adding or updating a Pick Order (Automatically issue materials on Pick Order Add/Update)
- Goods Receipt when adding or updating a Pick Receipt (Automatically receipt materials on Pick Receipt Add/Update)
Step 1: Create an empty Pick Receipt
Example of Final Goods receipt:
POST http://localhost:54000/api/ProcessForce/CreatePickReceiptForProductionReceipt
Content-Type: application/json

{
"PickOrderdReceiptType": "FinalGood",
"ManufacturingOrderDocEntries":
[ 1953]
}
Example of Coproducts receipt:
POST http://localhost:54000/api/ProcessForce/CreatePickReceiptForProductionReceipt
Content-Type: application/json

{
"PickOrderdReceiptType": "Coproducts",
"ManufacturingOrderDocEntries":
[ 1796]
}
Example of Scraps receipt:
POST http://localhost:54000/api/ProcessForce/CreatePickReceiptForProductionReceipt
Content-Type: application/json

{
"PickOrderdReceiptType": "Scraps",
"ManufacturingOrderDocEntries":
[ 1953]
}
Example of All receipt:
POST http://localhost:54000/api/ProcessForce/CreatePickReceiptForProductionReceipt
Content-Type: application/json

{
"ManufacturingOrderDocEntries":[1656],
"PickOrderdReceiptType": "All"
}
This way you can create the actual Pick Receipts.
Step 2: Update Pick Receipt with item details
Example for batch-managed items:
PATCH http://localhost:54000/odata/ProcessForce/PickReceipt(600)
Content-Type: application/json

{
  "U_Date": "2025-10-03T07:43:24.181Z",
  "RequiredItems": [
    {
      "U_PickedQty": 1.0,
      "U_LineNum": 1,
      "PickedItems":
      [
        {
          "U_ItemCode": "Product-A",
          "U_BnDistNumber": "2025-10-13-1",
          "U_Quantity": 1.0
        }
      ]

    }
  ]
}
Additional API Operations
The API provides many additional operations, including:
- Retrieving production orders
- Managing pick lists
- Updating documents
- Reading operational data
You can find all available endpoints in the CompuTec REST/Odata API documentation in Swagger using this link.
On the list of definitions, you’ll see all the plugins you have added and activated for your CompuTec AppEngine company.