You are currently viewing documentation for CompuTec AppEngine 3.0 (.NET 8).
If you are working with older environments, you may need the documentation for CompuTec AppEngine 2.0 based on .NET Framework: https://learn.computec.one/docs/appengine/2.0/.
Please note that CompuTec AppEngine 2.0 will be supported only until December 31, 2026. After this date, the product will no longer receive regular support or maintenance updates. Read more
As CompuTec AppEngine 3.0 introduces a new architecture, all CompuTec components must be updated together to ensure full compatibility.
Please review the CompuTec AppEngine 3.0 documentation before starting your installation or upgrade process.
Working with SAP Business One Web Client
CompuTec WebClient Start is an essential tool for integrating CompuTec AppEngine plugins and extending the functionality of the SAP Business One Web Client. It connects the two systems so you can extend your ERP with more tools and features. CompuTec WebClient Start is installed during the company activation.
Step 1: Install the CompuTec WebClient Extension Package
The CompuTec WebClient Extension Package contains all plugins enabled for a specific company. Each company has its own plugin pack, so you must install it separately for every company. Installing the CompuTec WebClient Extension is required to use CompuTec plugins in the SAP Business One Web Client.
To install the CompuTec WebClient Extension Package, follow these steps:
-
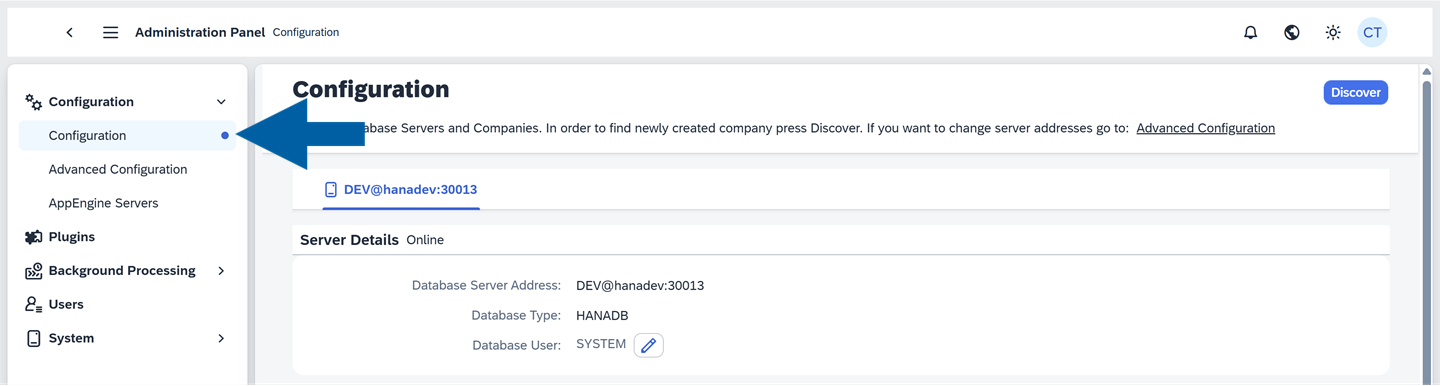
Log in to the CompuTec AppEngine Administration Panel.
-
Navigate to Configuration.
-
Find your company in the Companies list.

-
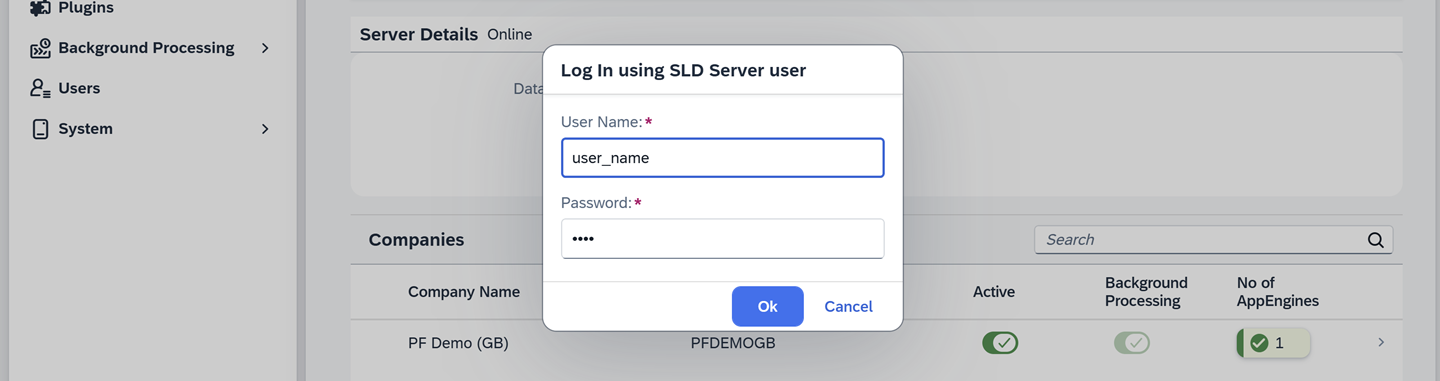
Click Install CompuTec WebClient Extension.

-
Log in using your SLD Server username and password.
-
Done! The installation of the CompuTec WebClient Extension Package was completed successfully.
Whenever you deactivate or activate a new company, repeat this process to install its updated CompuTec WebClient Extension Package.
Step 2: (Optional) Install and activate CompuTec WebClient Start manually using the Extension Manager
Sometimes, you need to install CompuTec WebClient Start extension manually. This kind of activation is mainly provided for SAP Business One Cloud Control Center (CCC).
To manually install and activate CompuTec WebClient Start, follow these steps:
-
Log in to CompuTec AppEngine Administration Panel.
-
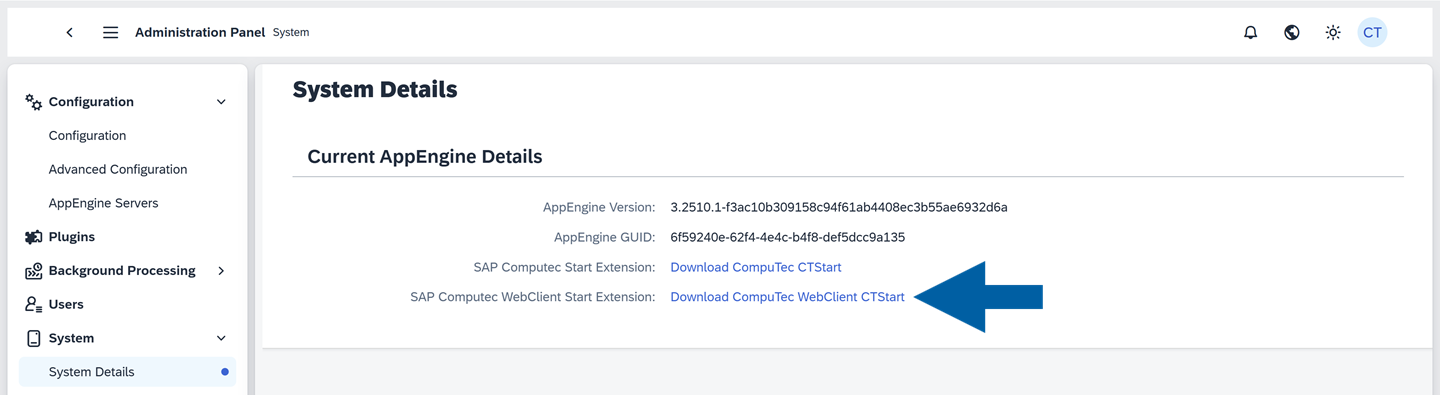
Navigate to Administration Panel > System.
-
In the System Details section, click Download CompuTec WebClient CTStart installation pack.
-
Open the Extension Manager in your browser using this address:
https://<SAPExtensionHost>:<SAPExtensionPort>/ExtensionManager/.Replace the placeholders with your system values, for example:https://hanadev:40000/ExtensionManager/.noteMake sure you have the necessary permissions to access the Extension Manager.
-
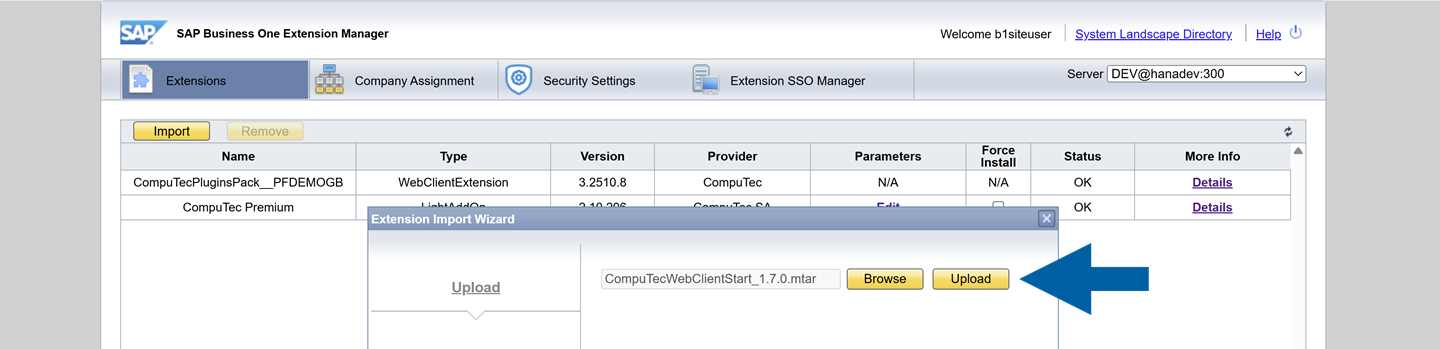
Click Import.

-
Choose the downloaded installation pack file, and click Upload.
-
Click Next.
-
(Optional) You can Specify Shared Parameters, and click Finish.
-
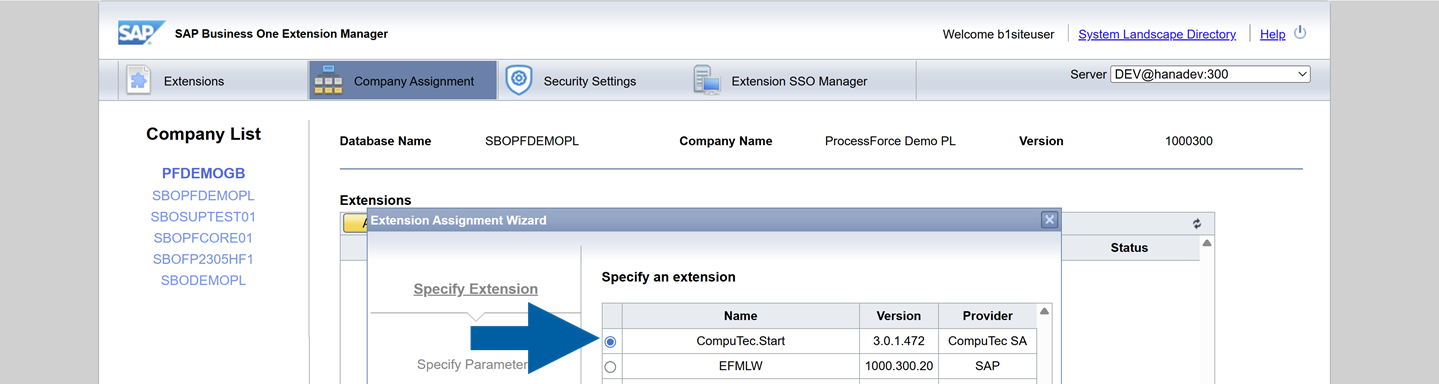
Navigate to Company Assignment, and select the company on the list on the left.

-
In Extensions, click Assign.

-
In Extension Assignment Wizard, choose the CompuTec.Start extension from the list and click Next.
-
(Optional) In User Preferences, you can change the Startup Mode for each user, and click Next.
-
Click Finish to complete the setup.
-
Done! You've successfully installed and activated CompuTec WebClient Start extension.
If you need help at any point, feel free to reach out through the CompuTec Support Portal.