Starting CompuTec WMS Client
CompuTec WMS Client offers various startup options, including server configuration, logging level, and user interface settings, to customize and optimize warehouse management workflows.
Starting CompuTec WMS Settings
-
To run the desktop version of the CompuTec WMS Client, an installation and configuration of the CompuTec WMS Server is required. For further information, click here.
-
To start the CompuTec WMS Client desktop version, choose it from a program list or run the CompuTec.Client.Desktop.exe file in the CompuTec WMS Client installation folder.
-
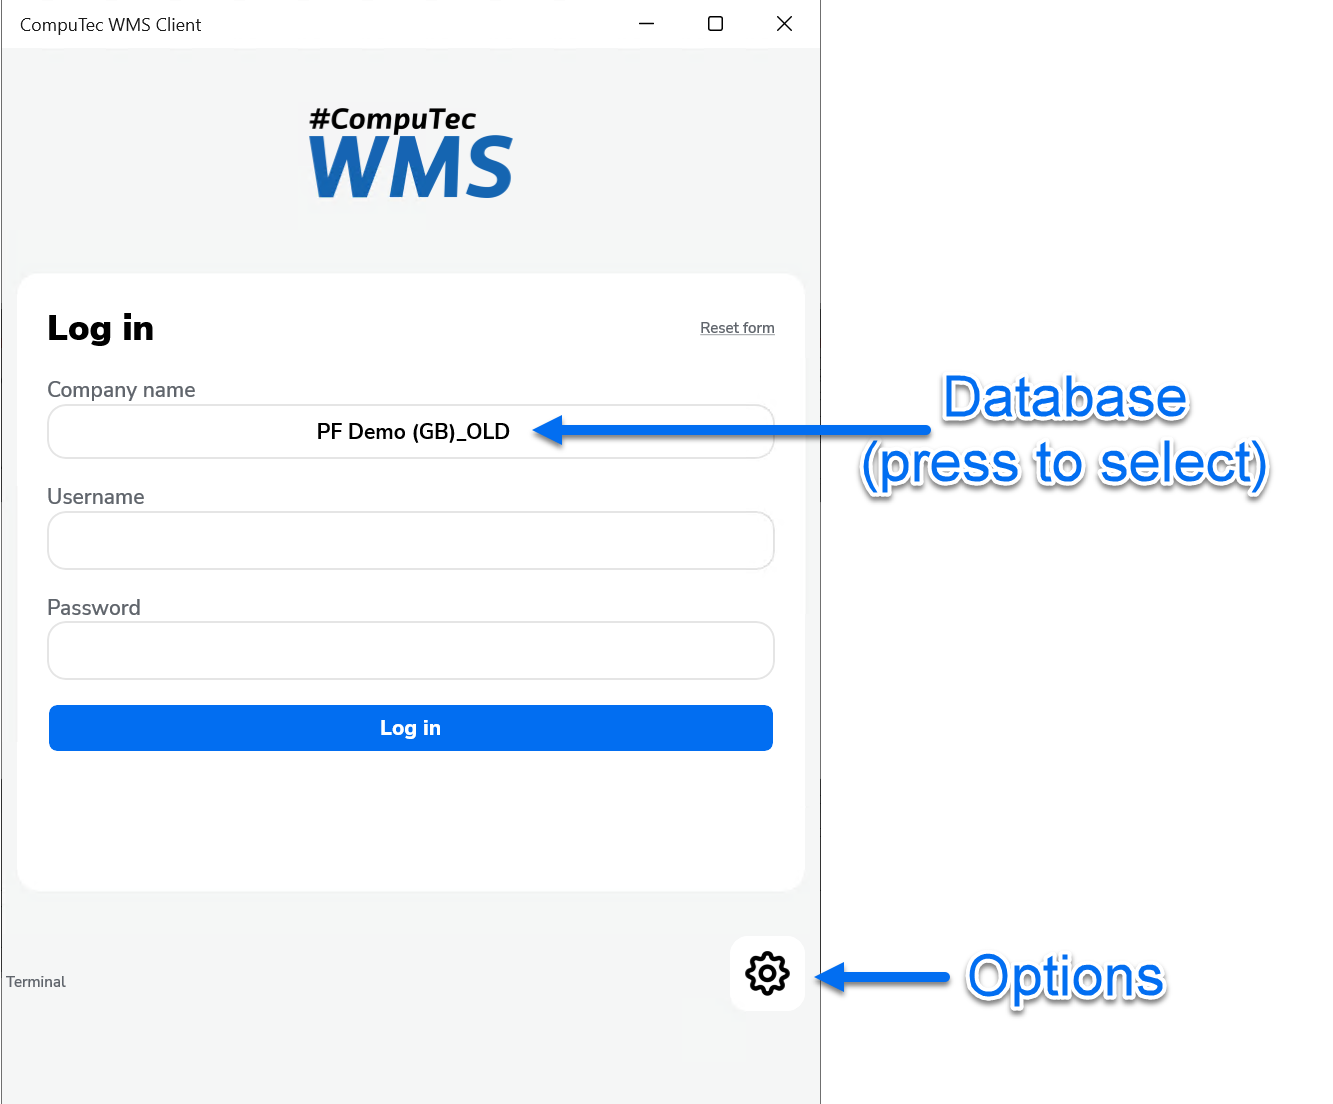
CompuTec WMS splash screen overview When running the application for the first time, select the Settings button to set up server addresses.
Options Overview
Configuration of WMS client-server Connection
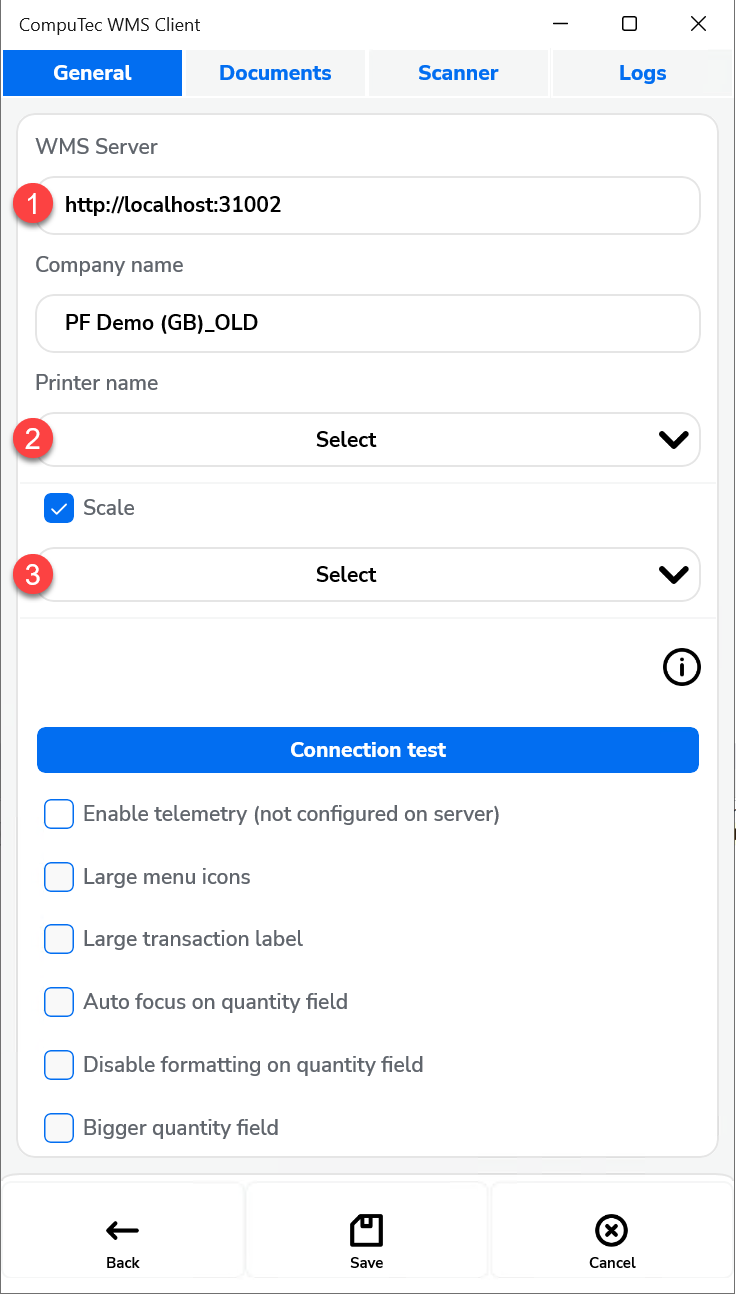
To ensure seamless communication between the CompuTec WMS Client and Server, follow the steps below:
- Server Address & Port: Ensure that the server address matches the location where the CompuTec WMS Server is installed. The port number must align with the one specified in the server settings. You can verify this in the server configuration.
- Printer Setup: Define the printer that will handle CompuTec Labels whenever CompuTec WMS sends a new request. The printer's IP address can be configured in Custom Configuration under the Common tab. For more details, click here.
- Scale Integration: If the CompuTec WMS is intended for use with a scale, enable the Scale checkbox to activate this functionality. Please refer to weight scale for more information.
Info icon
You can check the following information by clicking the 'i' icon:

- Server Name
- Company Name
- Database Name
- Server Version
- Client Version (tap twice to overwrite)
- Terminal ID
Other Options
Other options include:
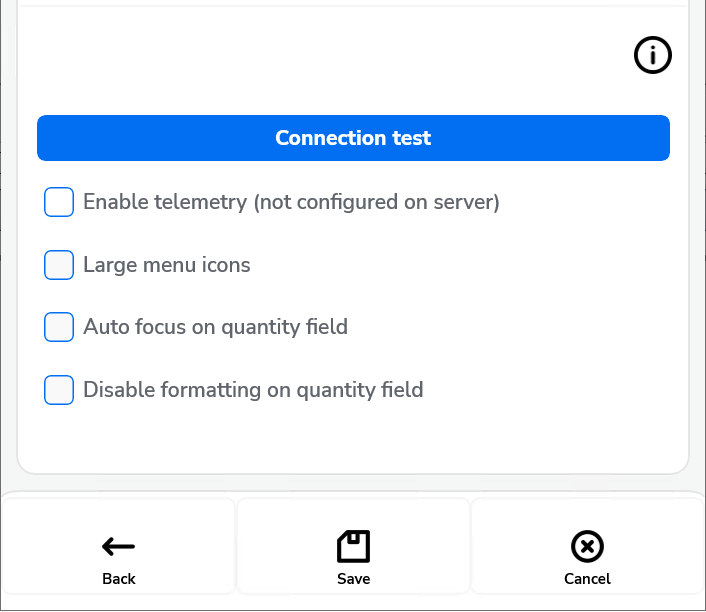
- Enable Telemetry(not configured on server): Activate the feature to collect performance and usage data.
- Large Menu Icons: Increase icon size in the menu, with a layout change to two columns instead of three.
- Auto-Focus on Quantity Field: On the Quantity screen, the focus will automatically move to the - Quantity field, simplifying the entry process.
- Disable Formatting on Quantity Field: Remove decimal places and separators from the Quantity field for a cleaner input.
Documents tab
Checking a specific checkbox displays the Warehouse Selection form of a particular transaction. If you want to use only one default warehouse, uncheck a checkbox for a required transaction and type in a required warehouse. Click here

Scanner tab
This tab is specifically designed to manage barcode scanner-related settings within the CompuTec WMS (Warehouse Management System) Client application.

Scanner Prefix:
- This field allows you to define a specific prefix value that is expected at the beginning of every scanned barcode.
- Example shown: 2 – This means the system will expect scanned data to begin with this prefix.
Scanner Suffix:
- A suffix is a character or value appended at the end of the scanned barcode.
- Example shown: 3 – The system will expect the scan to end with this value.
Scanner Group Separator:
- This field allows you to specify a character code (ASCII) that separates groups of data in a scanned string.
- Example shown: 29 – ASCII 29 corresponds to the Group Separator (GS) character, commonly used in barcode formats like GS1.
Enable scanner log (Checkbox)
- This optional setting, when checked, enables logging of scanner activity.
- Useful for debugging scanner inputs or tracing scan-related issues. In the screenshot, it is not enabled.
Logs tab
This tab is used for accessing, managing and sharing log files generated by the application.

- Share log: Use this option to send the selected log file via text message or save it as a file.
- Send to server: This option allows you to send the selected log file to the associated server. The default location for the server is: c:\programdata\CompuTec\CompuTec WMS\Server\Logs\ClientLogs\XXXXXXXX-XXXX-XXXX-XXXX-XXXXXXXXXXXX.
This section XXXXXXXX-XXXX-XXXX-XXXX-XXXXXXXXXXXX refers to the device's unique identification number.
Saving Settings and logging in
Click Save or Cancel on the General tab to save or discard changes. It leads back to the log in form.
Note that opening the Settings form and clicking Save (even without changing anything) is required to perform after the first installation of the application. This action creates the necessary configuration file to work with the application.
-
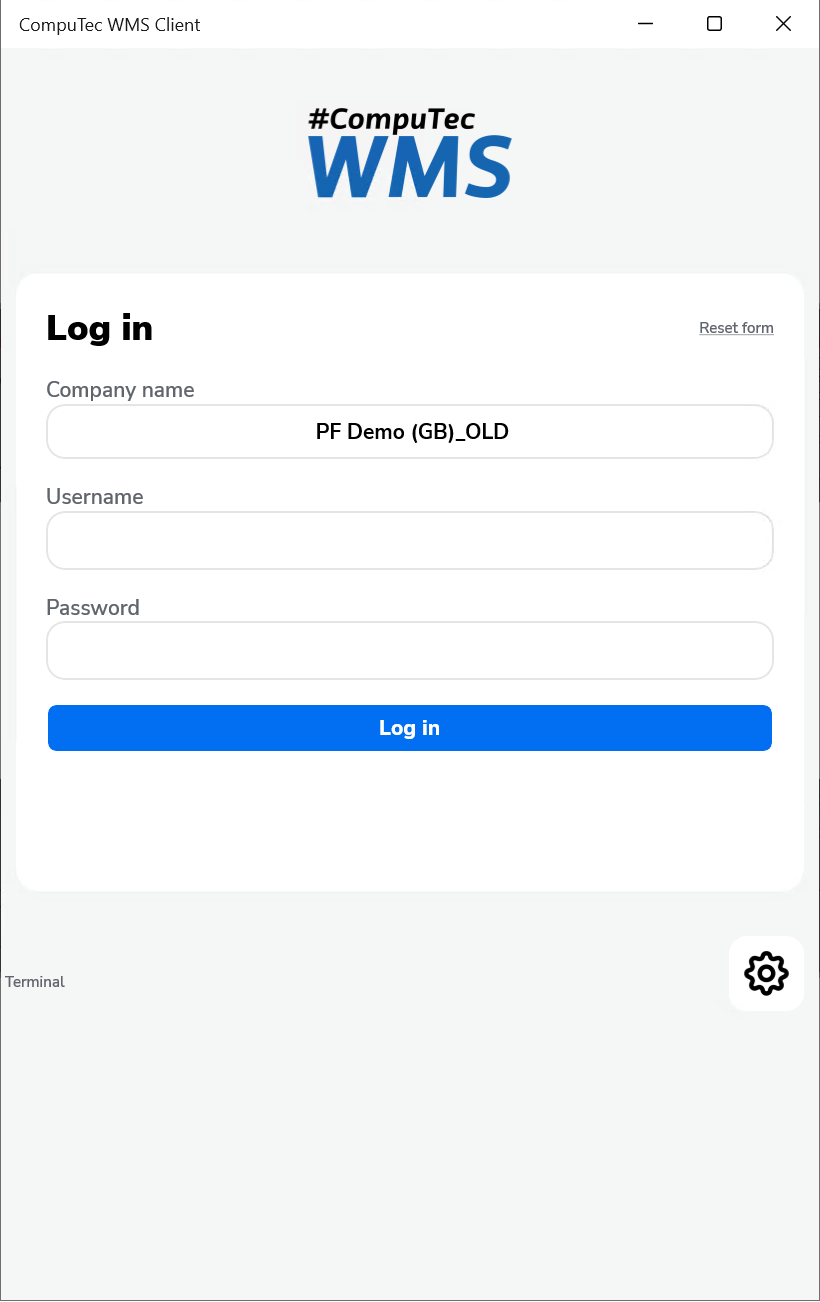
After saving, the log-in window appears.
-
Type in a terminal username and password or log in by scanning the Employee Badge.
-
Click here to find out how to create a terminal user. Click a green icon or press Enter. If a terminal user has a barcode assigned, scanning the code logs in the user.
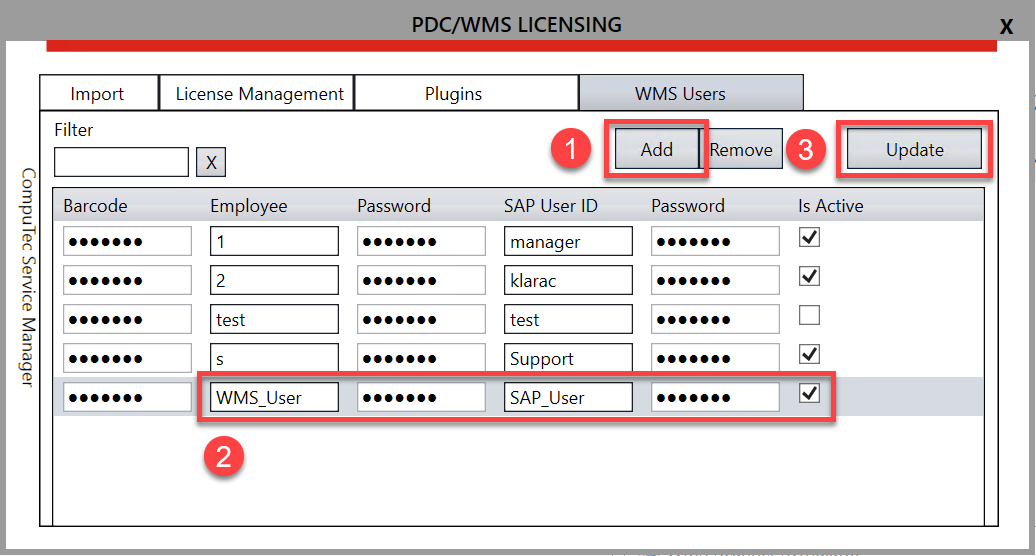
-
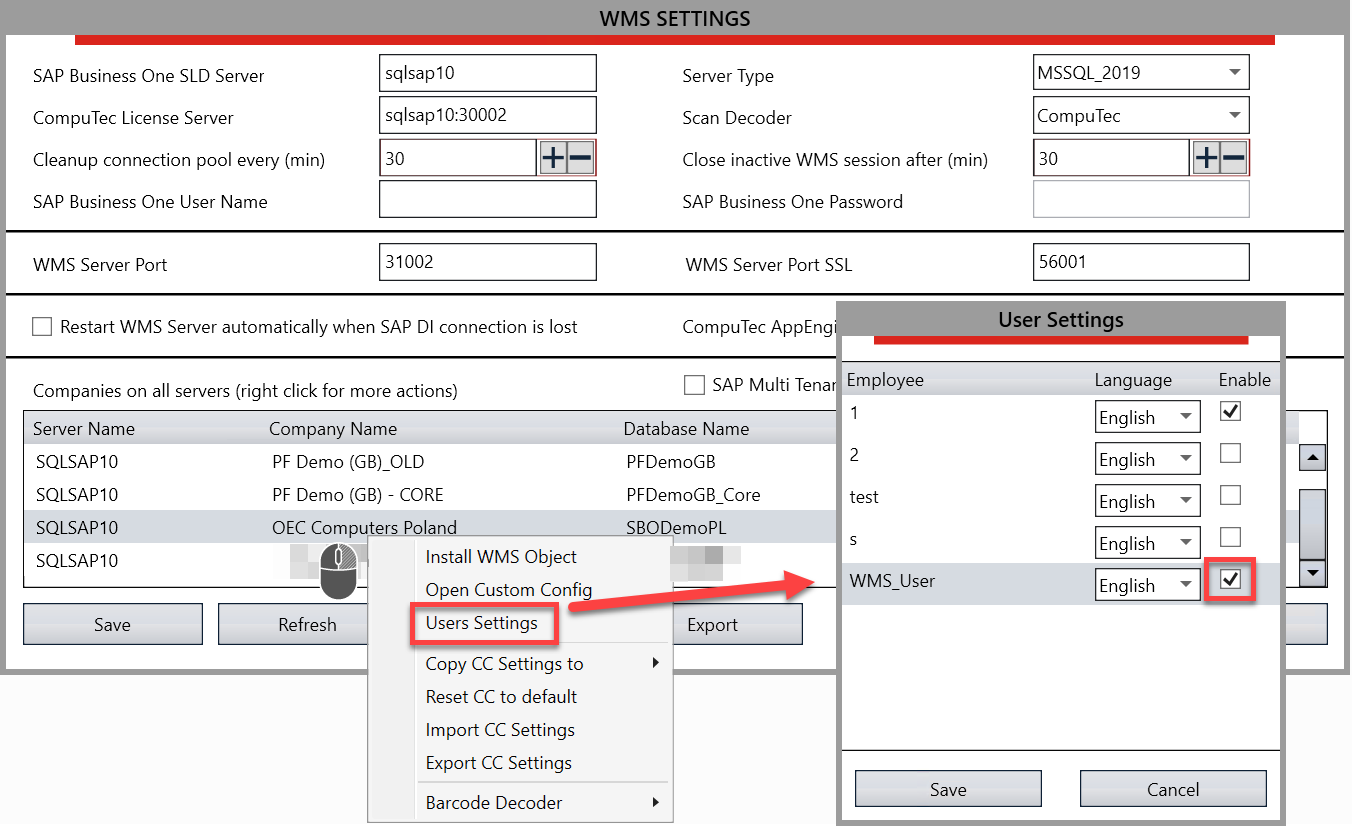
In CompuTec WMS Settings, right-click on the database and select User Settings. Then, check the box next to the user(s) who will have access to this database.
-
The main menu window appears. The desktop version of CompuTec WMS Client is ready to work with.