You are viewing documentation for CompuTec WMS 3.0, which runs on CompuTec AppEngine 3.0 (.NET 8).
If you use CompuTec WMS 2.0, see the CompuTec WMS 2.0 documentation.
When upgrading to CompuTec WMS 3.0, update all required CompuTec components together to ensure compatibility.
Before installing or upgrading, review the CompuTec WMS Installation Guide and the system requirements.
Install CompuTec WMS 3.0
This guide explains how to set up CompuTec WMS 3.0, including plugin installation, server and client configuration, licensing, and user access.
Please note that CompuTec WMS 2.0 will be supported only until the end of 2026. After this time, WMS 2.0 will no longer receive regular support or maintenance updates.
We recommend planning your upgrade to CompuTec WMS 3.0.
CompuTec WMS 3.0 uses CompuTec AppEngine for its plugin-based components.
Before you start
Before you start, make sure:
- You have reviewed the CompuTec WMS requirements
- CompuTec AppEngine is installed and configured. Read more
- You have access to the CompuTec AppEngine Administration Panel.
- At least one CompuTec AppEngine instance is configured and active.
- You have the required SAP Business One and system administrator permissions.
If you use CompuTec ProcessForce, additional components may be required. See the relevant installation instructions before continuing.
Install CompuTec WMS 3.0
Step 1: Install the CompuTec WMS 3.0 Plugin
To install and activate a CompuTec AppEngine WMS 3.0 plugin, follow these steps:
-
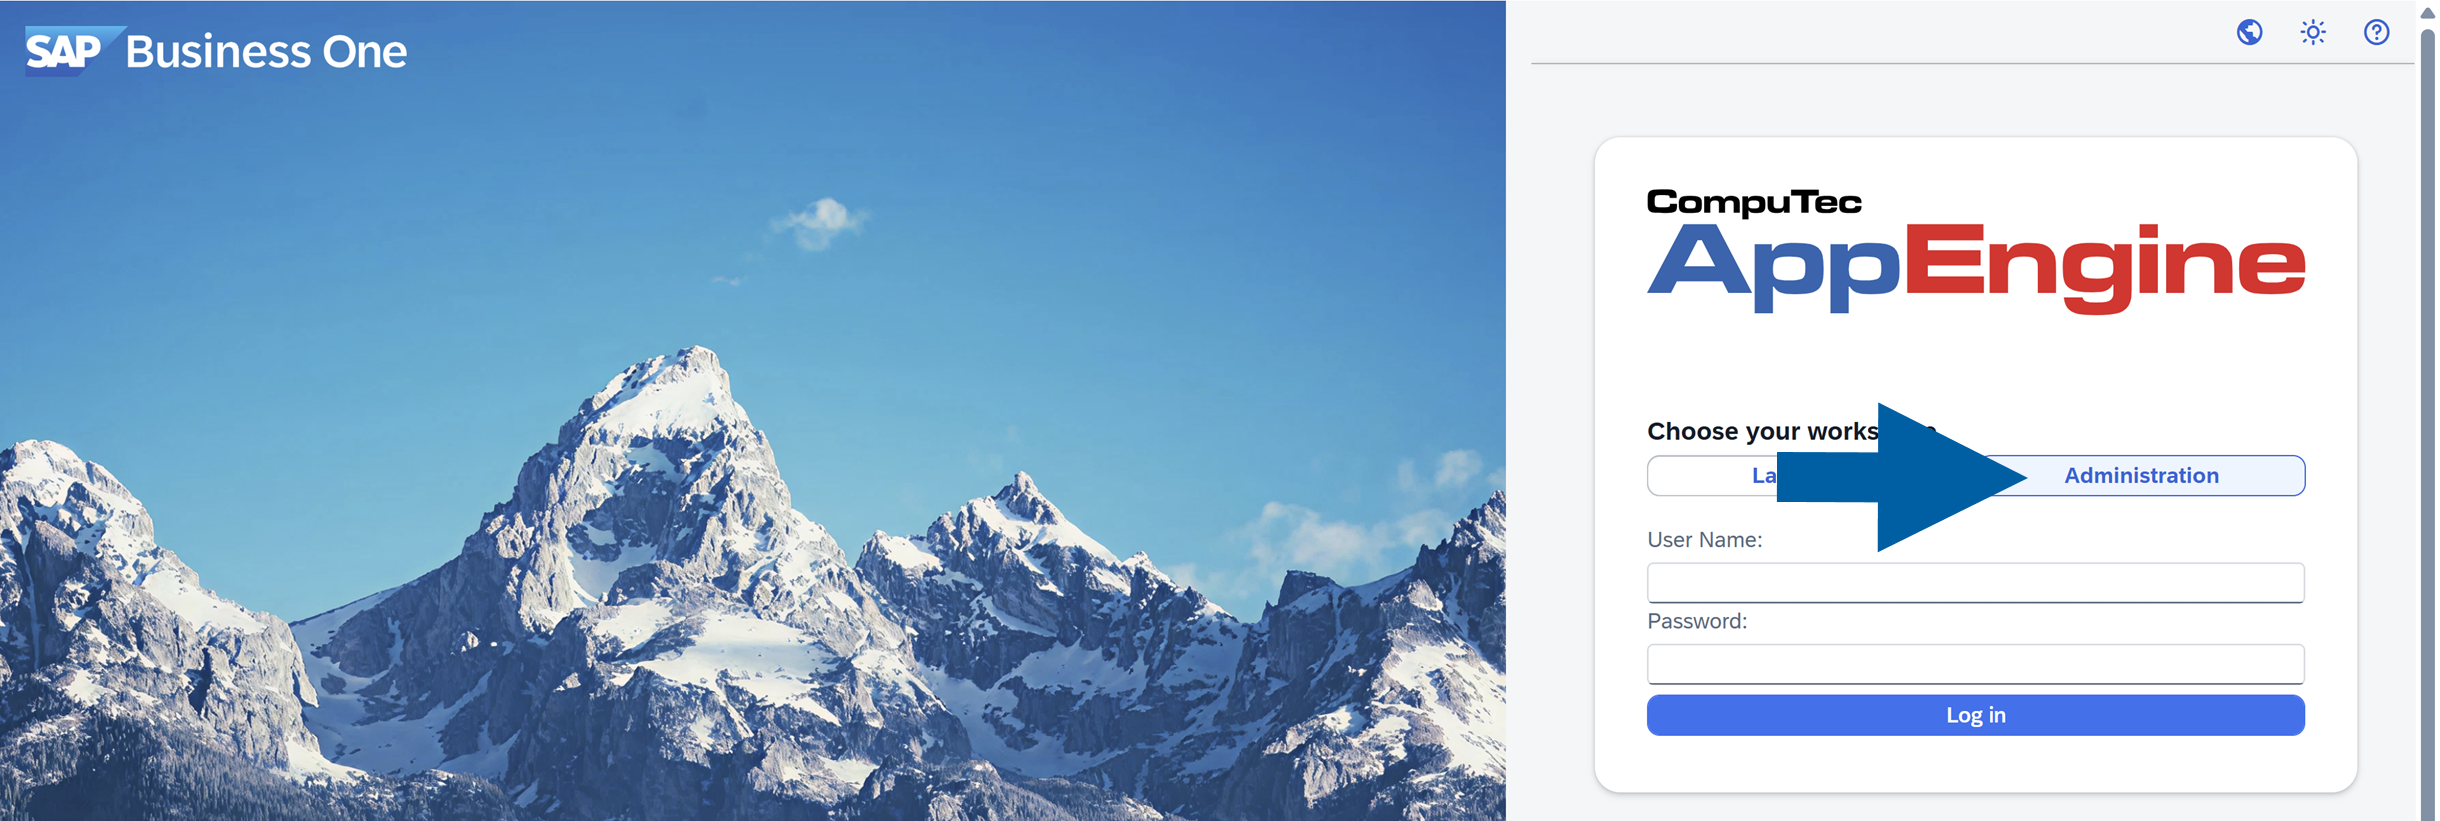
Log in to CompuTec AppEngine Administration Panel.
-
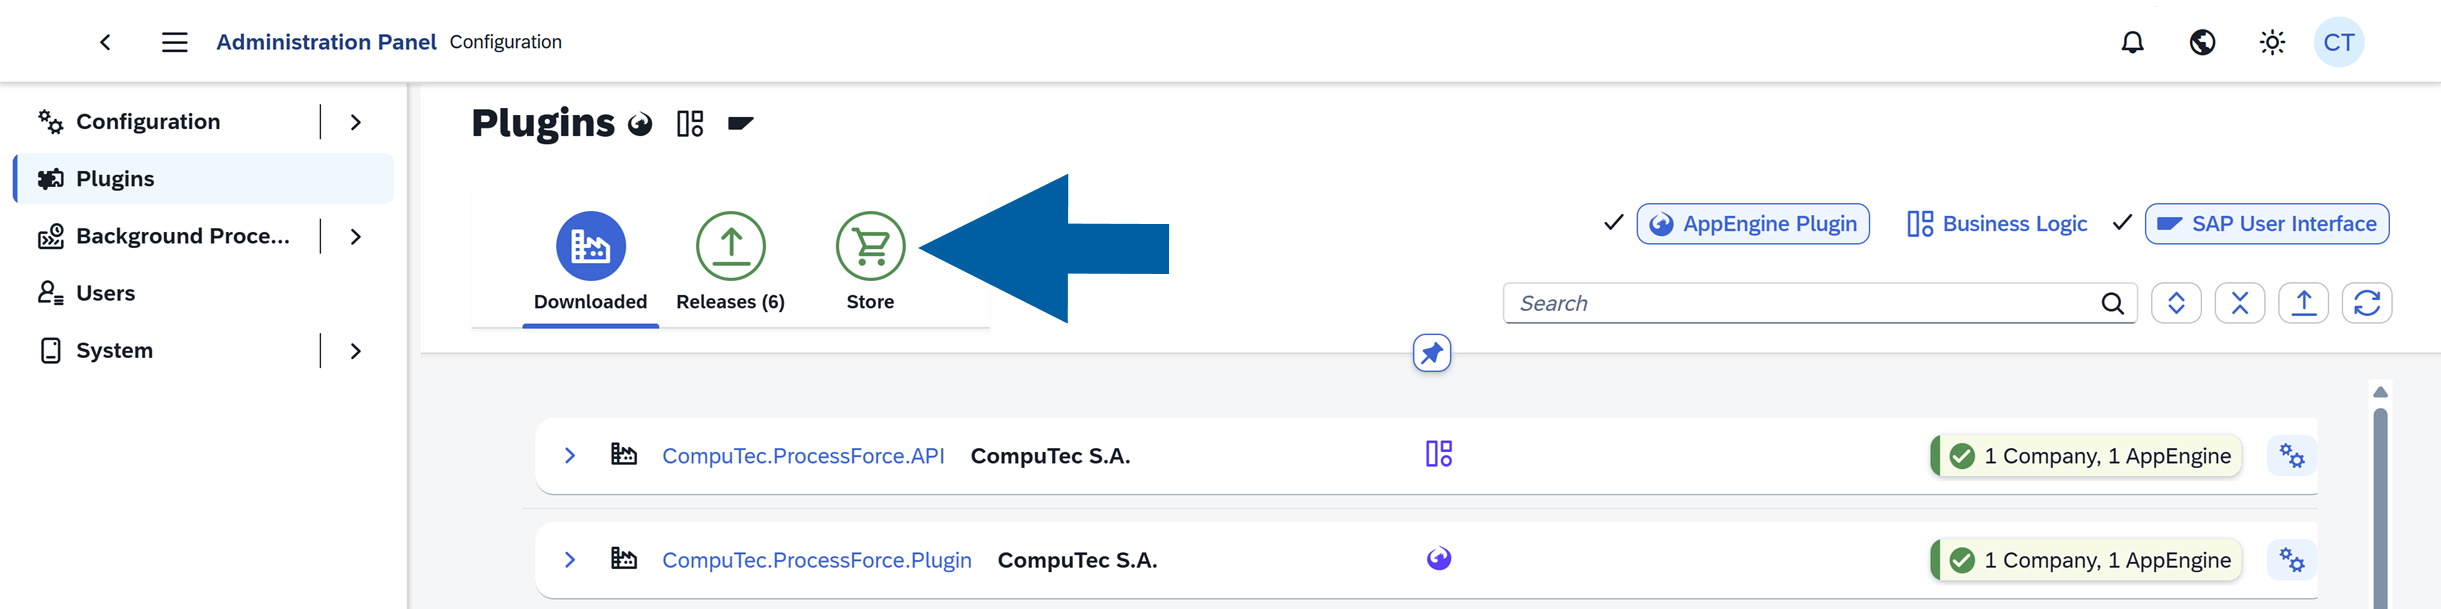
Go to Plugins.

-
Navigate to Store.
-
Install and activate
WMS.Pluginin CompuTec AppEngine. The requiredWMS.BusinessLogicplugin is installed automatically as a dependency. -
Click Get... next to the plugin name on the list to install the latest plugin version.

-
Click Get & Install.

-
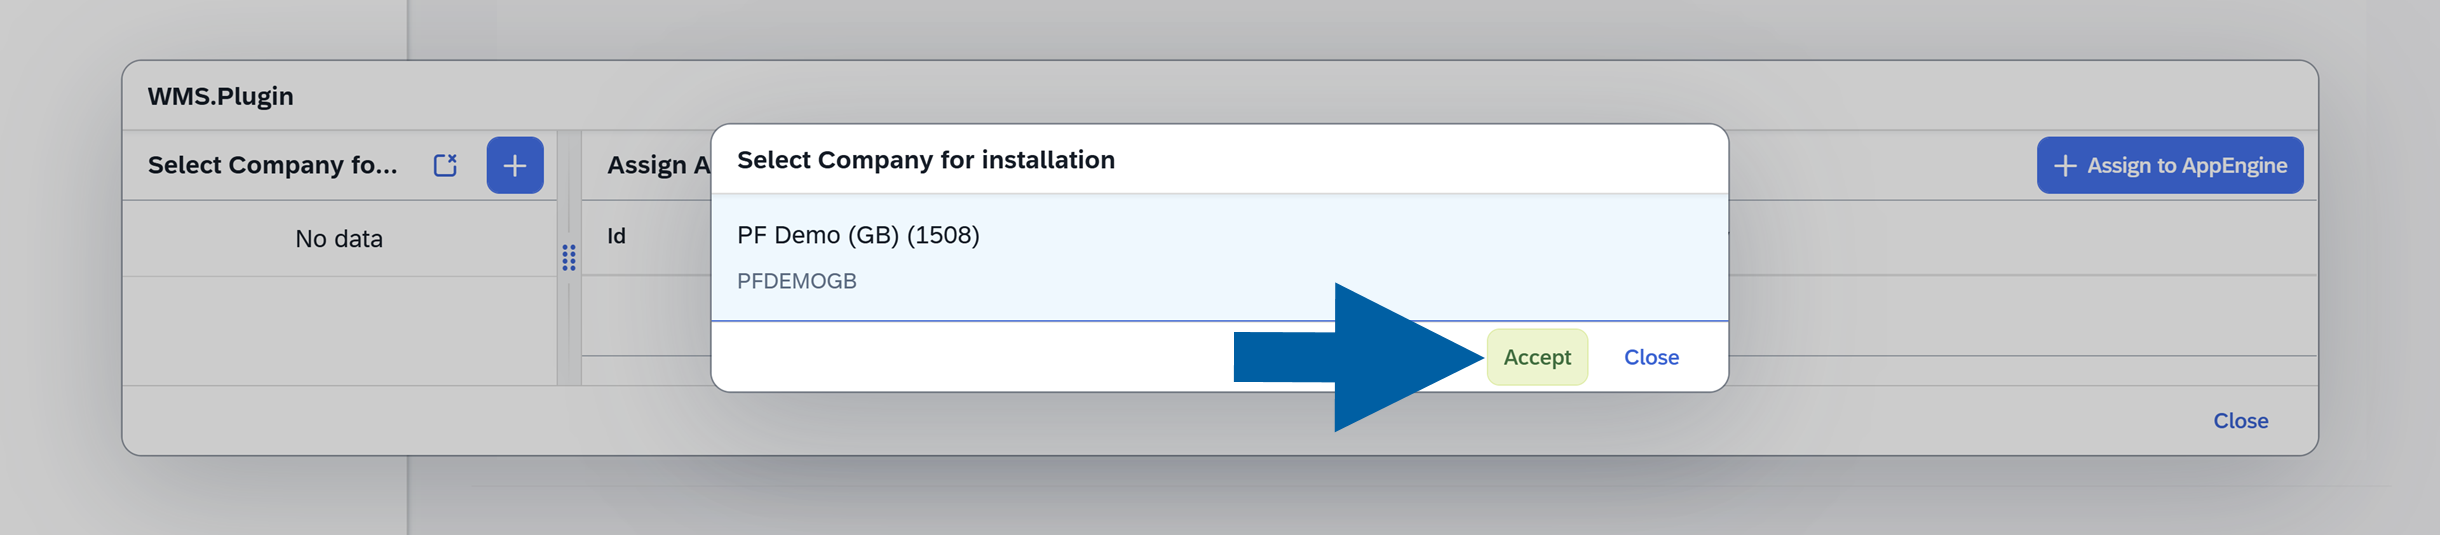
Select Company for installation and click Accept.
-
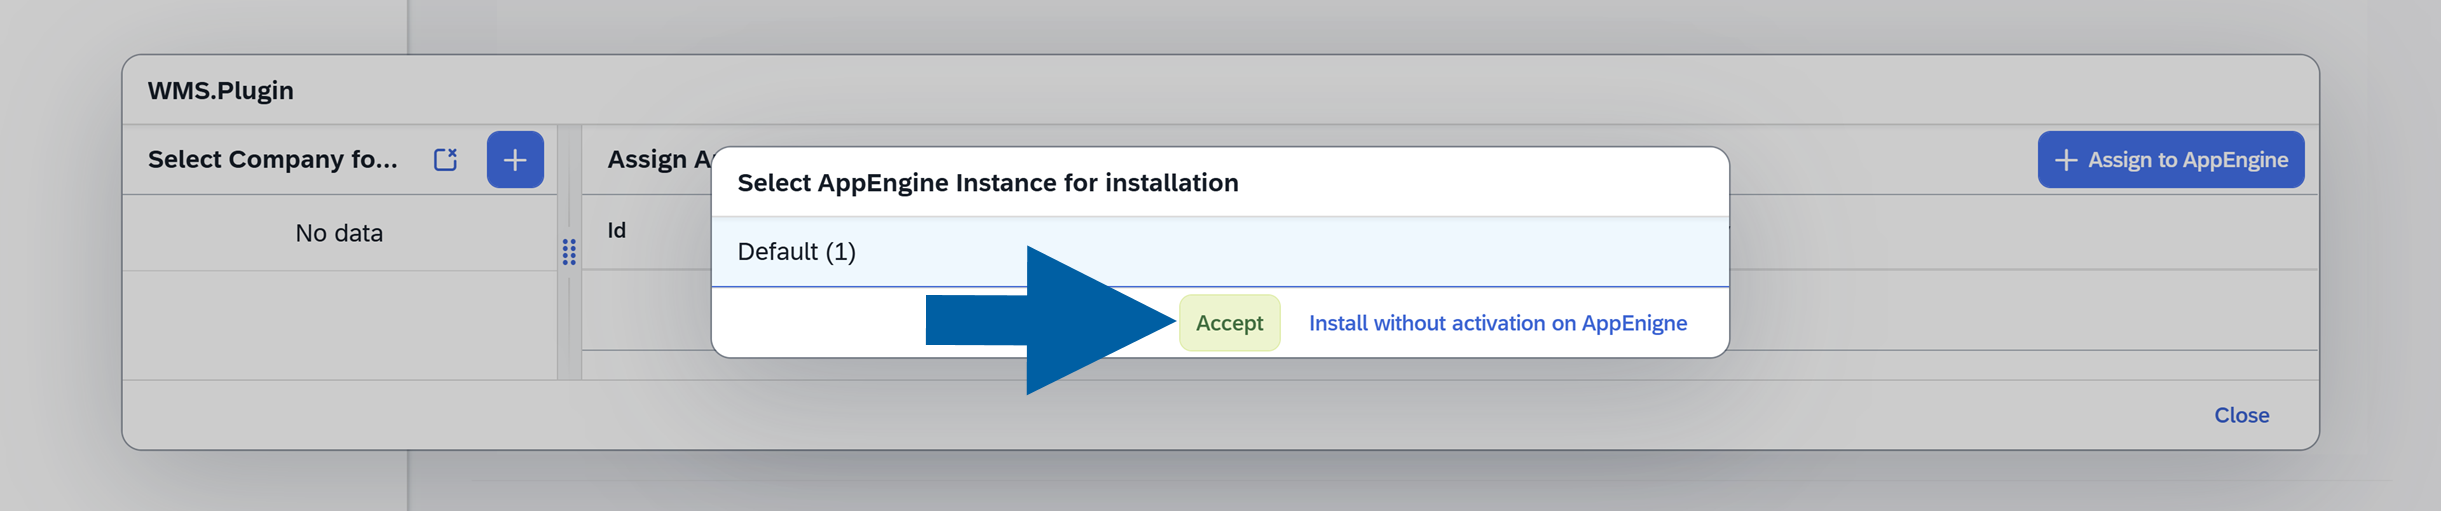
Select CompuTec AppEngine Instance for installation and click Accept.
-
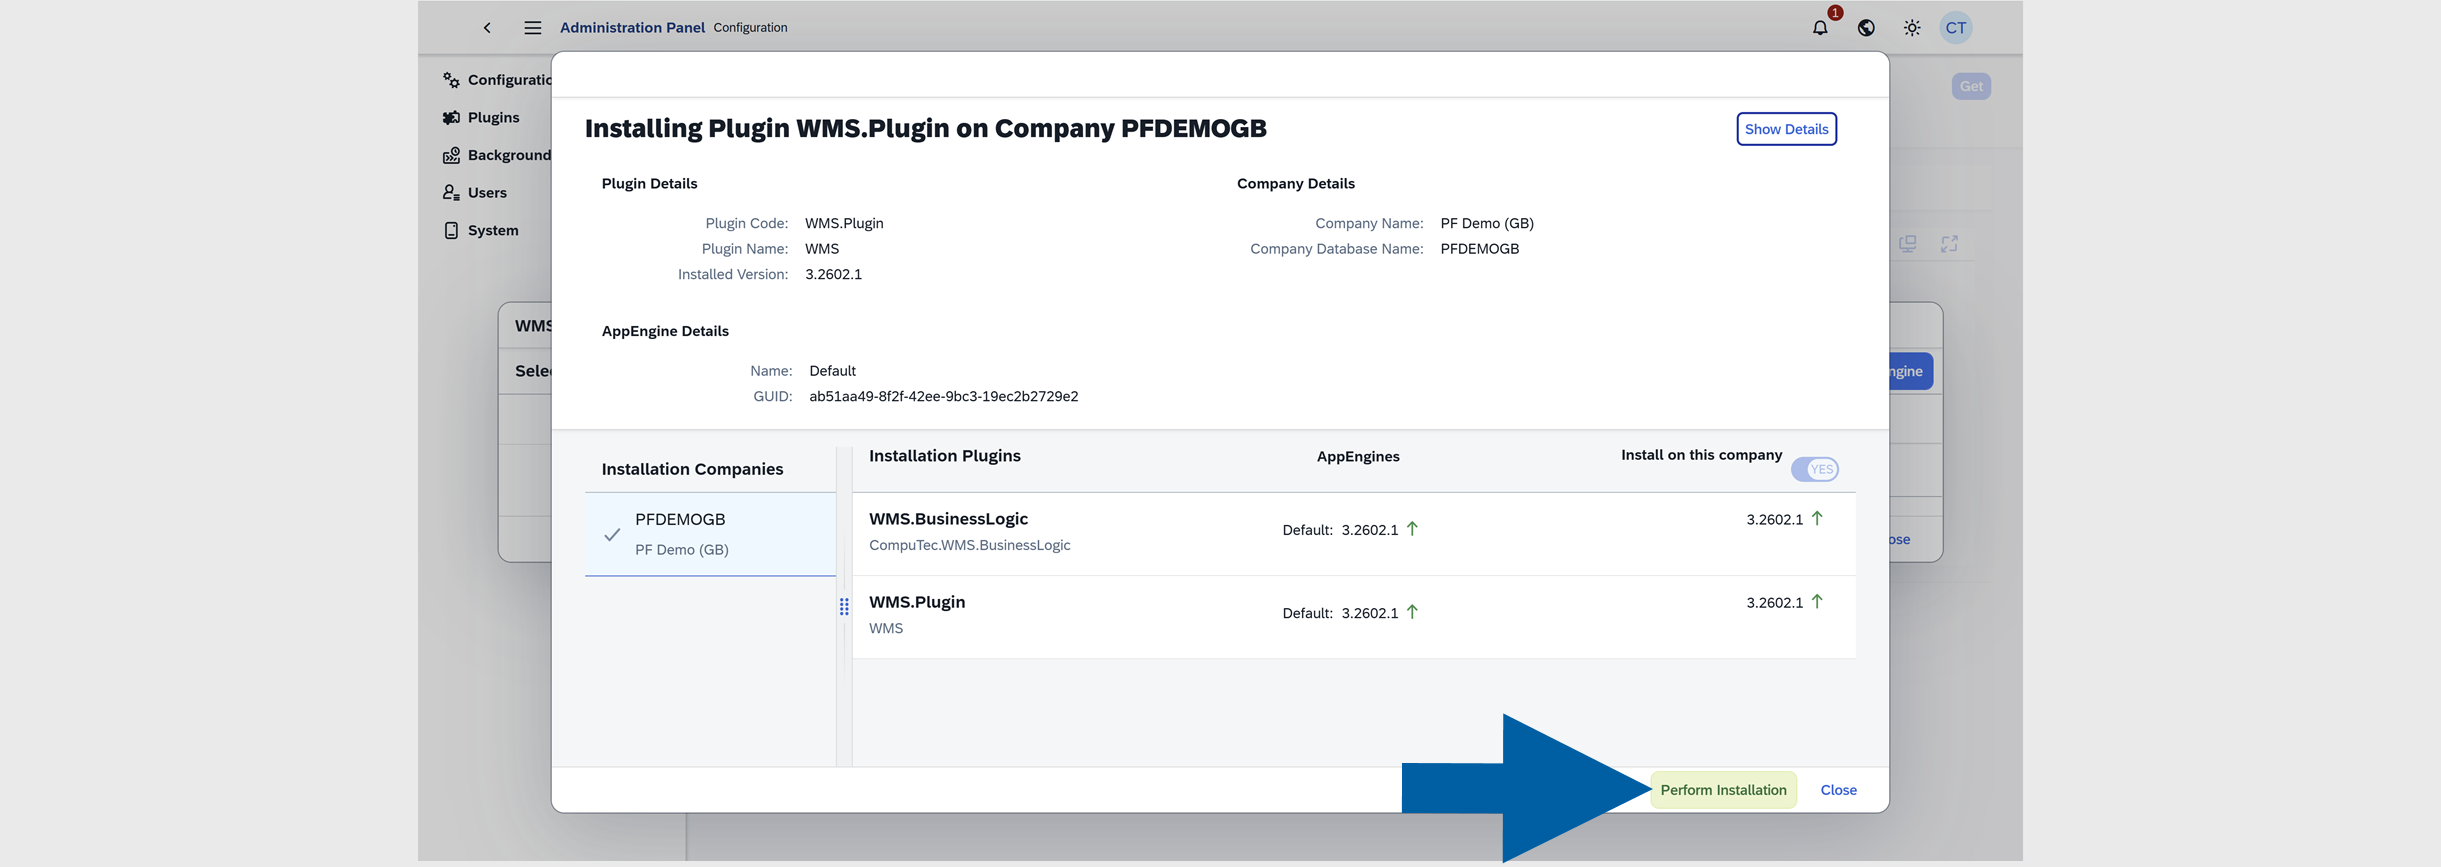
Review the installation details and click Perform Installation.
-
Click OK to confirm the plugin installation.

-
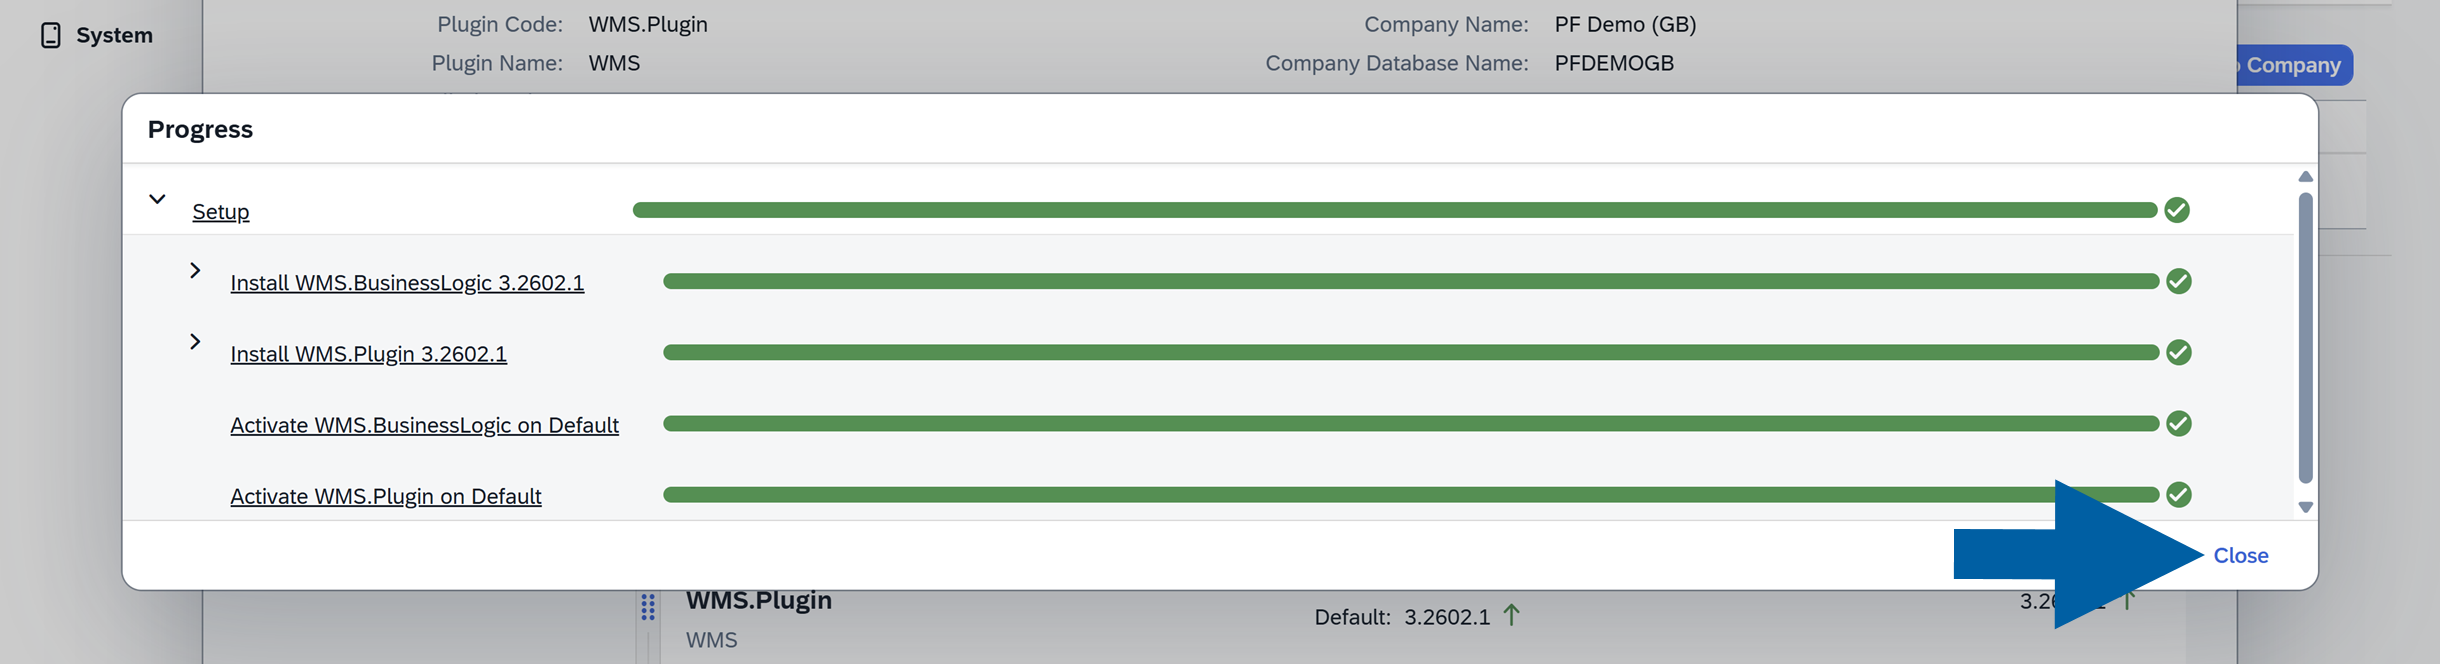
You can now track the installation progress. Once the installation is complete, click Close.
-
Click Yes to restart the CompuTec AppEngine.

-
Once the restart is complete, click OK.

-
The CompuTec WMS 3.0 Plugin is now installed. Continue with the setup steps below.
After successful installation:
- the plugin appears in the Downloaded tab
- it is assigned to the selected Company
- it is active on the selected CompuTec AppEngine Instance
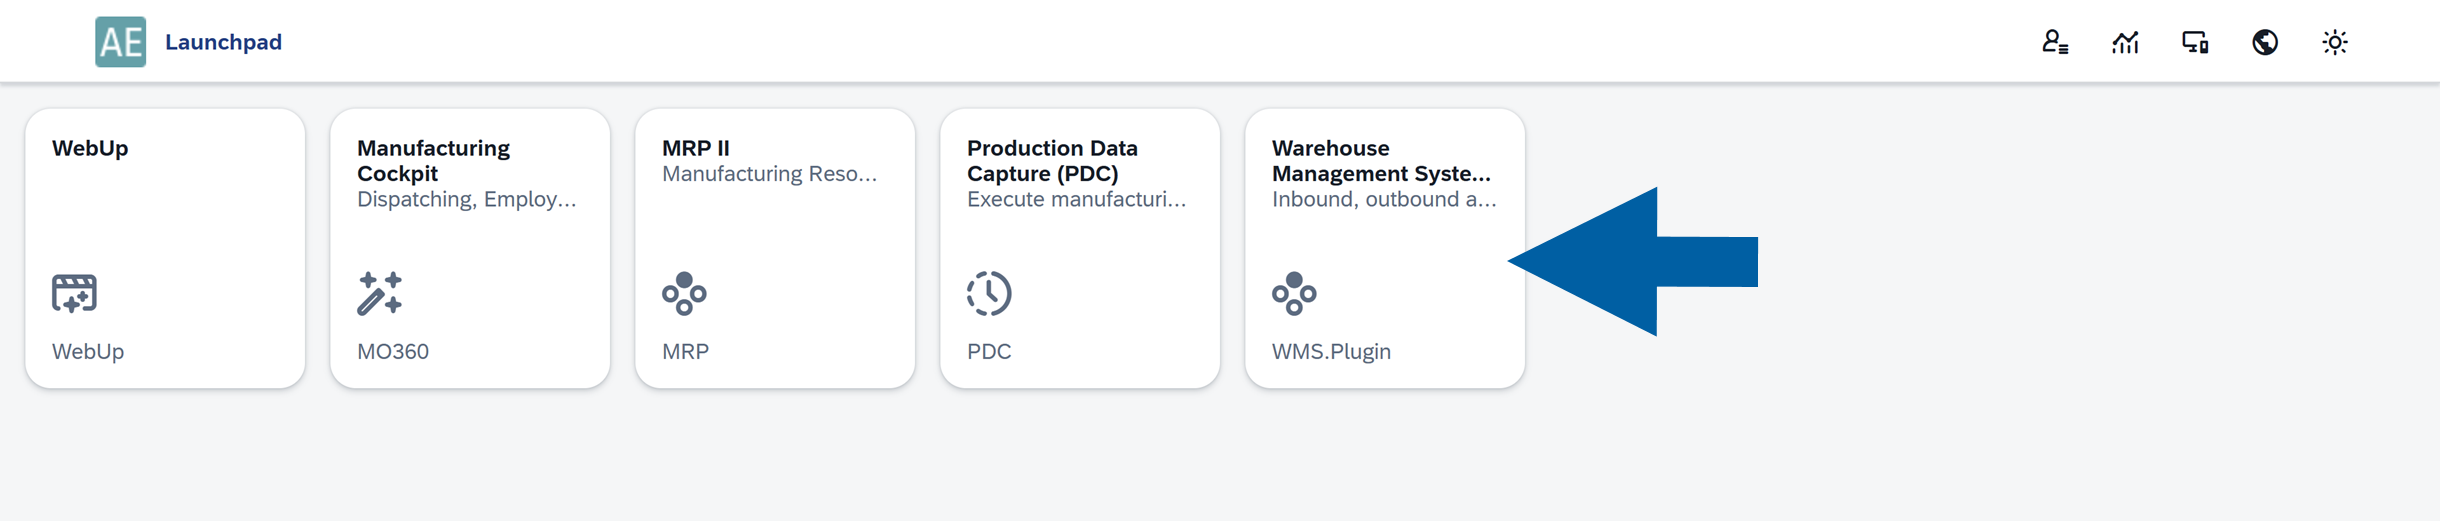
- the plugin is available in the CompuTec AppEngine Launchpad
Step 2: Activate the WMS background processing job
After installing and activating the CompuTec WMS 3.0 Plugin, activate the required WMS background processing job in CompuTec AppEngine.
-
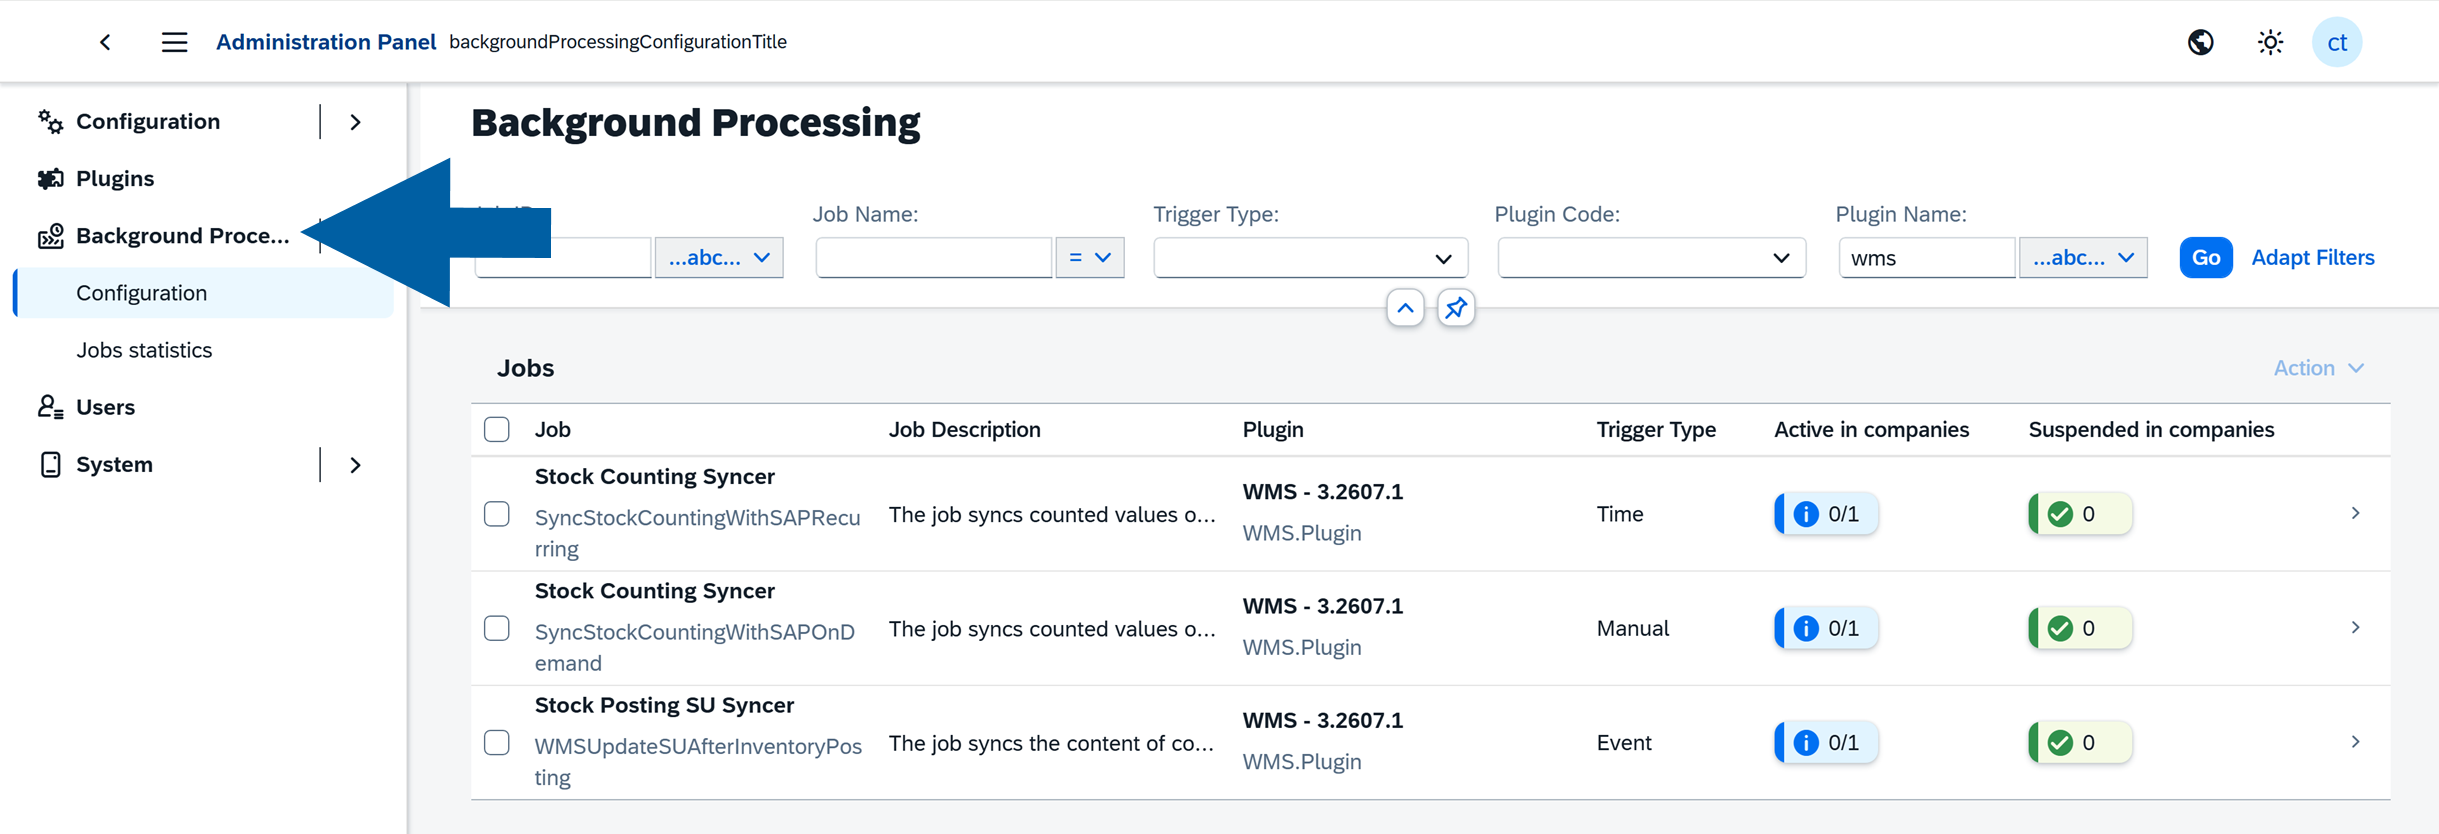
Go to CompuTec AppEngine Administration Panel > Background Processing.
-
Filter Jobs by Plugin Name containing
wms, and click Go to apply filters.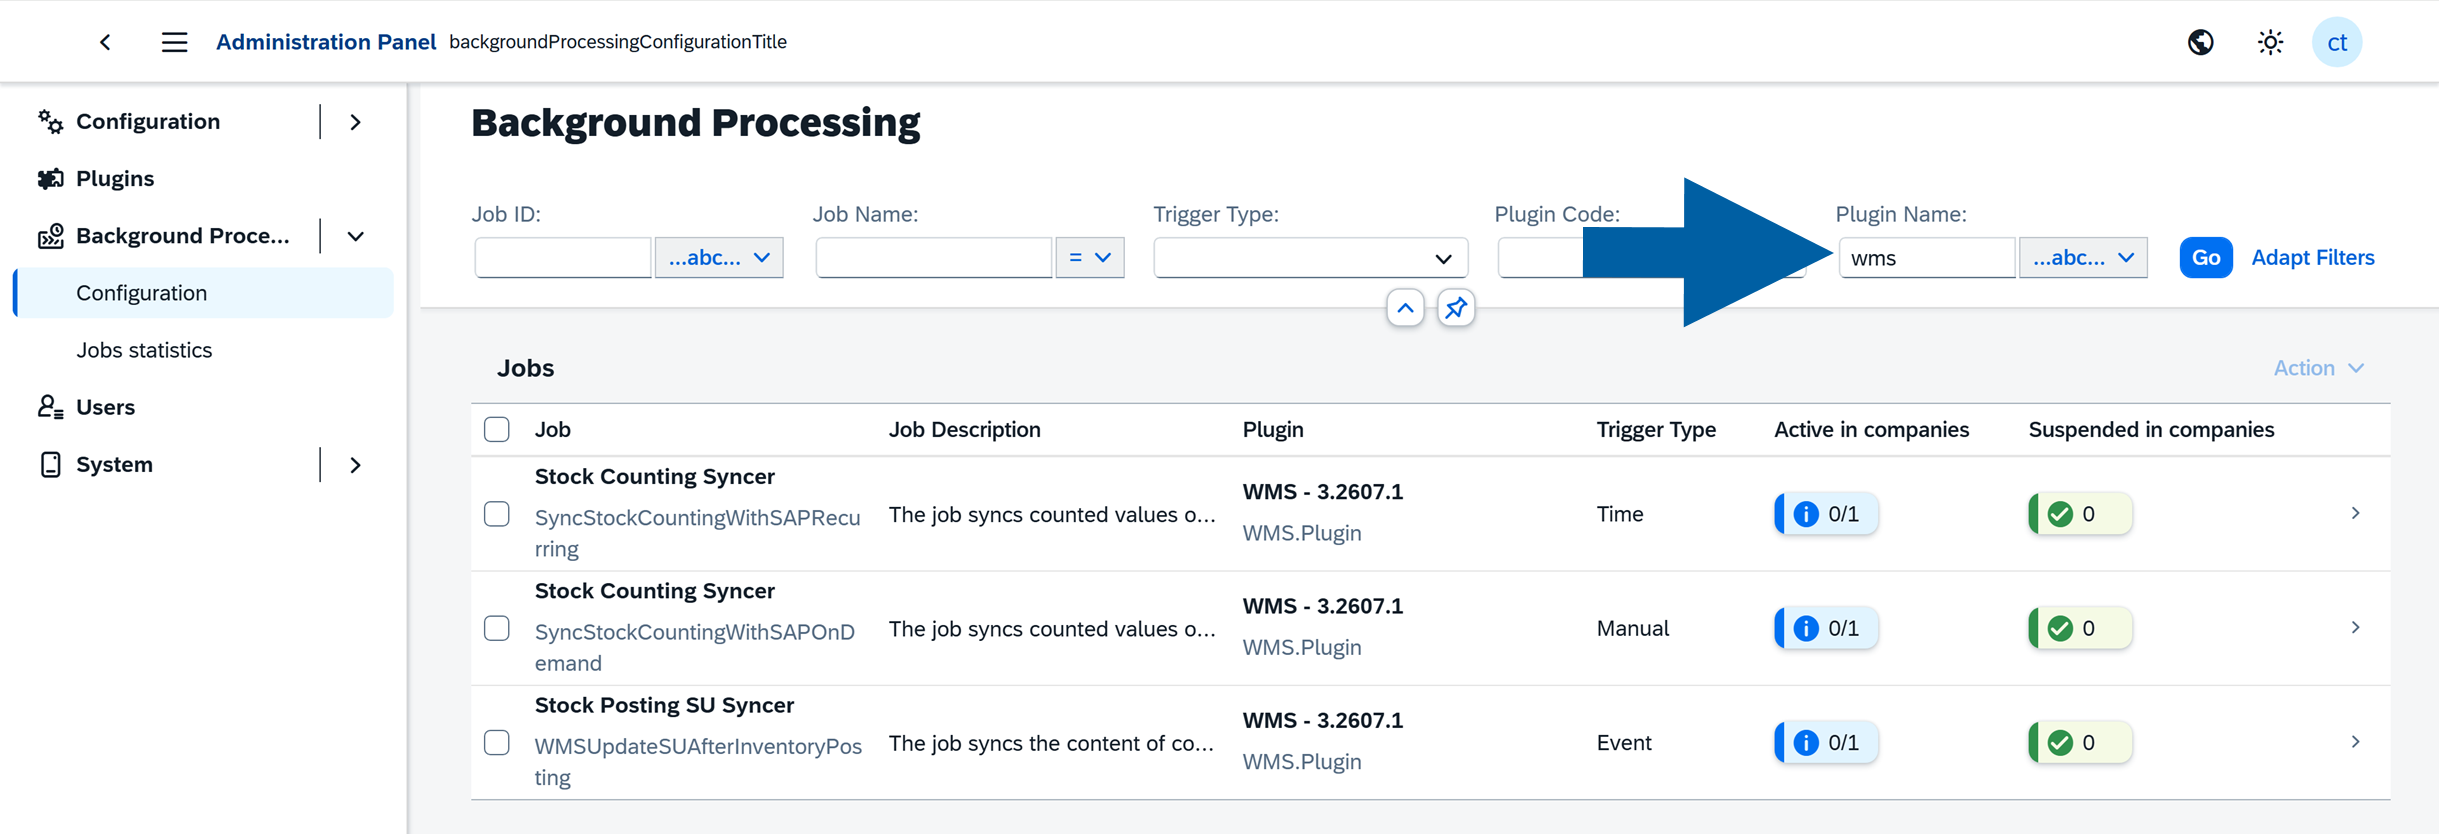
-
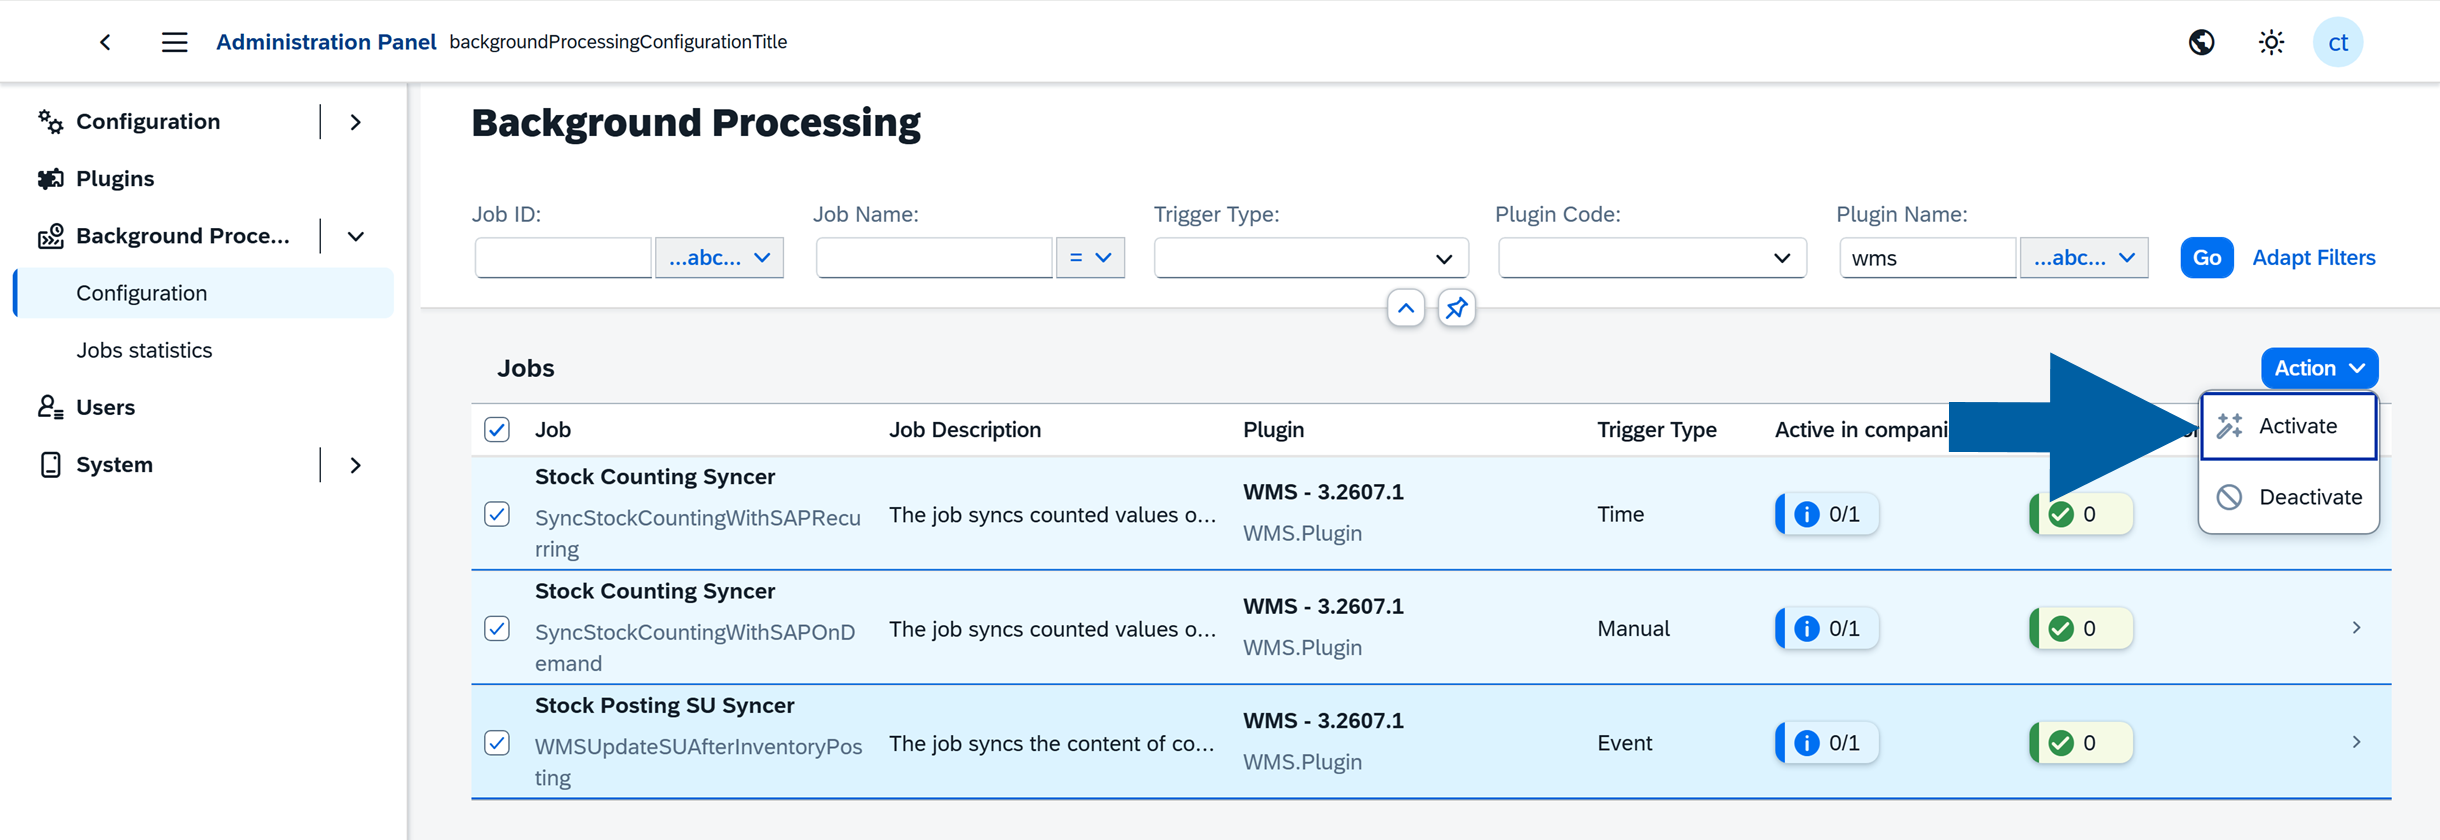
Mark all the WMS plugins in the list and click Action > Activate.
-
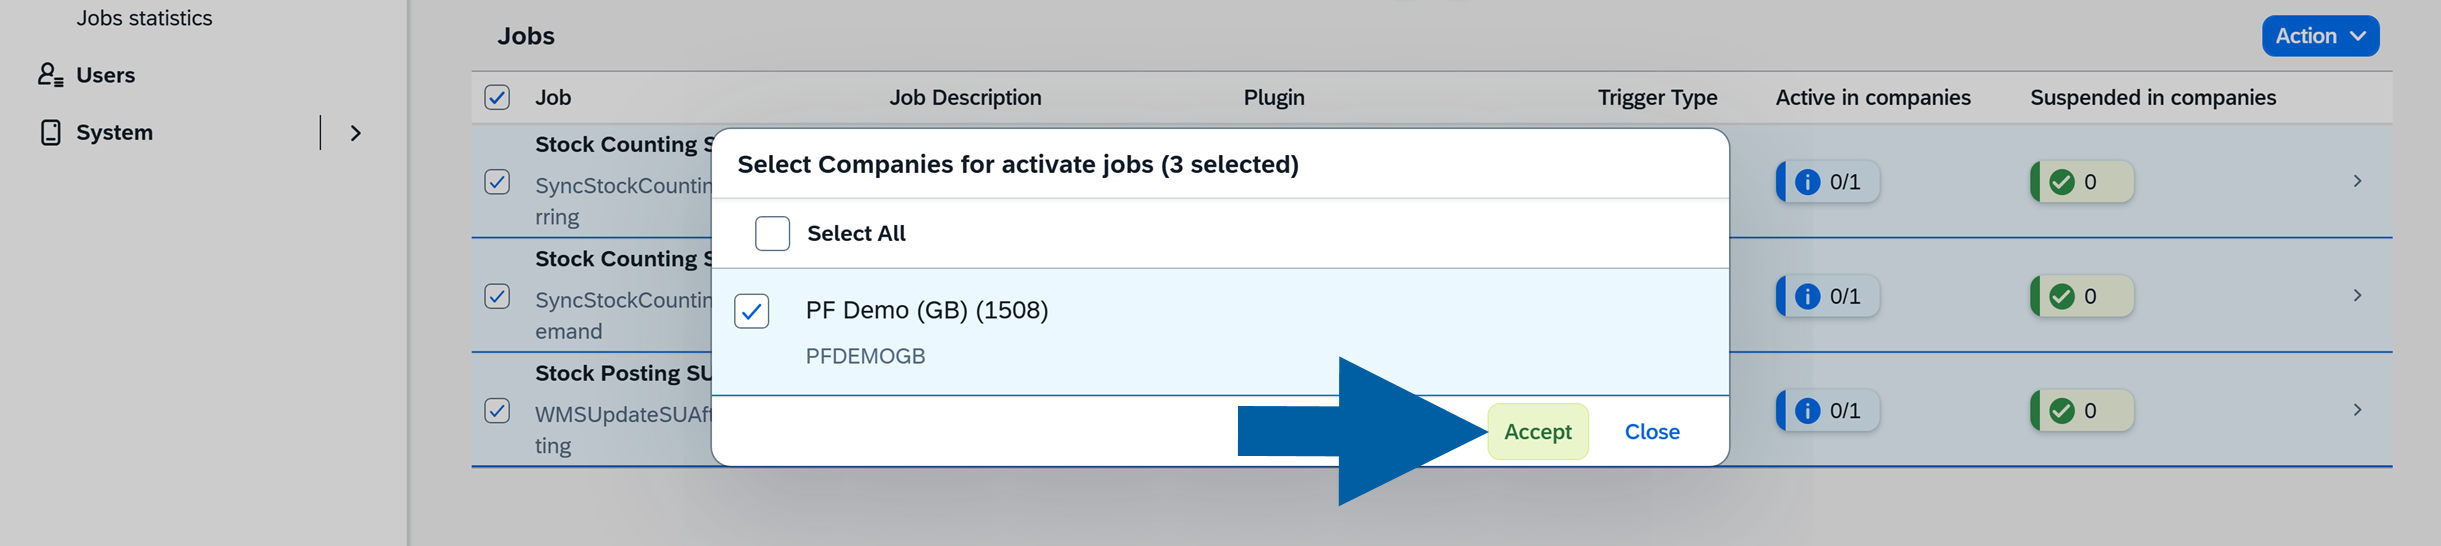
Select a company and click Accept.
-
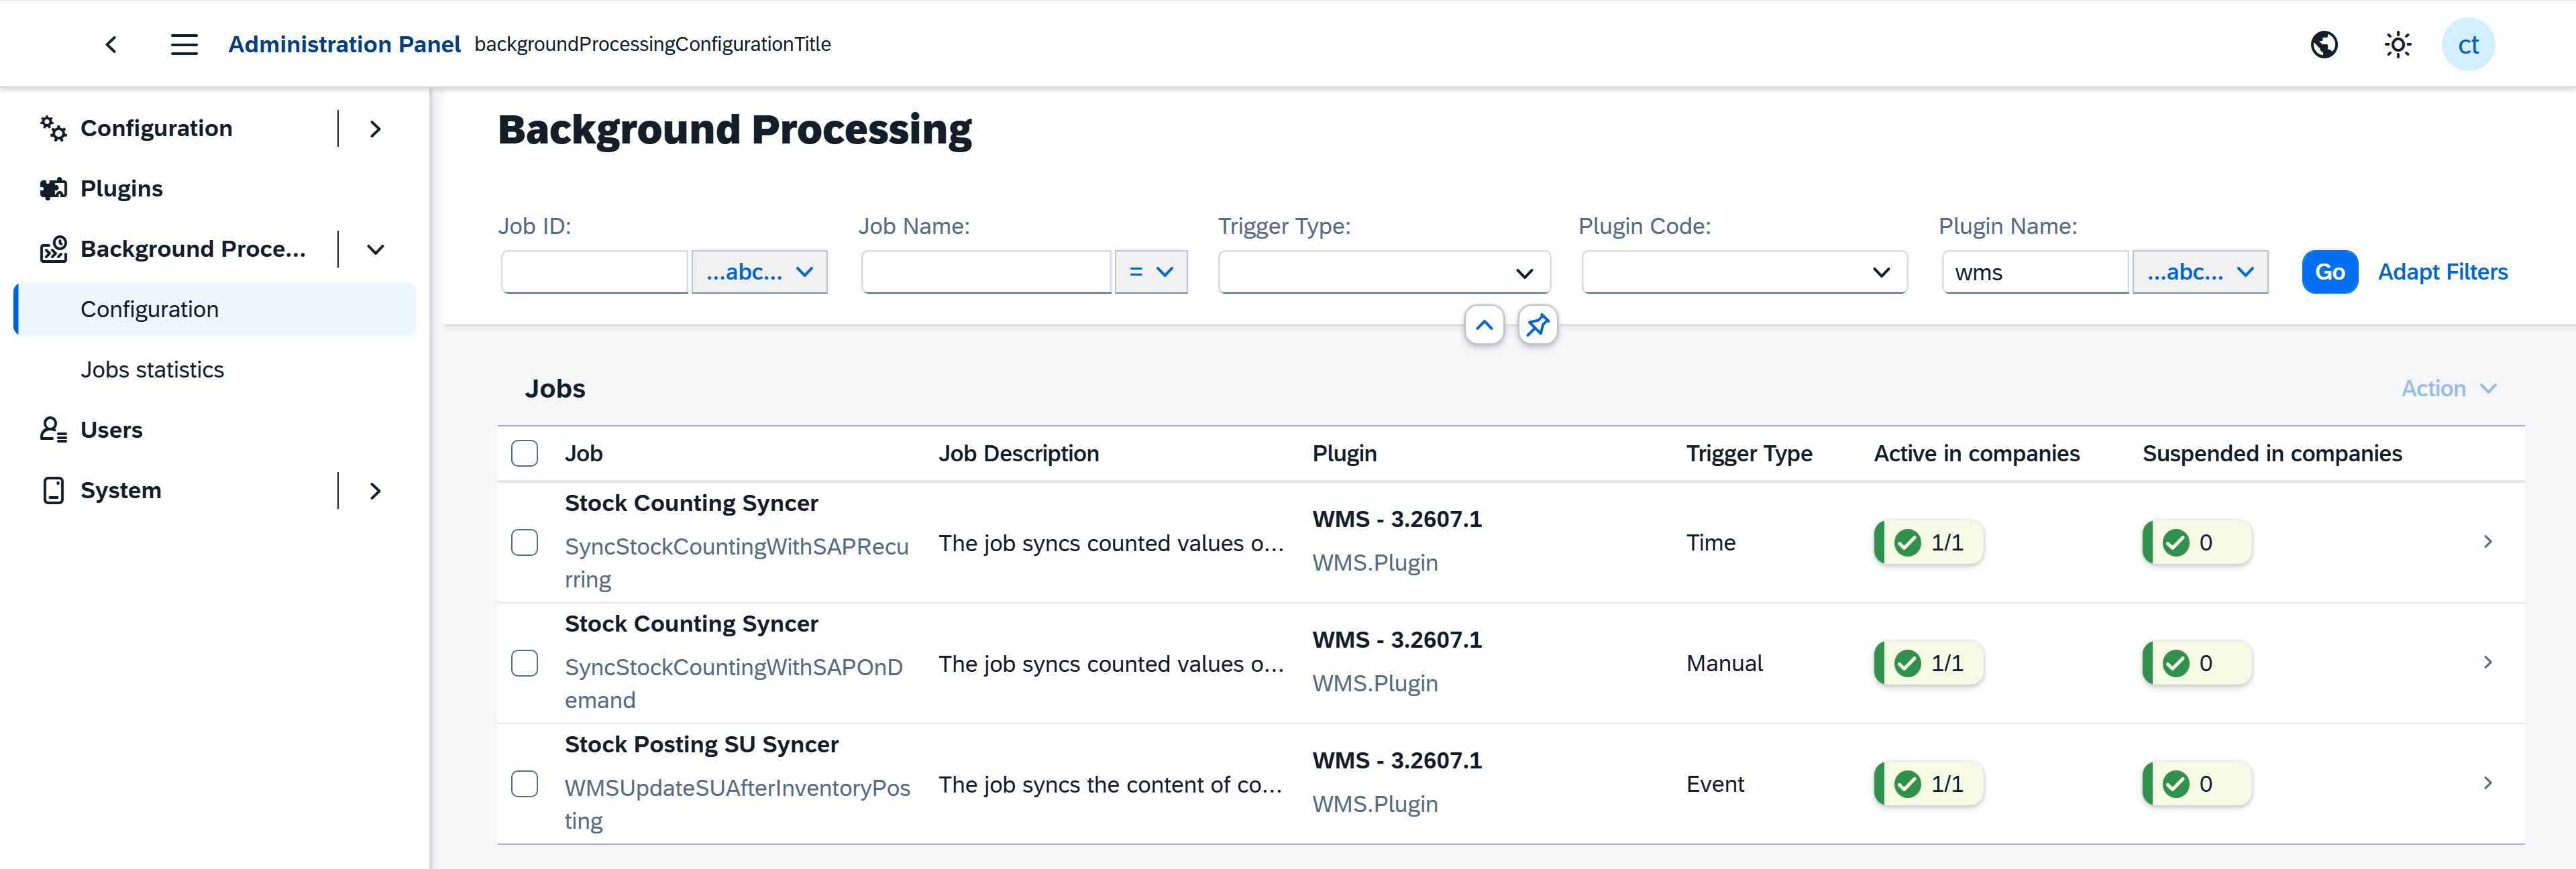
Now all WMS Background Processing jobs are active.
This step applies to CompuTec WMS 3.0 only.
Step 3: Download and install CompuTec WMS Server
To download and install CompuTec WMS Server, follow these steps:
-
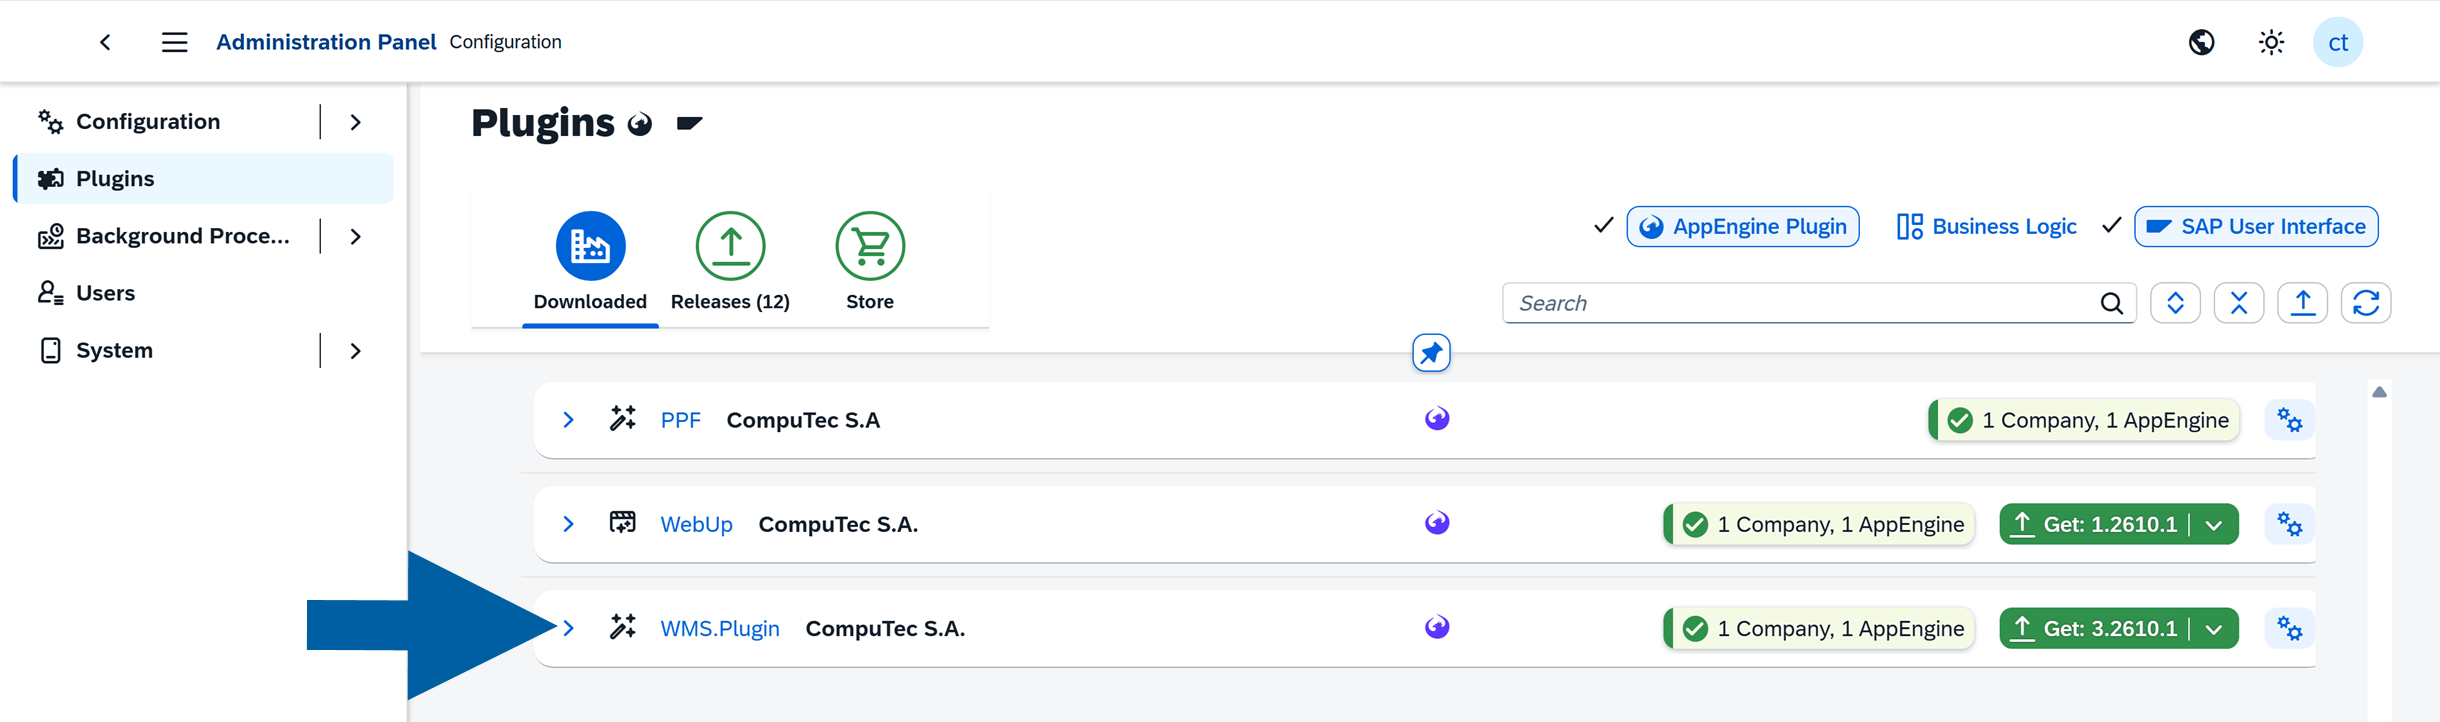
Open the installed CompuTec WMS plugin in CompuTec AppEngine.
-
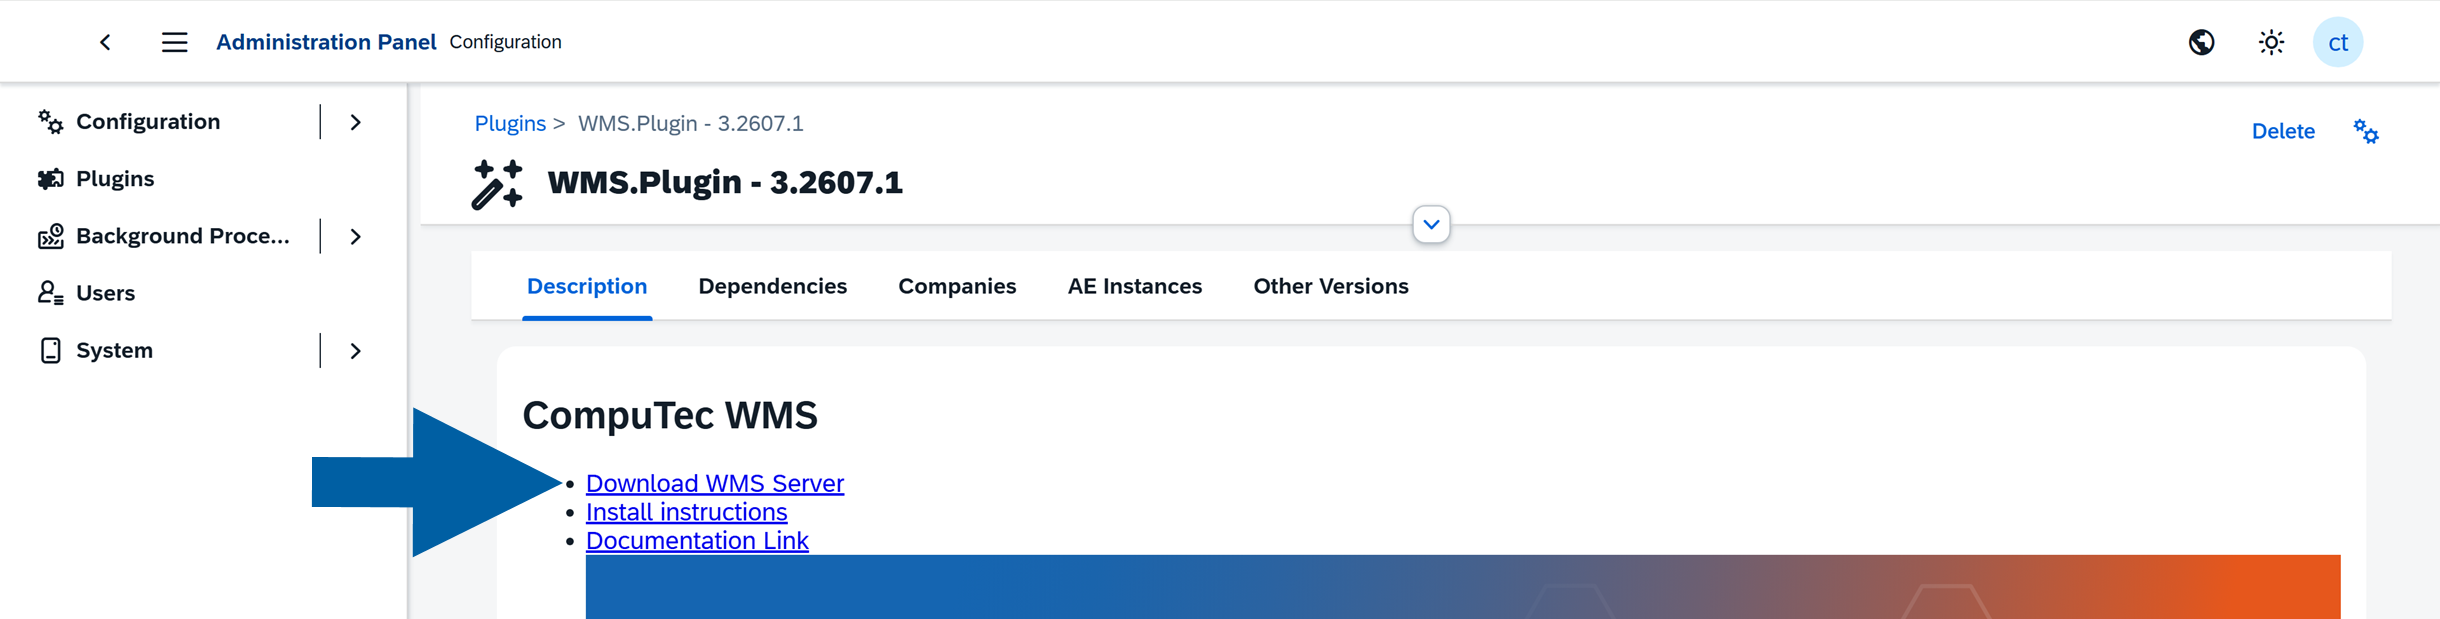
Locate the link to the CompuTec WMS Server installer.
-
Download the installer.
-
Install CompuTec WMS Server using the installer downloaded from the CompuTec WMS plugin.
After installation, configure the server connection and the SAP Business One companies that will use CompuTec WMS.
infoFor detailed instructions, see WMS Server Installation and Configuration Guide.
Step 4: Install CompuTec ProcessForce API, if ProcessForce is installed
If CompuTec ProcessForce is installed in the SAP Business One environment, you must also install the CompuTec ProcessForce API Plugin.
CompuTec WMS detects that ProcessForce is installed and requires the ProcessForce API to communicate with it correctly.
-
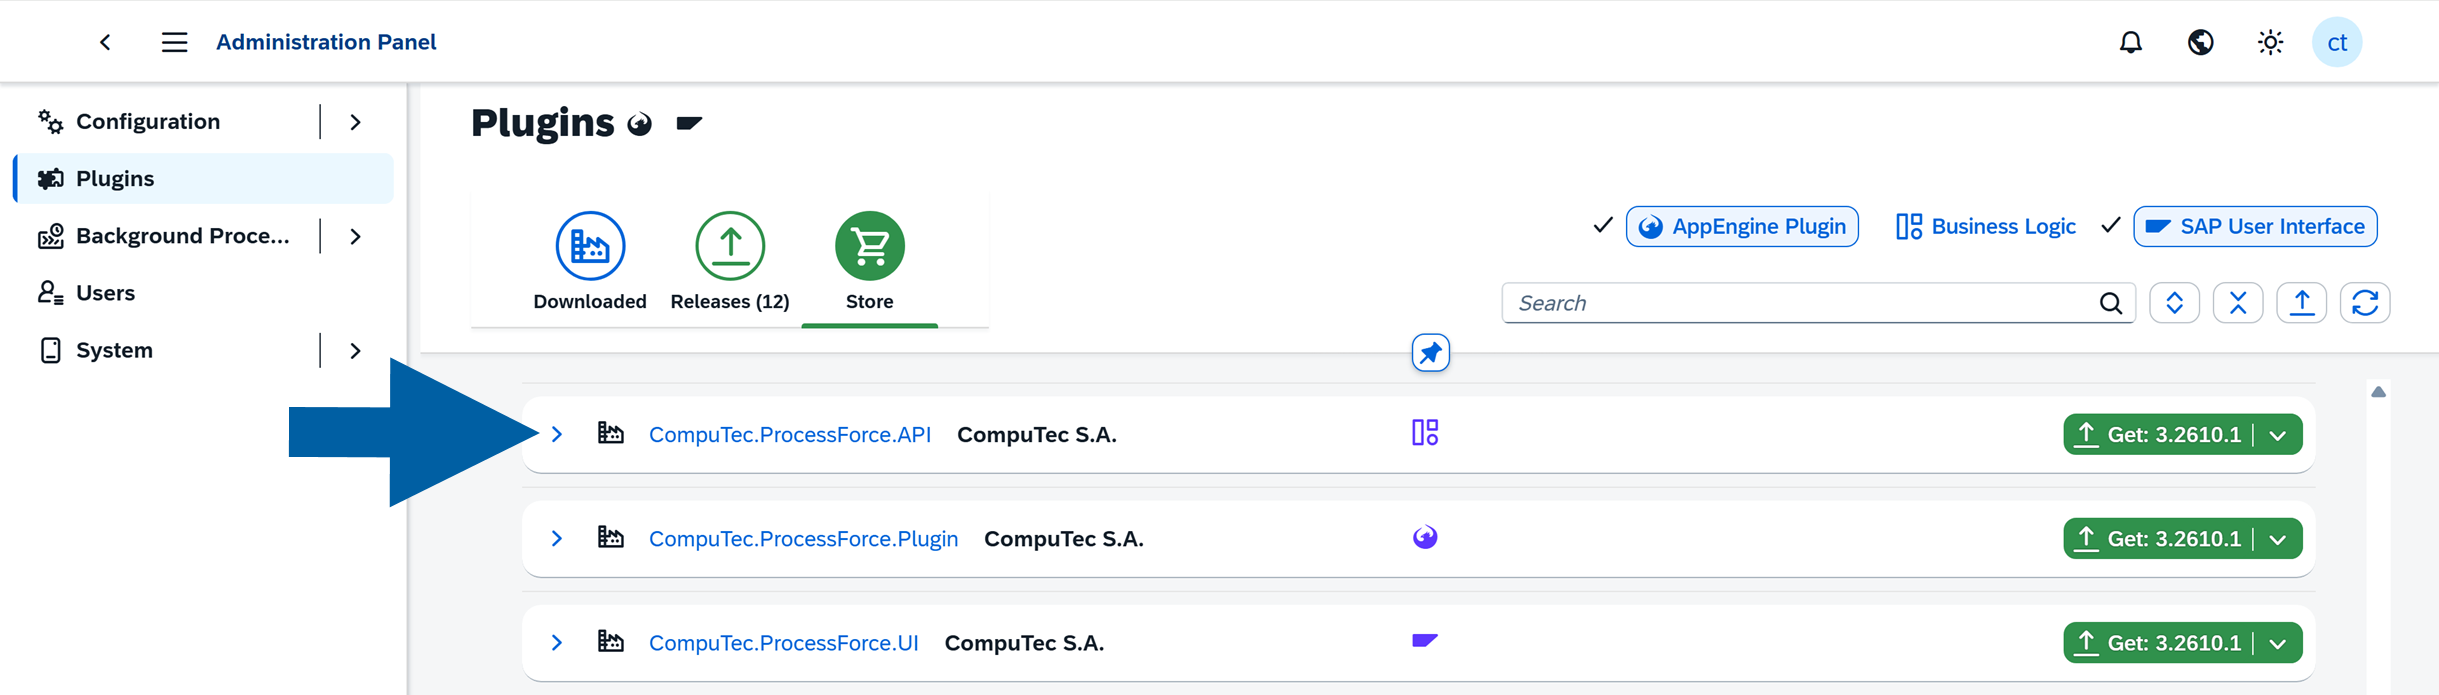
Go to CompuTec Administration Panel > Plugins > Store.
-
Install the CompuTec ProcessForce API following the same plugin installation process used for the CompuTec WMS 3.0 Plugin.
-
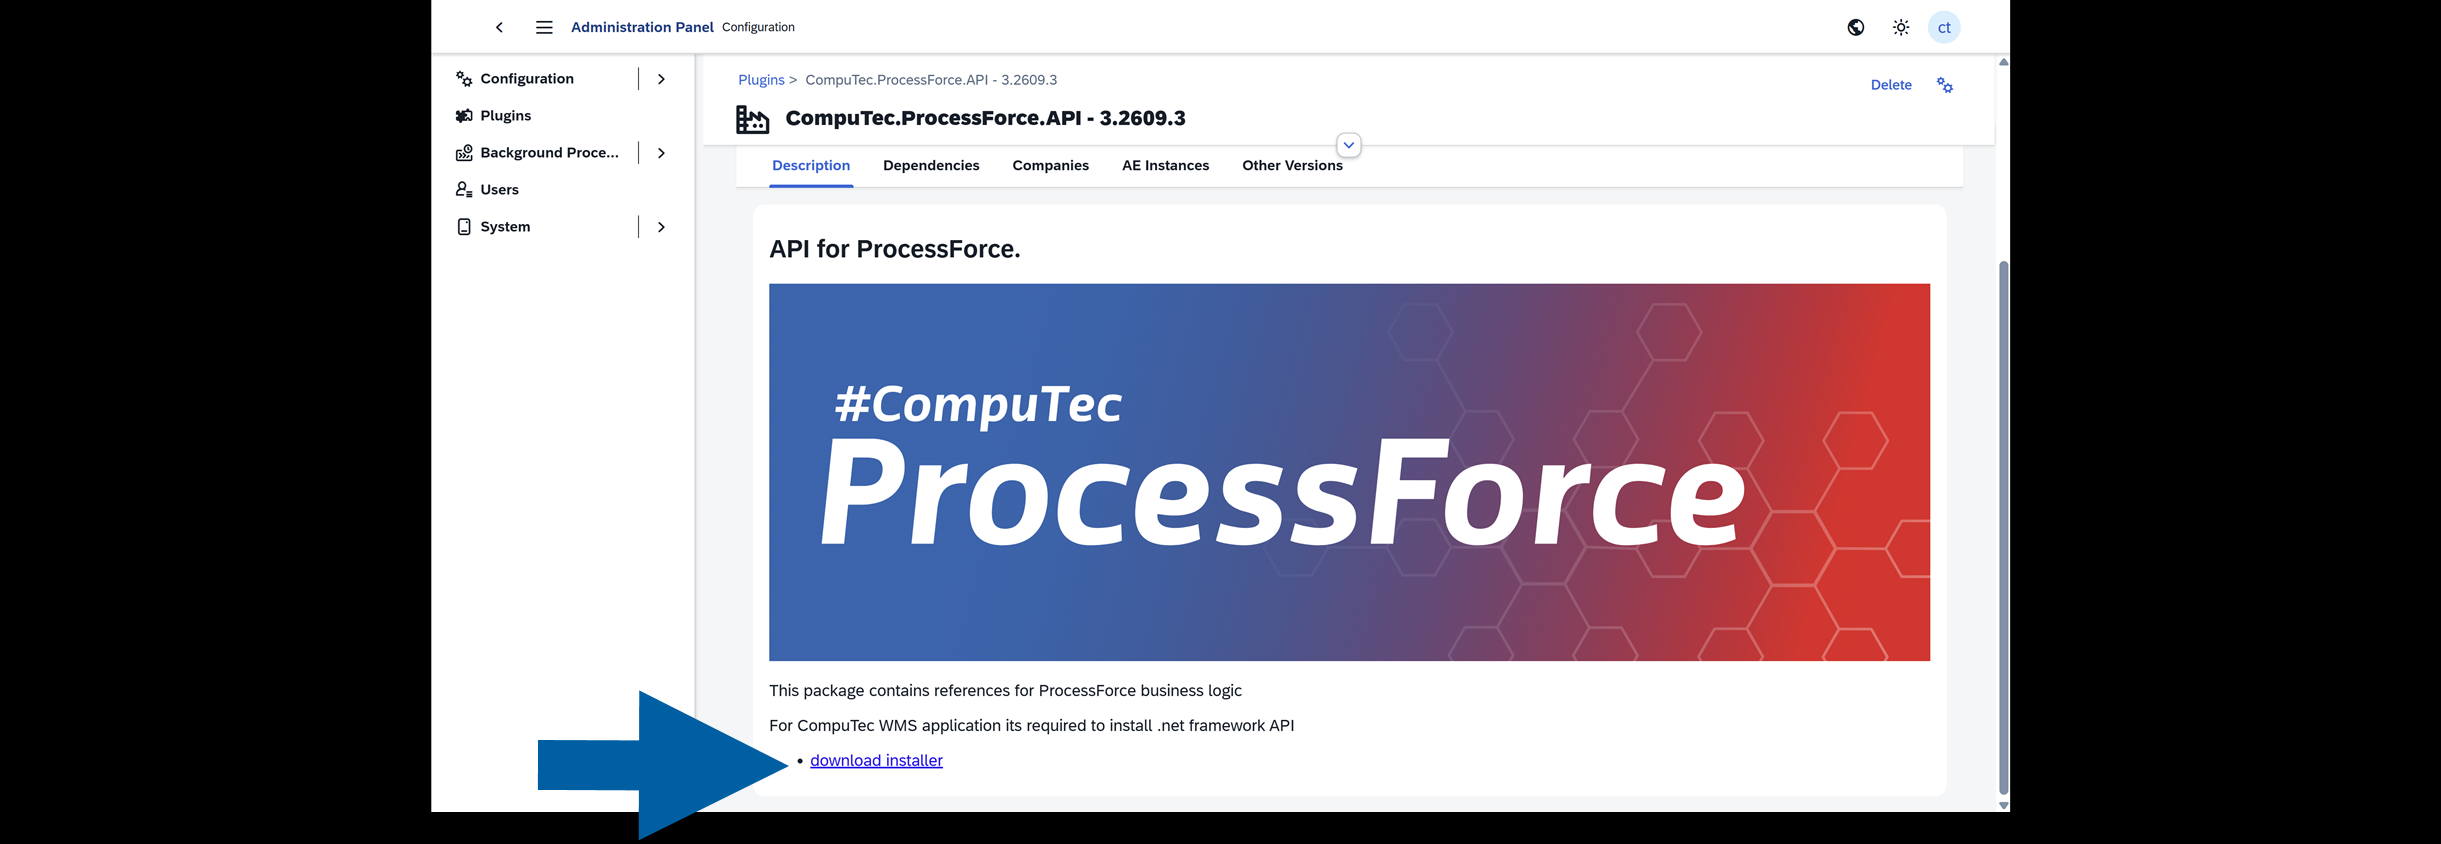
Go to CompuTec.Processforce.API Plugin Description, and click the link to download CompuTec ProcessForce API for WMS.
-
Follow the installation steps.

If CompuTec ProcessForce is not installed in your environment, you can skip this step.
Step 5: Configure CompuTec WMS licensing
Configure the required CompuTec WMS licenses and assign them according to your environment.
For detailed instructions, see WMS Licensing.
Step 6: Install CompuTec WMS Client
Download and install CompuTec WMS Client on the devices that will be used for warehouse operations.
For detailed instructions, see Download CompuTec WMS Client.
Step 7: Configure CompuTec WMS Client
Connect the WMS Client to the WMS Server and configure the required client settings.
For detailed instructions, see Configure CompuTec WMS Client.
Validations
To ensure a seamless and error-free experience with CompuTec WMS, verify the following during installation and configuration:
-
Log in with your username and password to authenticate credentials before selecting a database.

-
Verify CompuTec AppEngine connection by checking the connectivity to the CompuTec AppEngine server and confirm the accuracy of the data entered in the CompuTec WMS Server configuration.

-
Ensure that the CompuTec ProcessForce API is updated to the latest version for compatibility.

-
Verify that the installed CompuTec WMS version is compatible or update it directly via CompuTec AppEngine.

-
If WMS.BusinessLogic is not linked to the selected database, assign it and ensure the correct CompuTec AppEngine instance is chosen.
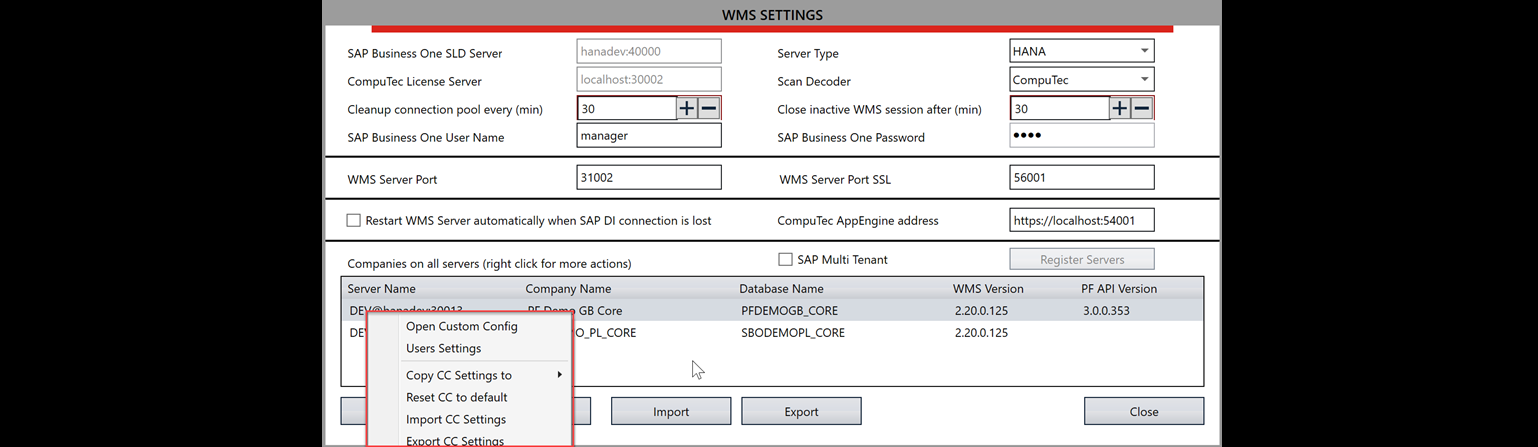
Additional Configuration
Depending on your environment and warehouse processes, additional configuration may be required, such as:
- CompuTec Gateway Service for weight scales and label printing
- RDP scanner configuration
- SAP Business One settings
- Barcode configuration
- Company-specific WMS settings
For company-specific application settings, see Custom Configuration.
Quick start
Follow these steps to set up CompuTec WMS 3.0 and prepare it for use.
Install the components
- Install CompuTec License Server.
- Install and activate
WMS.PluginandWMS.BusinessLogicin CompuTec AppEngine. - Install CompuTec WMS Server.
Request and import a license
-
Open CompuTec Service Manager.
-
Select CompuTec License Server from the Service list.
-
Click PDC/WMS Licensing.

-
On the Import tab, click Copy to Clipboard to copy the terminal license key.

-
Create a license request in the CompuTec Support Portal. Include the following information:
- Full server name.
- Terminal license key.
- Required number of terminal licenses.
- Intended use, such as customer use or partner testing.
-
After you receive the license file, return to the Import tab.
-
Click Browse and select the license file.

-
Click Import.
Add and activate users
-
Open the WMS Users tab.
-
Click Add.

-
Enter the CompuTec WMS user credentials and the associated SAP Business One user credentials.
-
Select Is Active for the user.
-
Click Update.
-
Repeat these steps for each user.
Configure license assignment
-
Open the License Management tab.
-
Select Assign available licenses for newly added terminal accounts automatically.
Available licenses will be assigned automatically to new terminals.

-
Open the Plugins tab.
-
Select Used for the CompuTec WMS Server entry.
-
Click Update.

The CompuTec WMS Server entry may appear only after the first attempt to log in to CompuTec WMS Client. If the entry is missing, attempt to log in, then return to the Plugins tab to assign the server license.
Enable users for a company
-
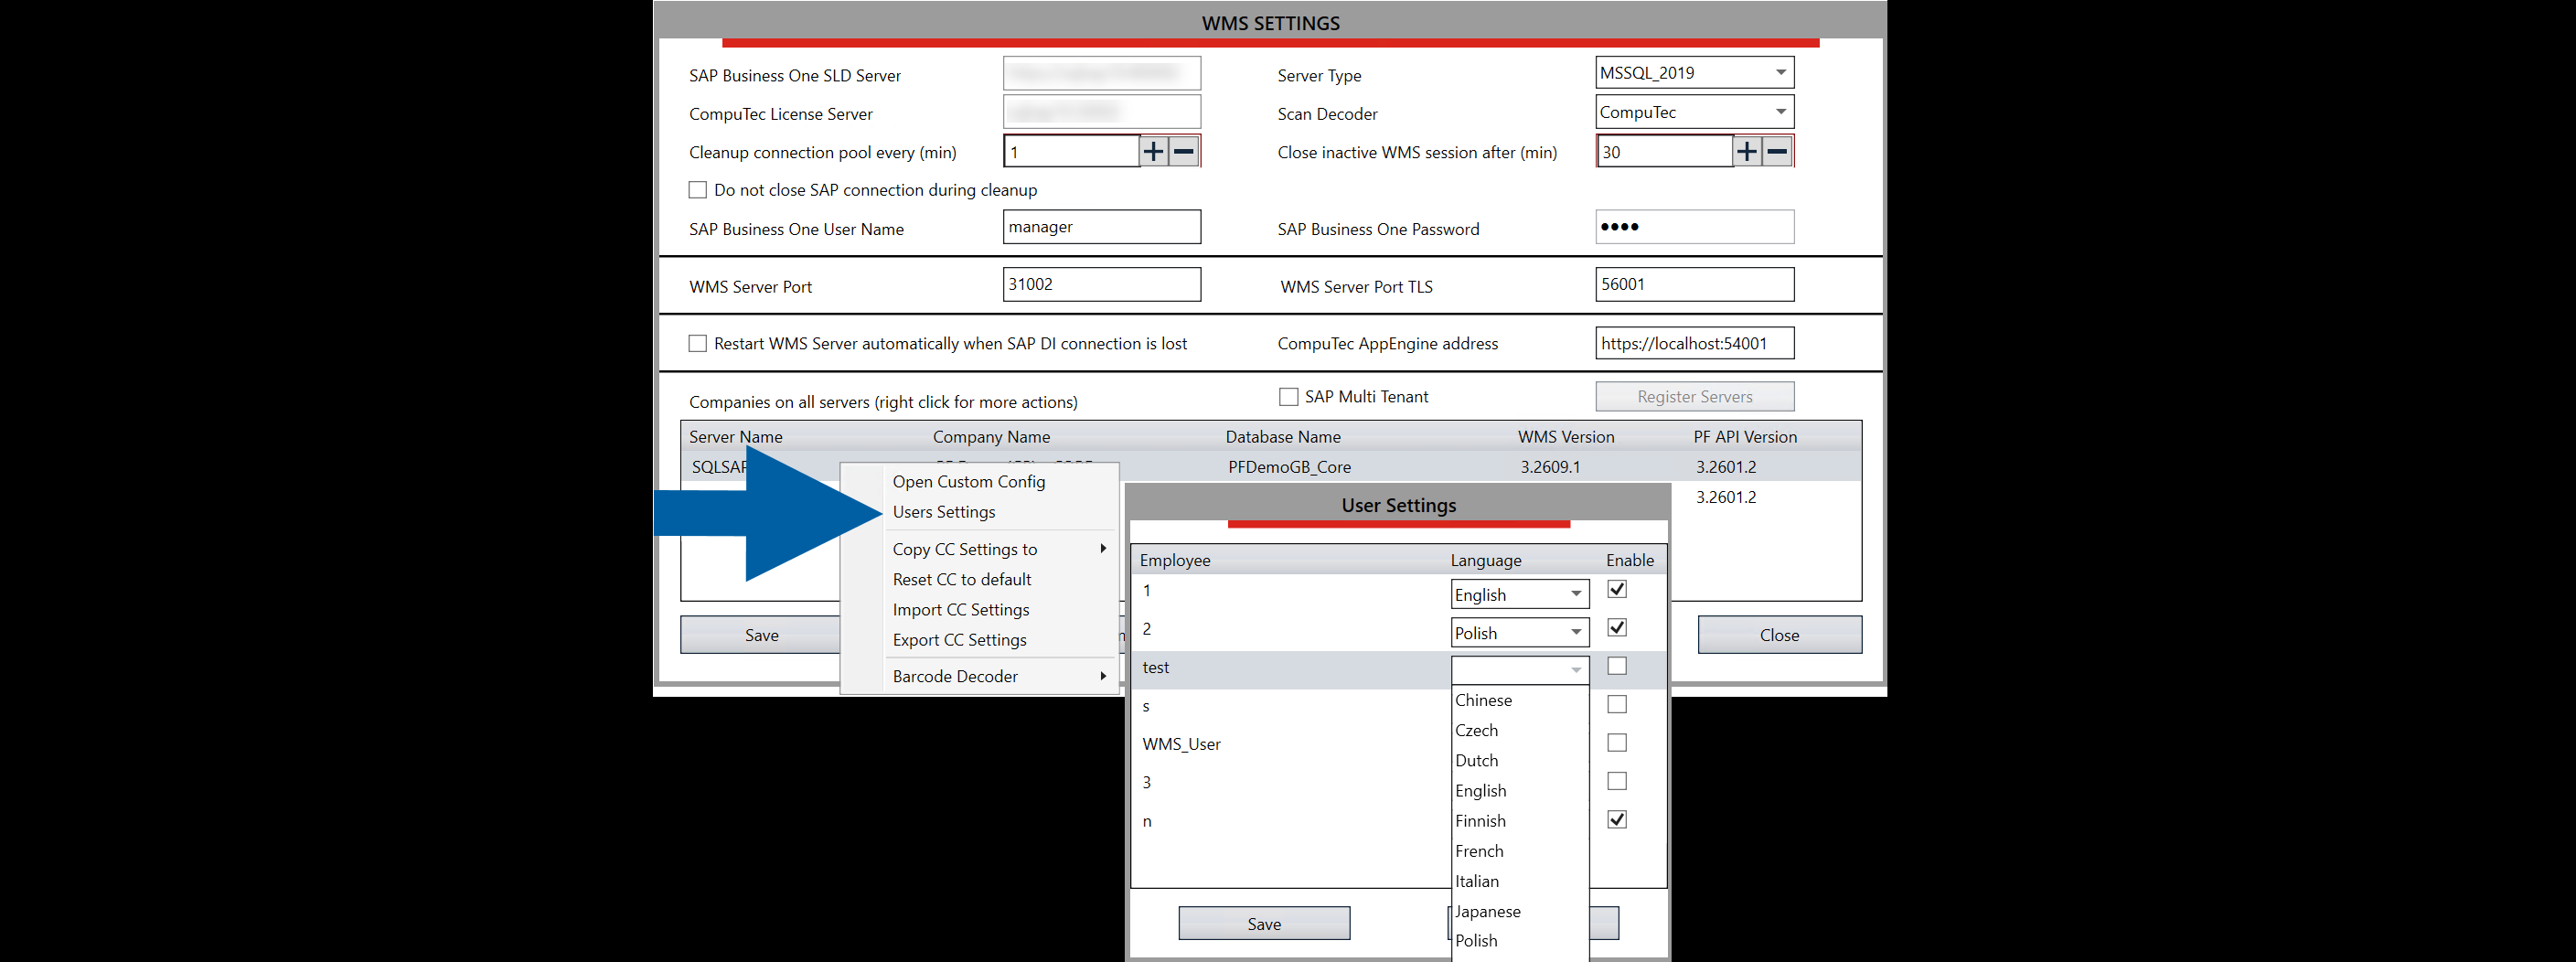
Run WMS Settings as an administrator.
-
Right-click the company and select Users Settings.
-
Select Enable for each user who needs access to the company.
-
Select a Language for each enabled user.
-
Click Save in the User Settings window.
Log in
- Open CompuTec WMS Client.
- Log in with the CompuTec WMS user credentials.