You are viewing documentation for CompuTec WMS 3.0, which runs on CompuTec AppEngine 3.0 (.NET 8).
If you use CompuTec WMS 2.0, see the CompuTec WMS 2.0 documentation.
When upgrading to CompuTec WMS 3.0, update all required CompuTec components together to ensure compatibility.
Before installing or upgrading, review the CompuTec WMS Installation Guide and the system requirements.
Interface Design Manager
The Interface Design Manager allows administrators to customize the layout and appearance of the CompuTec WMS client.
Using workflow templates, you can configure how the application's main menu is organized, control which transactions are available to users, group transactions into containers, customize line colors, and simplify the interface for warehouse operators.
With the Interface Design Manager, you can:
- create workflow templates,
- organize transactions,
- create multi-level menus,
- merge layout cells,
- assign custom icons,
- customize document line colors,
- hide selected interface buttons,
- assign templates to SAP Business One users.
Enable the Interface Design Manager
Before creating or assigning templates, enable the feature.
- Go to Custom Configuration > Manager.
- Select Enable Interface Design Manager.
- Select Save.
The Interface Design Manager becomes available.
Create a template
-
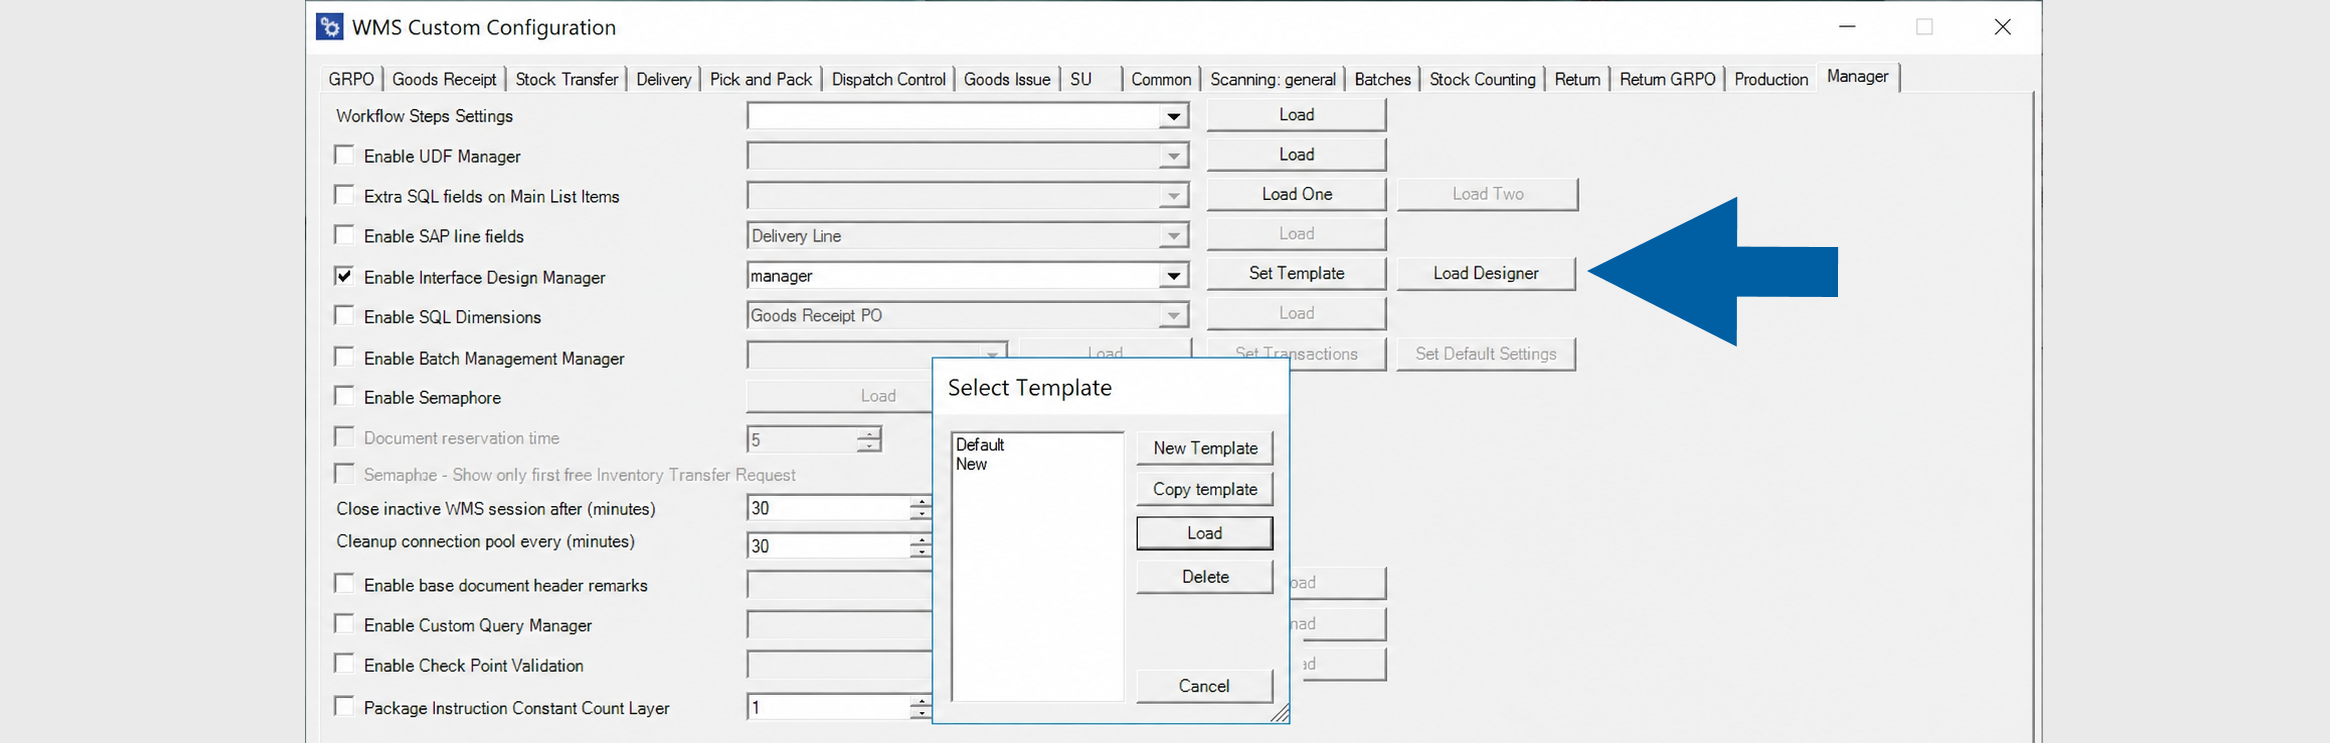
Click Load Designer.
-
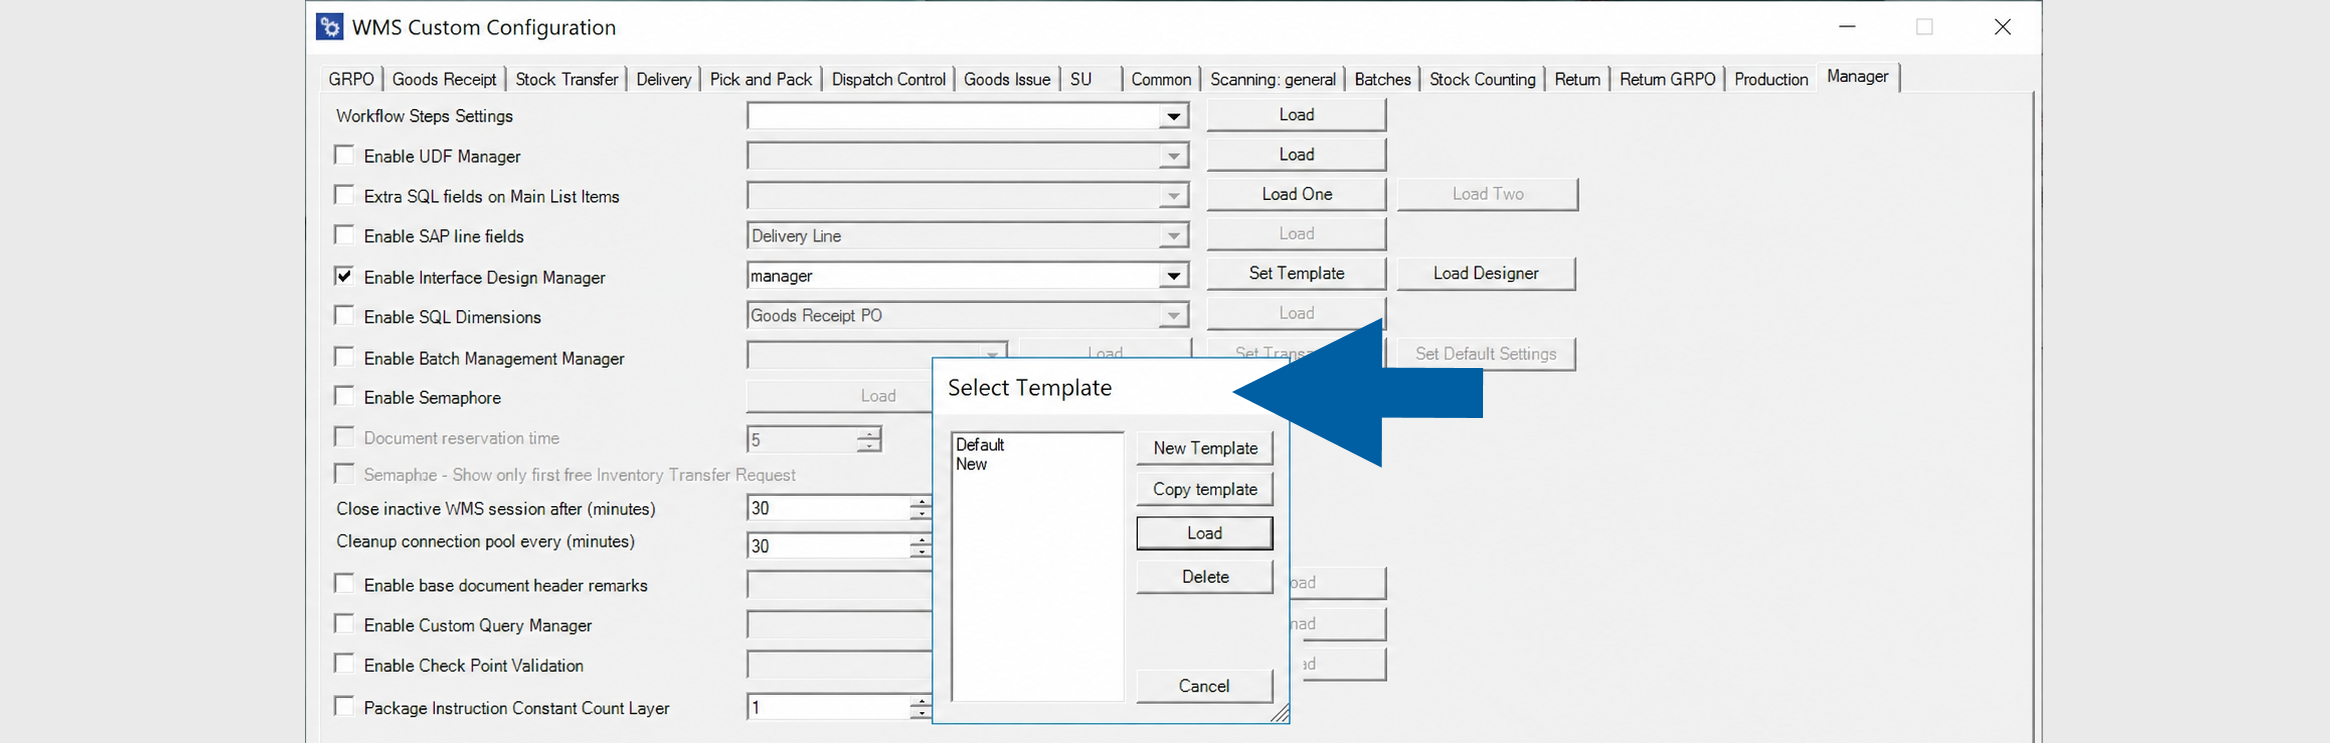
The Select Template window opens. From here, you can:
- create a new template,
- copy an existing template,
- load a template for editing,
- delete a template.
-
After selecting or creating a template, the Interface Design Manager opens.
Design the workflow
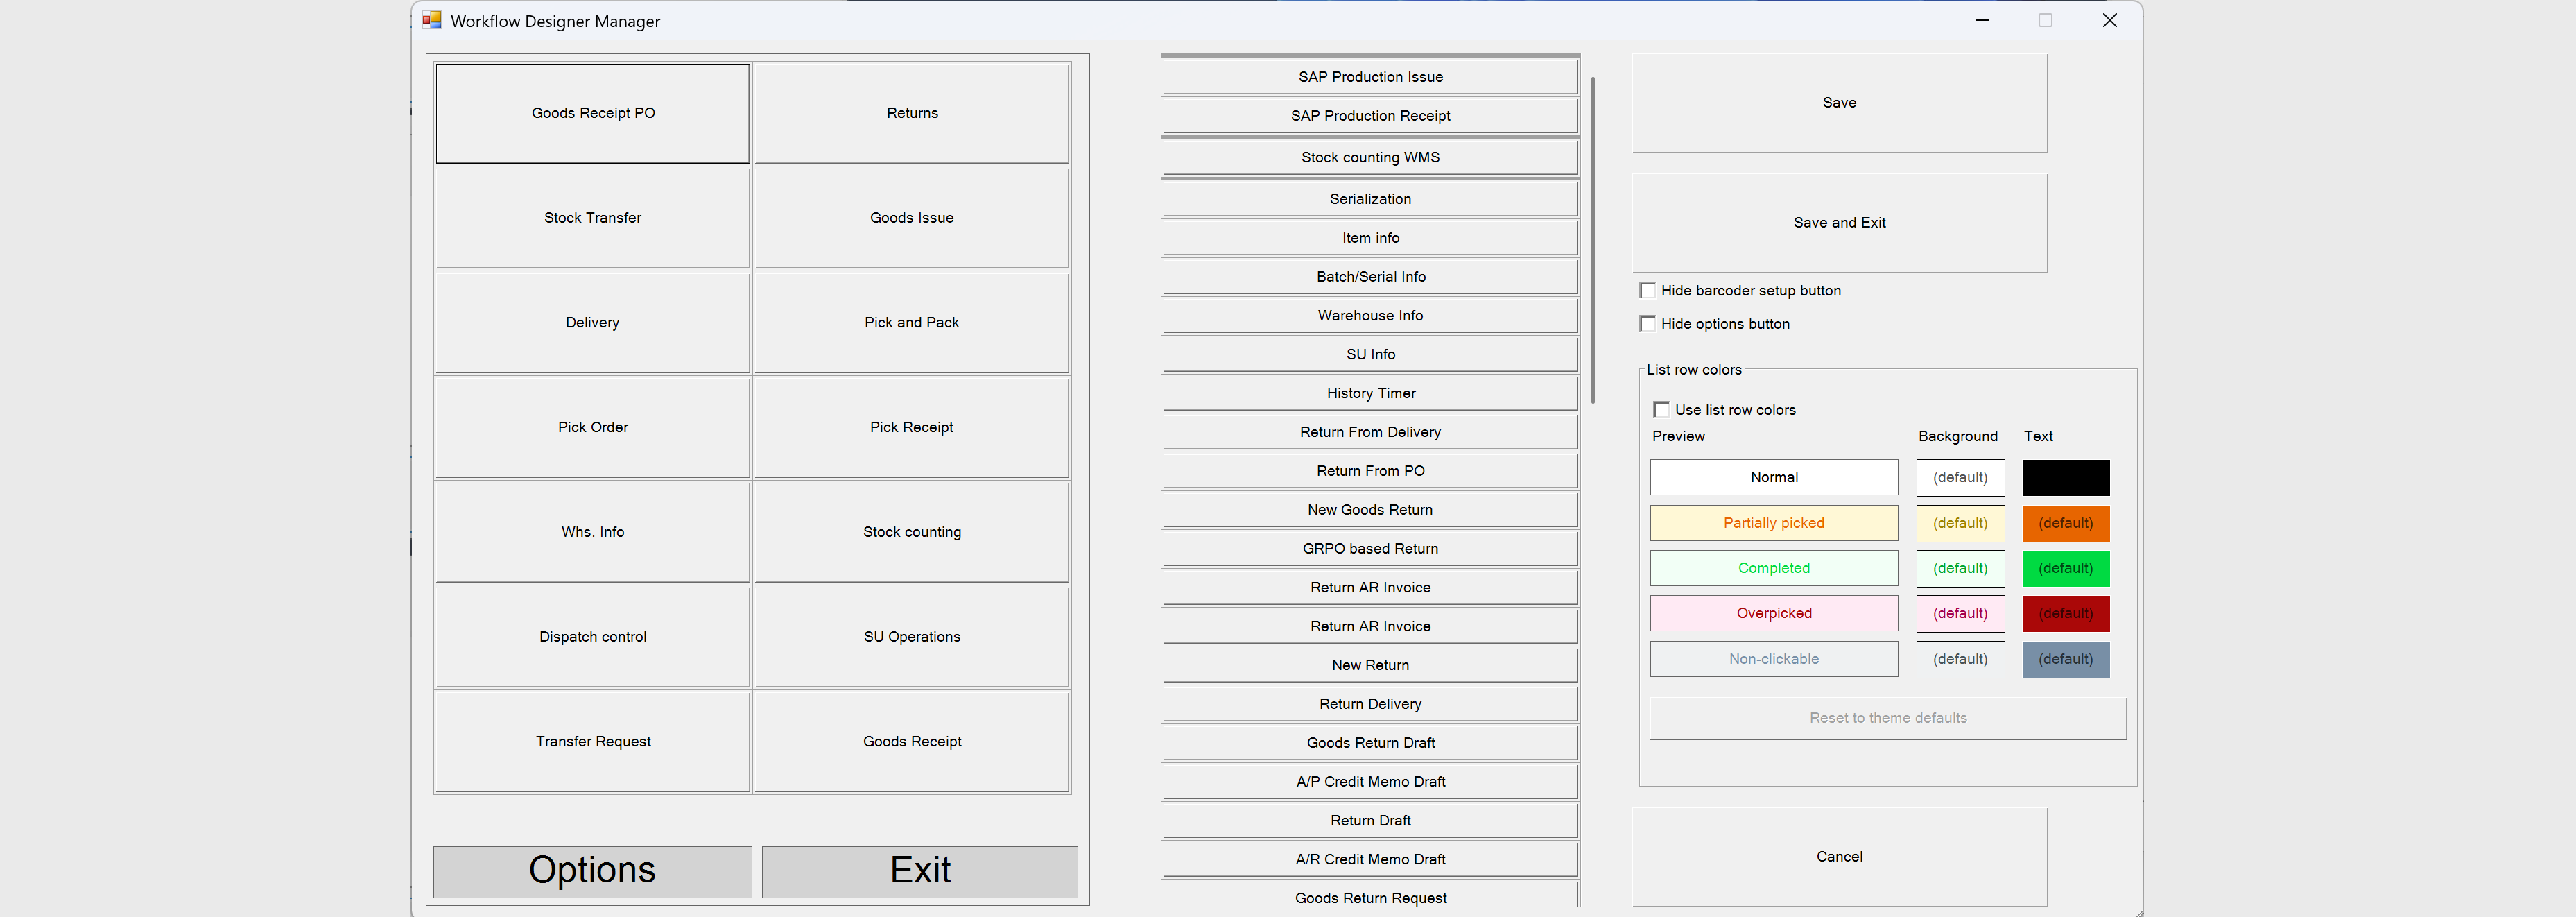
The Interface Design Manager contains three working areas.
Layout
The left panel displays the application's main menu.
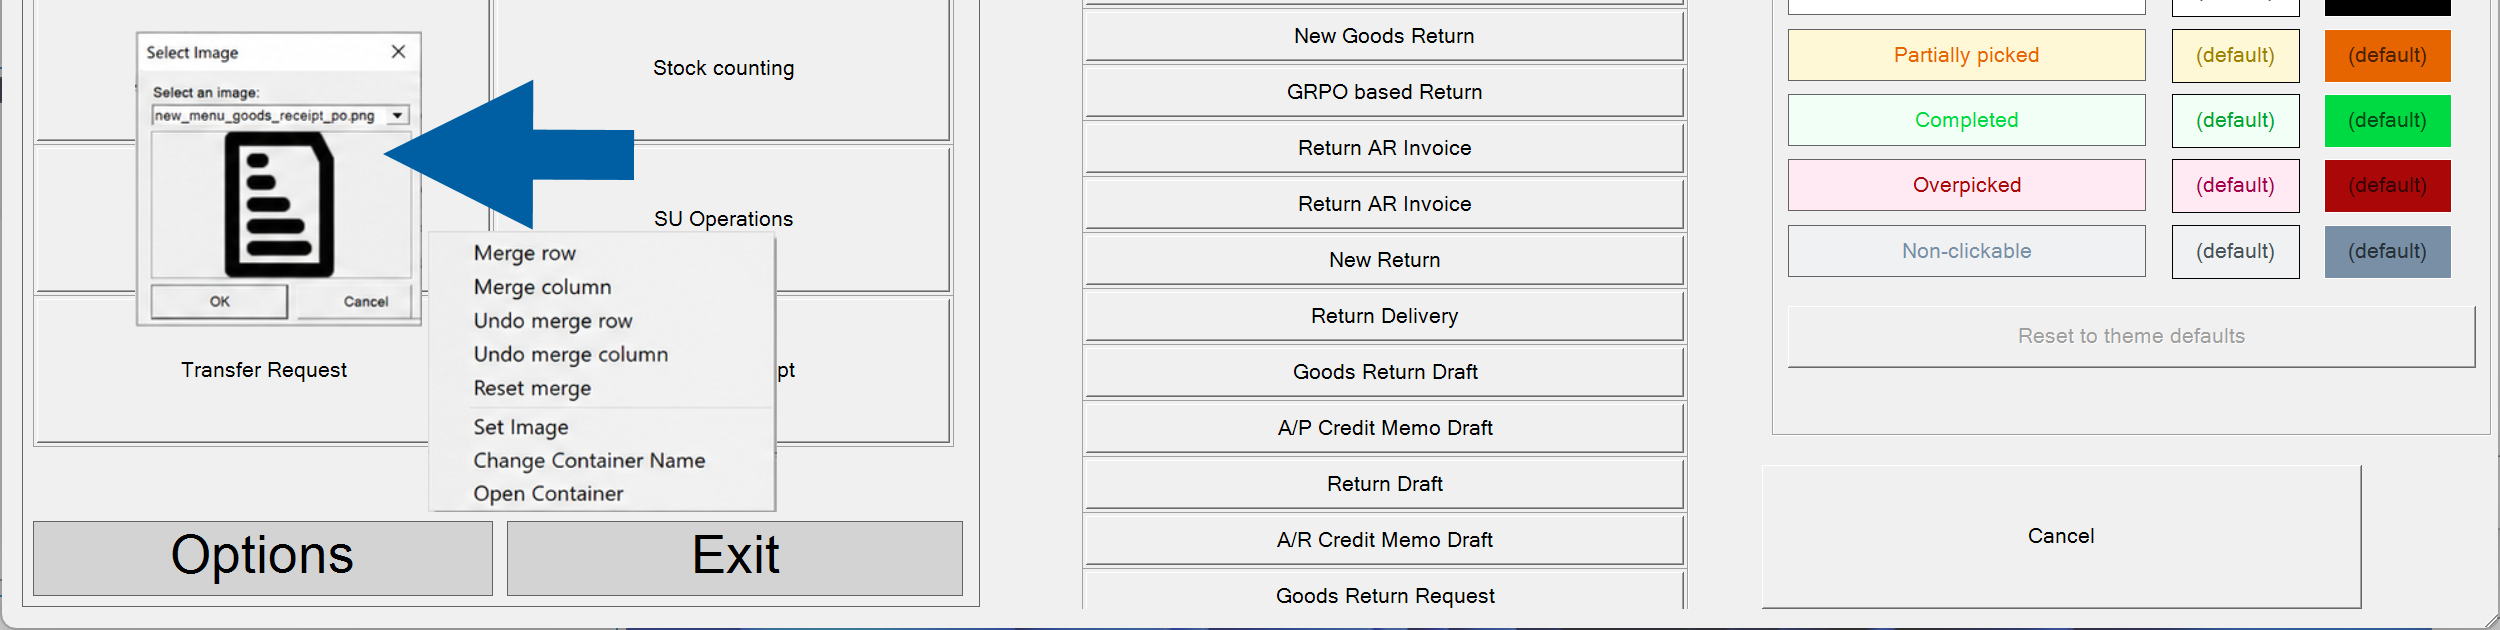
Click Options to open the context menu, and then you can:
- add rows,
- add columns,
- merge rows and columns
- assign icons.

Drag transactions or containers into the layout to build the menu structure.
Transactions
The center panel contains all available transactions.
Drag a transaction into the layout to make it available from the main menu.
To remove a transaction, drag it back to the transaction list.
Containers
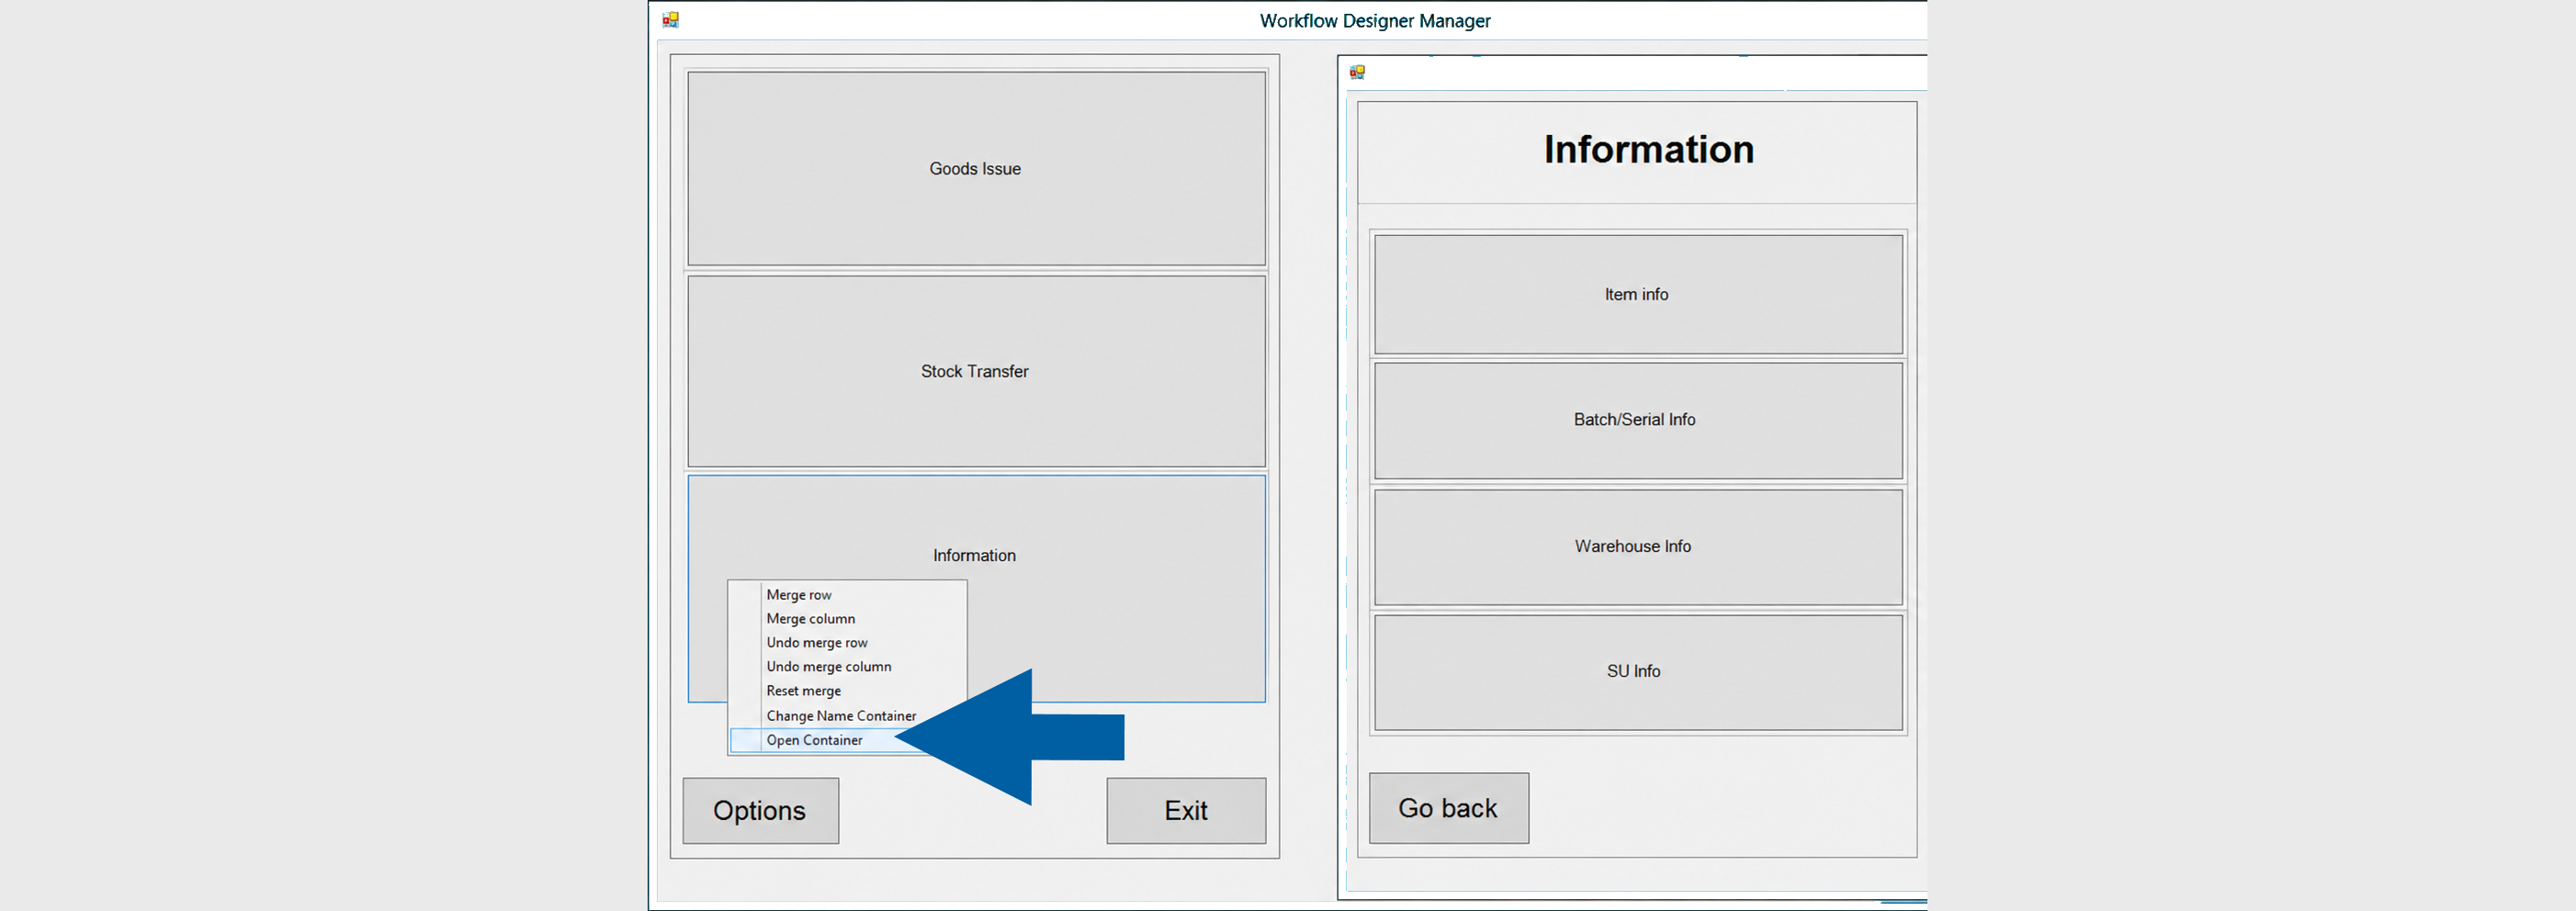
Containers allow you to group multiple transactions into a single menu item.
You can:
- create folders,
- rename containers,
- build multi-level menus by nesting containers.
Configuration
The right panel contains options for saving the template and customizing the interface.
From here, you can:
- save changes,
- save and exit,
- cancel changes,
- hide selected buttons,
- customize document line colors.
After adding some transactions to grids, it is possible to merge rows or columns. You can reach the option from a right-click context menu.
Hide interface buttons
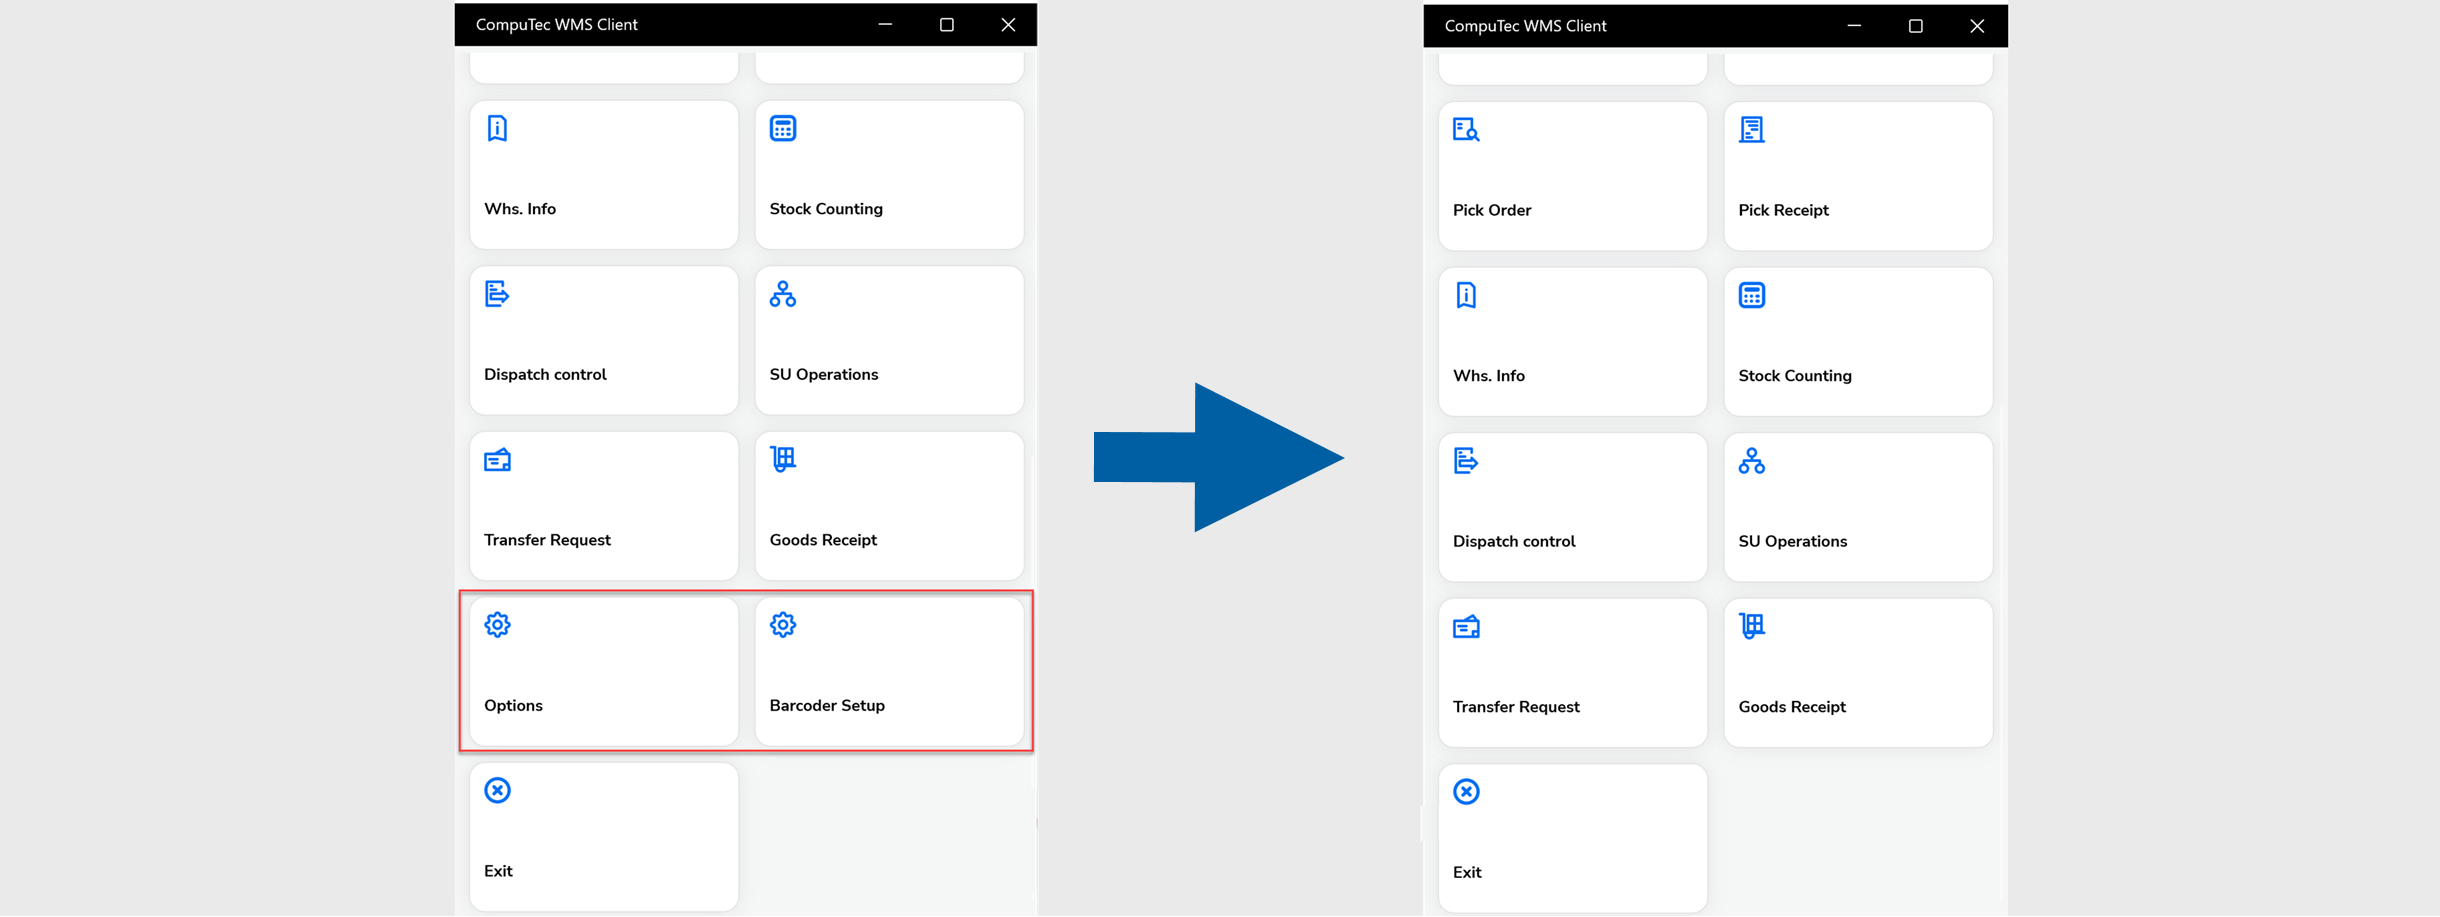
To simplify the interface for warehouse operators, you can hide selected buttons.
Available options:
- Hide barcoder setup button
- Hide options button
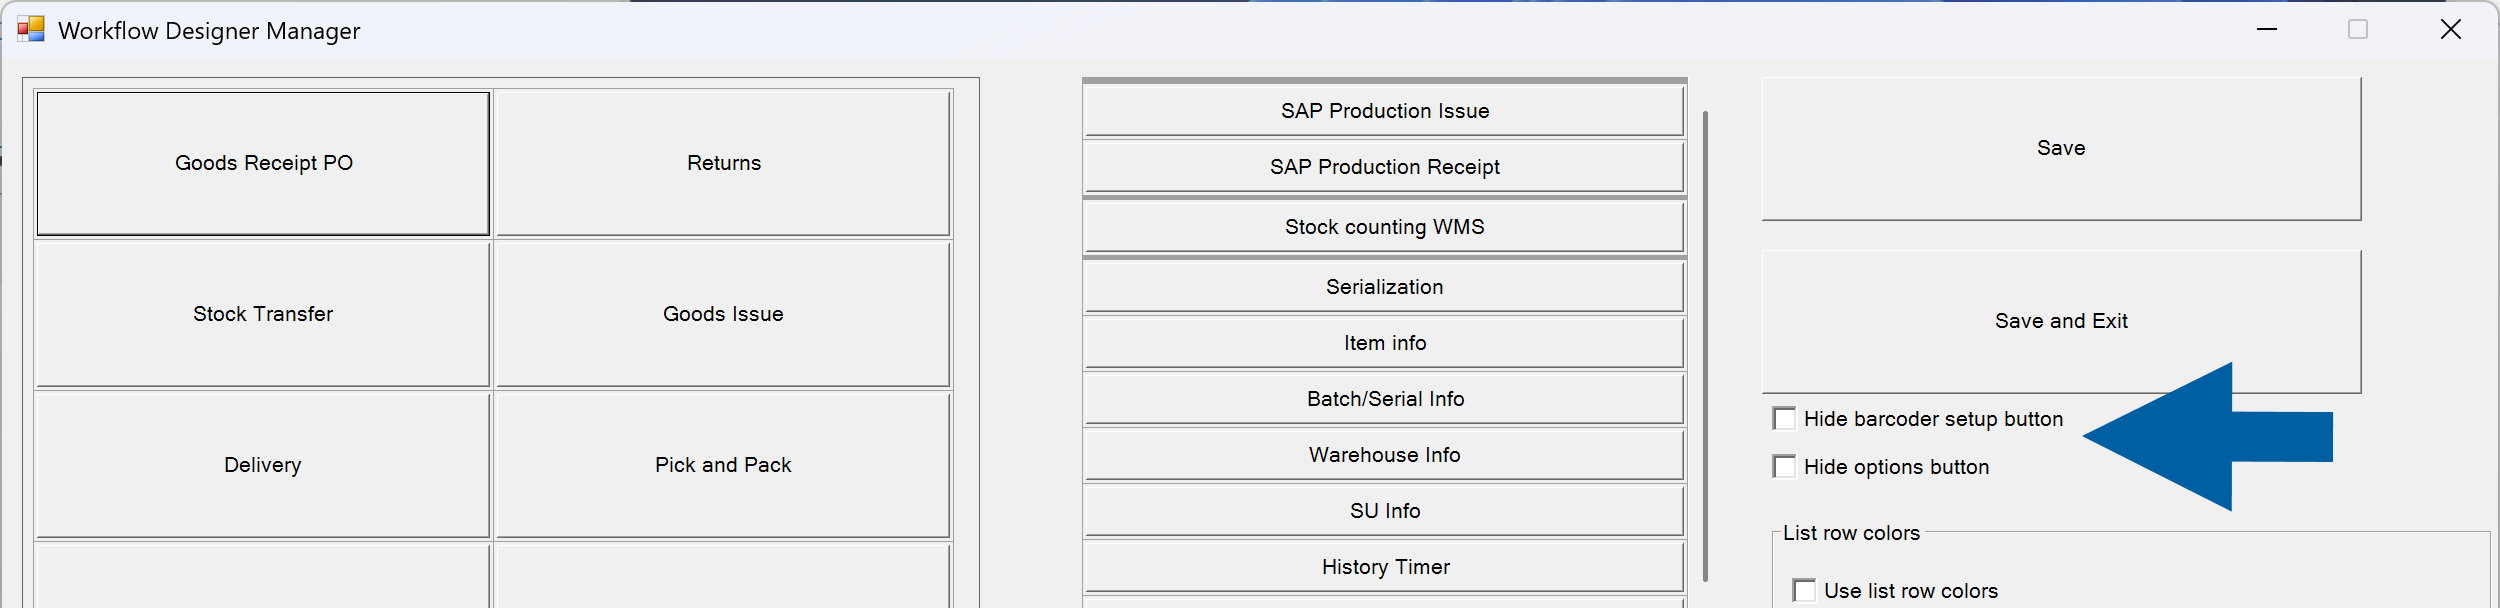
When enabled, the selected buttons are not displayed in the CompuTec WMS client.
Customize document line colors
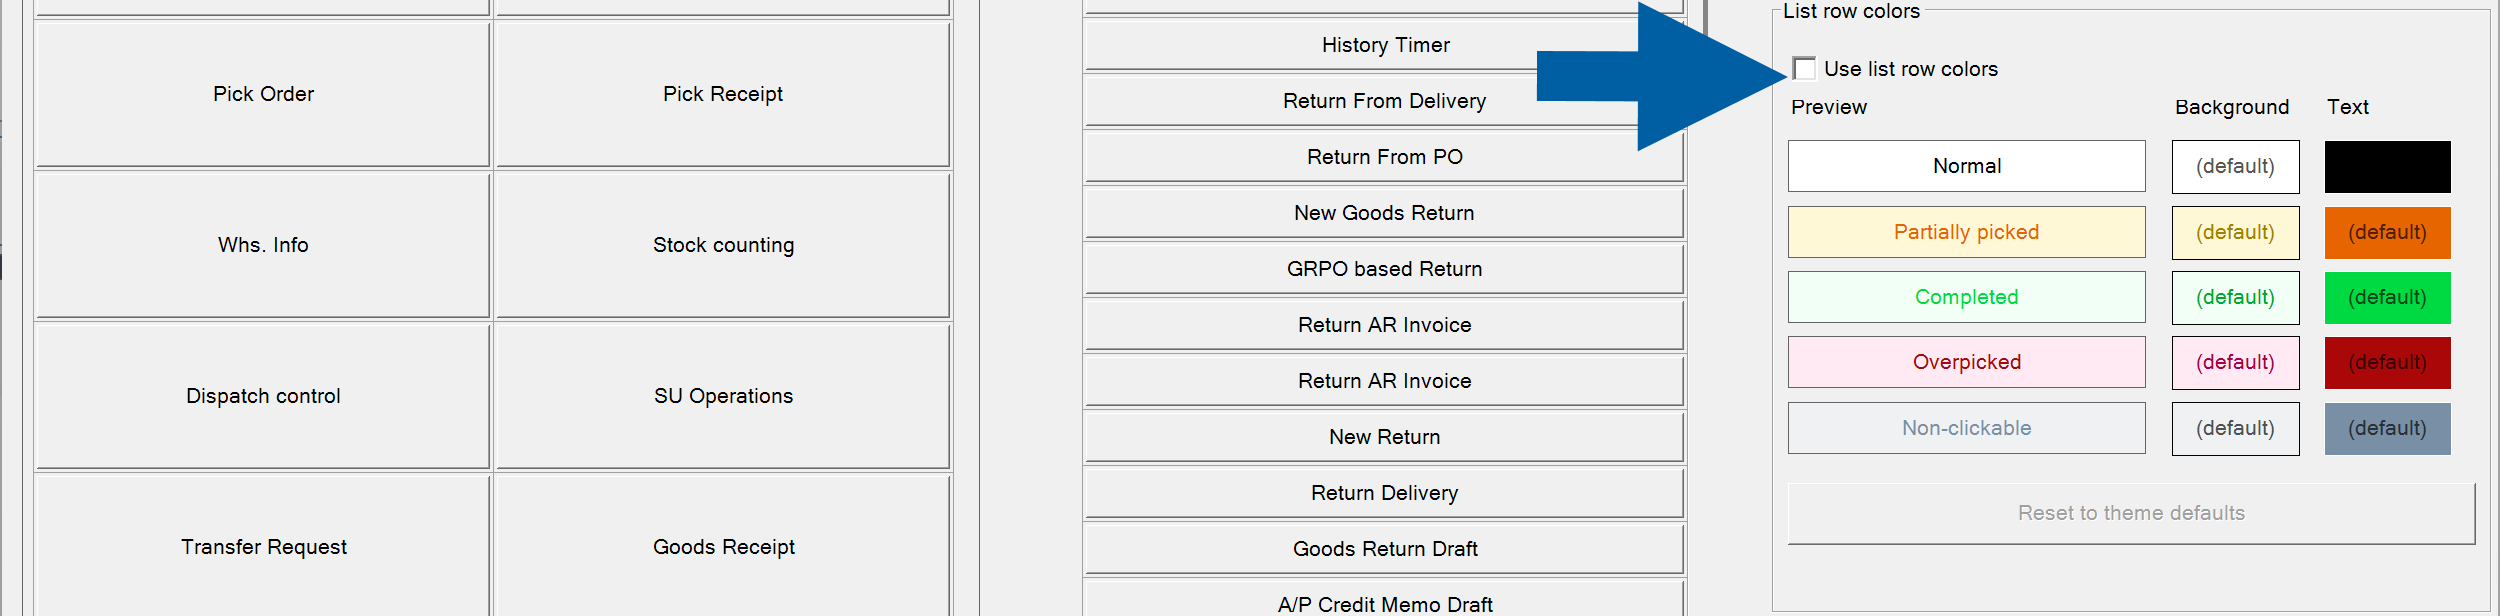
You can customize the colors displayed for document lines in the CompuTec WMS client.
This makes it easier for warehouse operators to identify document statuses at a glance.
Available statuses include:
- Normal
- Partially picked
- Completed
- Overpicked
- Non-clickable
By default, each status uses the application's theme colors.

To use custom colors:
-
Select Use list row colors.
-
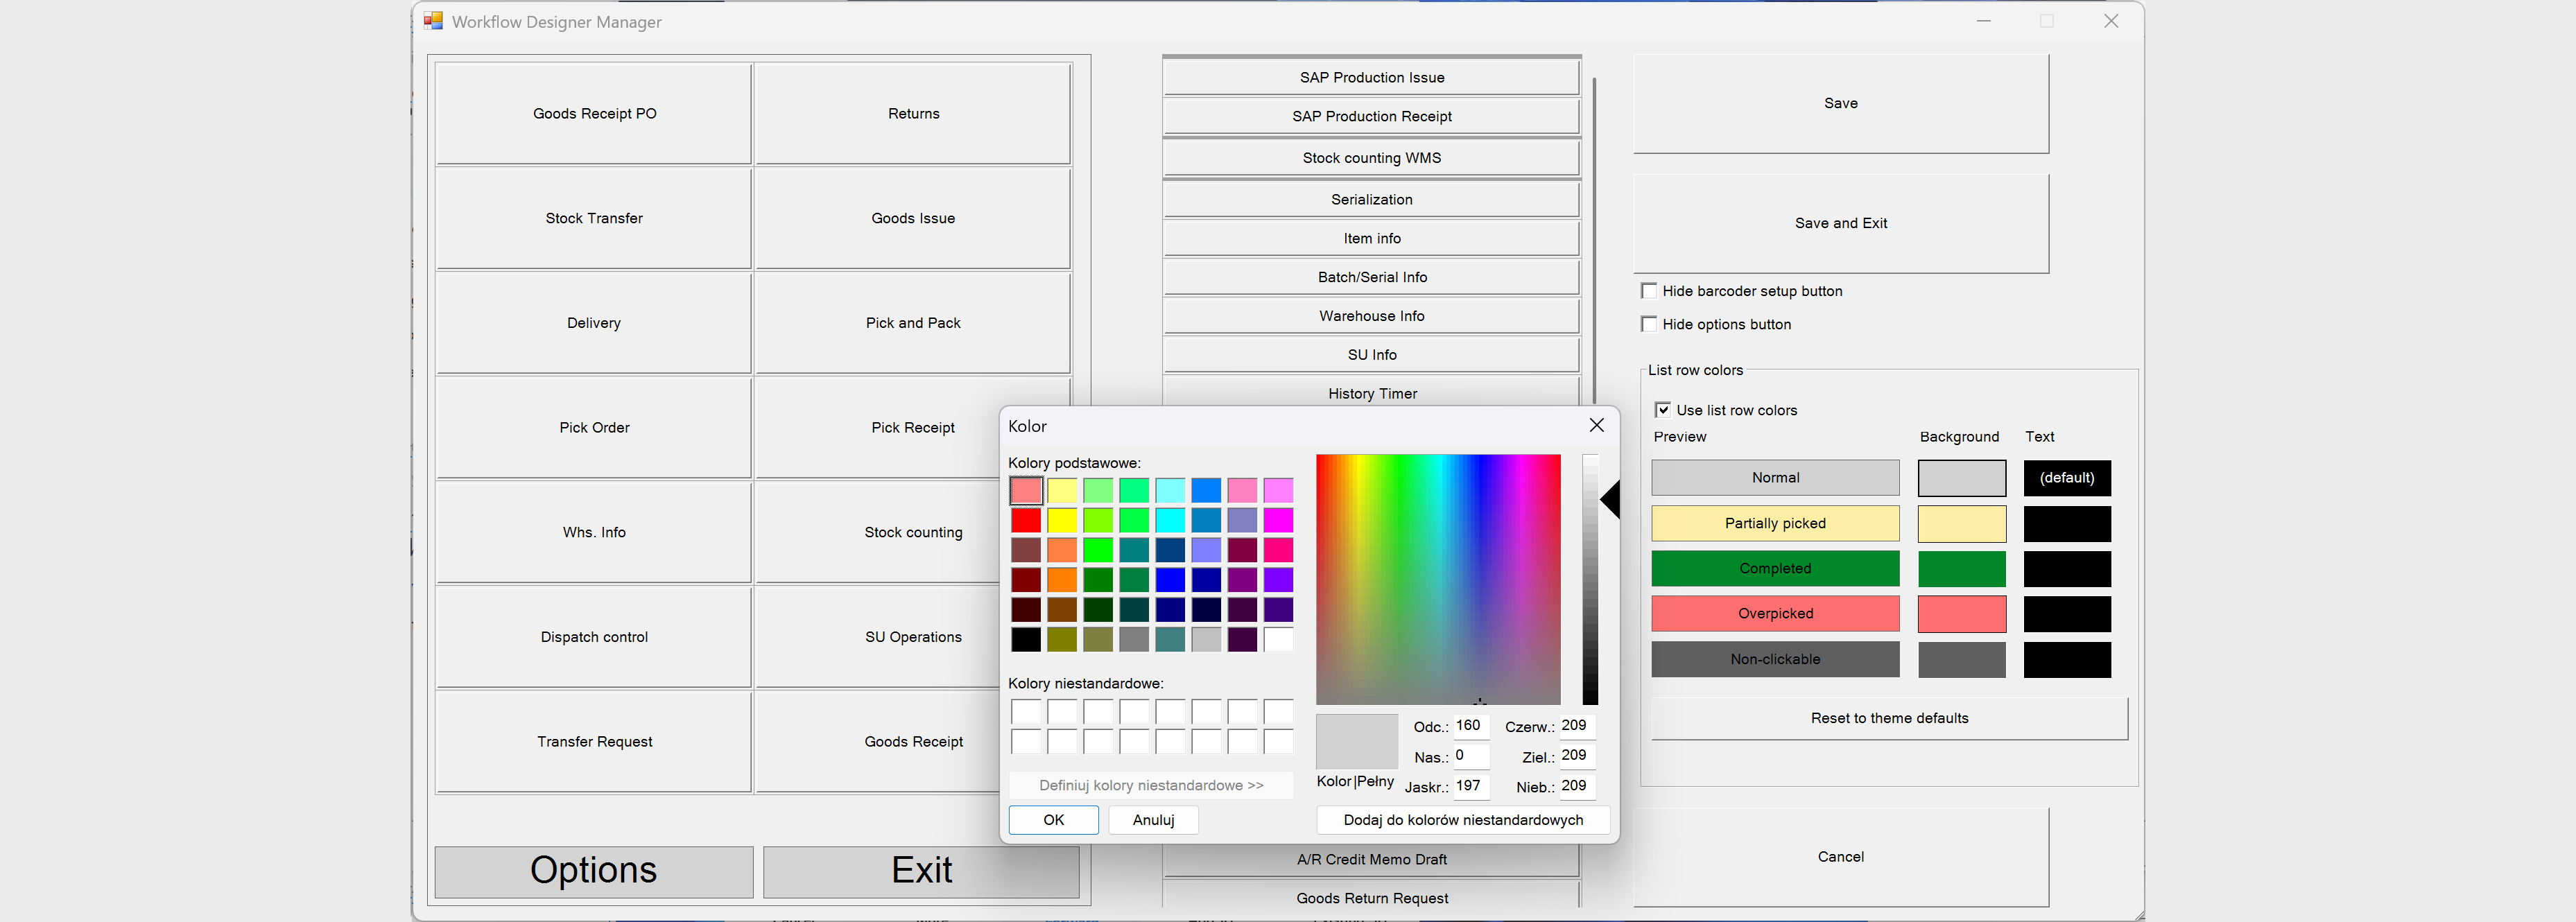
Select the background or text color for the required status.
-
Choose a color from the color picker.
-
Select OK.
-
Save the template.
-
After assigning the template to a user, document lines are displayed using the selected colors in the CompuTec WMS client.
For example:
- completed lines can be displayed with a green background,
- partially picked lines with a yellow background,
- overpicked lines with a red background.
 note
noteChoose high-contrast colors to improve readability on handheld devices, especially in warehouse environments.
Assign an icon
Icons make navigation easier by helping users quickly identify menu items.
You can assign custom icons to:
- transactions,
- containers.
To assign a custom icon, follow these steps:
-
Click Options in Interface Design Manager.
-
Click Set Image.

-
Select an image.
-
Click OK.
-
Save the template.
Assign a template
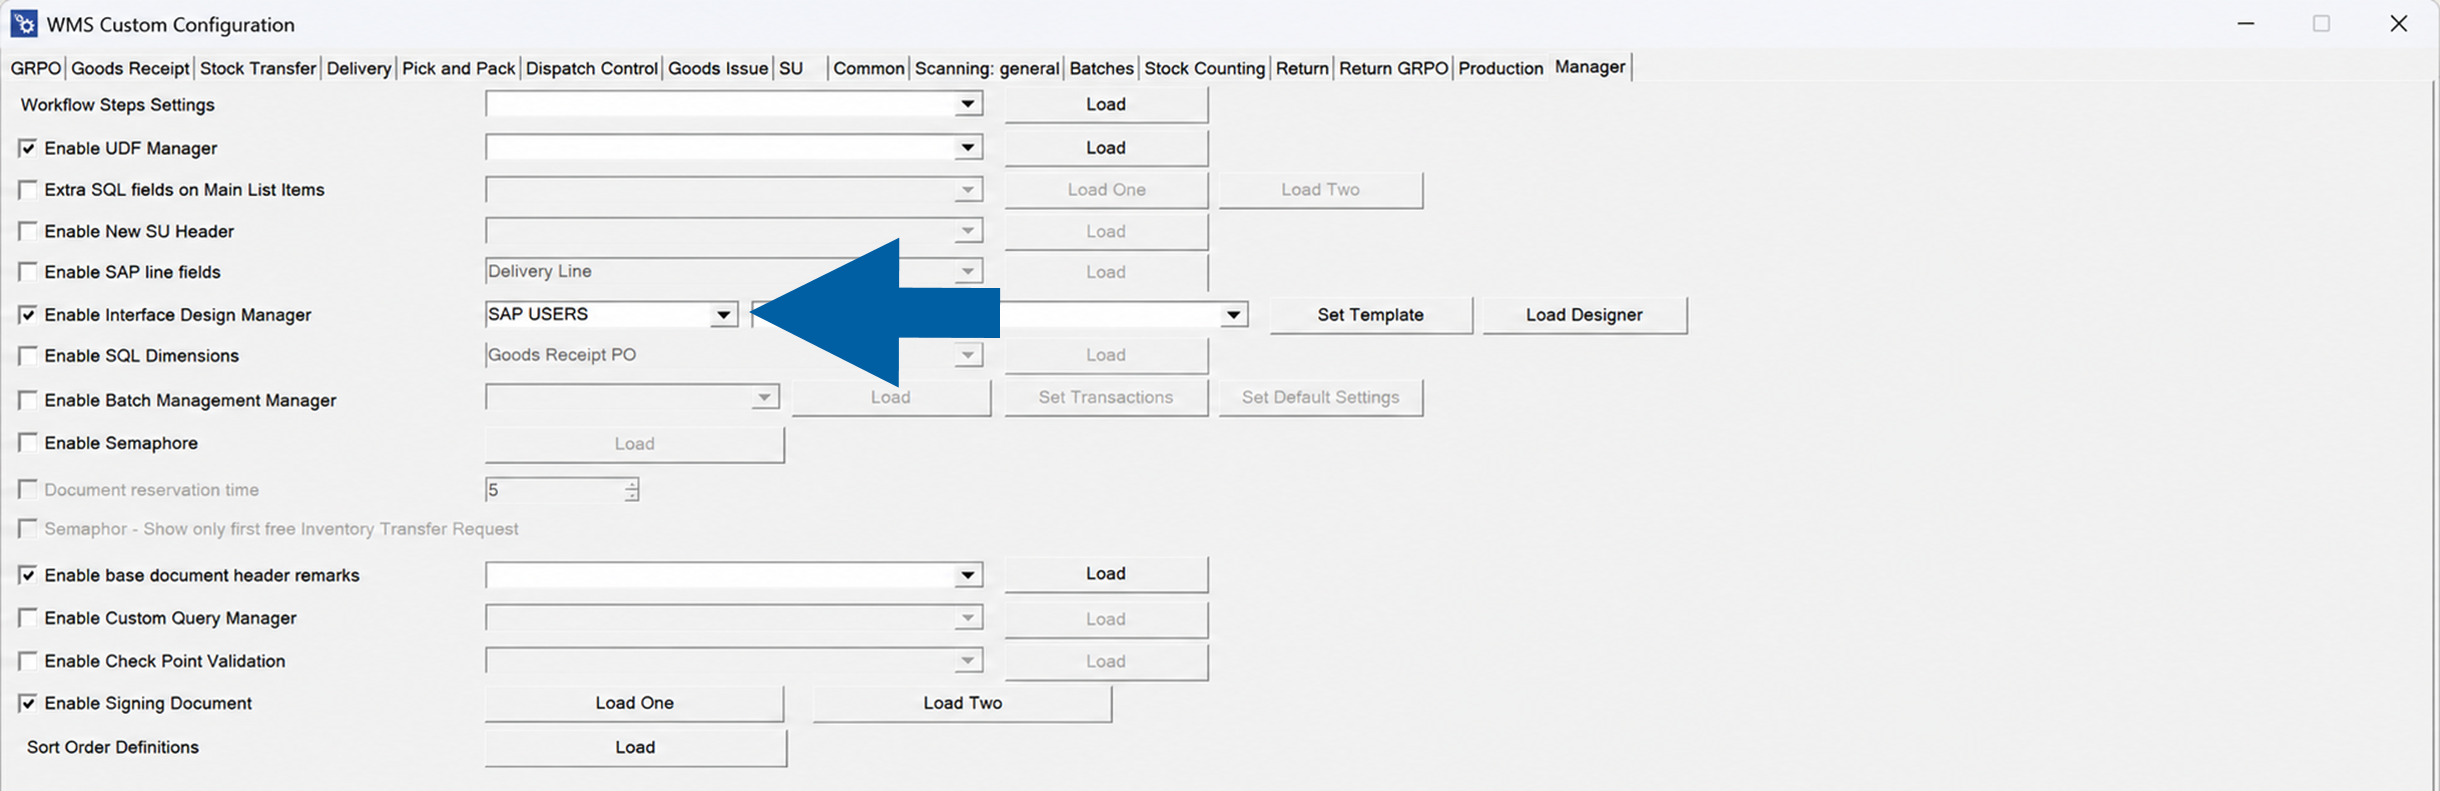
A template becomes active only after it is assigned to a SAP Business One user.
-
In WMS Custom Configuration window, click the drop-down list next to Enable Interface Design Manager.
-
Select a user.
-
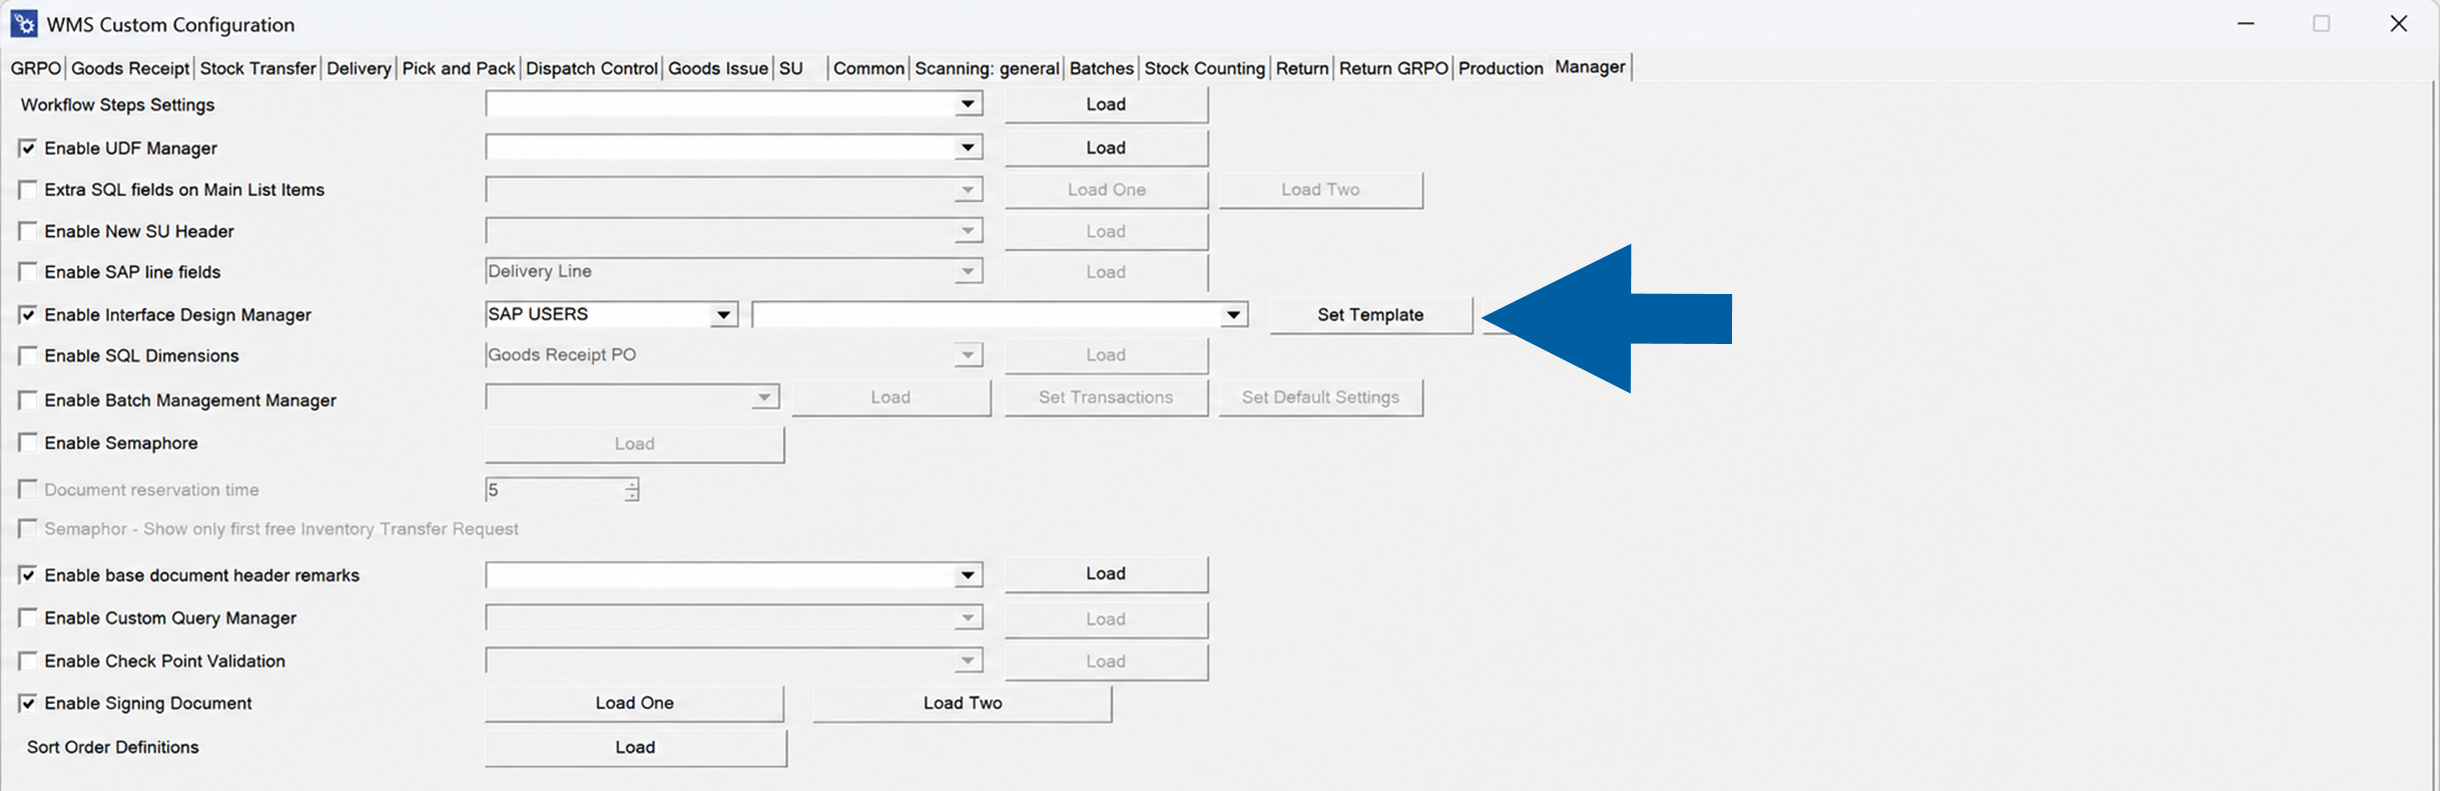
Click Set Template.
-
Choose the required template.
-
Select Save.
Restart the CompuTec WMS Server to apply the changes.
Default template
The Interface Design Manager includes one predefined template.
If no custom template is assigned, the default template is used automatically.
The default template cannot be edited directly.
To customize it:
- Copy the default template.
- Modify the copy.
- Assign the copied template to users.
Example
The following example shows a workflow template configured for warehouse operators working with Goods Issue and Stock Transfer transactions.
Informational functions are grouped into a separate container to keep the main menu simple and focused on daily operations.