Creating a Custom View
CompuTec AppEngine provides a mechanism for encapsulating complex database queries as simple structures and exposing them as REST API and OData.
Features
- simplified data consumption in Web API client or UI
- supports OData V4
- supports SAP HANA and Microsoft SQL Server
- supports CompuTec AppEngine plugins
- the CustomViews folder is available in the AppEngine installation directory, and ProgramData/CompuTec/AppEngine
Usage
Create a Custom View
-
Open a plugin project in Visual Studio
-
Create a folder, e.g., CustomView (right-click on a Project → New Folder), and go to it
-
Open Terminal (View → Terminal)
-
Navigate to the created folder
-
Create a new custom view by using the following command in Terminal (named SalesOrderList in the following example):
dotnet new ctaecustomview --name SalesOrderList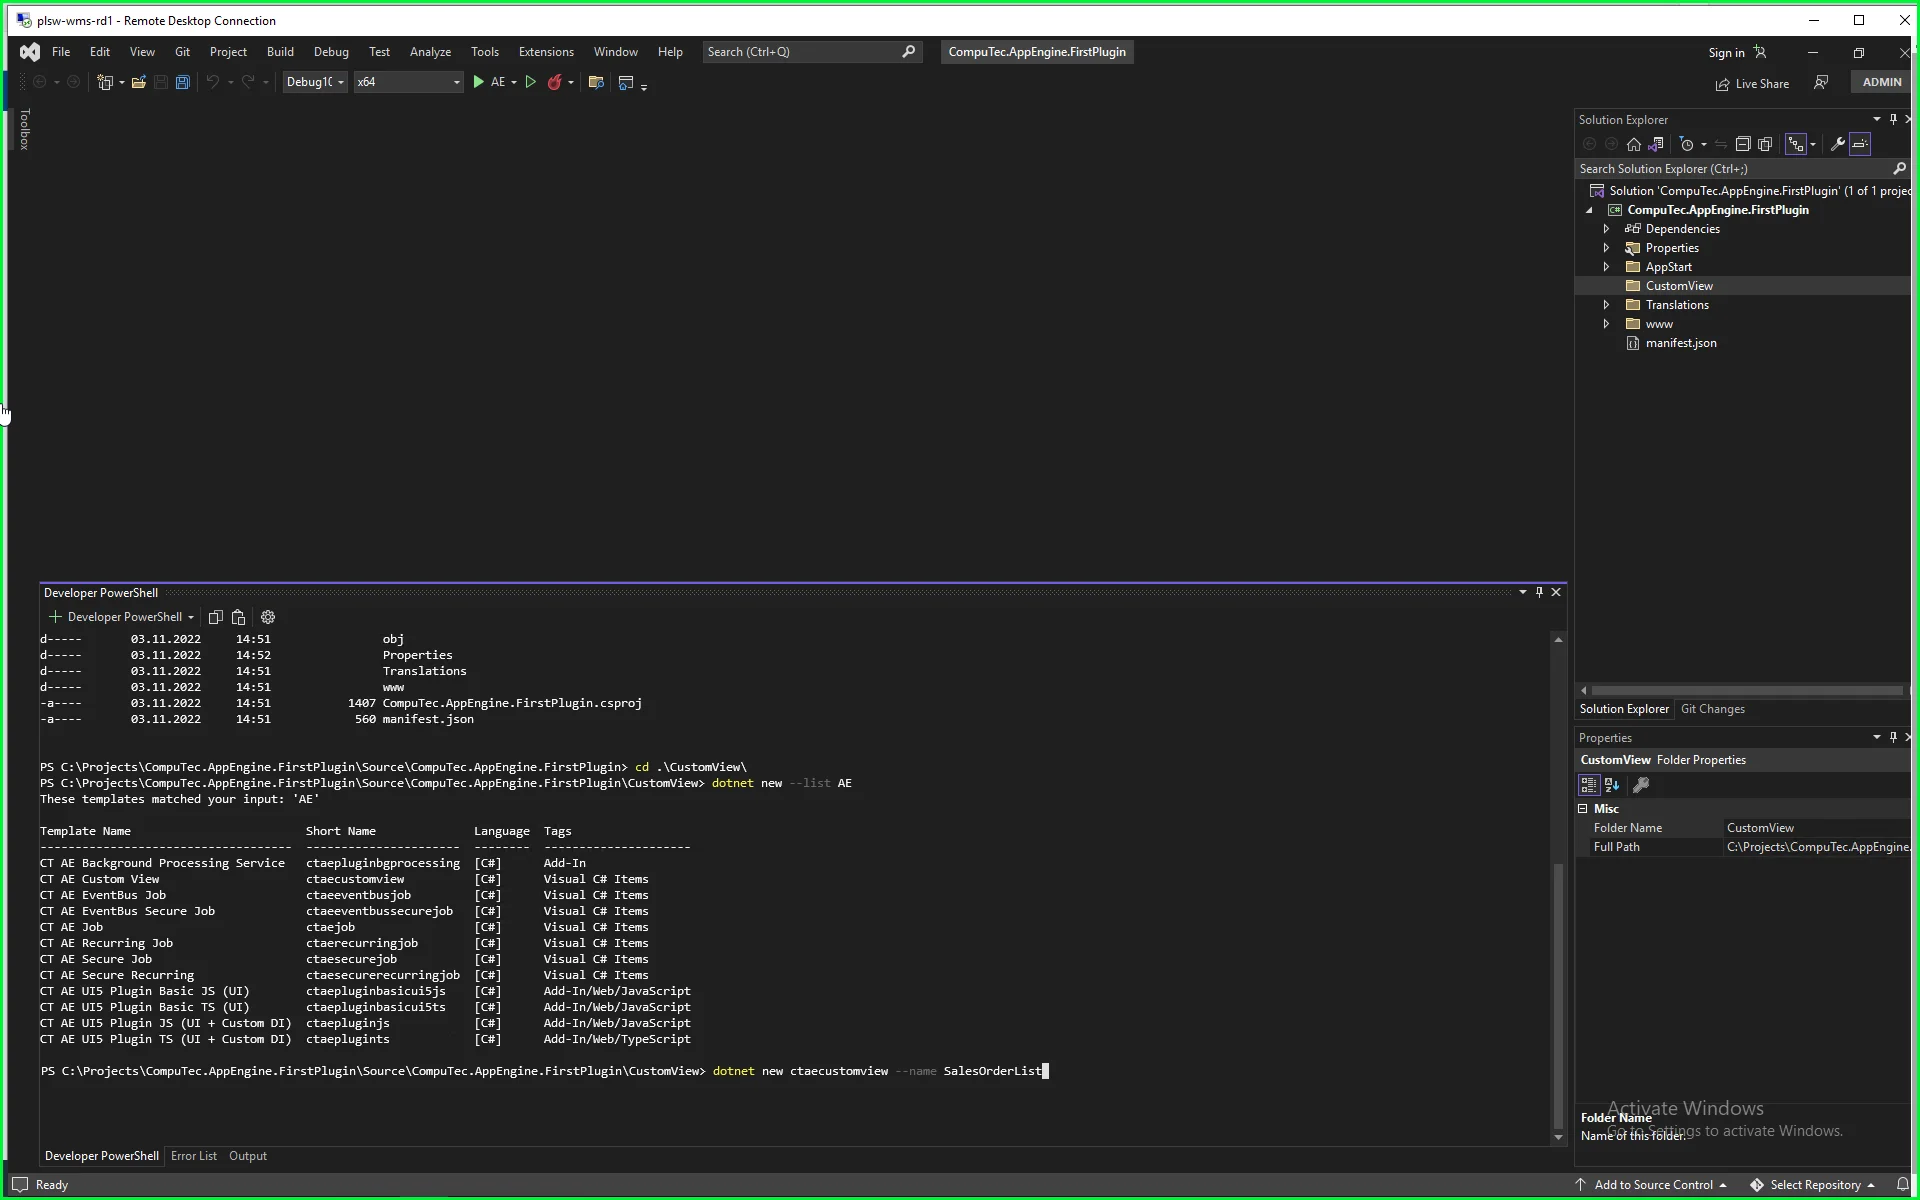
-
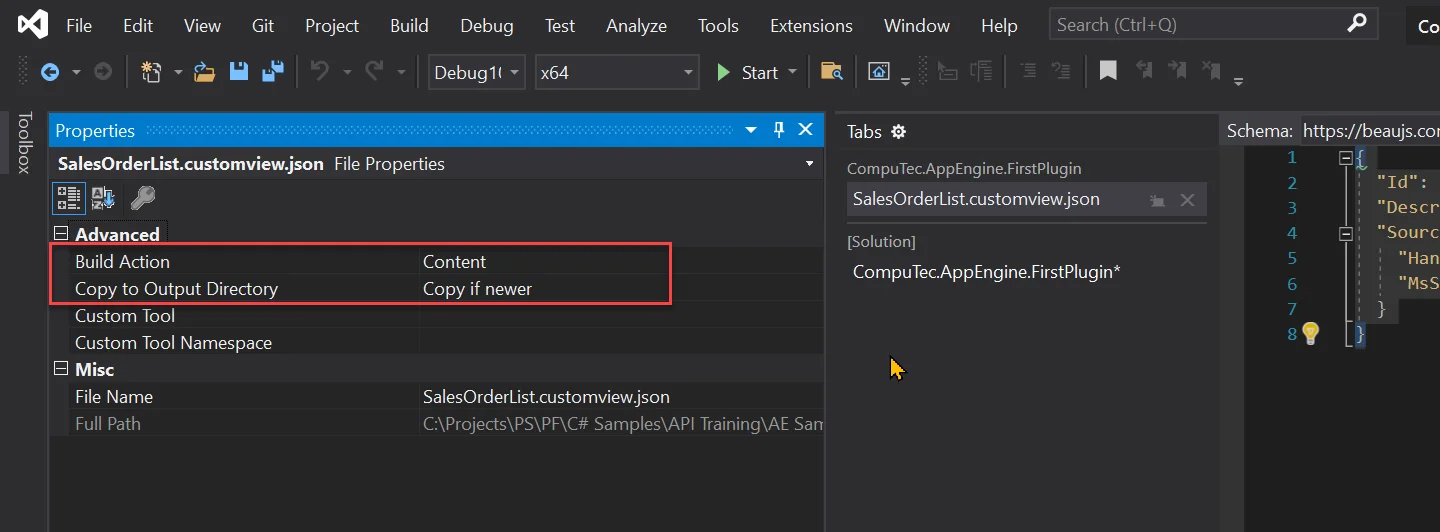
Open the properties of the added file and set up the following values:
- Build Action to Content
- Copy to Output Directory to "Copy if newer."
-
Open the created file and define queries for HANA and MSSQL in the following structure:
- Id – Id of a CustomView. This ID will be used to retrieve data from this view
- Description – meaningful description of this view for developer reference
- Source
- Hana – SQL Query for HANA server type
- MsSql – SQL Query for MSSQL server type
-
Example of a defined view:
SalesOrderList.customview.json
{
"Id": "SalesOrderList",
"Description": "Sales Order List",
"Source": {
    "Hana": "SELECT \"DocEntry\", \"DocNum\", \"CardCode\", \"CardName\" FROM ORDR",
    "MsSql": "SELECT DocEntry, DocNum, CardCode, CardName  FROM ORDR"
}
}
Bind Custom View to Control in UI5
-
To bind a created custom view to our control, we need to use the following syntax:
AE>/CustomViews/Views.Custom(Id='<PluginId>:<ViewId>') -
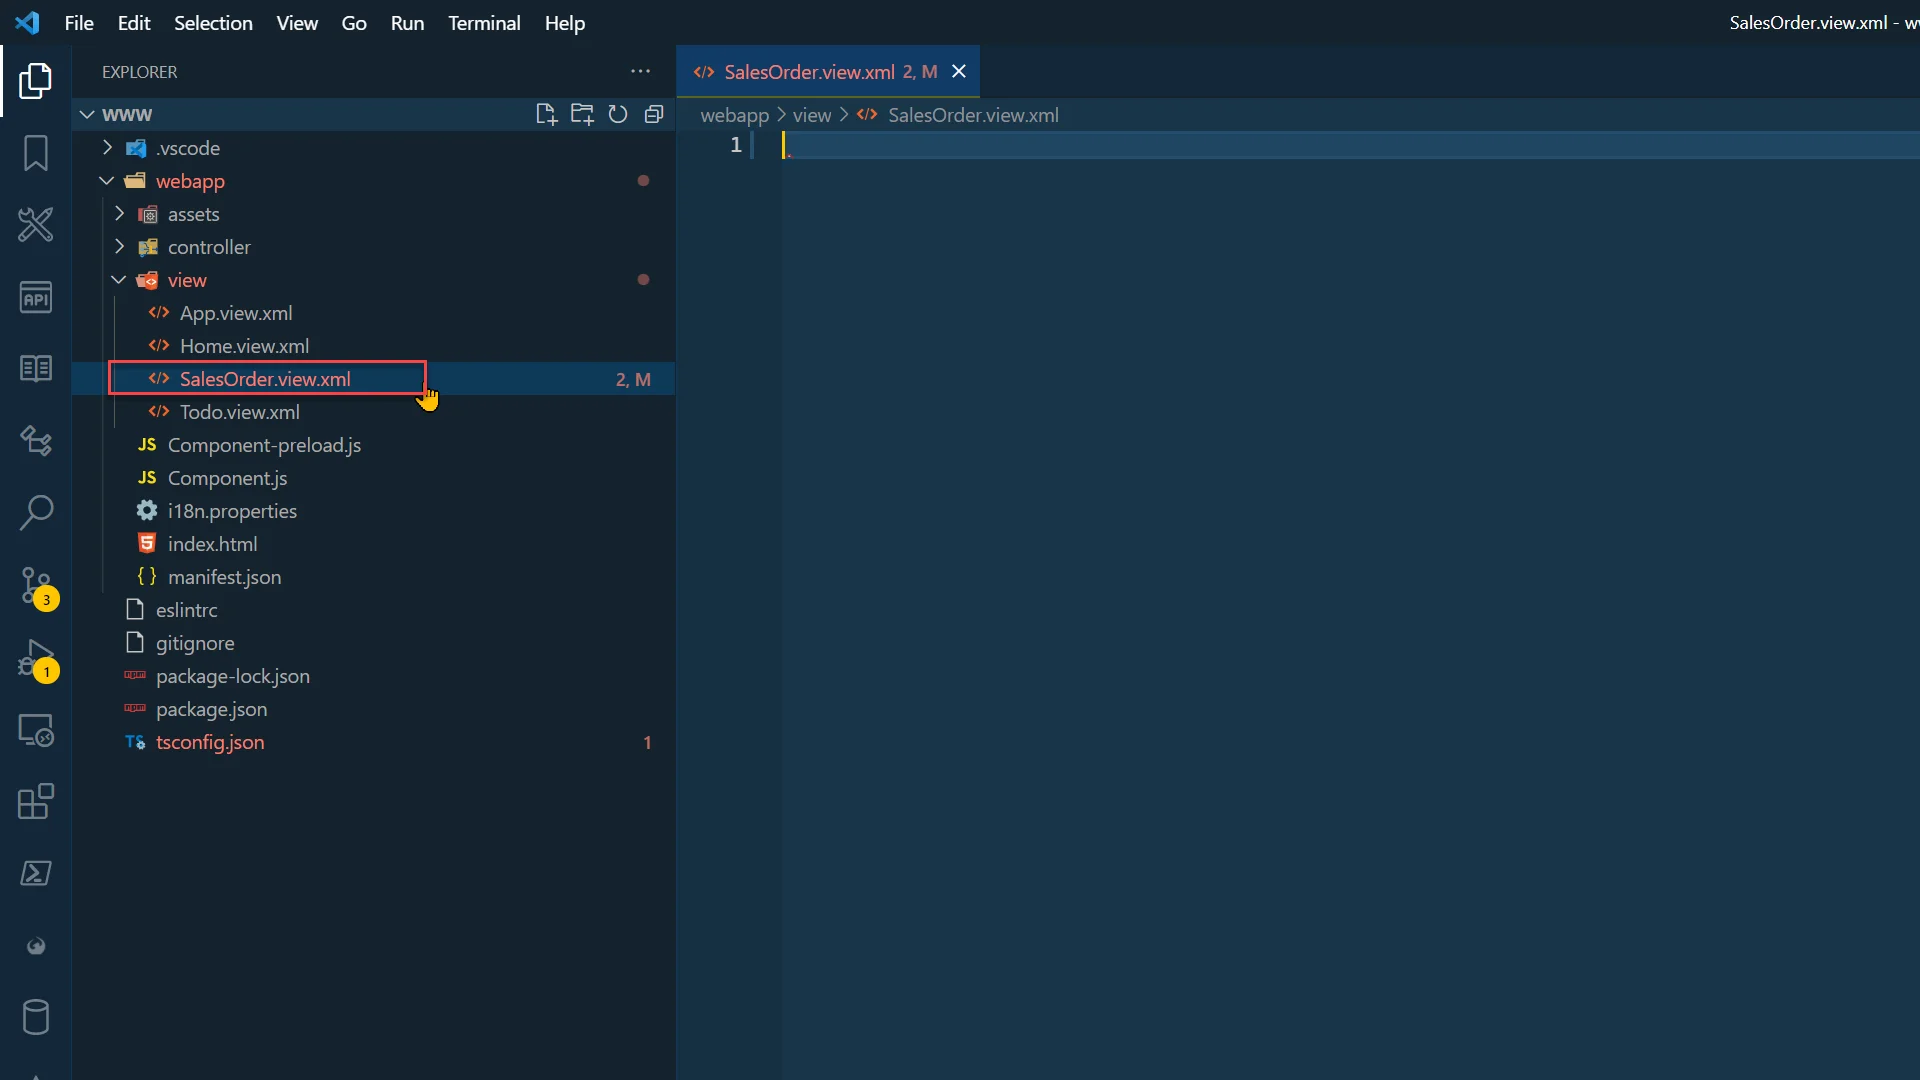
Open the www folder in the preferred IDE. In the below examples, we use Visual Studio Code.
-
Now, in the view folder, let's create a new file, SalesOrder.view.xml.
-
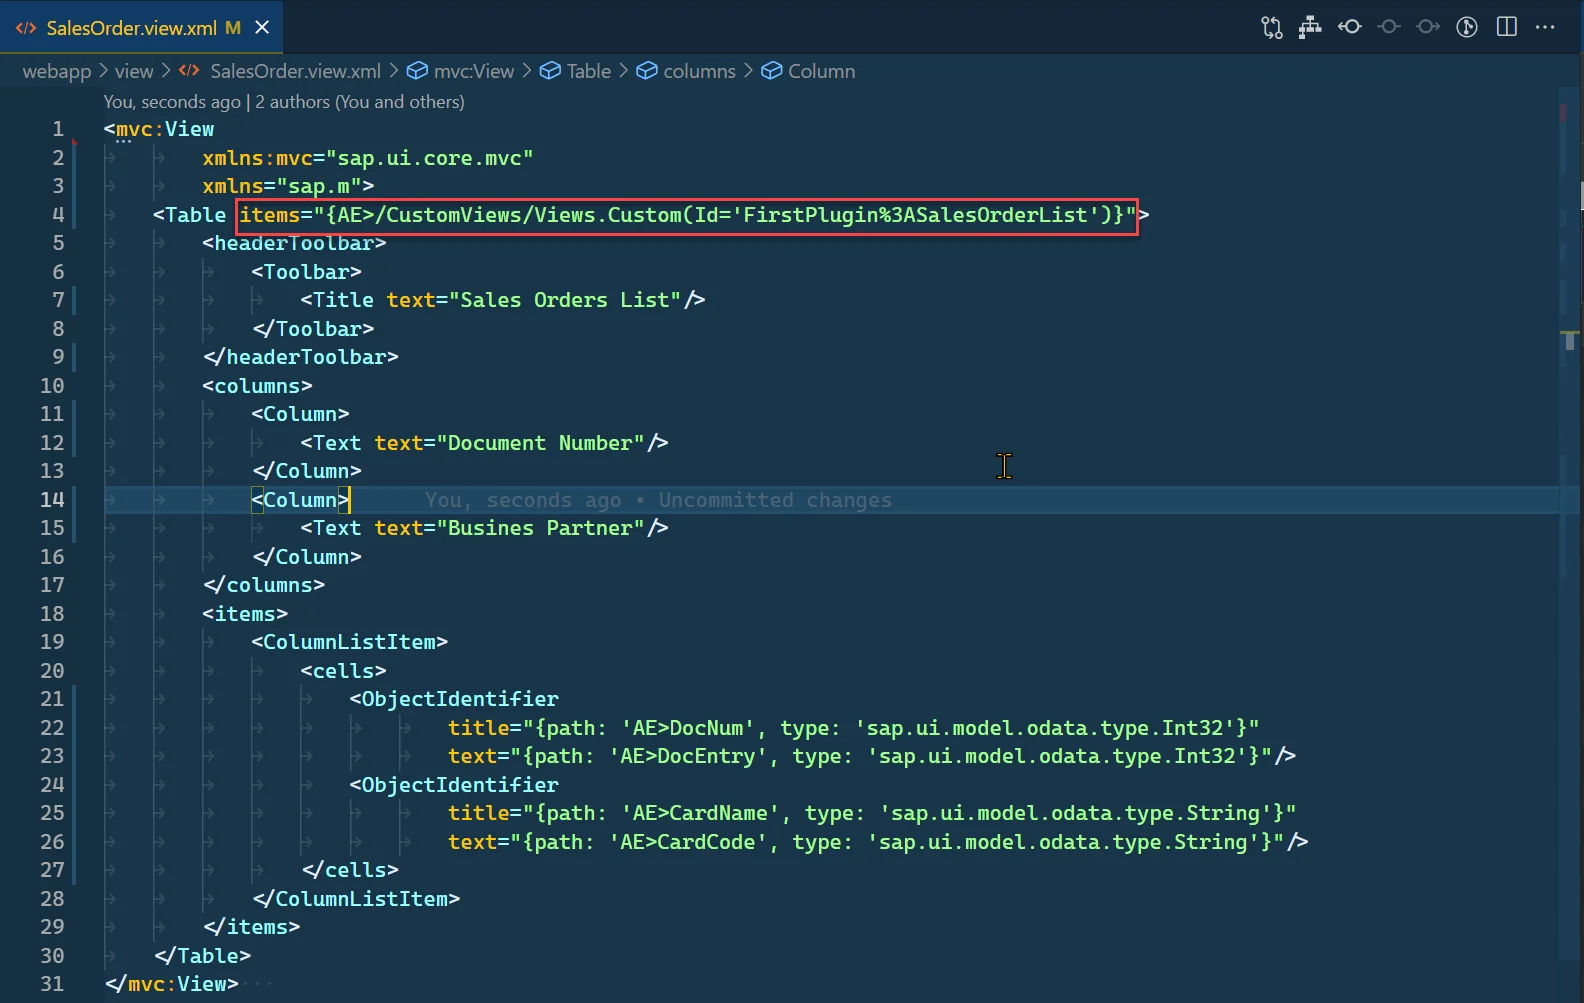
Add View definition and table definition in it:
SalesOrder.view.xml
<mvc:View
        xmlns:mvc="sap.ui.core.mvc"
        xmlns="sap.m">
    <Table items="{AE>/CustomViews/Views.Custom(Id='FirstPlugin%3ASalesOrderList')}">
        <headerToolbar>
            <Toolbar>
                <Title text="Sales Orders List"/>
            </Toolbar>
        </headerToolbar>
        <columns>
            <Column>
                <Text text="Document Number"/>
            </Column>
            <Column>
                <Text text="Business Partner"/>
            </Column>
        </columns>
        <items>
            <ColumnListItem>
                <cells>
                    <ObjectIdentifier
                            title="{path: 'AE>DocNum', type: 'sap.ui.model.odata.type.Int32'}"
                            text="{path: 'AE>DocEntry', type: 'sap.ui.model.odata.type.Int32'}"/>
                    <ObjectIdentifier
                            title="{path: 'AE>CardName', type: 'sap.ui.model.odata.type.String'}"
                            text="{path: 'AE>CardCode', type: 'sap.ui.model.odata.type.String'}"/>
                </cells>
            </ColumnListItem>
        </items>
    </Table>
</mvc:View> -
As you can notice, we bind our custom view to Table control items aggregation. AE is a model alias available when you run your plugin inside Launchpad (your plugin Component needs to extend Computec.AppEngine.ui.core.Component). Please note that you must change ":" in Custom View ID to its URL encoded version %3A, as shown below.
-
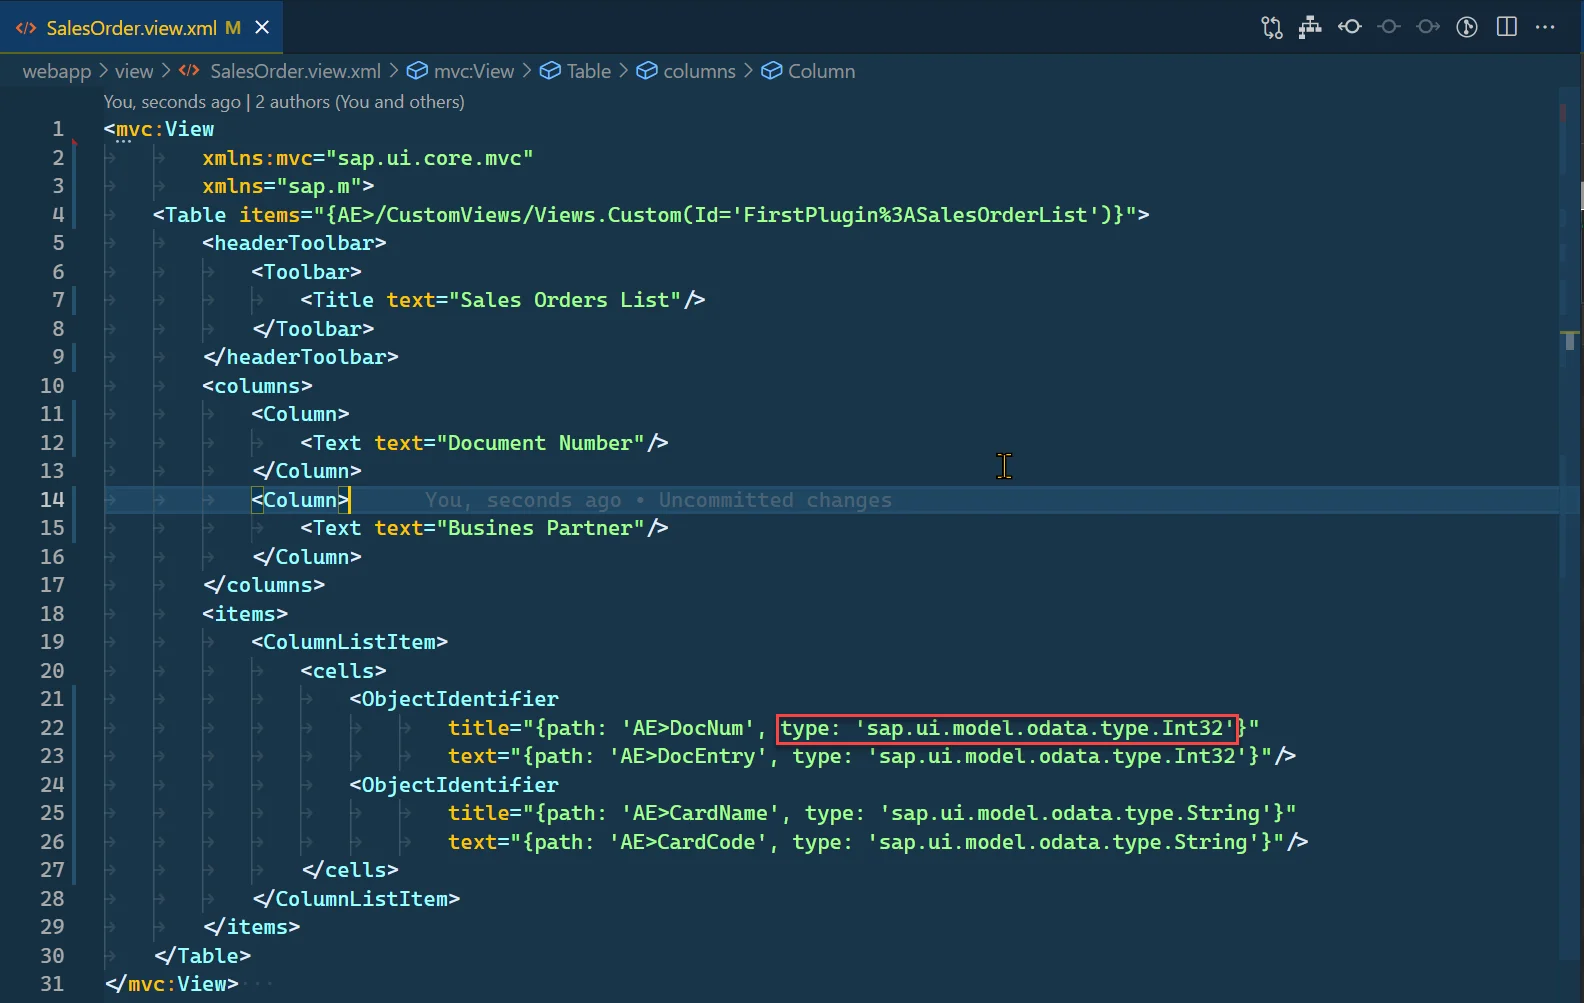
To bind controls inside our table, we must provide data type. This is required in the case of Custom Views because we don't have the $metadata definition of our custom view.
Test of Created View
-
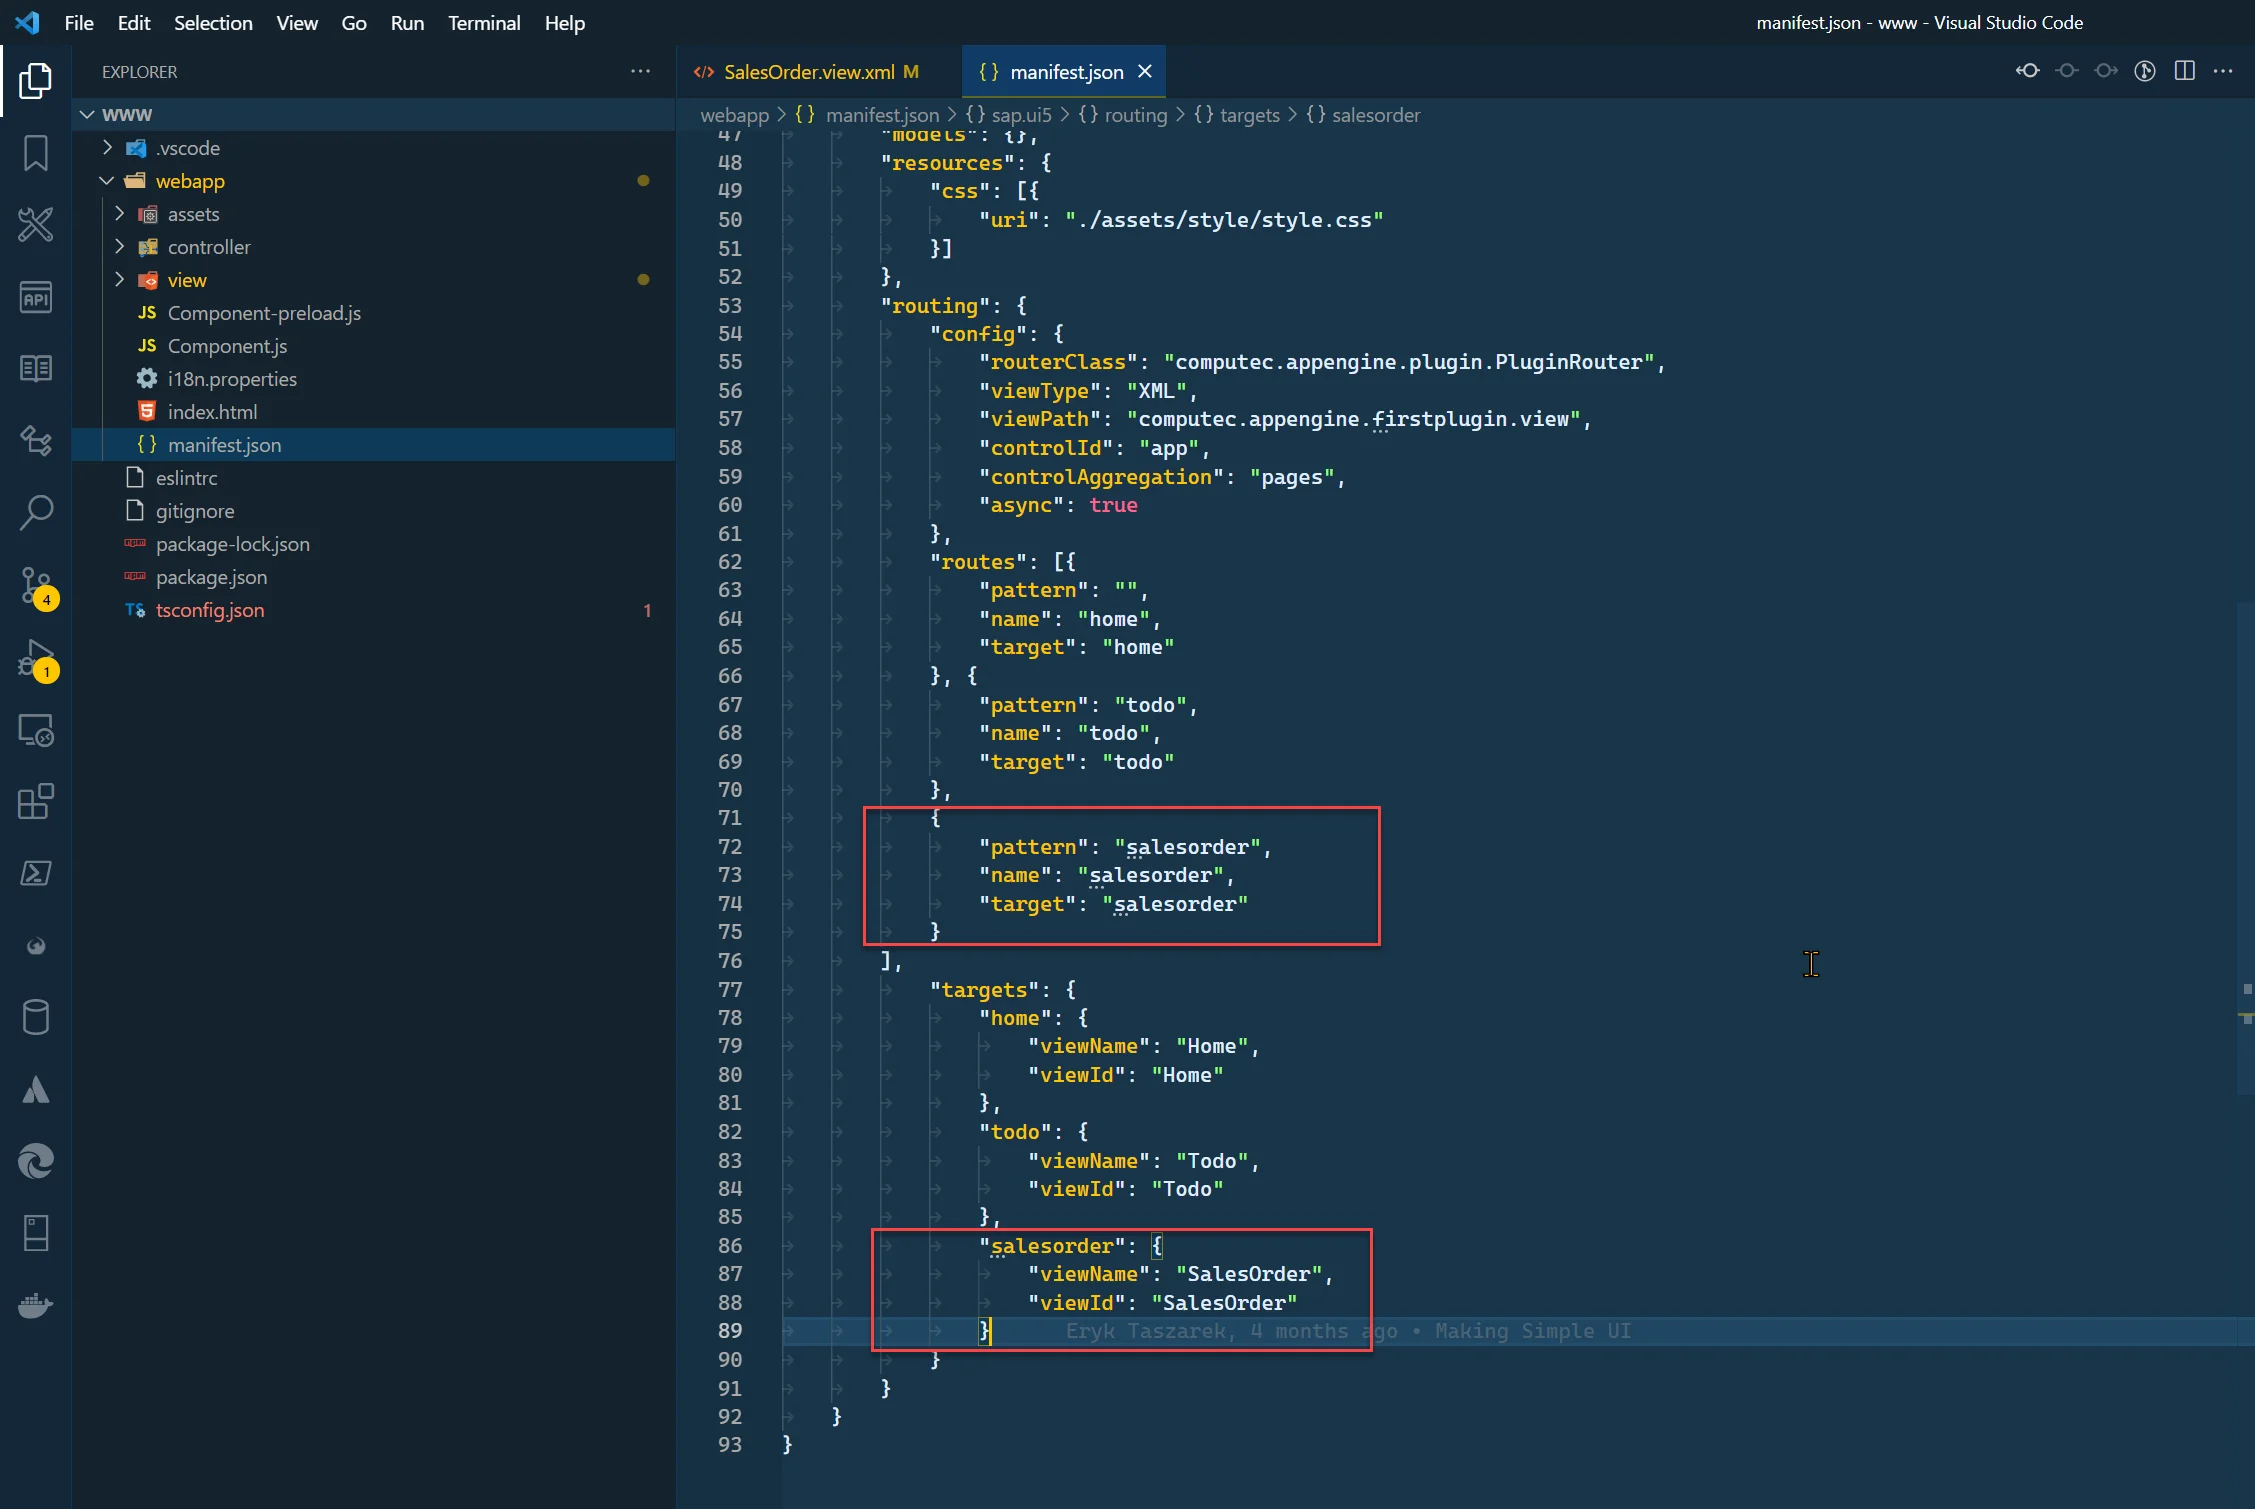
To test our view, we need to set up a route to it. To do this, open the manifest.json file.
-
There, you need to add a route and target as shown below:
-
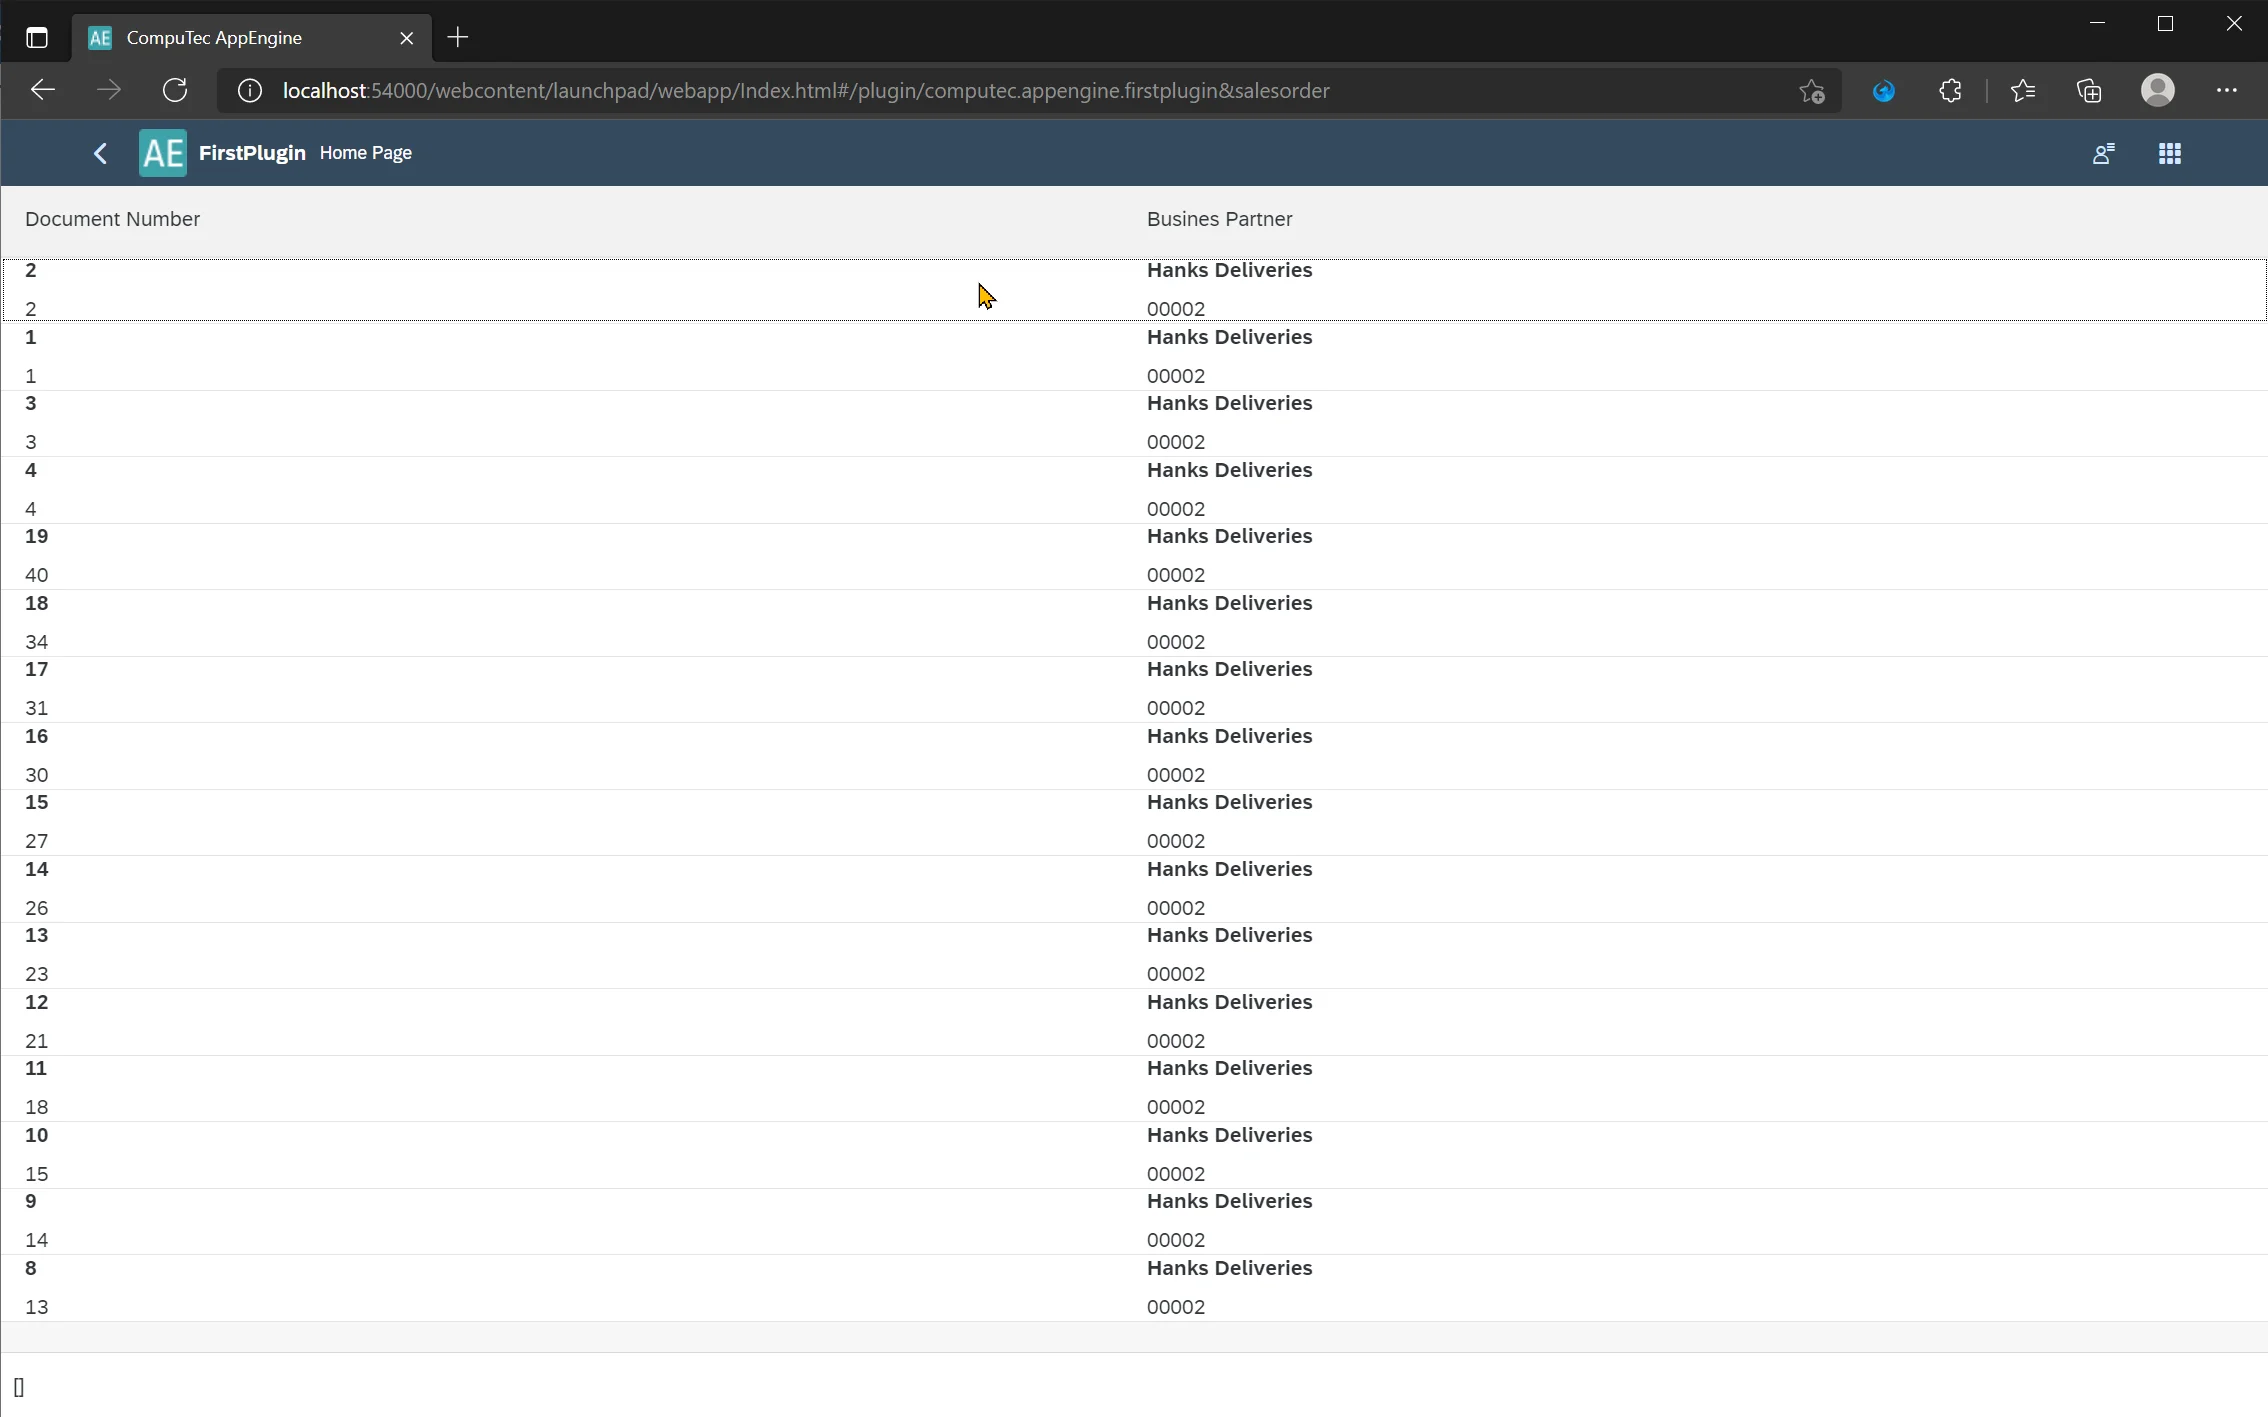
Now you can navigate to this path manually:
http://localhost:54000/webcontent/launchpad/webapp/Index.html#/plugin/computec.appengine.firstplugin&salesorder -
Optionally, you can add a tile to the Home view with navigation, as shown below.
Adding Navigation to the Sales Orders View
-
Edit Home.view.xml.
-
Add the following Tile inside the Horizontal Layout.
Home.view.xml
<GenericTile
    class="sapUiTinyMarginBegin sapUiTinyMarginTop tileLayout"
    header="SalesOrder"
    press="onSalesOrderPress">
    <TileContent>
        <ImageContent src="sap-icon://activity-2"/>
    </TileContent>
</GenericTile>
-
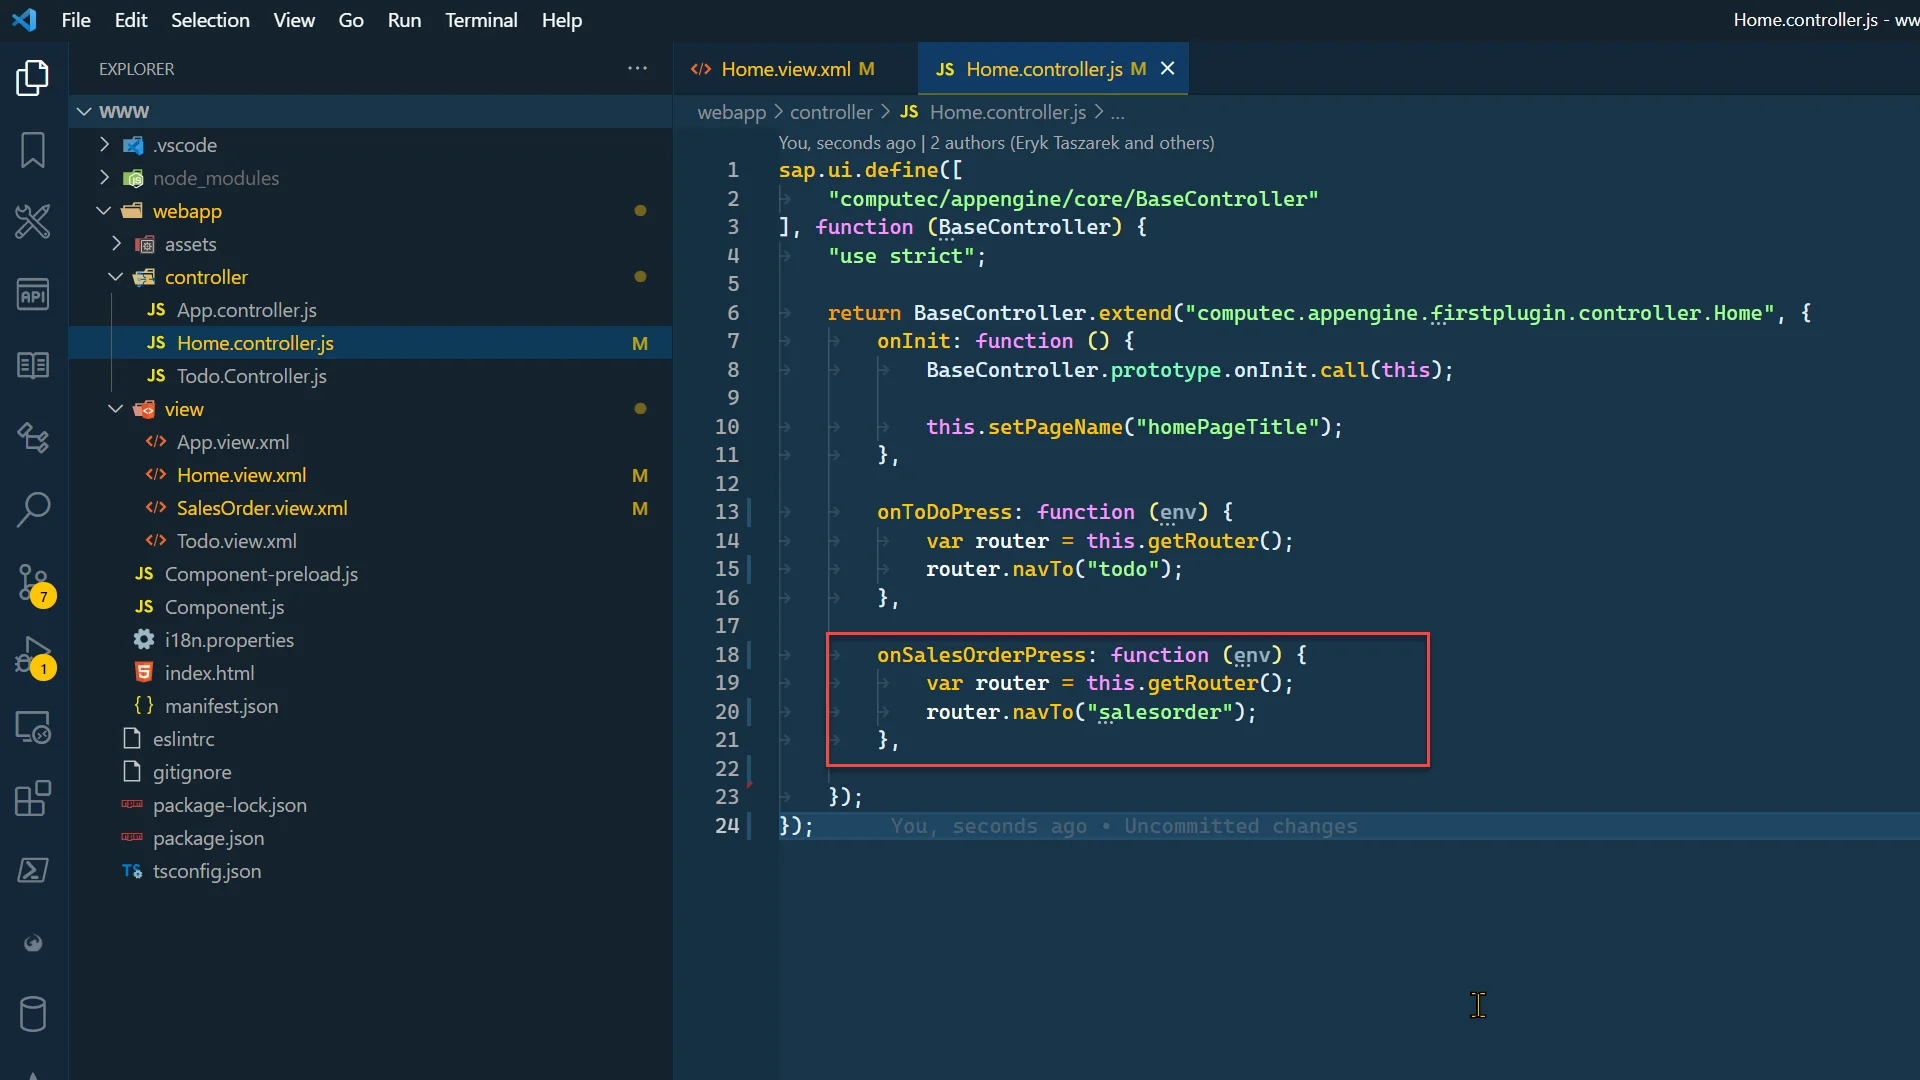
Now, we need to add the "onSalesOrderPress" function to Home.controller.js.
Home.controller.js
onSalesOrderPress: function (env) {
    var router = this.  getRouter();
    router.navTo("salesorder");
},
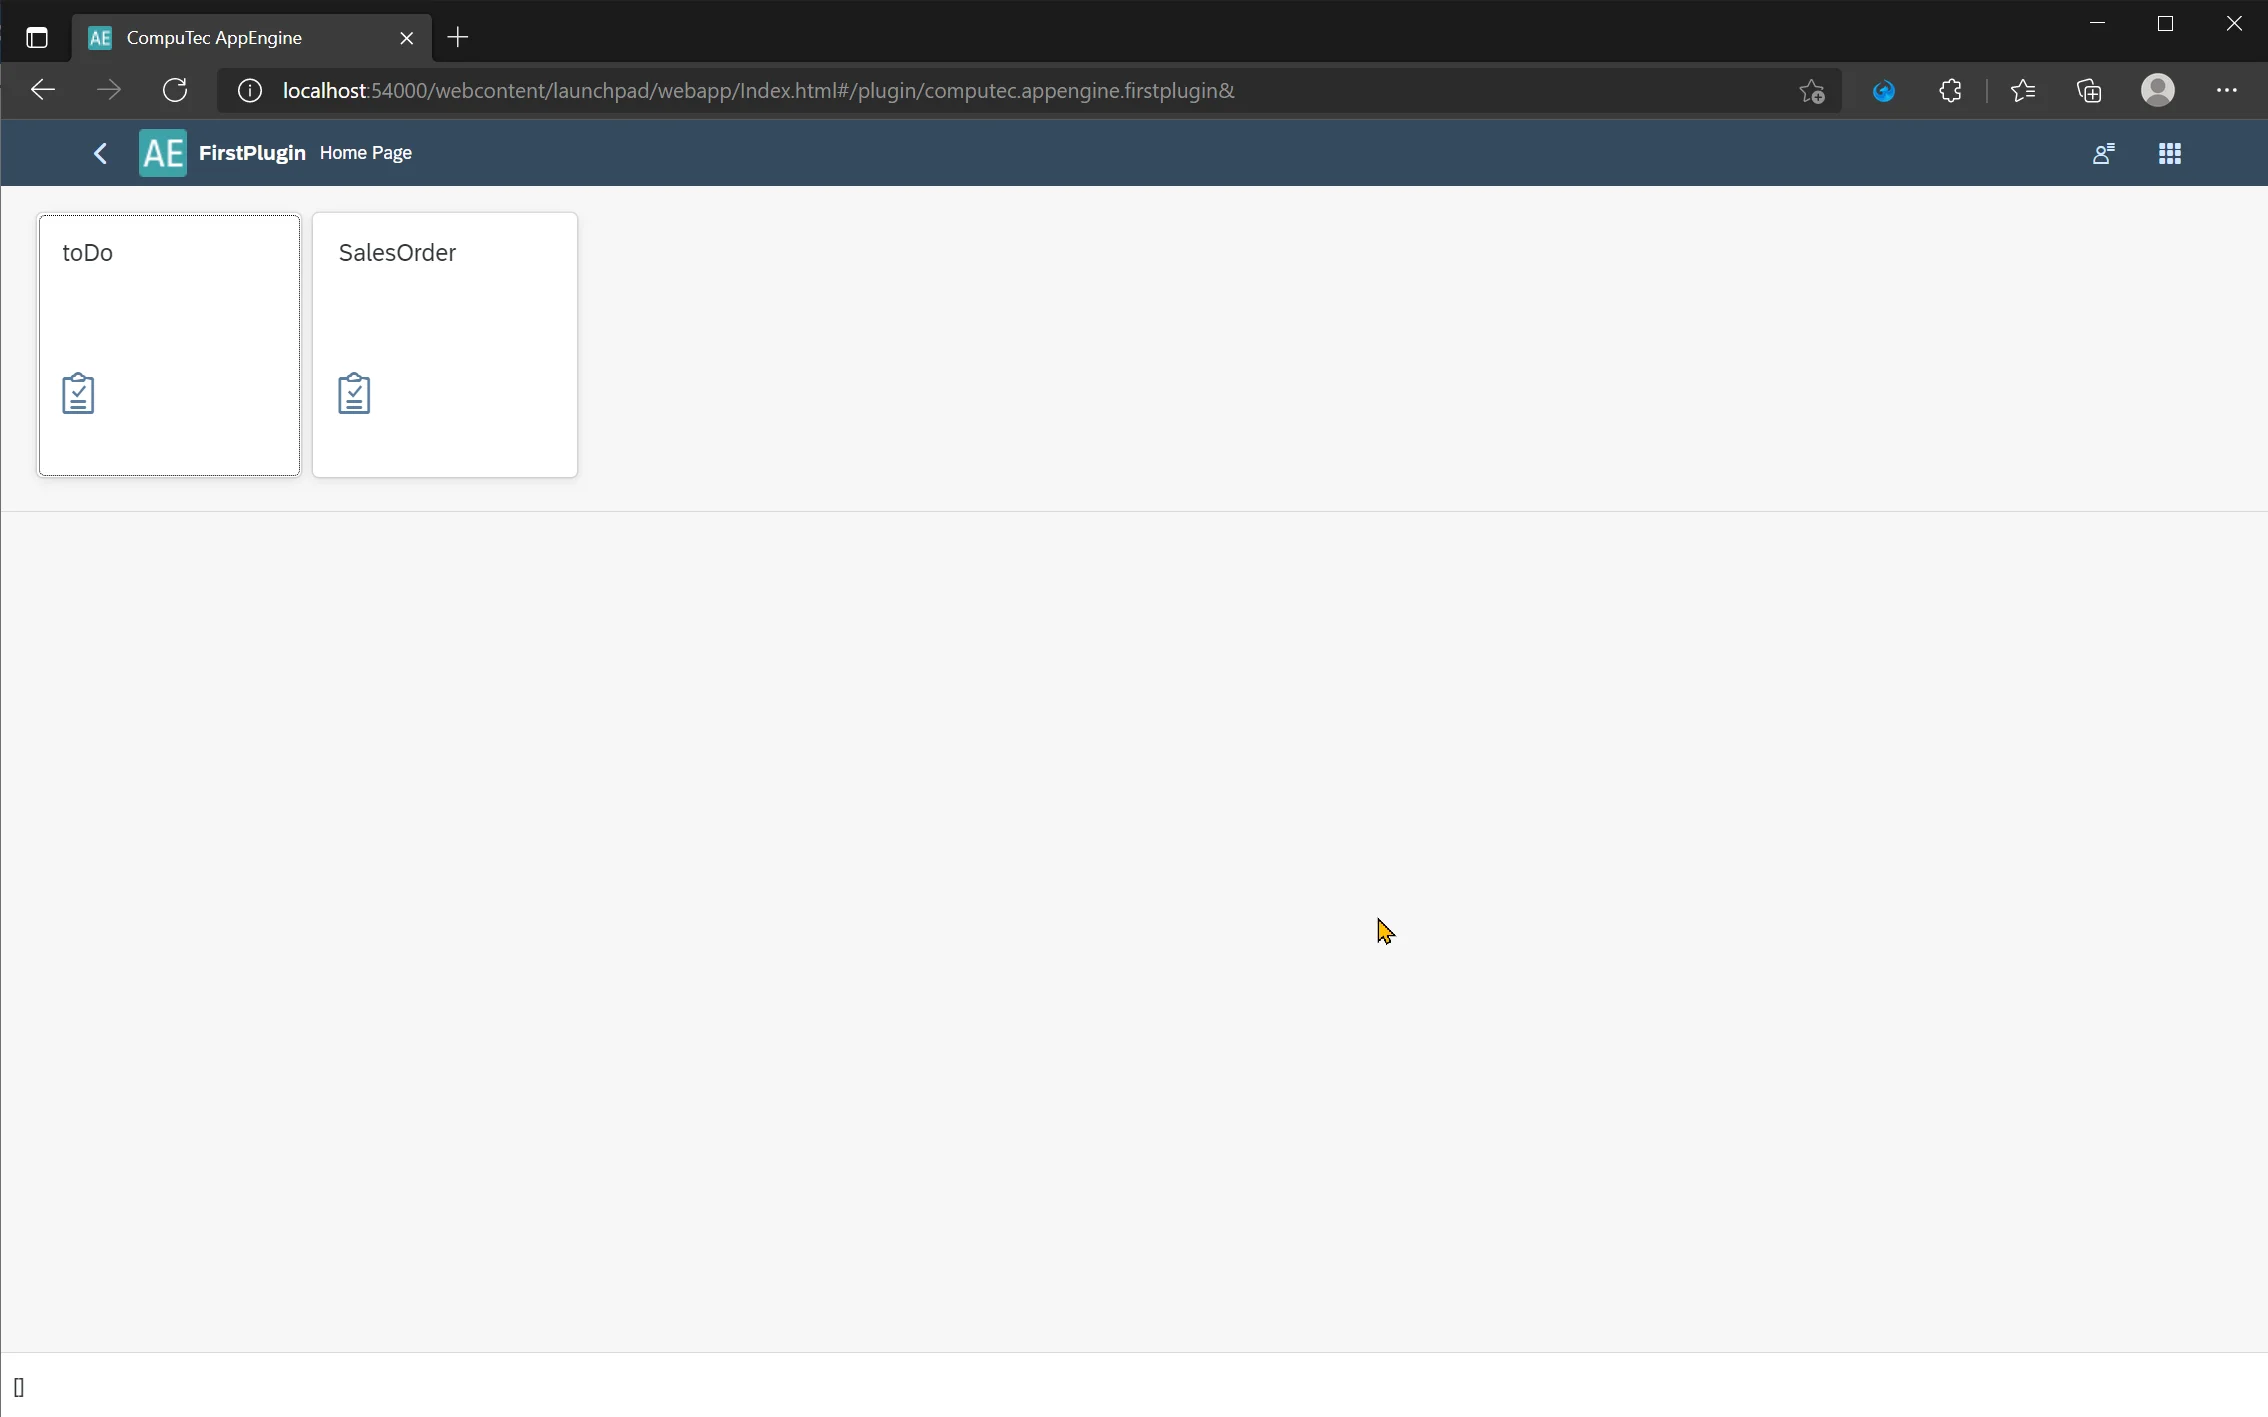
Results
-
Plugin Navigation Tiles.
-
Sales Orders view.