RDP Scanner PC Configuration
This guide explains how to configure a manual scanner and a PC for use with the CompuTec WMS Client without requiring installation of the client on the scanner. The setup employs a remote desktop (RDP) connection, ensuring seamless operation between the scanner and PC. By following this step-by-step guide, you will successfully connect a SYMBOL MC32N0 scanner running Windows CE 7.0 with a PC.
Requirements
In this manual, the following environment is used:
- System Windows CE 7.0
- Scanner SYMBOL MC32N0
PC Setup
Check your IP address
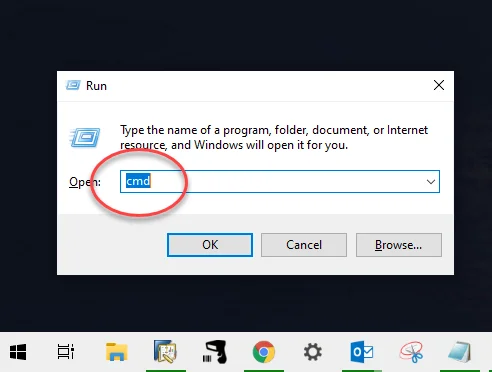
Press Win + R, type cmd, and click Enter:
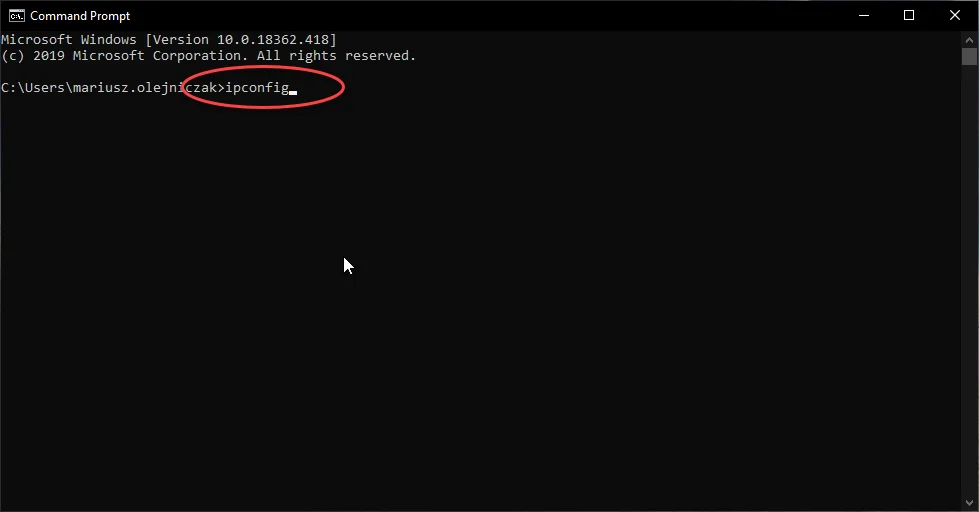
Type ipconfig and click Enter:
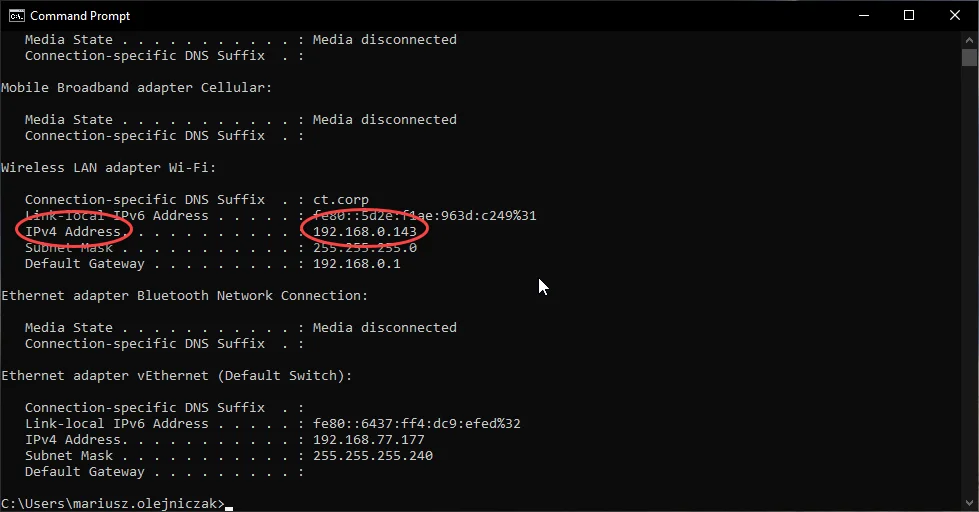
Write down your IPv4 Address in the format presented on the screenshot, e.g., 192.168.0.143:
Add CompuTec WMS Client to Startup
-
Press the Win key.
-
Search for CompuTec WMS Client.
-
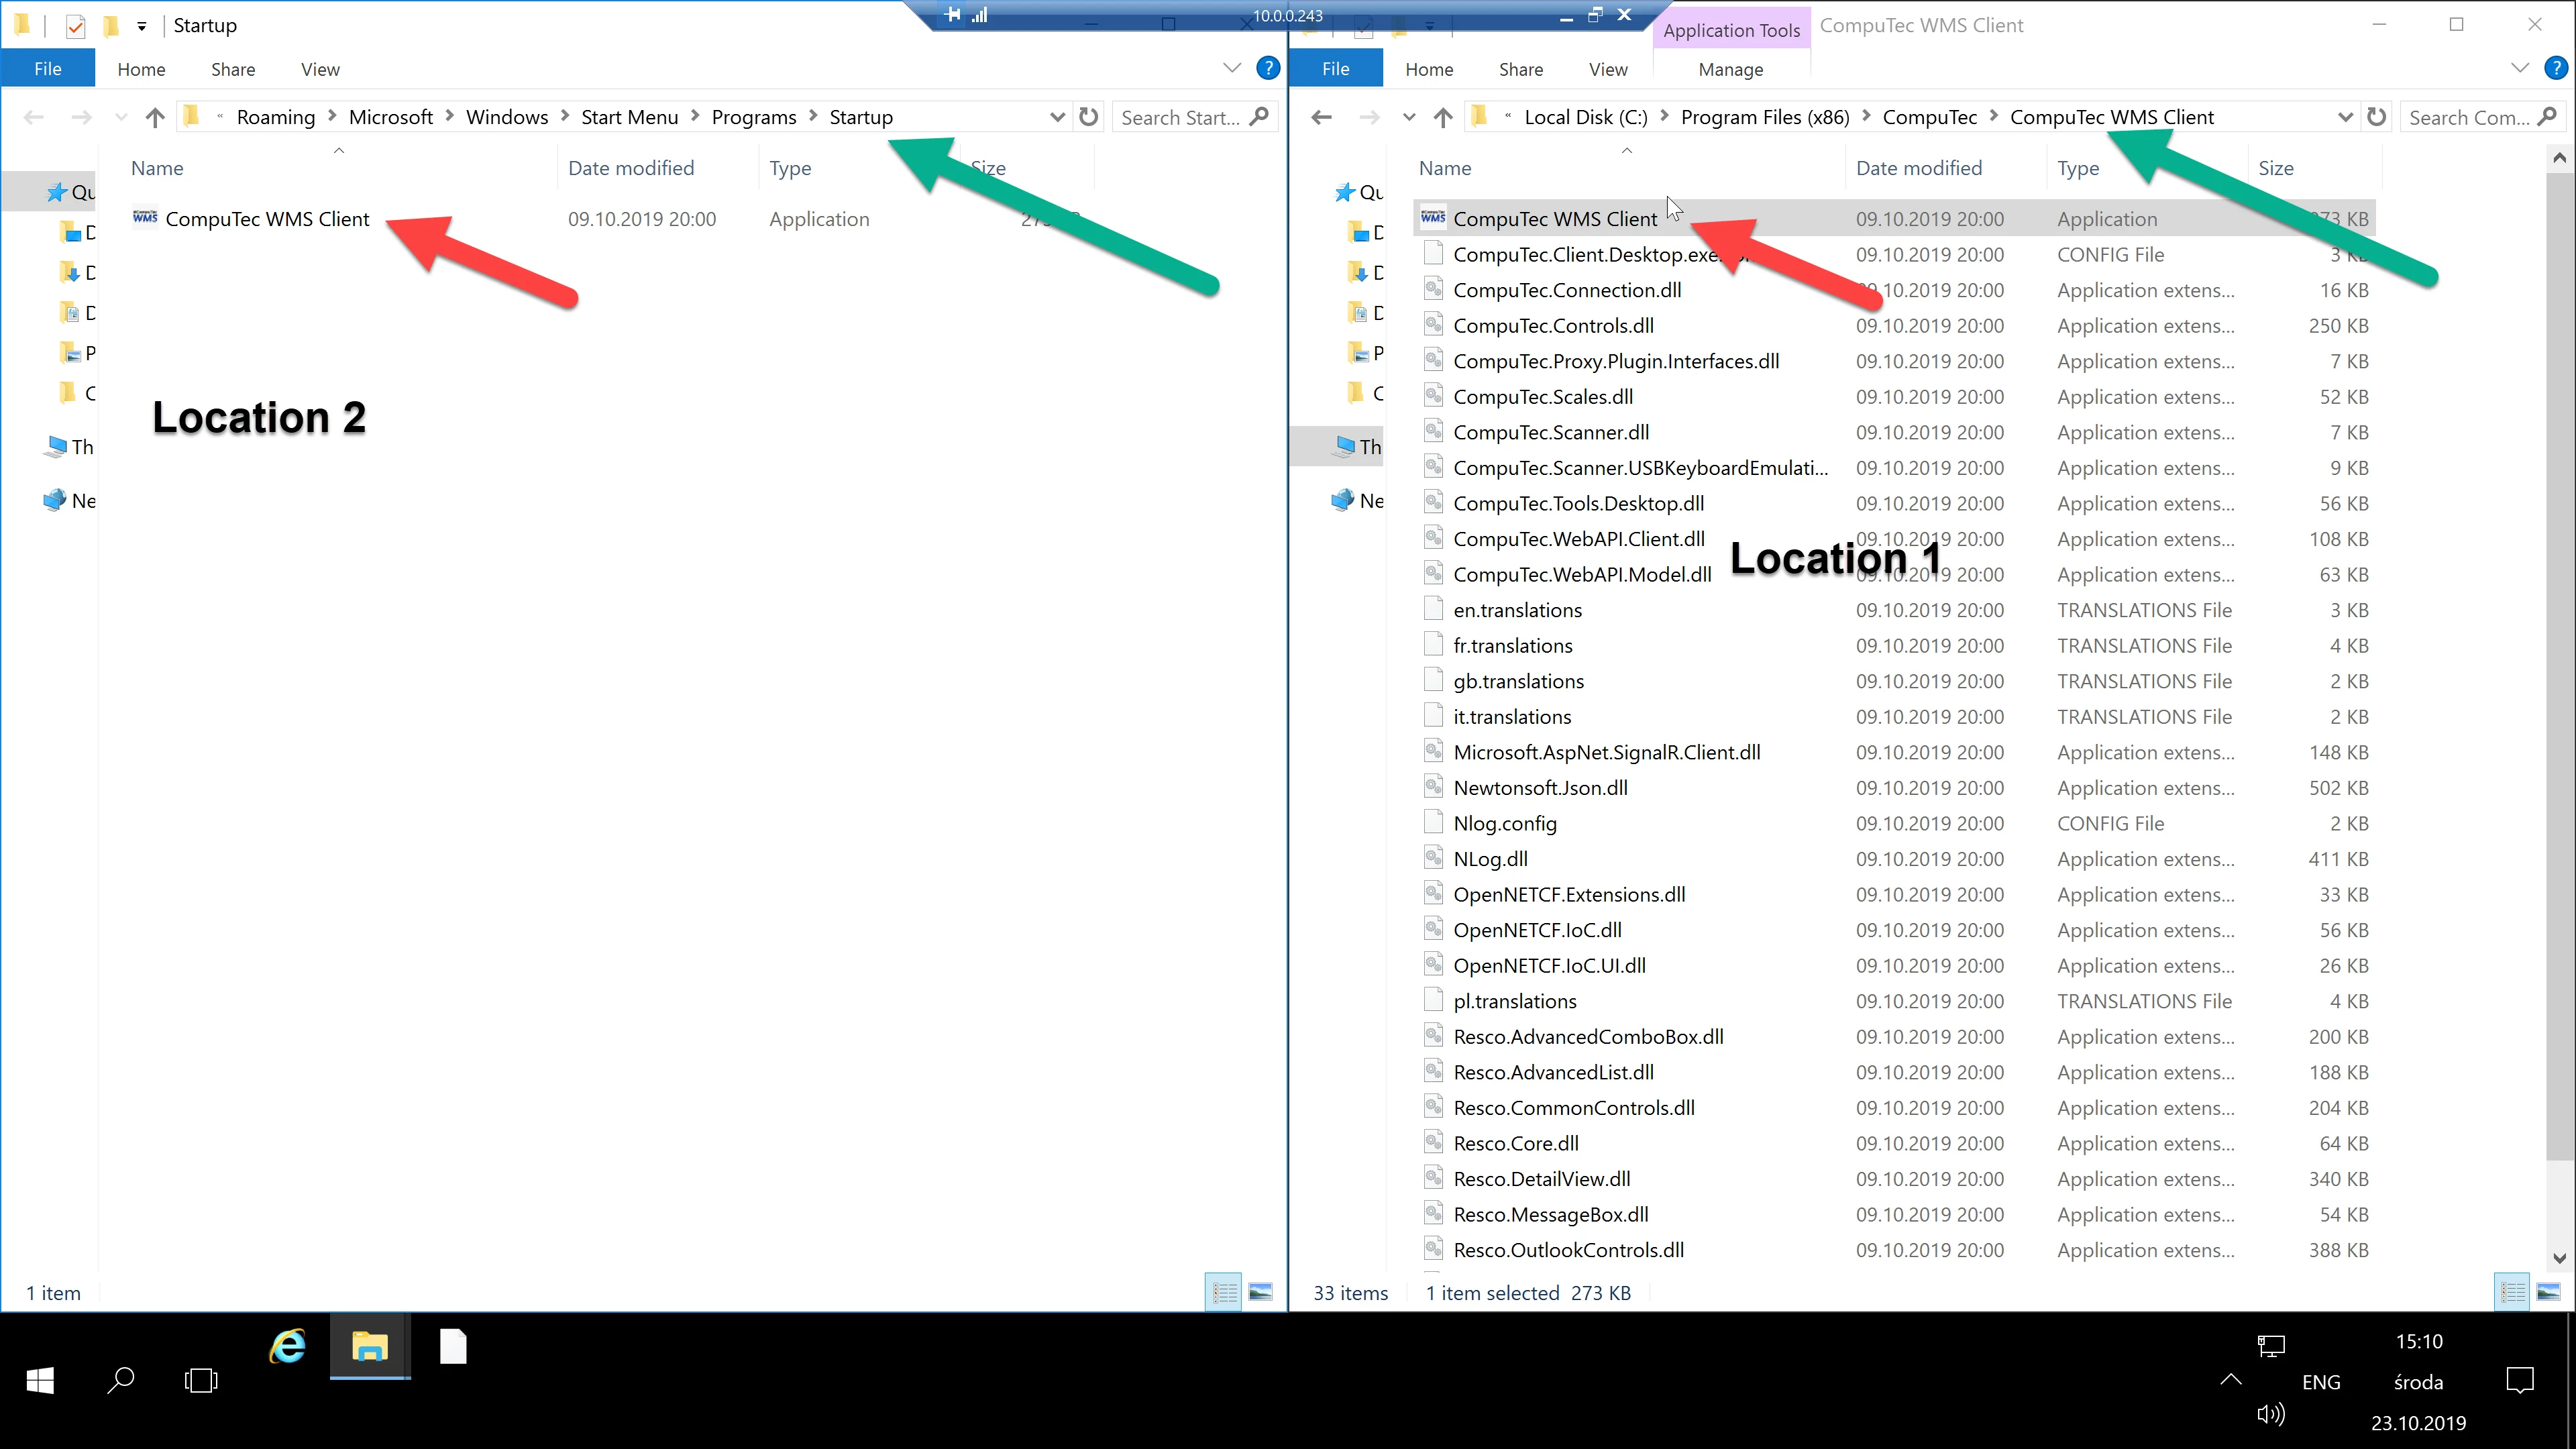
Right-click on the CompuTec WMS Client icon and select Open file location (Location 1).
-
Do not close the window
-
Press Win+R
-
Type shell::startup and Enter (Location 2)
-
This is location 2
-
Copy the CompuTec WMS Client icon from Location 1 (client) to Location 2 (start up).
-
This ensures the CompuTec WMS Client will start automatically when Windows boots.
DataWedge Setup on Scanner
You need to set up DataWedge to enable the CompuTec WMS Client on the PC through an RDP connection.
On your SYMBOL scanner, navigate to: Start → Settings → Control Panel → DataWedge.
Click the Running Button on YES → STATUS:Ready.
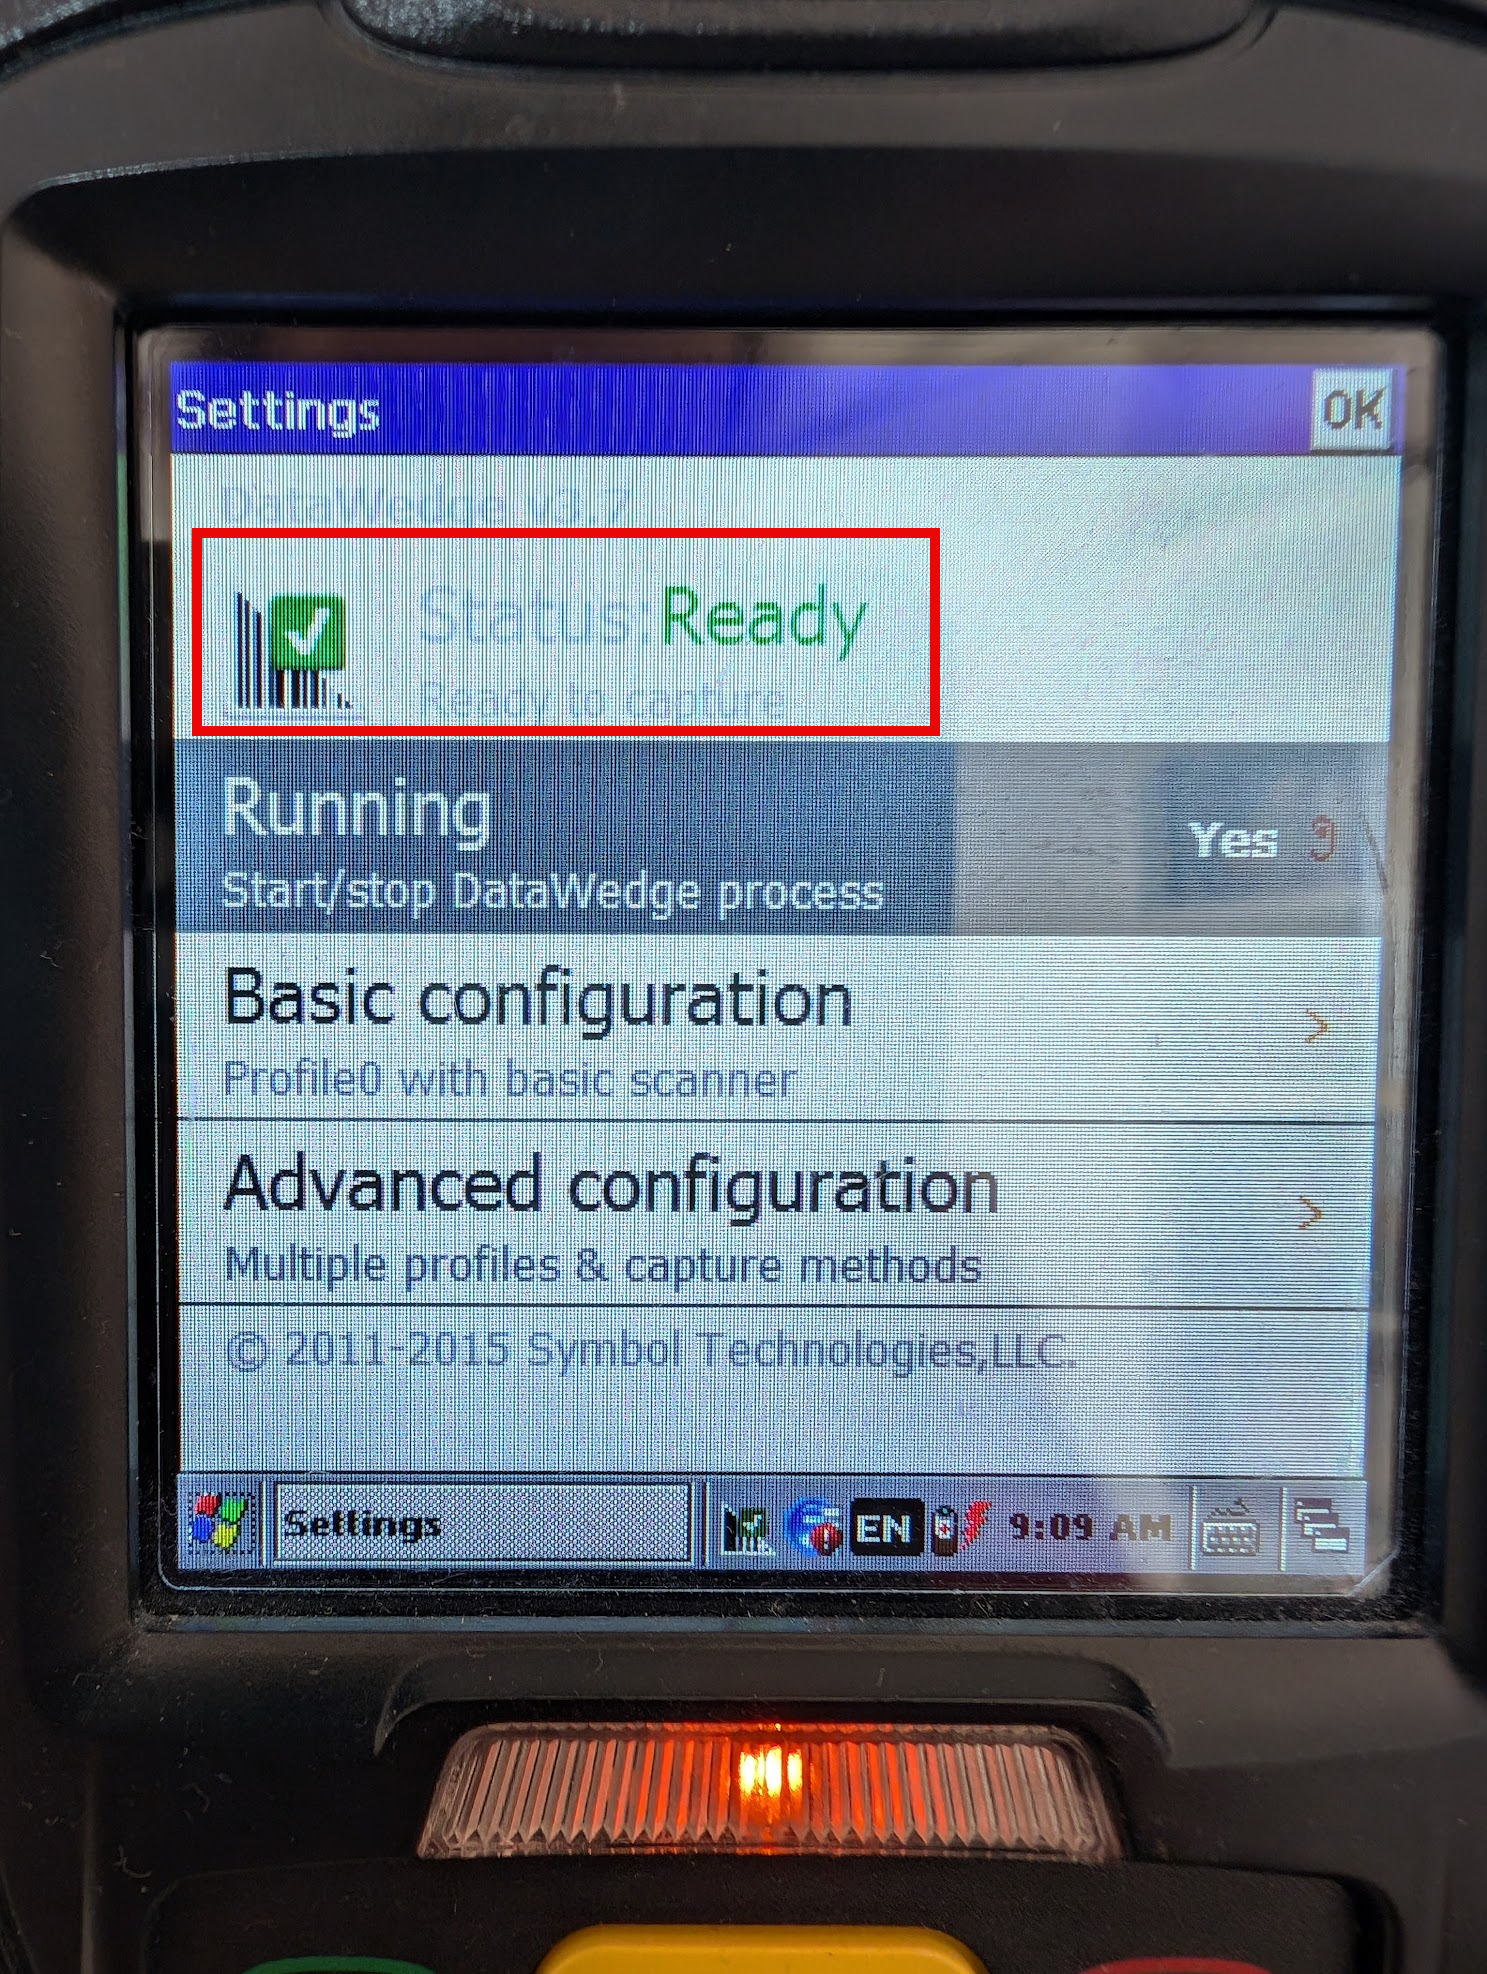
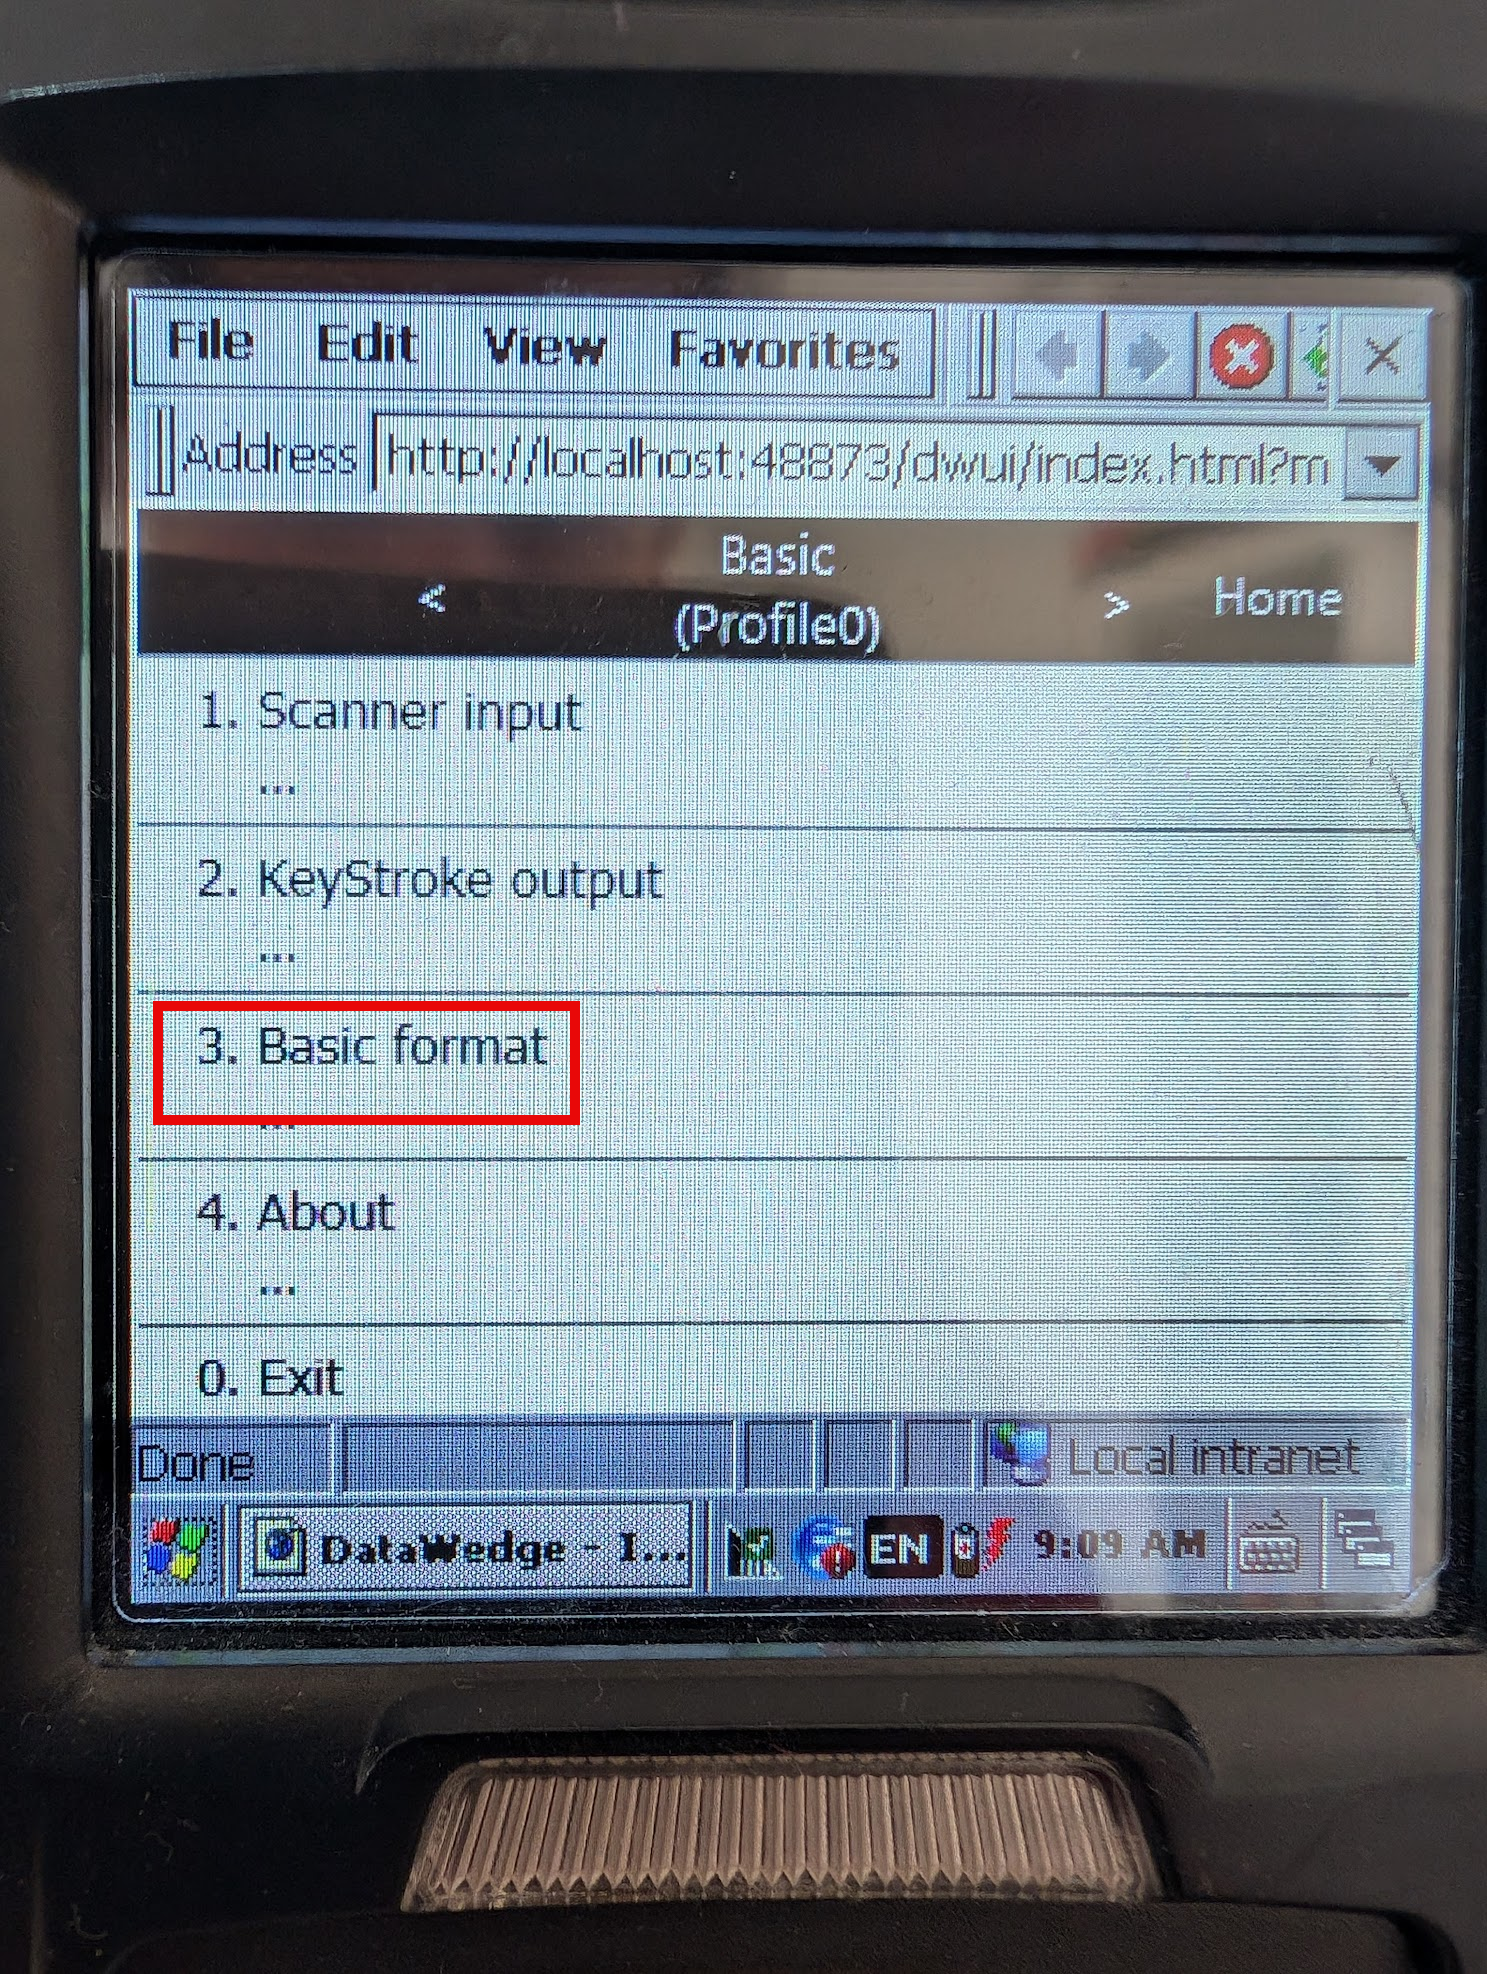
Click Basic Configuration, then Basic Format:
Prefix to data → Set \u0002 → Save
Suffix to data → Set \u0003 → Save
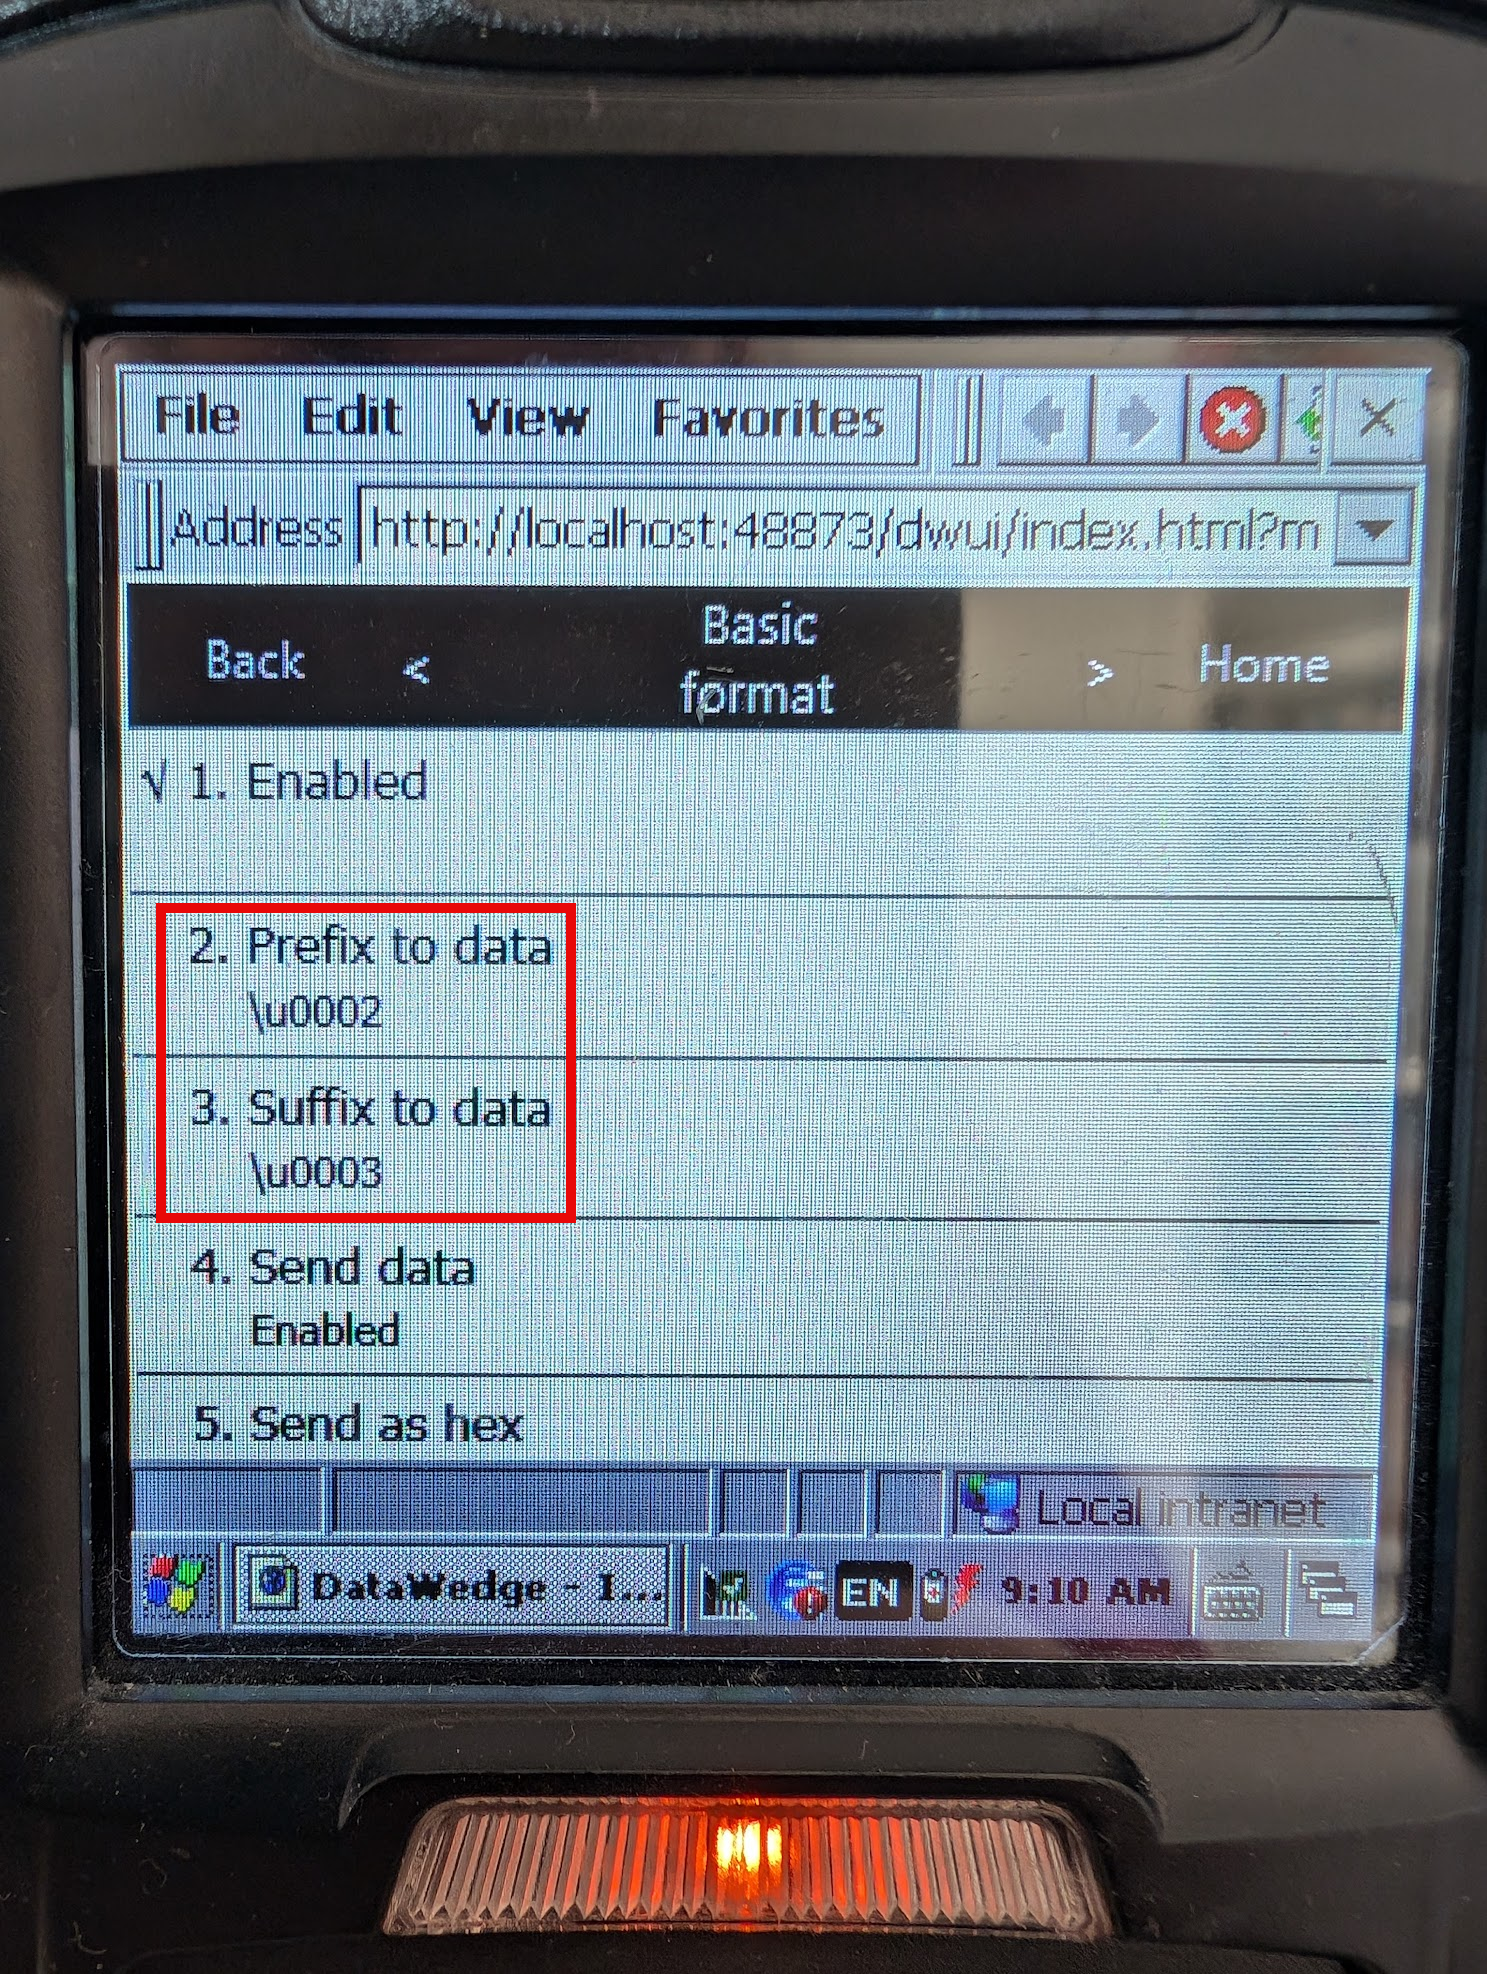
Save and Close.
RDP Setup on Scanner
Configuration
Open RDP on Scanner, then go to Configuration, General tab, and type in your IPv4 Address on Logon settings.
Now go to the Display tab, Display Configuration → Set Small.
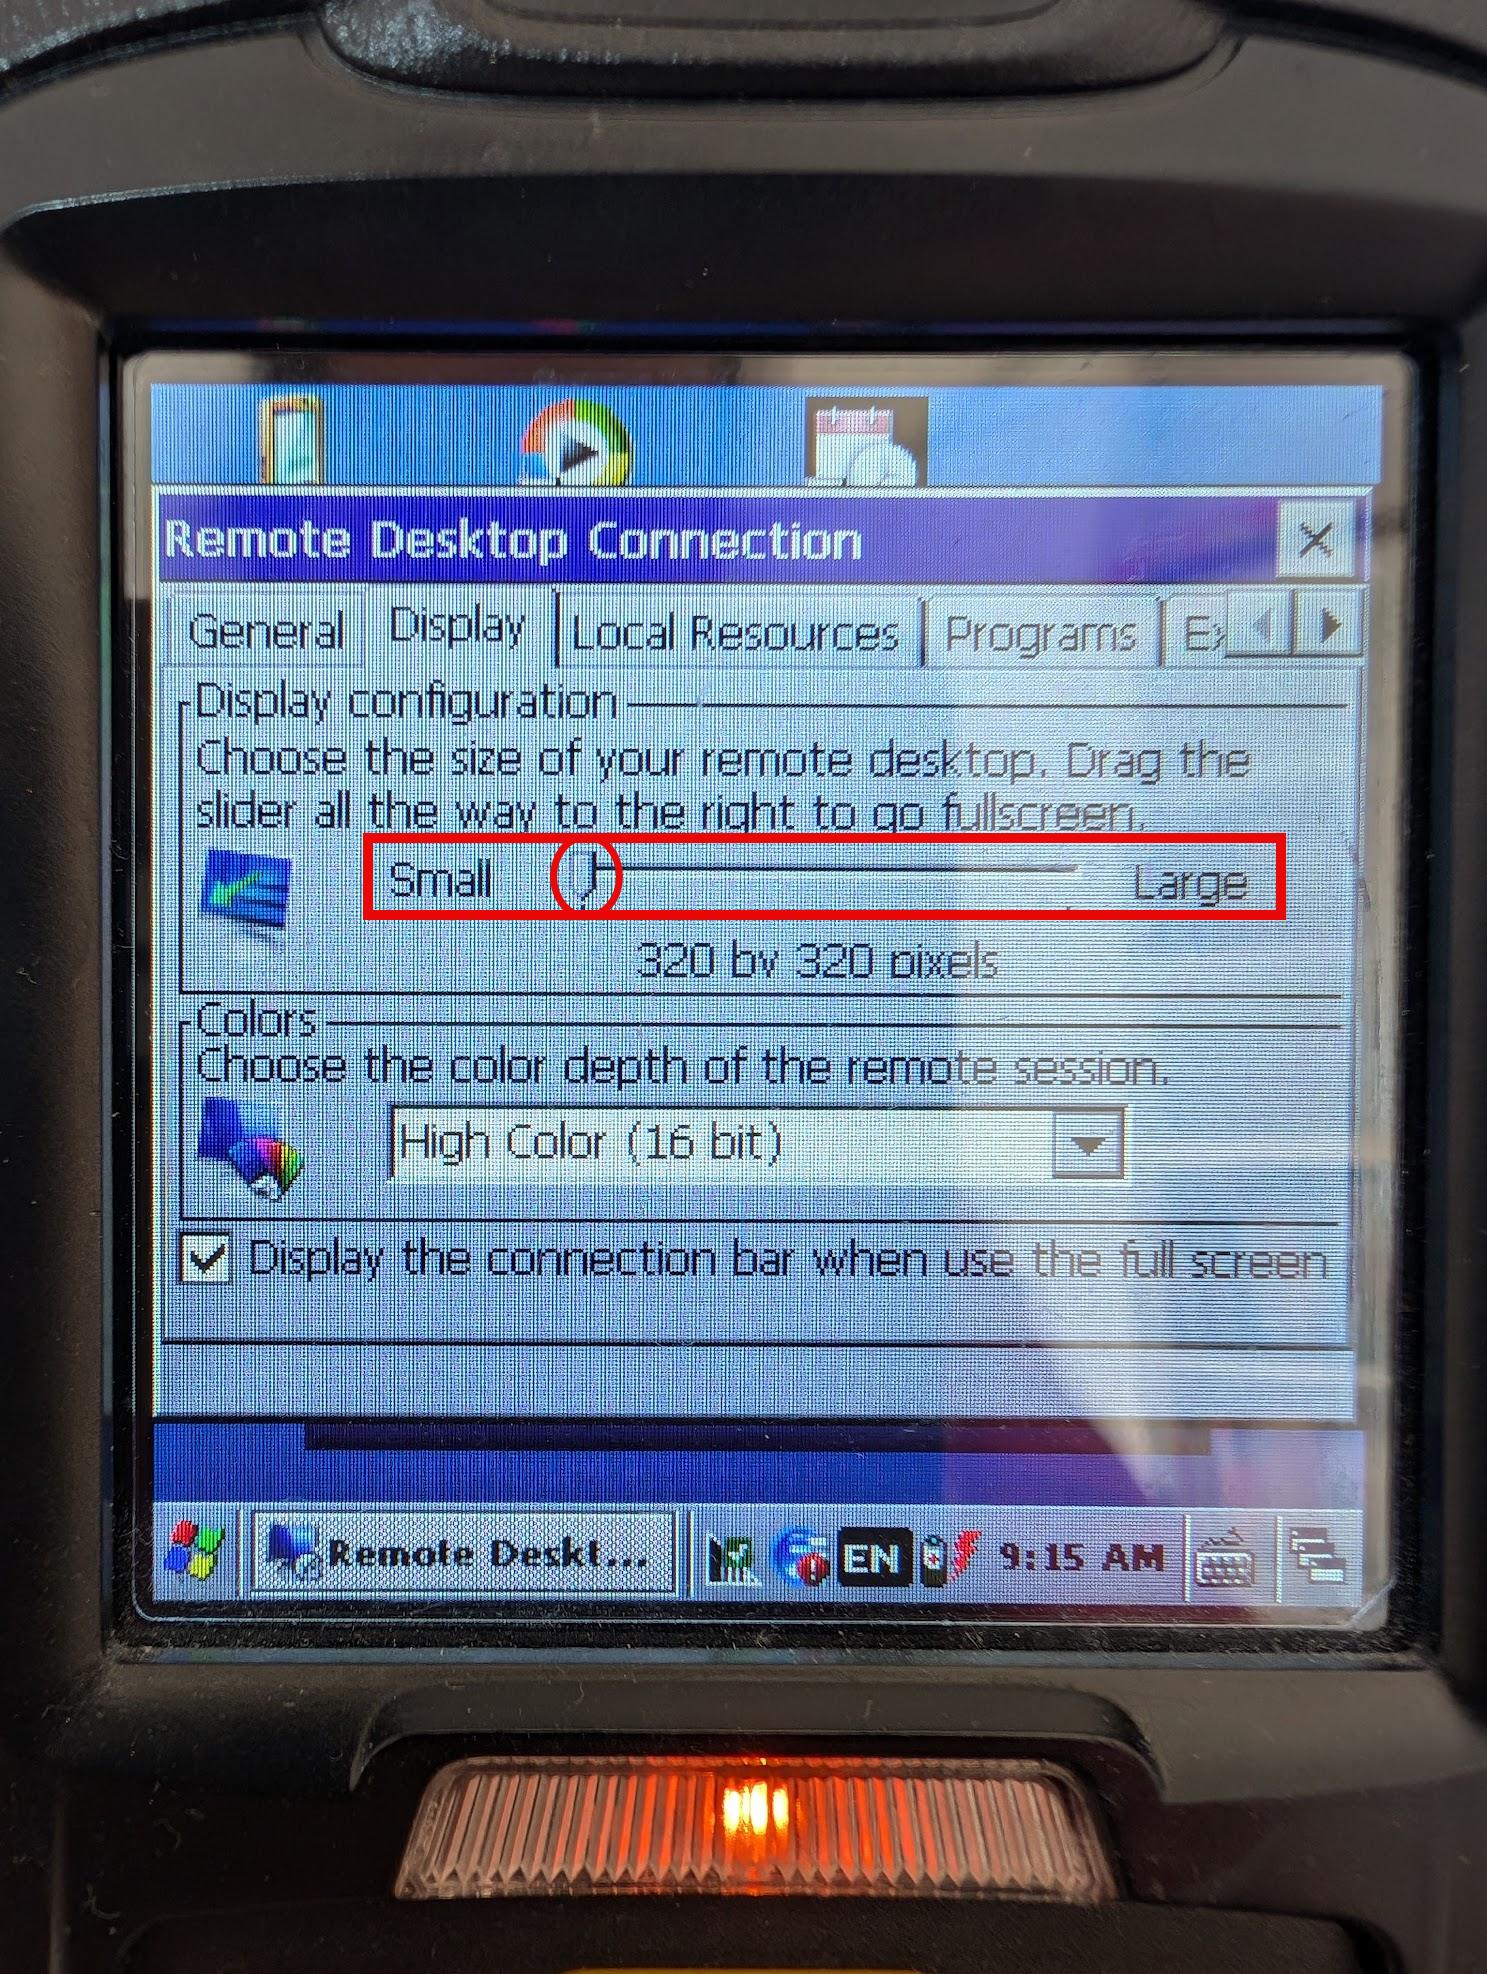
Save and Close.
Next, go to the Local Resources tab, Local Resources - Keyboard - Apply Windows key combination On this computer.
RDP Connect
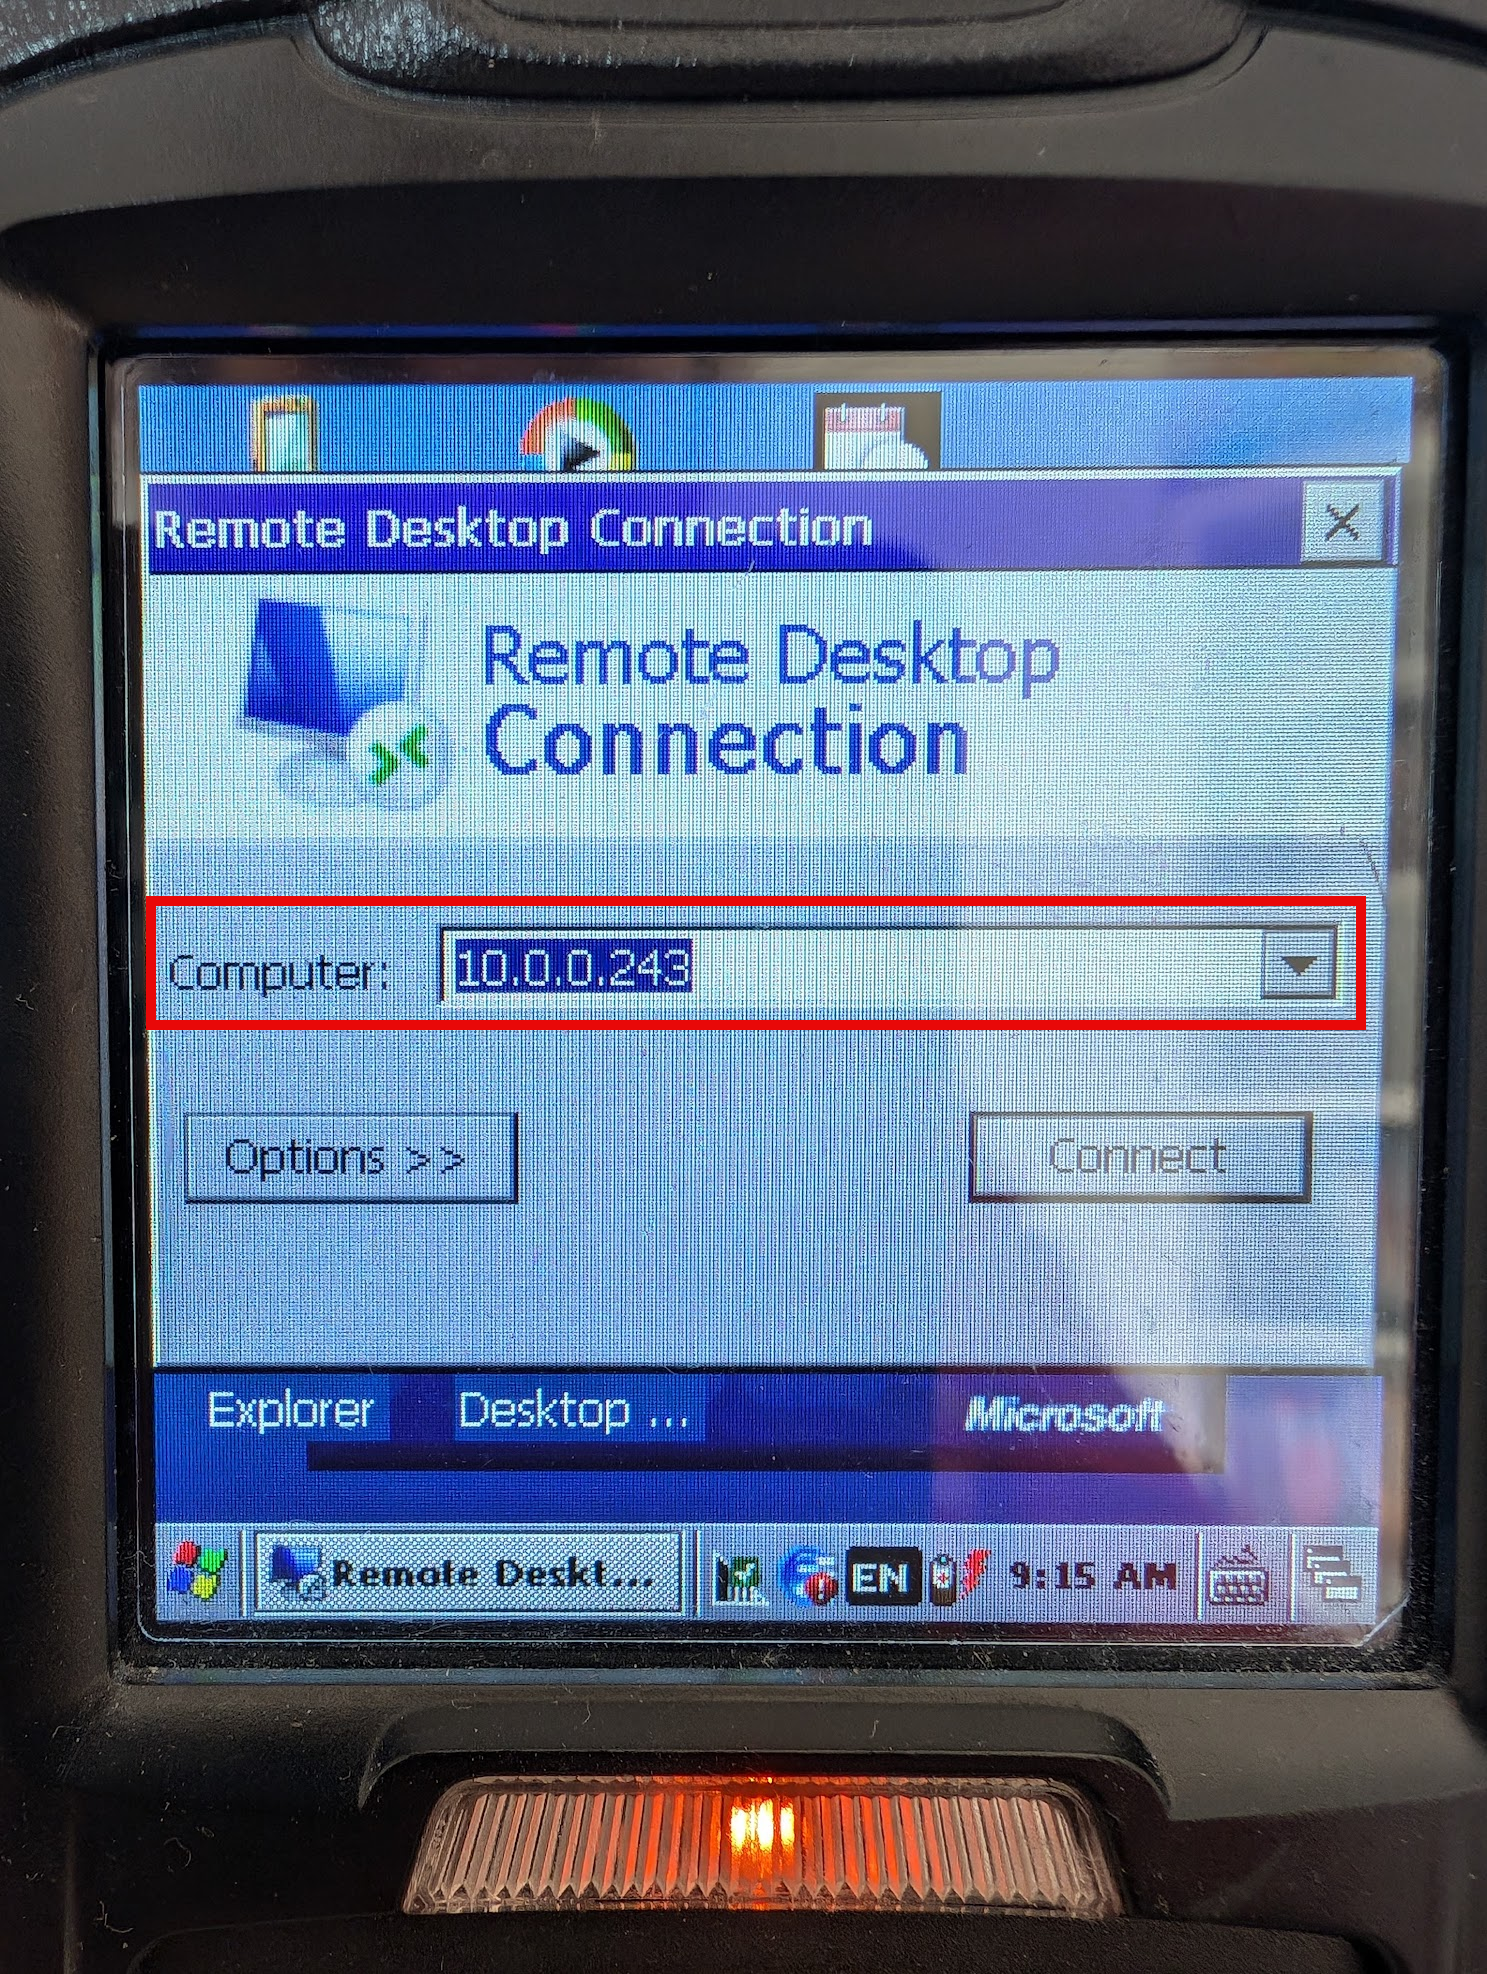
Set IPv4 Address (it should be filled in automatically).
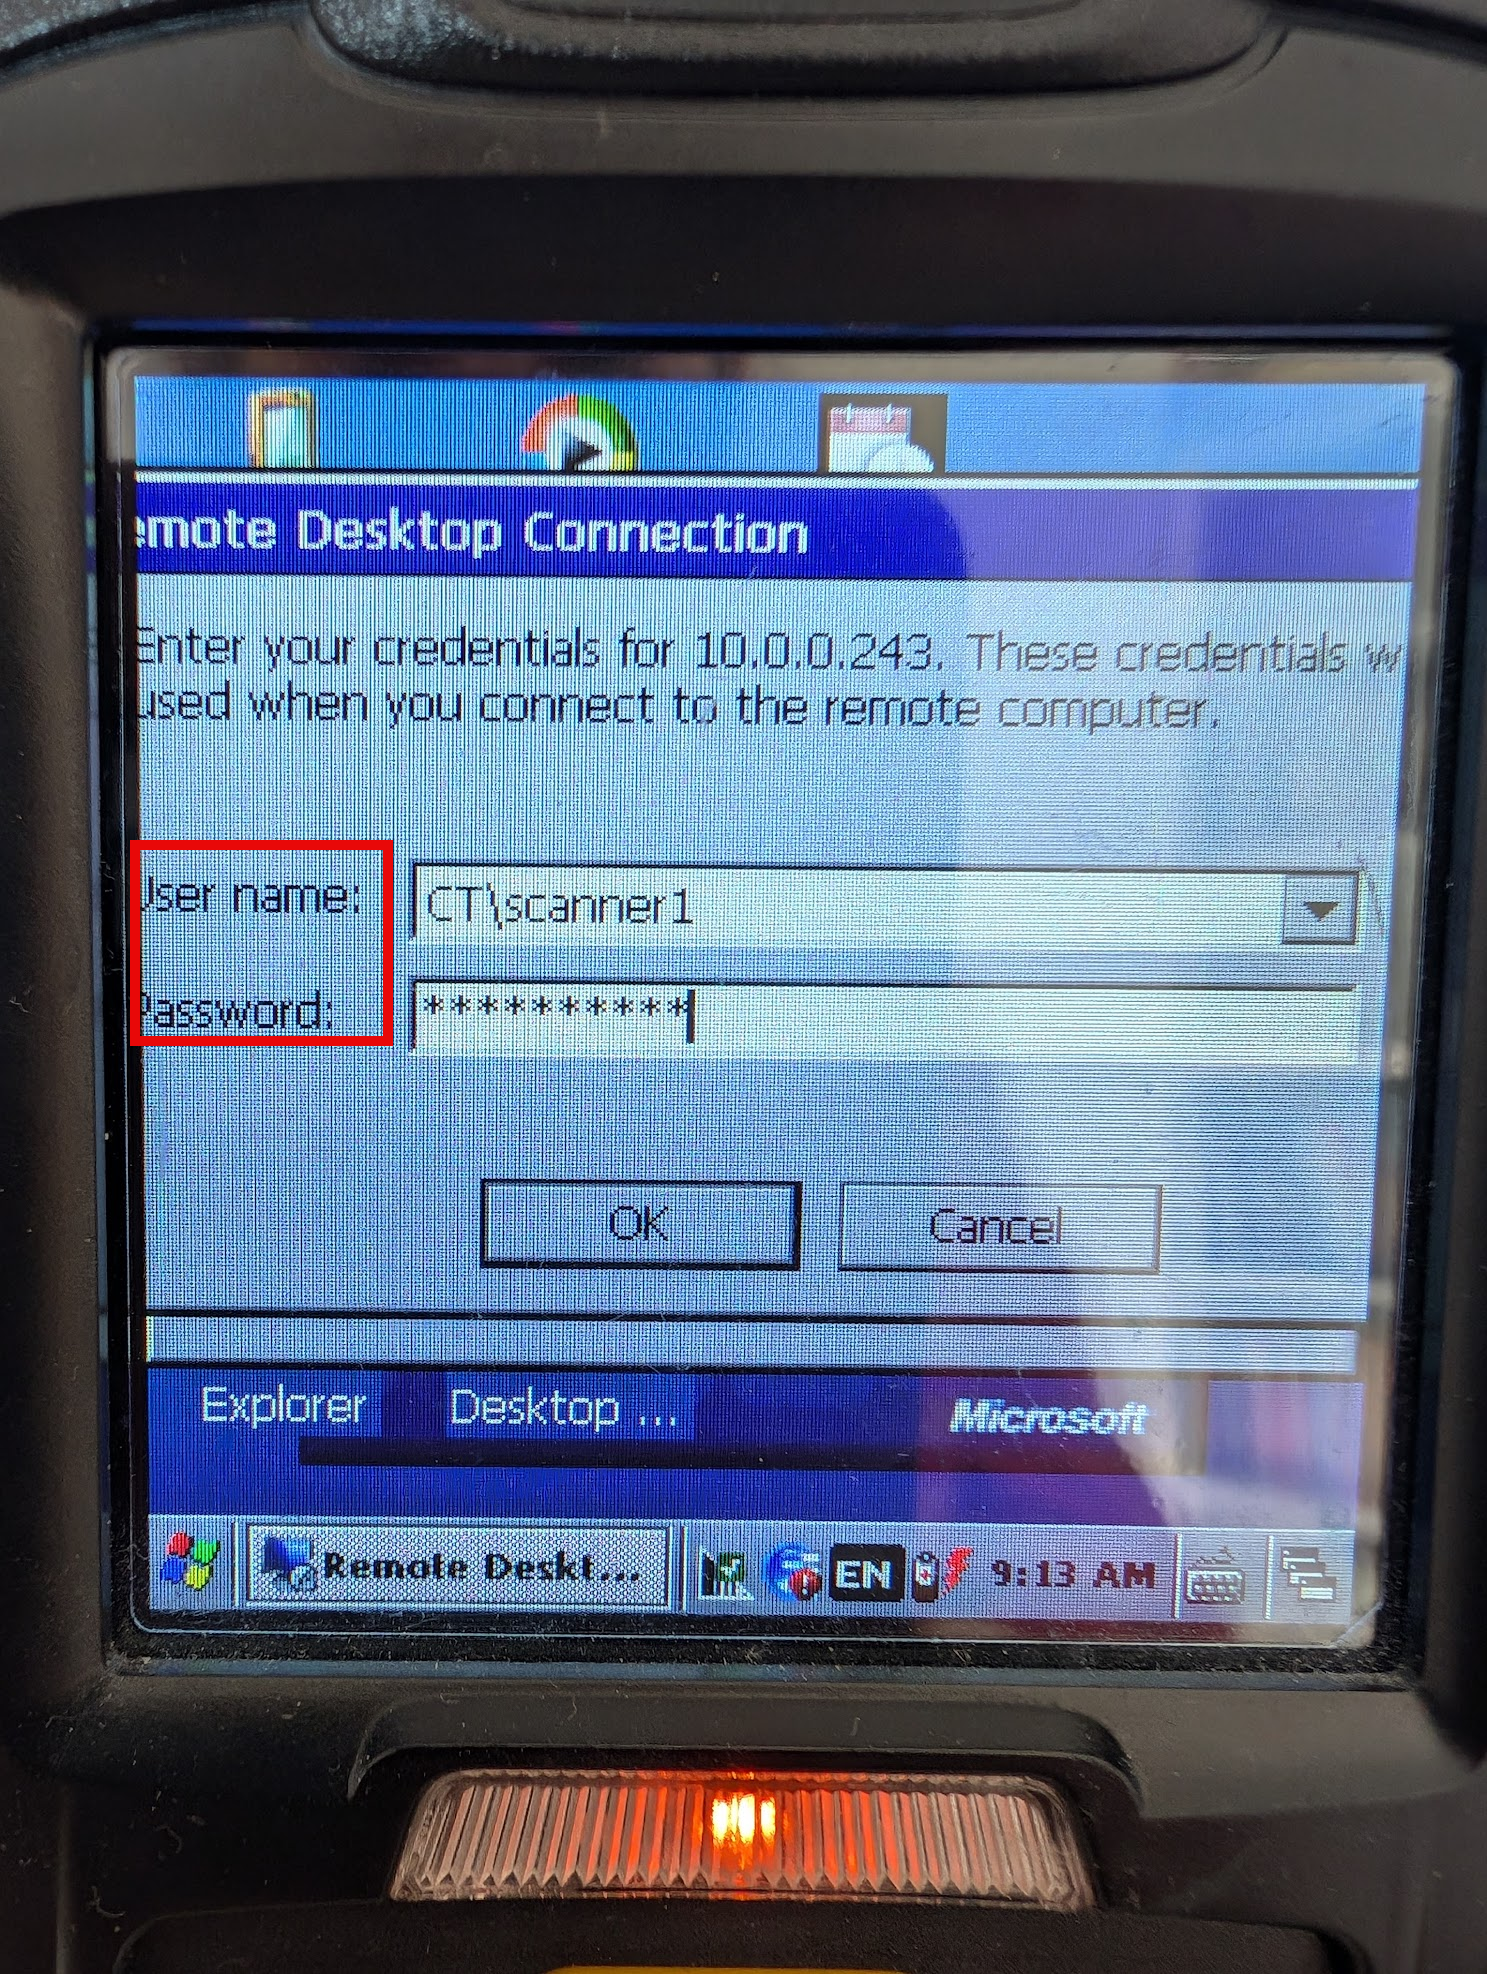
Set the User and Password of the PC.
DataWedge Scanning Configuration(PickList Mode)
DataWedge for Windows:
- Open the DataWedge setting.
- Tap Basic configuration.
- Scanner input.
- Tap on the displayed internal scanner (for example, Long, range Imager, or Kepler Imager).
- Reader Params.
- More.
- Picklist mode.
- Select a Hardware or Software reticle to enable it.
- Tap Back until you see the message 'saving changes, please wait...'.
- Tap Home then Exit.
- Hit OK to close DataWedge settings.
Finish
After completing the above configurations, use the scanner to establish an RDP connection with your PC. The CompuTec WMS Client should now work seamlessly, enabling efficient scanning operations.
If you encounter issues connecting to Windows Mobile 6.x systems or require additional troubleshooting, please use the following instructions:
https://www.zebra.com/us/en/support-downloads/software/operating-system/mc65-operating-system.html
By following this guide, you are now ready to utilize your scanner with the CompuTec WMS Client efficiently.