You are viewing documentation for CompuTec WMS 3.0, which runs on CompuTec AppEngine 3.0 (.NET 8).
If you use CompuTec WMS 2.0, see the CompuTec WMS 2.0 documentation.
When upgrading to CompuTec WMS 3.0, update all required CompuTec components together to ensure compatibility.
Before installing or upgrading, review the CompuTec WMS Installation Guide and the system requirements.
Install and Configure CompuTec WMS Client
CompuTec WMS Client connects warehouse users to CompuTec WMS Server and provides access to warehouse operations.
Before logging in for the first time, configure the connection to CompuTec WMS Server and review the client settings.
In CompuTec WMS Client, you can configure connection details, printers, scales, interface behavior, document settings, scanner settings, and logs.
Before you start
Before you start, make sure:
- CompuTec WMS Server is installed and configured. Read more
- You have downloaded CompuTec WMS Client installation file from the Downloads.
For more information, see CompuTec WMS Server.
Install CompuTec WMS Client
-
Download CompuTec WMS Client installation file from the Downloads.
-
Run the installation file and click Next.

-
Follow the installation steps, and click Finish.

Start CompuTec WMS Client
-
Start the desktop version of CompuTec WMS Client from the Windows program list or run
CompuTec.Client.Desktop.exefrom the CompuTec WMS Client installation folder.
-
On the login screen, click the settings icon.
 note
noteWhen you start CompuTec WMS Client for the first time, configure the connection to CompuTec WMS Server before logging in. Read more.
-
Configure the required settings using the following tabs
- General
- Options
- Appearance
- Documents
- Scanner
- Logs

Configure CompuTec WMS Client general settings
Use the General tab to configure the connection to CompuTec WMS Server and select the company, printer, and weight scale.

Configure the following settings as required:
- WMS Server – Enter the address and port of the CompuTec WMS Server. The address and port must match the CompuTec WMS Server configuration.
- Company name – Select the SAP Business One company database that you want to use.
- Printer name – Select the printer that CompuTec WMS Client will use for printing. Read more
- Scale – Enable this option if you want to use a weight scale, and then select the required scale. Read more
Review client and server information
Click the information (i) icon on the General tab to review information about the current client and server configuration.

The displayed information includes:
- Server Name
- Company Name
- Database Name
- Server Version
- Client Version
- Terminal ID
On Android, tapping Client Version twice can also be used when overwriting a client version. Read more
Test the server connection
Click Connection test to verify the connection between CompuTec WMS Client and CompuTec WMS Server.

Configure CompuTec WMS Client options
Use the Options tab to configure the behavior and appearance of CompuTec WMS Client.

Depending on the client, the following options are available:
- Enable telemetry (not configured on server) – Enables the collection of telemetry data when telemetry is configured on the server.
- Large menu icons – Displays larger icons in the main menu.
- Open in full screen – Opens CompuTec WMS Client in full-screen mode.
- Large transaction label – Displays a larger transaction label.
- Auto focus on quantity field – Automatically moves the focus to the quantity field when quantity input is required.
- Disable formatting on quantity field – Disables formatting in the quantity field.
- Bigger quantity field – Displays a larger quantity field.
- Enable editable date control – Enables editing of the date control.
- Enable alternate picker control – Enables the alternate picker control.
- Highlight last edited row – Highlights the row that was edited most recently.
- Auto-scroll to scanned item – Automatically scrolls to the scanned item.
- Disable activity indicator – Disables the activity indicator.
- Disable progress bar – Disables the progress bar.
- Disable software keyboard – Prevents the software keyboard from being displayed.
- Show new Success message – Displays a full-screen confirmation after a document is created successfully. When this option is enabled, use Visible for (seconds) to specify how long the confirmation remains on the screen.
Available options can differ between the desktop and Android versions of CompuTec WMS Client.
Configure success messages
By default, CompuTec WMS Client displays a standard confirmation message after a document is created successfully.

To configure a new full-screen success message, follow these steps:
-
On the Options tab, select Show new Success message.
-
In Visible for (seconds), enter how long the message should remain on the screen.

-
Click Save.
After a document is created successfully, the full-screen confirmation displays the document type and document number.

The message closes automatically after the configured time. To close it earlier, tap or click anywhere on the screen.
This setting changes only success messages. Error messages continue to be displayed in the existing format.
Configure appearance settings
Use the Appearance tab to adjust text sizes in CompuTec WMS Client. You can scale all text in the application or set a specific size for individual types of text.

Save font settings as a template
You can save your current font settings as a template and reuse them when needed. Templates include the general font scale and any individual font sizes you have configured.
Font templates are shared with all users.
To create a template:
-
On the Appearance tab, configure the required font sizes.
-
Click Templates.

-
In Template name, enter a name for the template.

-
Click Save current settings as template.

-
The new template is added to the list of available templates.

Apply a font template
To apply previously saved font settings:
-
On the Appearance tab, click Templates.
-
Select the required template from the list.

-
The selected template name and its font settings are displayed on the Appearance tab.

Modify font settings based on a template
After applying a template, you can adjust the font settings without changing the saved template.
When you change the general font scale or an individual font size, the template indicator changes to Custom. This indicates that the current settings no longer match the selected template.

To save these settings as a new template:
-
Click Template.
-
Enter a new Template name.
-
Click Save current settings as template.
Delete a font template
To delete a saved template:
-
On the Appearance tab, click Templates.
-
Find the template that you want to remove.
-
Click the X icon next to the template.

The template is removed from the list.
Scale all text
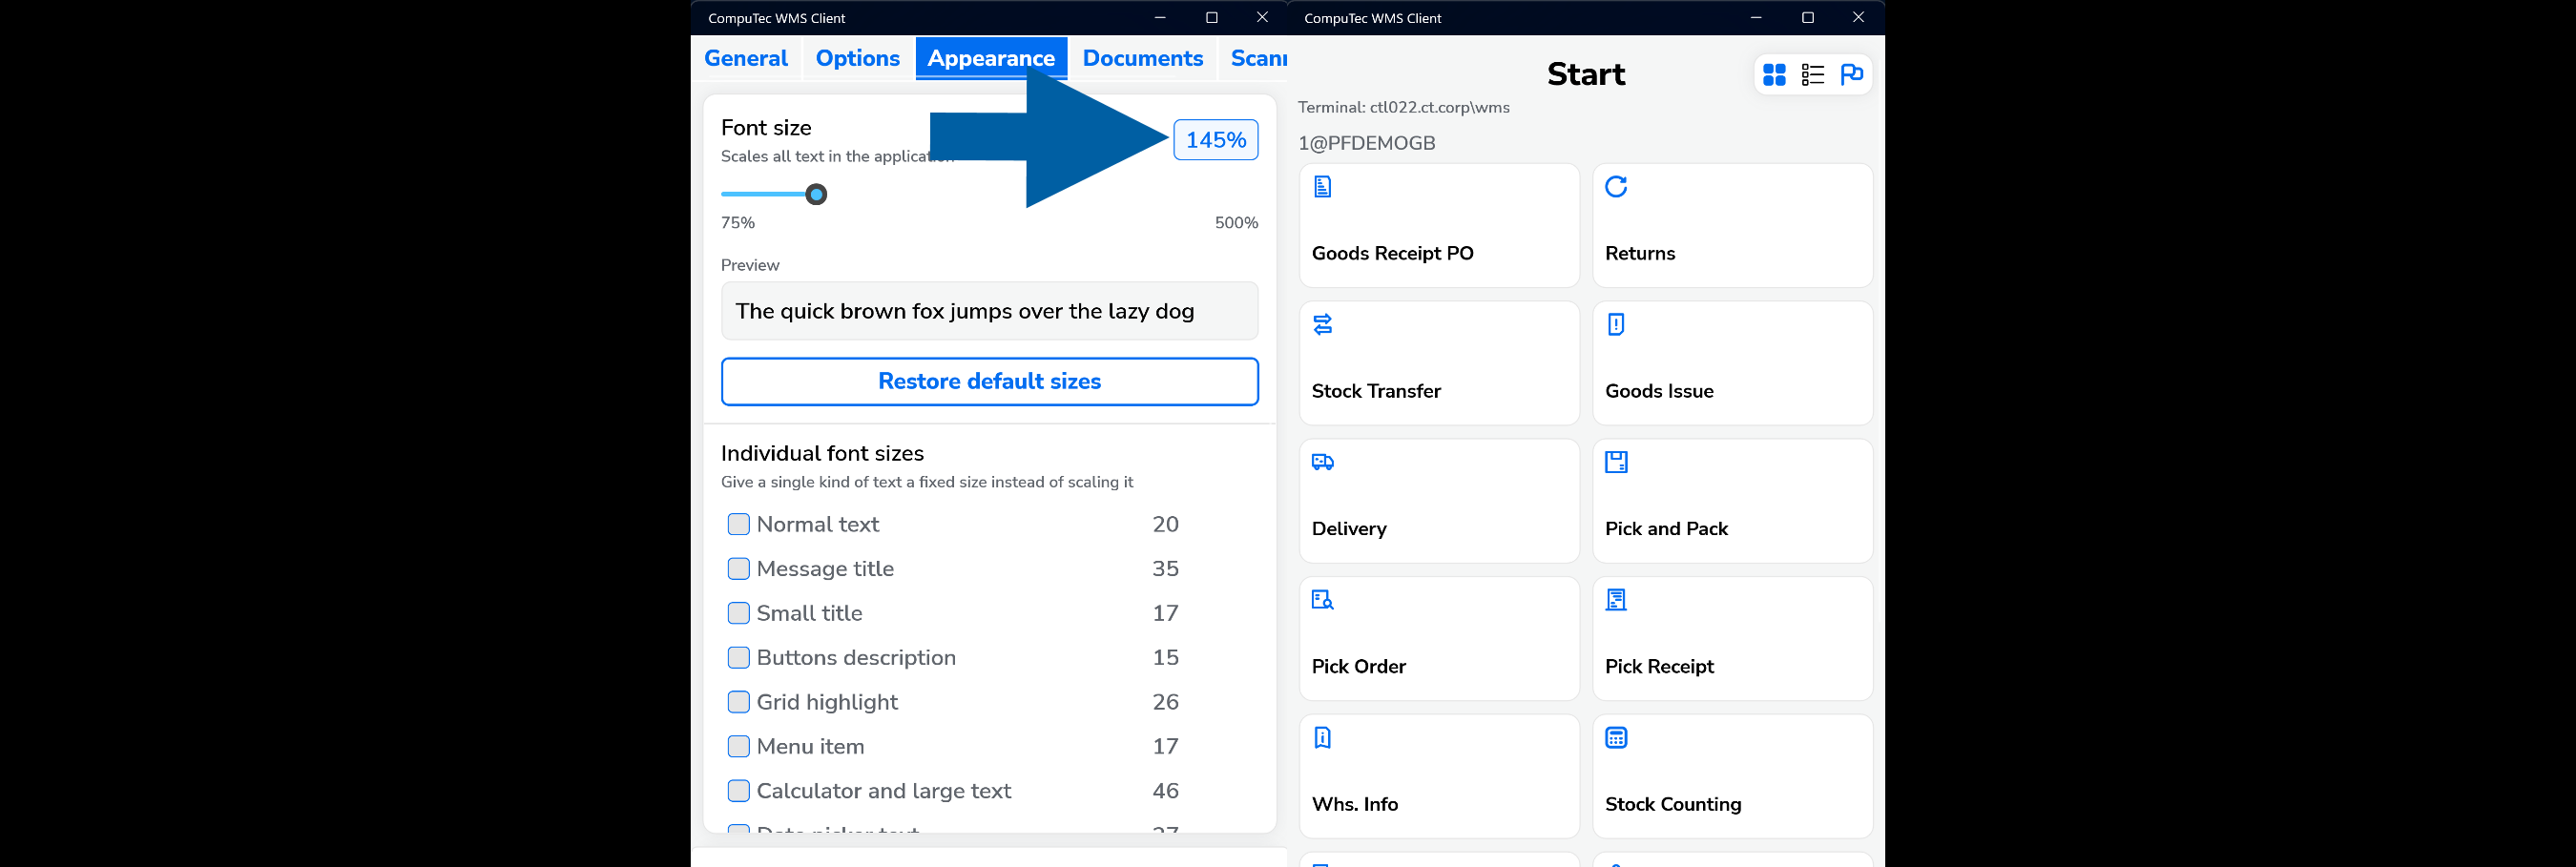
Use Font size to scale text throughout CompuTec WMS Client.
-
Move the Font size slider to the required value.
The available range is from 75% to 500%.

-
Review the Preview to see how the selected scale affects text.
-
Click Save to apply the changes.

-
The selected scale is applied to text throughout the application.
Set individual font sizes
You can override the general font scaling for specific types of text.
The following text types can be configured individually:
- Normal text
- Message title
- Small title
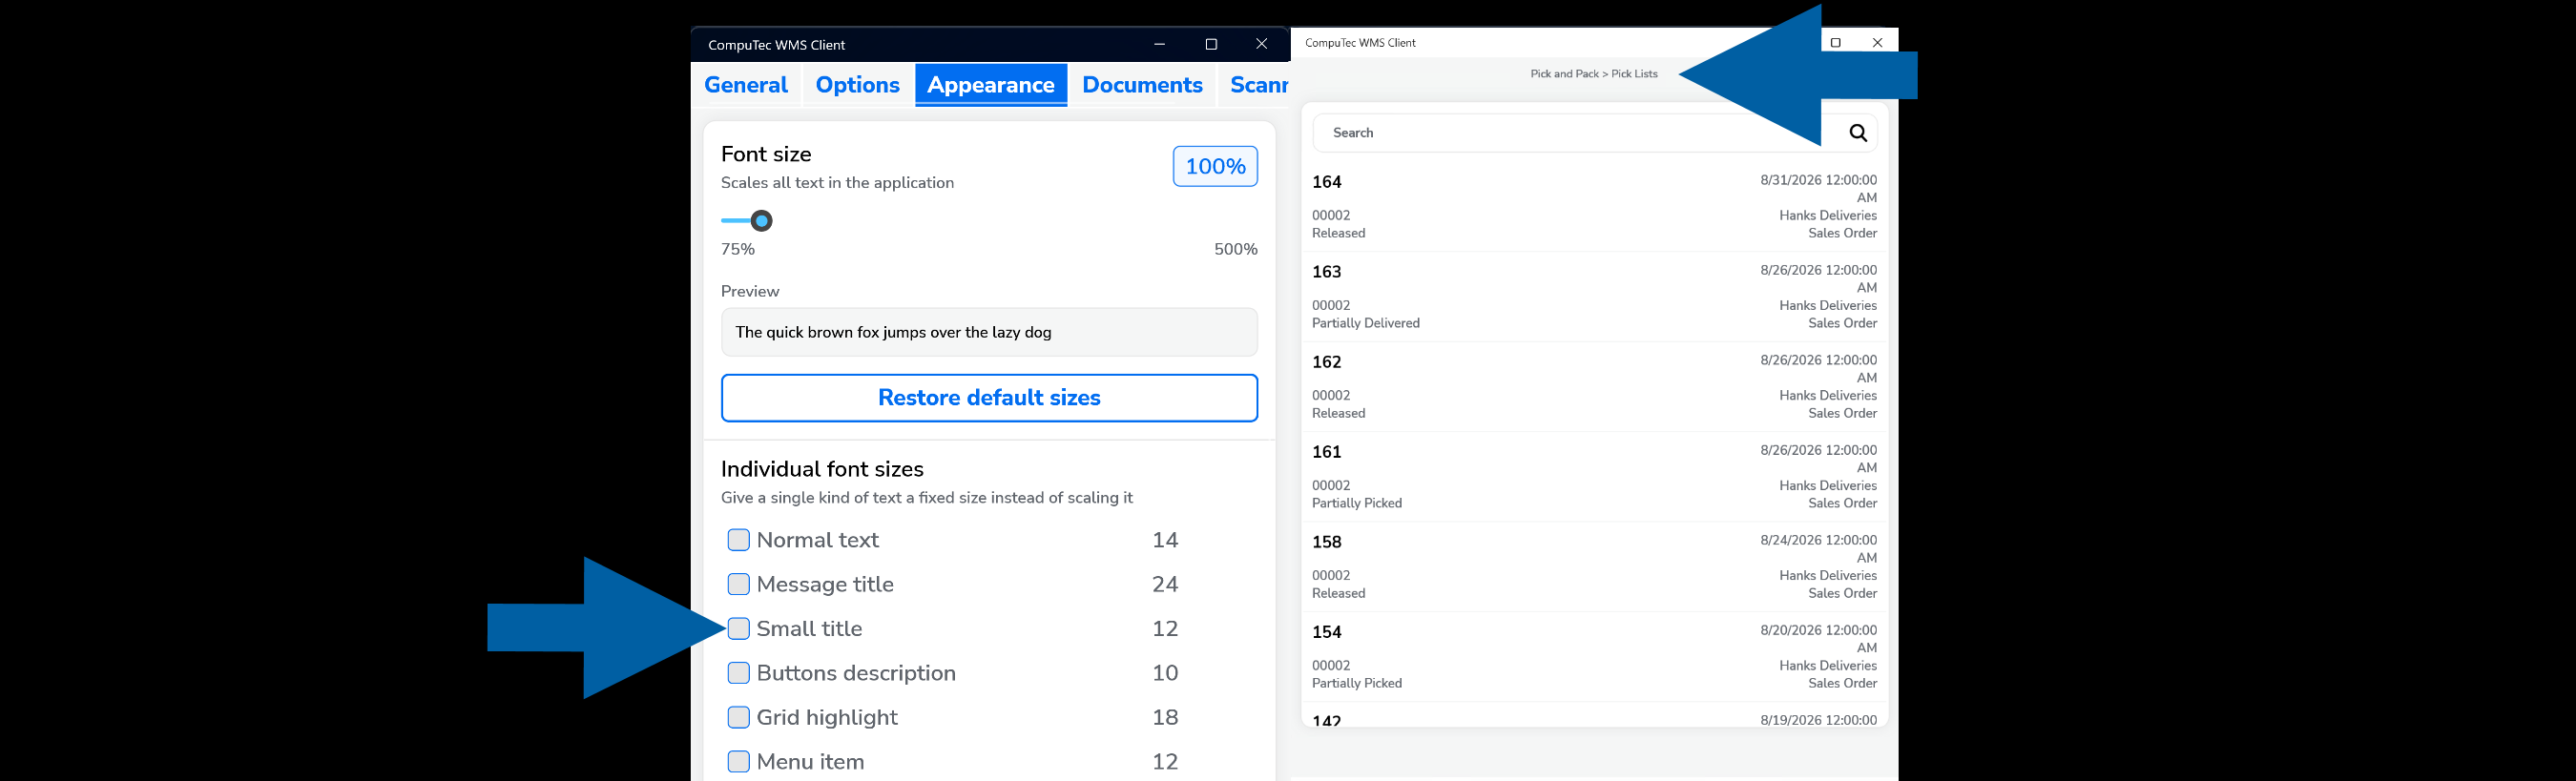
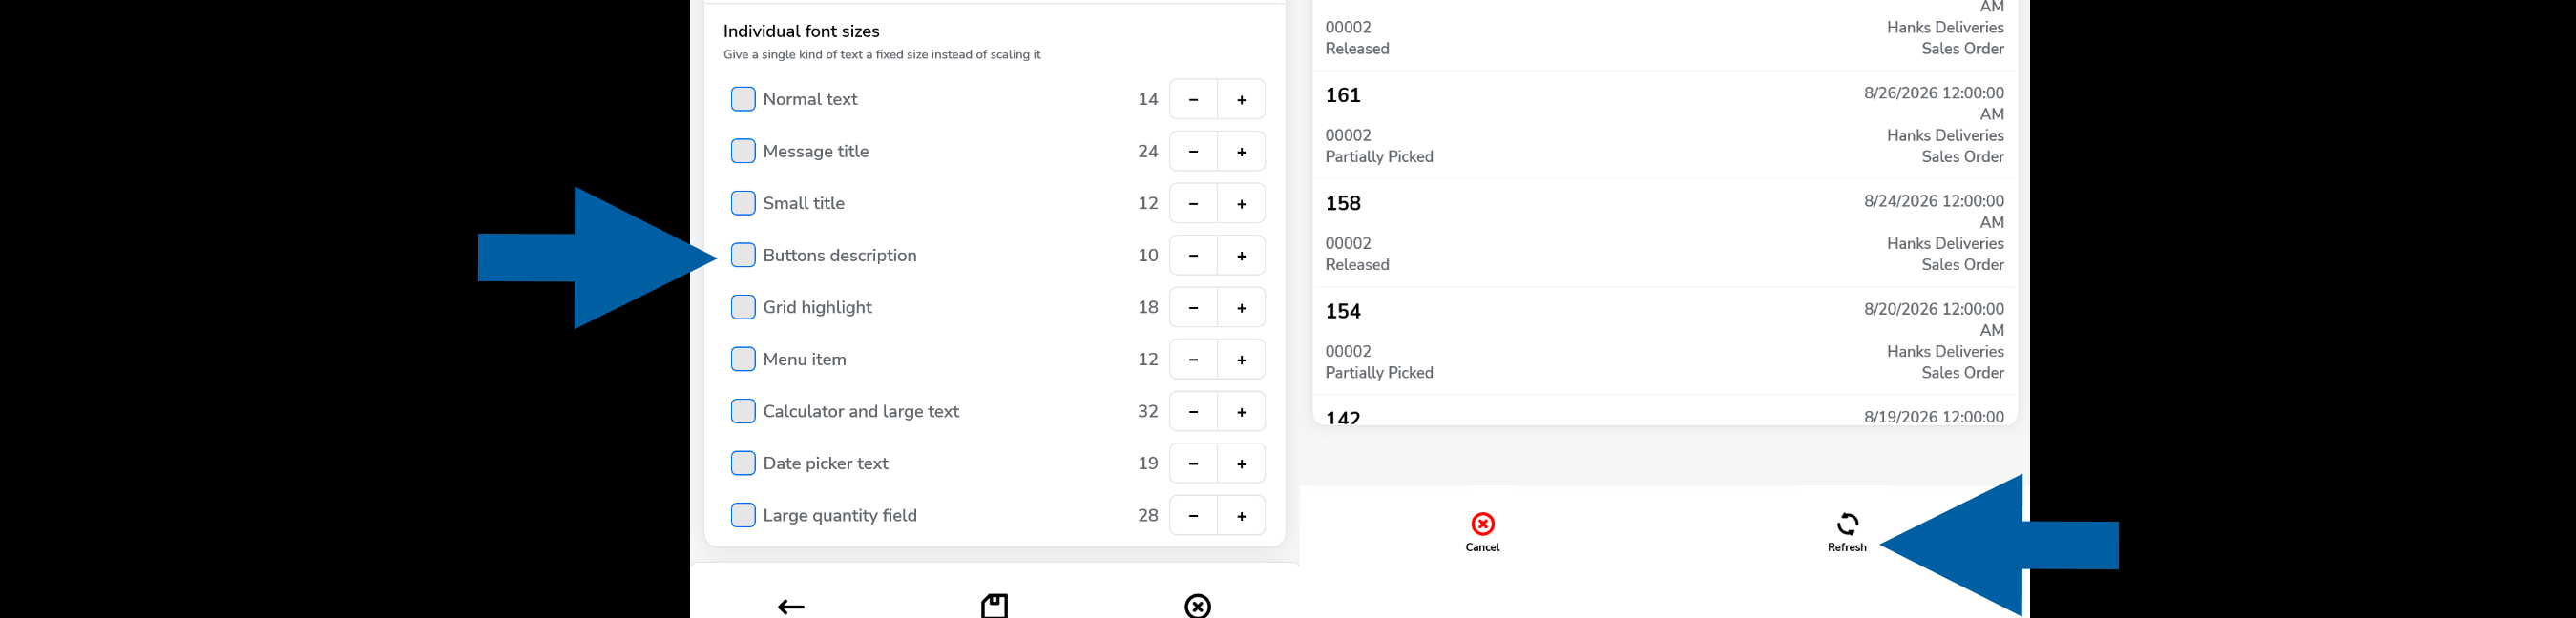
- Buttons description
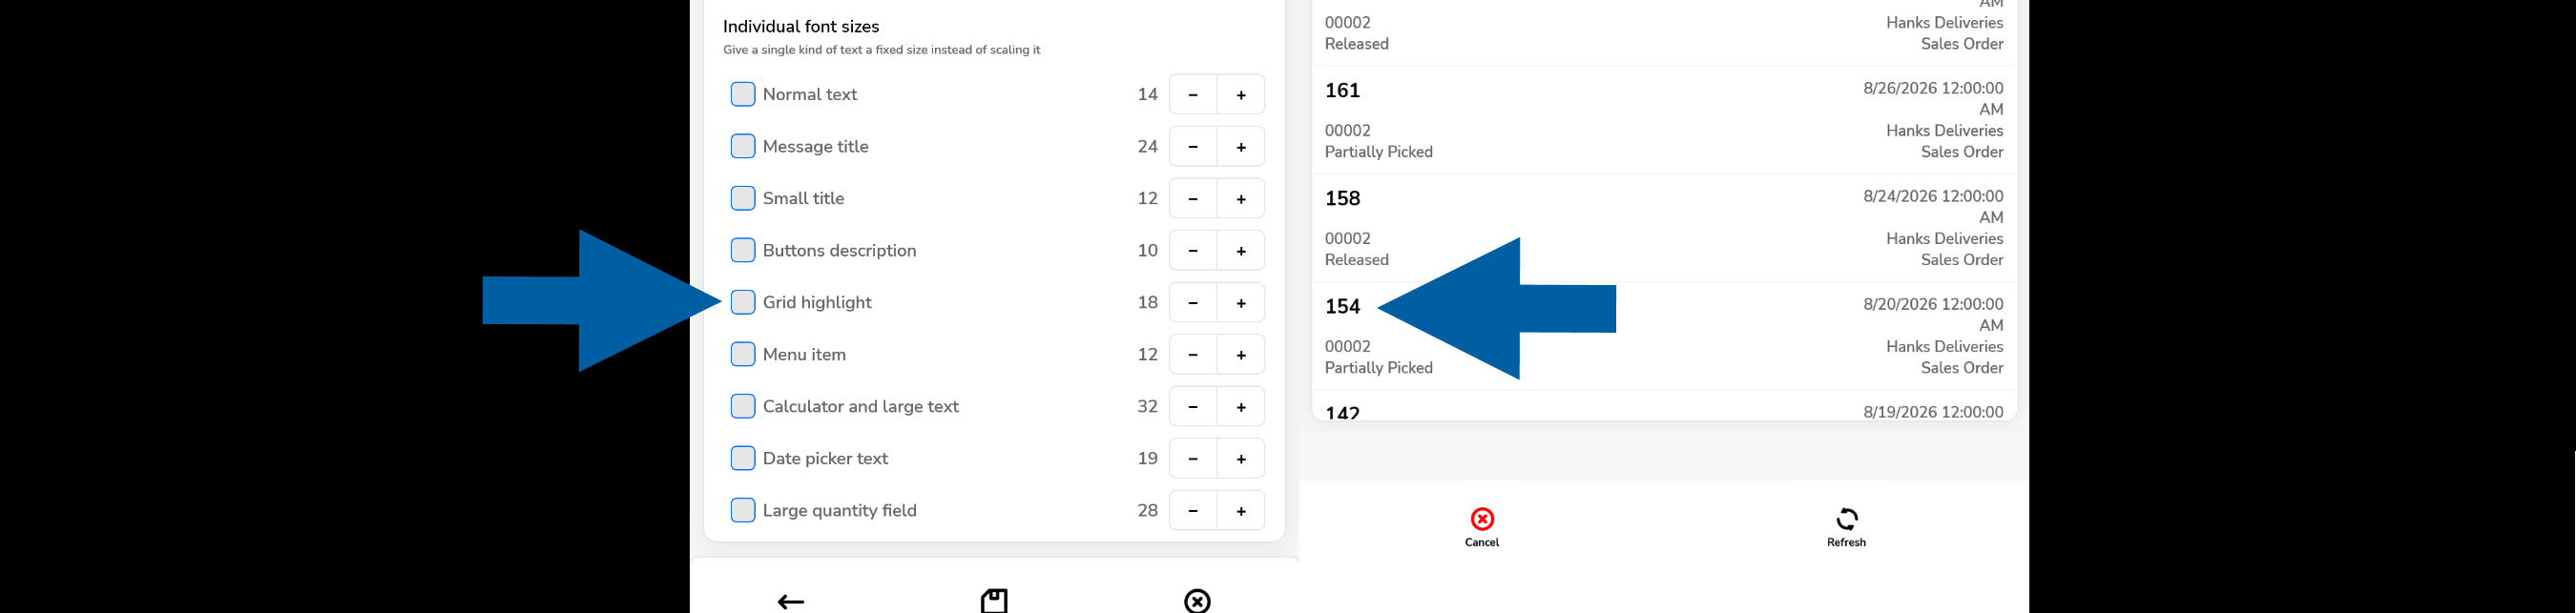
- Grid highlight
- Menu item
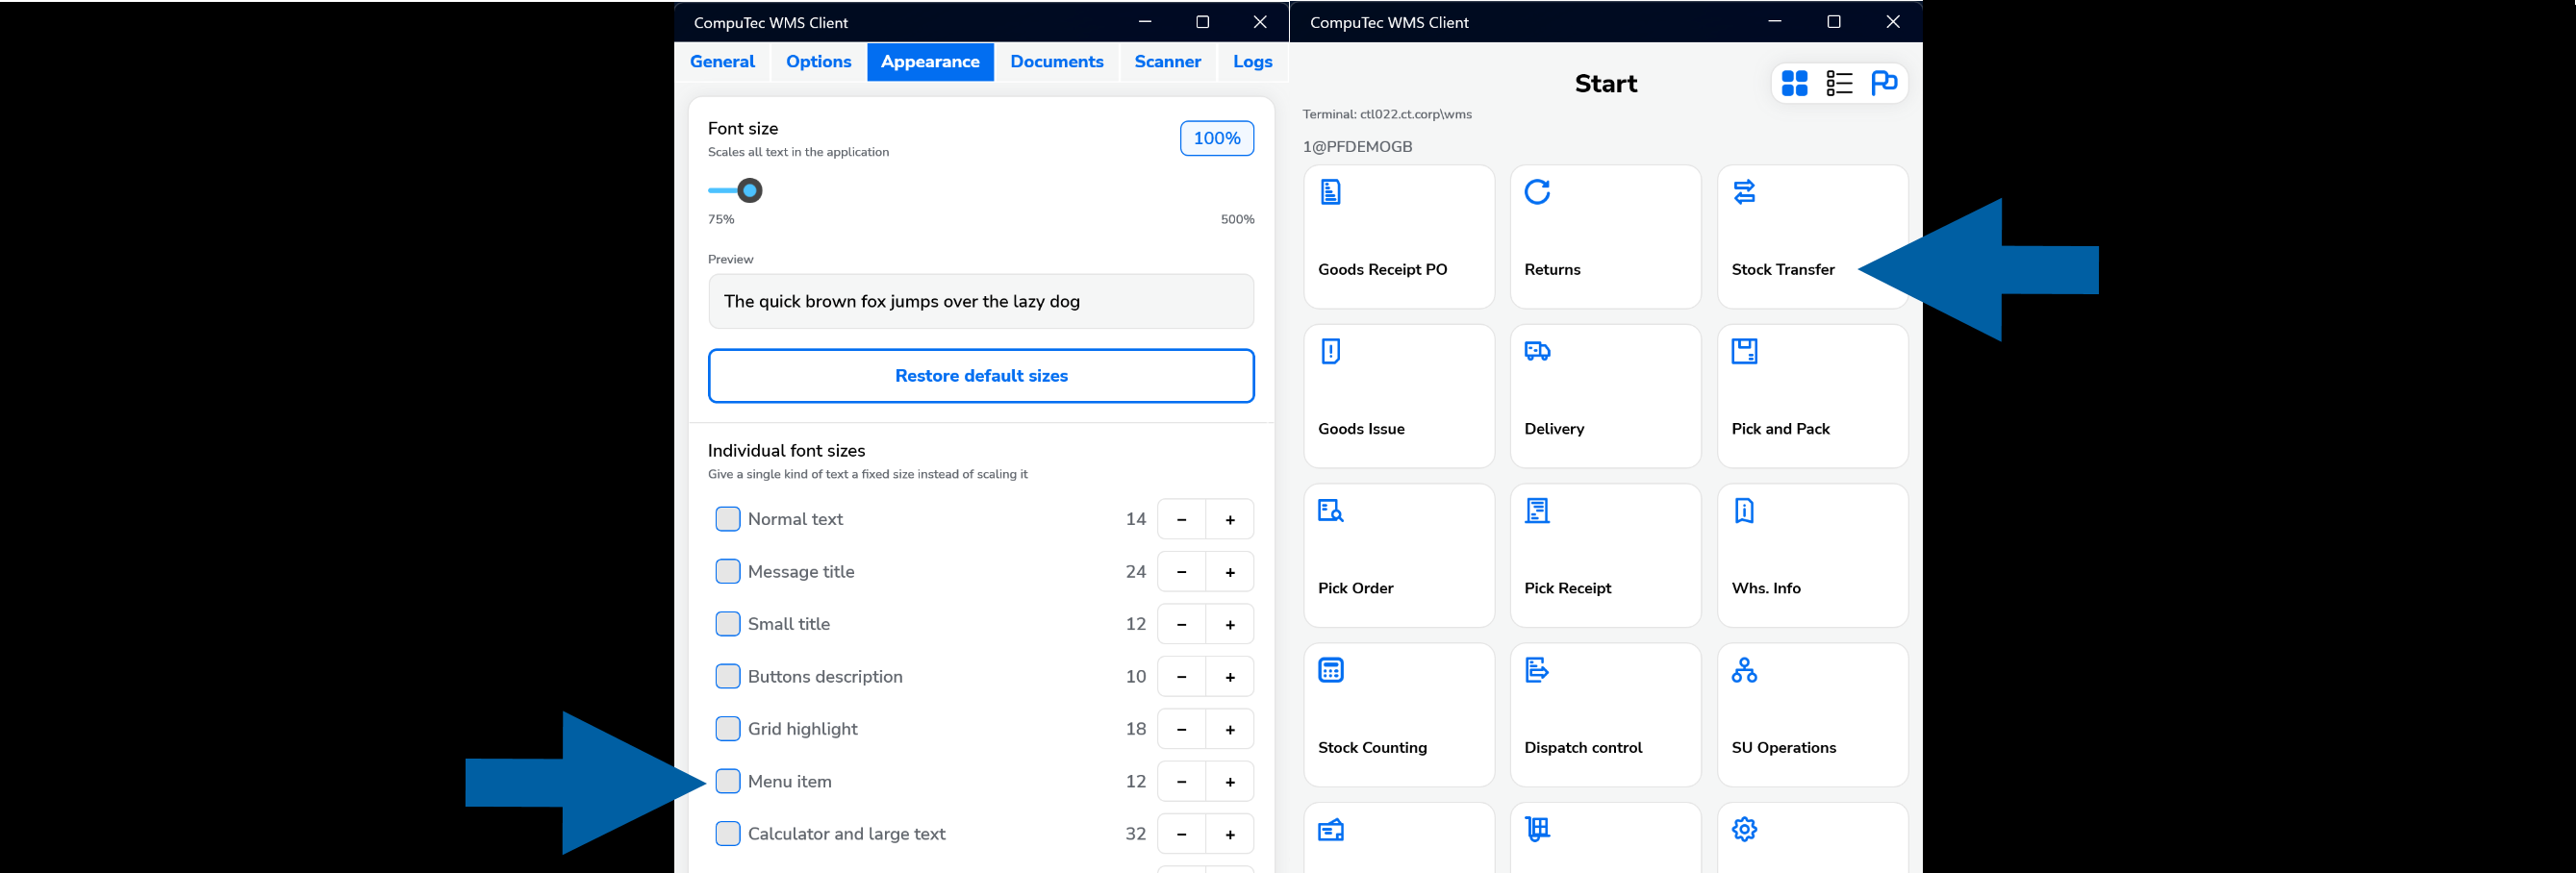
- Calculator and large text
- Date picker text
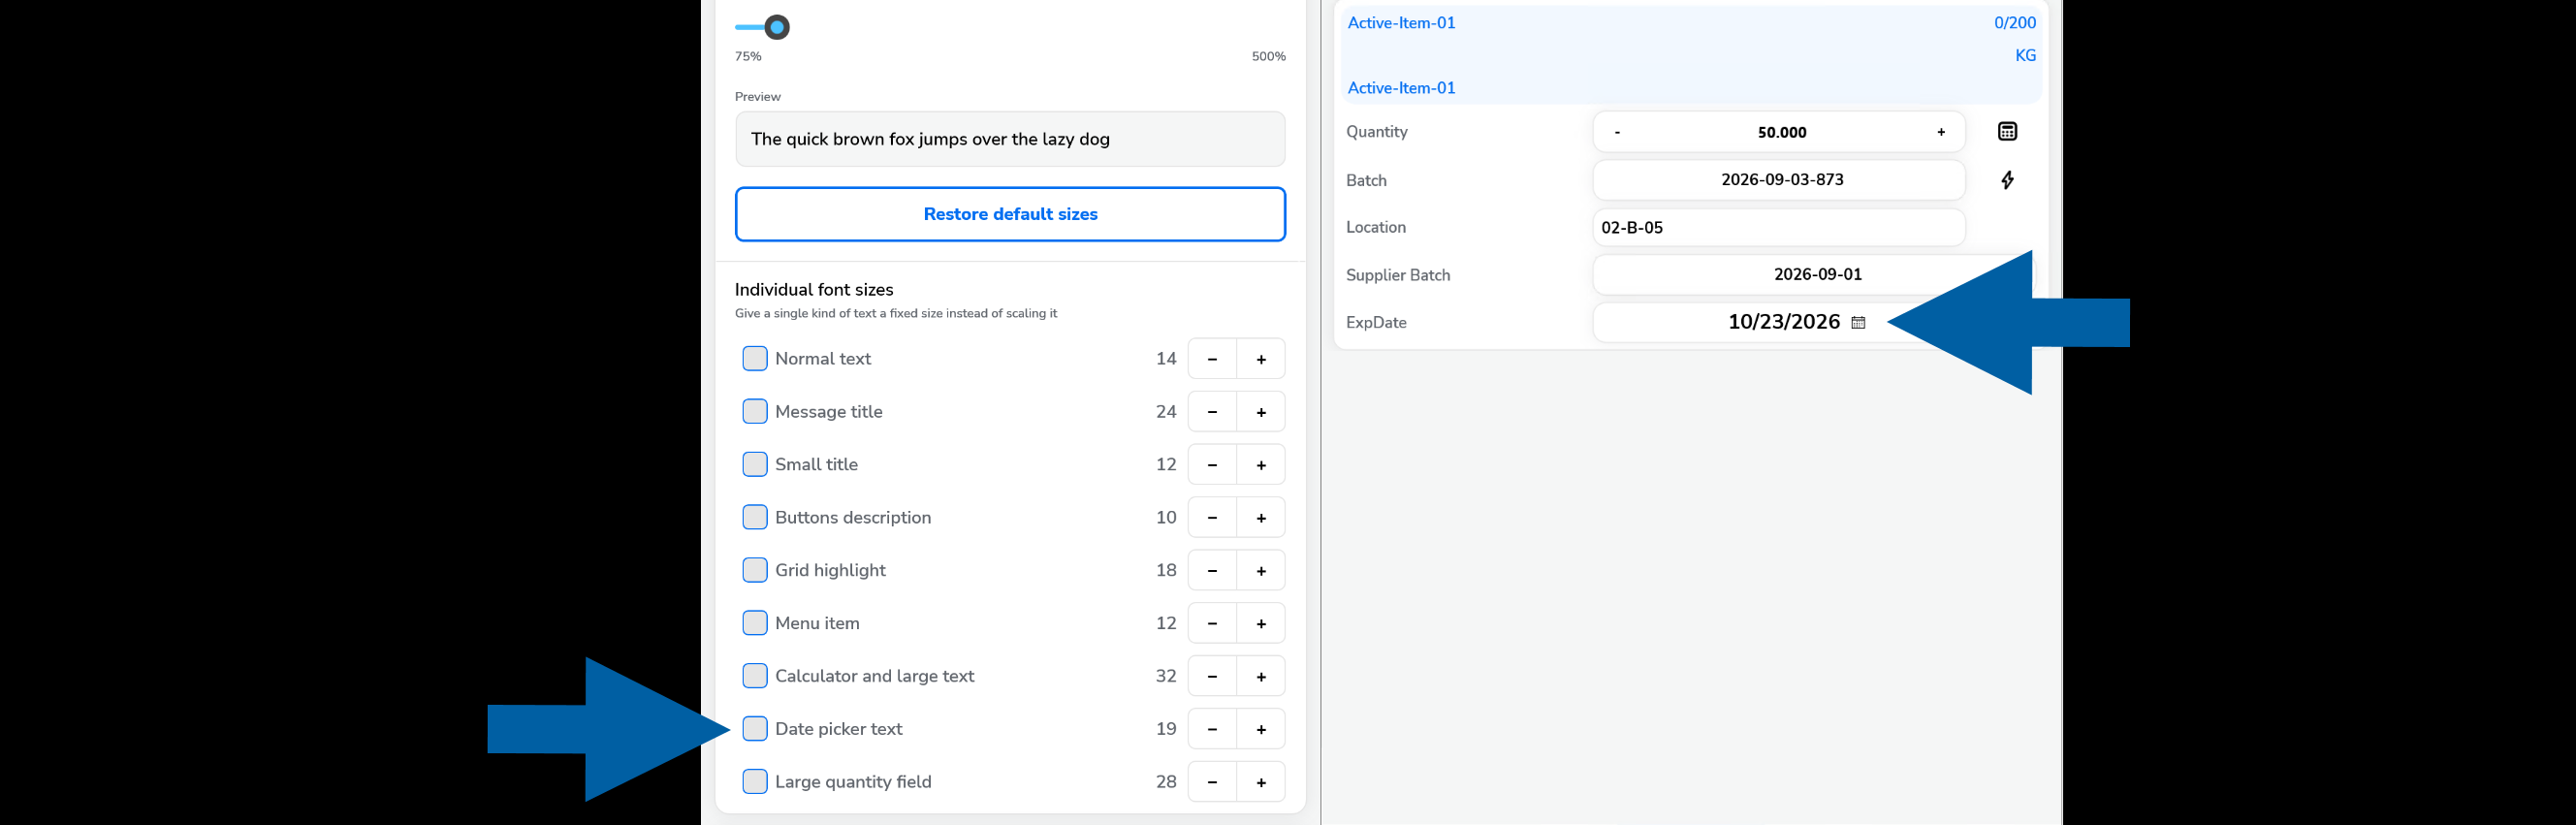
- Large quantity field
To set an individual font size:
-
Select the checkbox next to the text type that you want to configure.

-
Use the minus (-) or plus (+) button to adjust its font size.
-
Click Save.
The selected text type uses the specified font size instead of the general font scaling.
Restore the default font sizes
Click Restore default sizes to restore the default font size settings.

Configure document settings
Use the Documents tab to configure warehouse selection for individual transaction types.

Select the checkbox for a transaction if users should select a warehouse when processing that transaction.
If you want to use a default warehouse instead, clear the checkbox for the required transaction and specify the warehouse.
For more information, see Client Settings – Warehouses.
Configure scanner settings
Use the Scanner tab to configure barcode scanner behavior in CompuTec WMS Client.

The following settings are available:
- Scanner Prefix: Defines the value expected at the beginning of scanned barcode data. For example, 2 – This means the system will expect scanned data to begin with this prefix.
- Scanner Suffix: Defines the value expected at the end of scanned barcode data. For example, 3 – The system will expect the scan to end with this value.
- Scanner Group Separator: Defines the ASCII character used to separate groups of data in a scanned value. For example, ASCII
29is the Group Separator (GS) character commonly used in GS1 barcodes. - Enable scanner log (Checkbox): Enables logging of scanner activity. Use this option when you need additional information to investigate scanner input or scanning problems.
Logs tab
Use the Logs tab to access and manage log files generated by CompuTec WMS Client.

The following actions are available:
- Share log – Shares the selected log file using the sharing options available on the device.
- Send to server – Sends the selected log file to CompuTec WMS Server.
By default, client logs sent to the server are stored in:
C:\ProgramData\CompuTec\CompuTec WMS\Server\Logs\ClientLogs\XXXXXXXX-XXXX-XXXX-XXXX-XXXXXXXXXXXX
XXXXXXXX-XXXX-XXXX-XXXX-XXXXXXXXXXXX represents the unique ID of the device.
Save the client settings
After configuring the required settings, click Save to save the configuration and return to the login screen.

To return without saving your changes, click Cancel.
After the first installation of CompuTec WMS Client, open the settings and click Save, even if you do not make any changes. This creates the configuration file required by the application.
Log in to CompuTec WMS Client
After configuring the client, log in to start working with CompuTec WMS.
-
On the login screen, select the required Company name.
-
Enter the terminal username and password. If a barcode is assigned to the terminal user, you can scan the barcode to log in.
infoFor information about creating terminal users and licensing, see CompuTec WMS Licensing.
-
Click Log in.
Grant a user access to a company database
Users must have access to the required company database. To grant an access, follow these steps:
-
Open CompuTec WMS Settings.
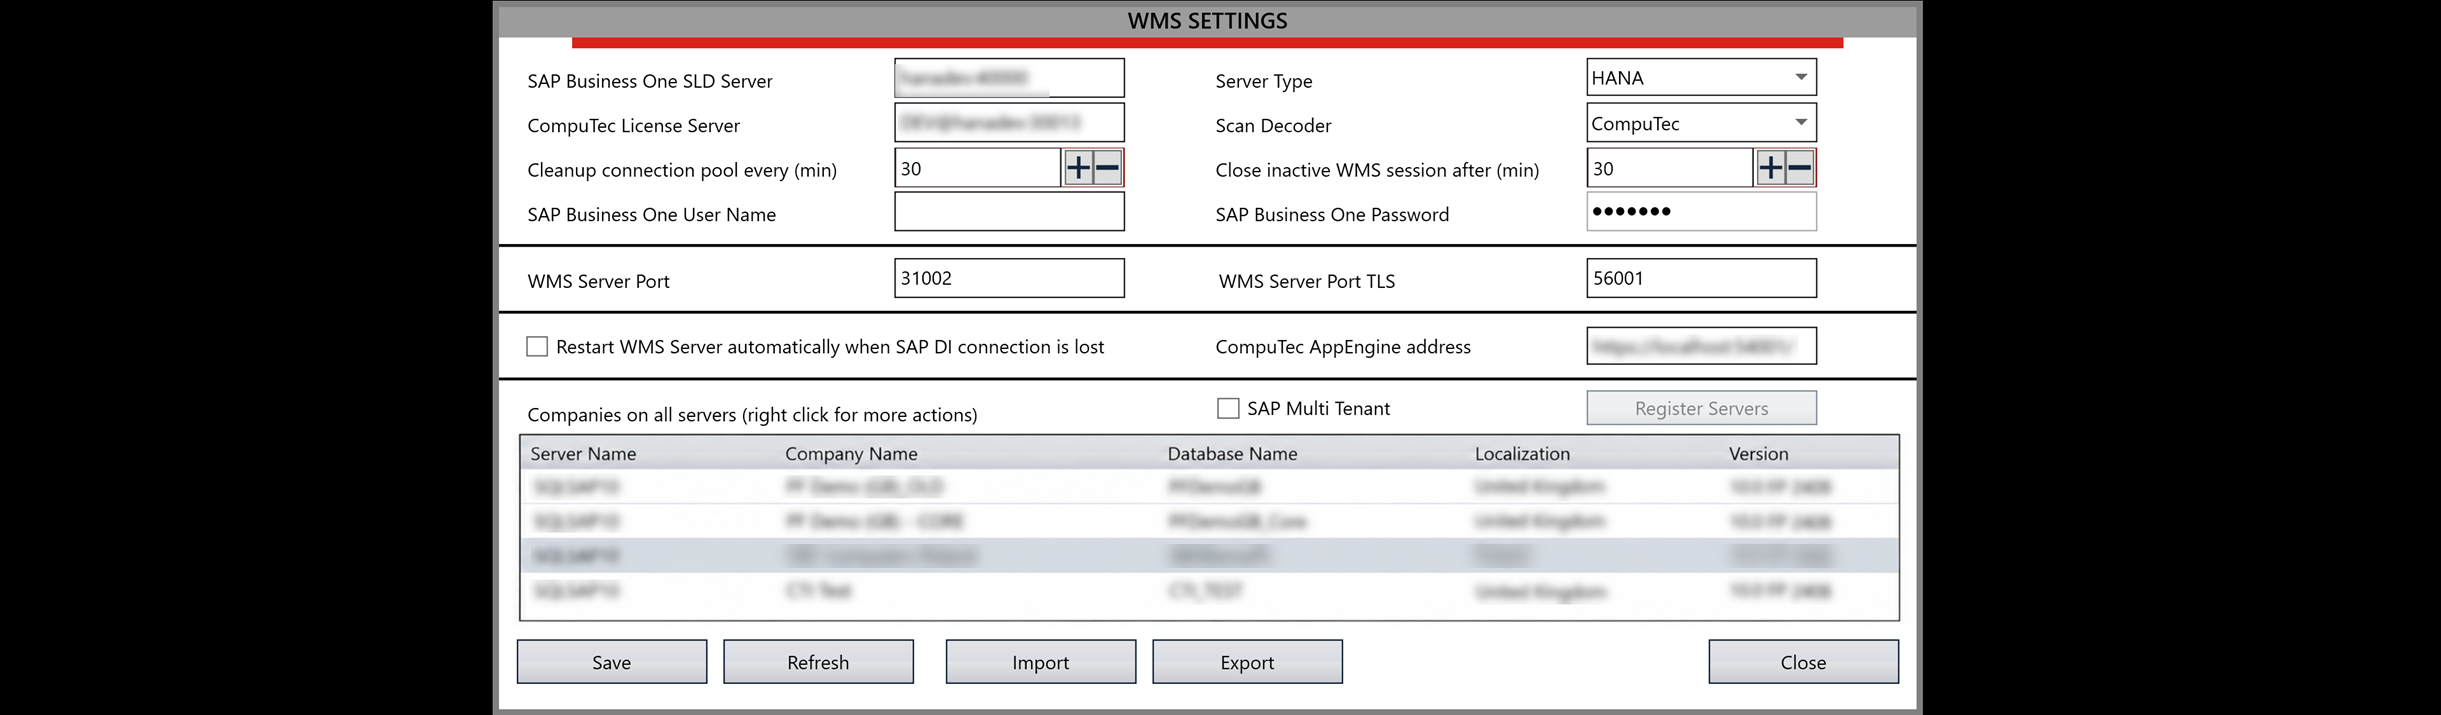
-
Right-click the required database and select User Settings.
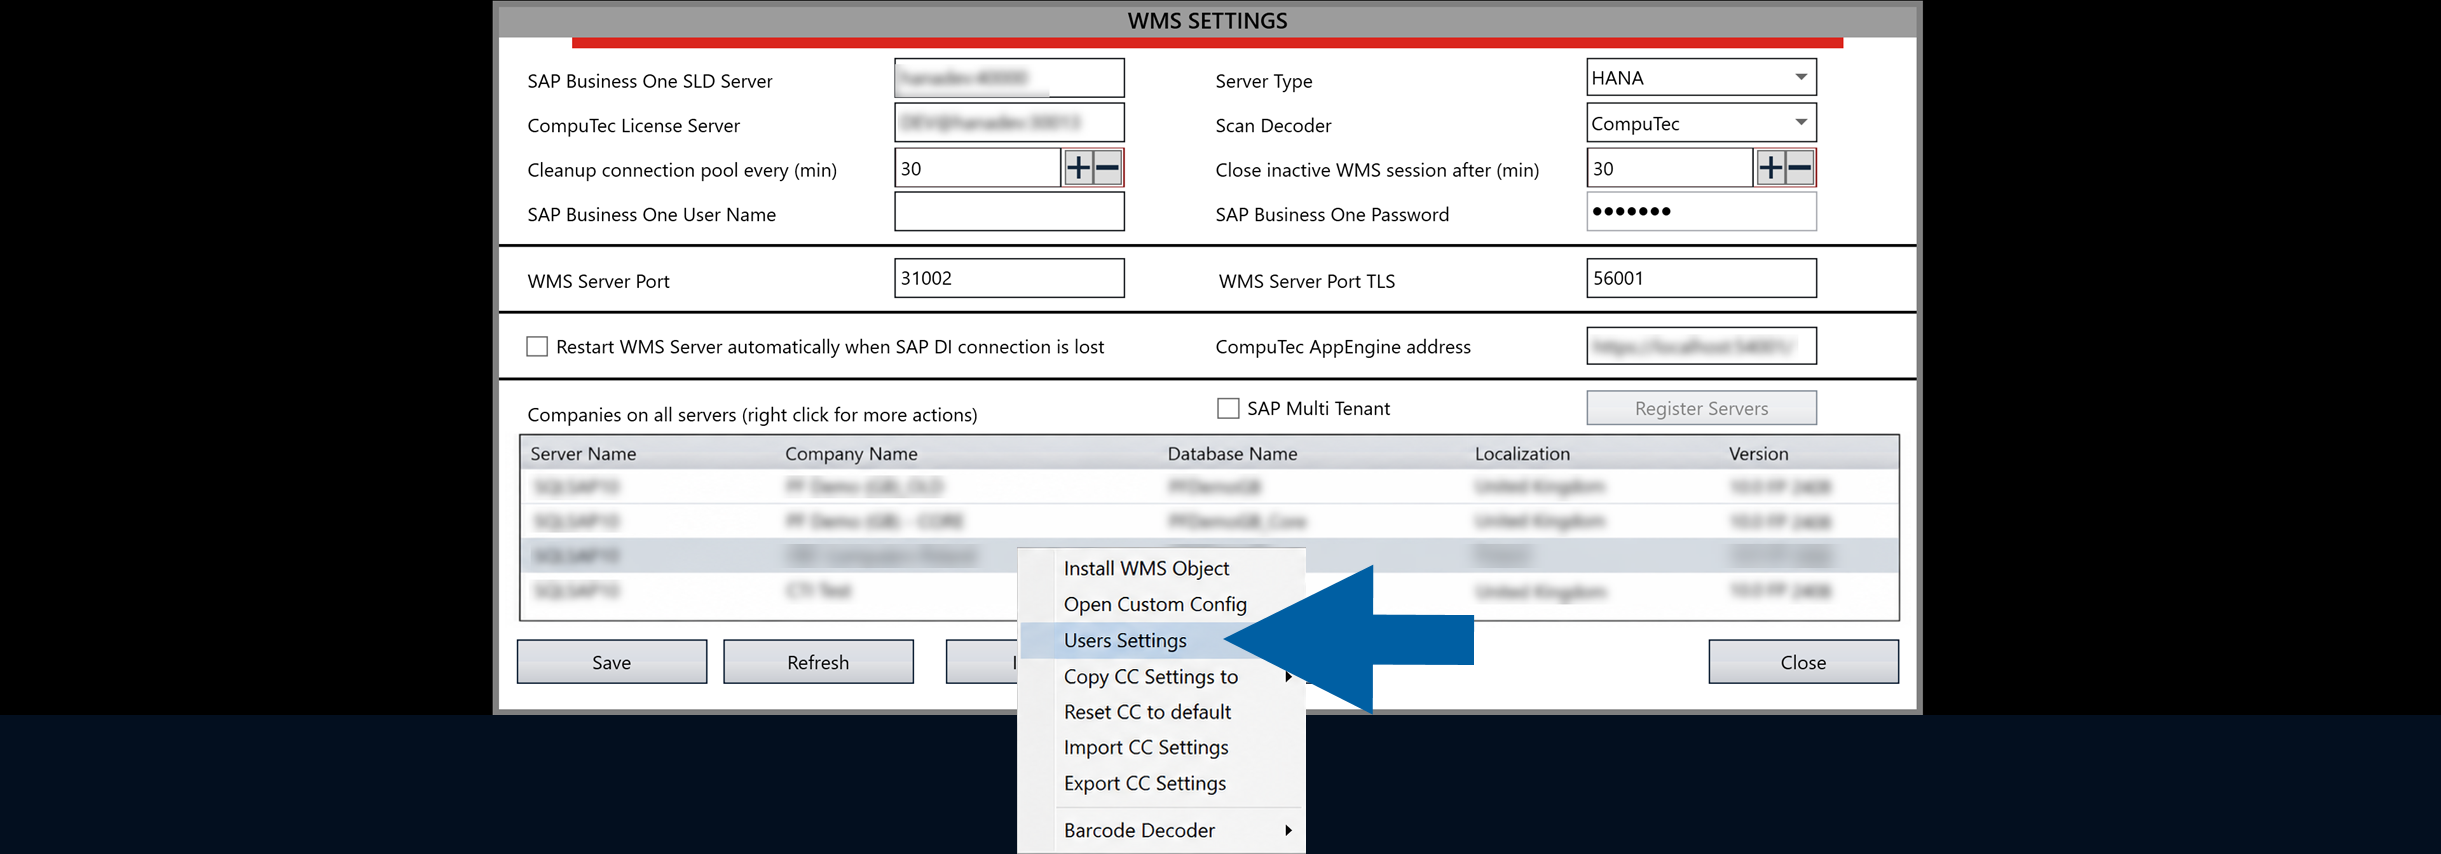
-
Select the users who should have access to the database.
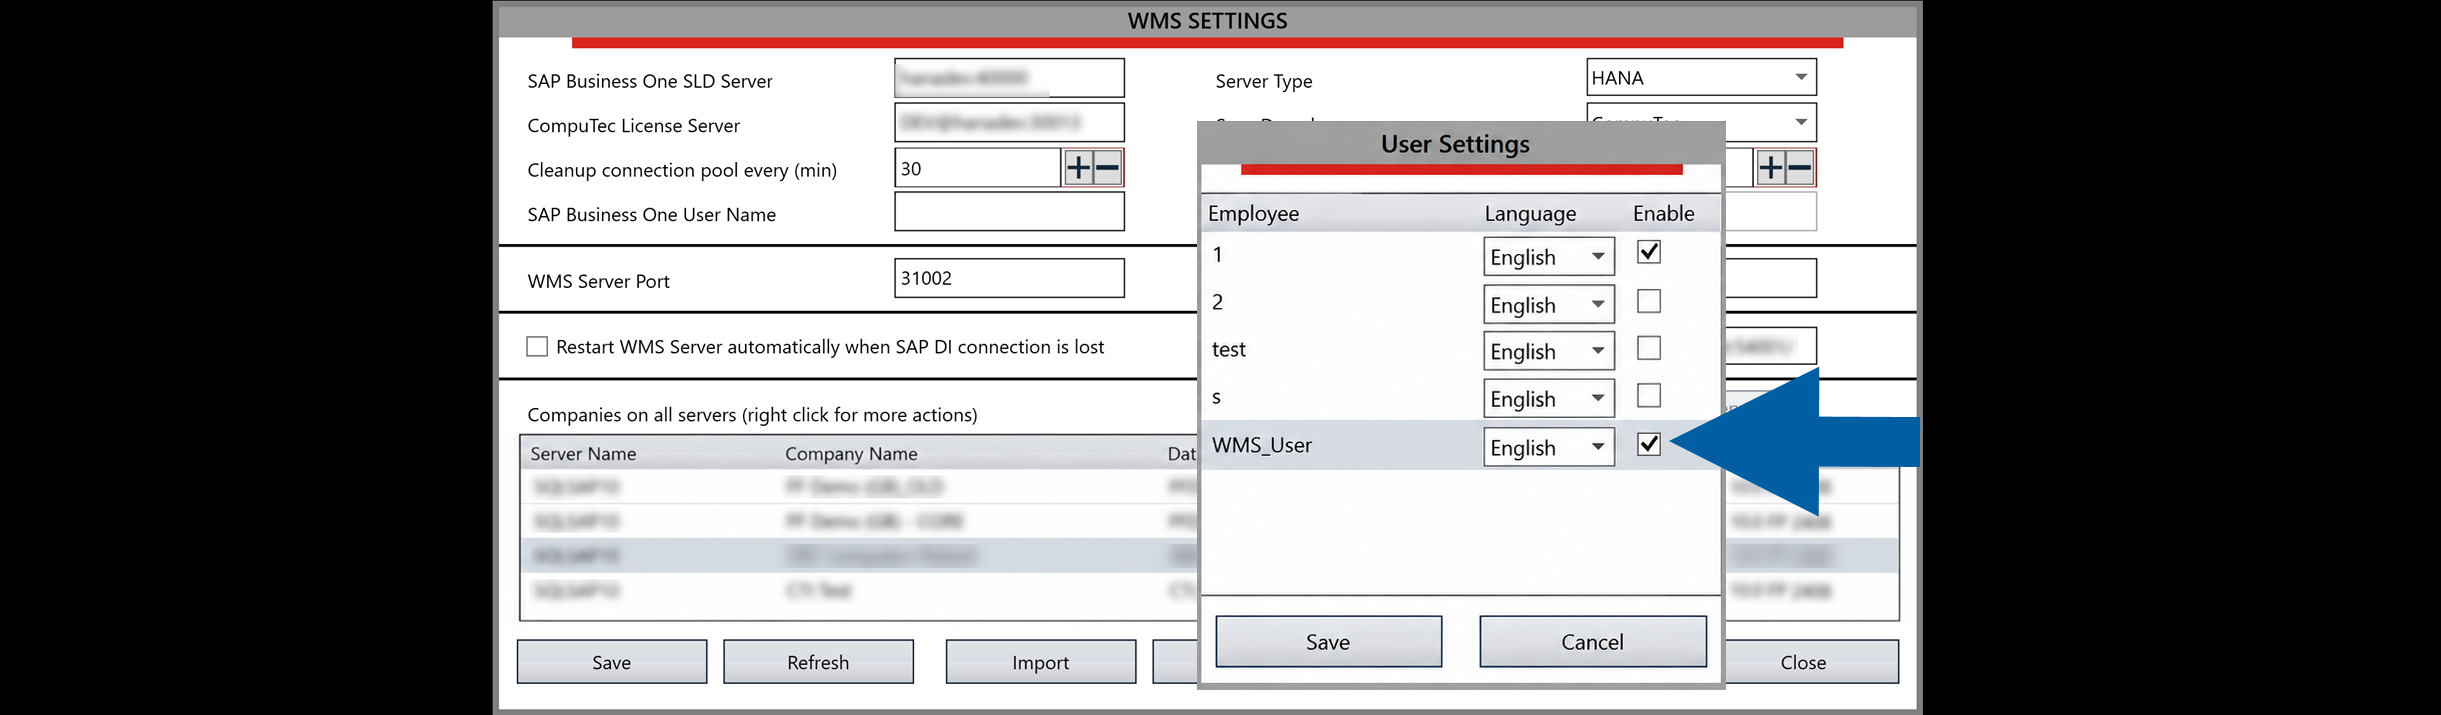
After a successful login, the CompuTec WMS Client main menu appears.
Review Pick List notifications
The Notification Center displays informational messages and errors related to Pick Lists. Messages are displayed in the Notification Center instead of interrupting users while they work with Pick Lists.
To review notifications:
-
Go to the main screen of CompuTec WMS Client.
-
Click the Notification Center icon in the upper-right corner.

-
Review the available messages and errors.
The Notification Center icon is available on the main screen of CompuTec WMS Client. It is not displayed when you open a Pick List.
Notifications displayed in the Notification Center are based on entries in the @CT_WMS_ONOT table related to Pick Lists.